
Many photographers head out with their cameras expecting to get sharp photos. Yet when they load them onto their computer, they are disappointed to find that part of, or all of, the photos are blurred.
If you have faced this problem, read on. There are numerous causes of unsharp photos that are usually easy to prevent. Sometimes a deliberate blur is intended in part of the photo. However, for most images, we want a sharp photo.
In this, the first of two articles on getting sharp images, we look at the factors that can degrade image quality, leading to a photo appearing blurred. The second article will consider focus and shutter speed.
When it Looks Blurry Through the Viewfinder
Firstly, this does not affect the actual photo you take, but it is amazing how many people haven’t noticed the little dial (or slider) situated next to the camera’s viewfinder. That is a dioptre adjustment. It does not alter the photo’s sharpness; it just changes the image you see through the viewfinder when you hold the camera to your eye. Adjusting it matches the viewfinder to your eye.
To do that, focus on something by half-pressing the shutter button, then turn that wheel (or slide the slider) until the scene in the viewfinder looks sharp.
 As I took this photo, it appeared blurry through the viewfinder. Then I remembered I had lent the camera to someone who wore much stronger glasses than I did. They had adjusted the dipotre to their eye.
Stability is Key
Two or three times a year, someone will call me to say their camera is not working because their photos are blurry. I tell them to come to see me. They turn up at my door, I take some test shots, and they are sharp. I tell them to do the same, and the photos are blurred. The issue is usually down to one of two reasons.
Firstly, people are trying to hold the cameras like they do when taking pictures with their phones. That is an unstable way of supporting the camera. Use the viewfinder instead. Stand at about 45° to the scene with your feet apart and your knees unlocked. Tuck your elbows in. Crouching down will make you even more stable and often produce a more interesting photo; you are showing the world in a way most people don’t see it.
Leaning against walls, fences, or other stable structures will also add stability. Don’t hold the camera too tightly. Take a deep breath, exhale, then take the shot.
 Standing sideways on and not gripping too hard.
Squeeze Don’t Jab
The second and more common problem is the person jabbing at the shutter button. Consequently, the entire camera moves, causing the image to blur. Instead, gently squeeze the button and don’t remove your finger until the shutter is closed and the exposure is over.
Use a Tripod
Compared with wildlife or sports, landscapes are slow-moving. Therefore, we can normally take our time composing the shot. Using a tripod is a good way of making sure you don’t rush the photo. It allows you to look around the edges of the frame and think about the composition. A favourite approach of mine is to limit myself to twelve photos. In that way, I ensure that I take my time over each image so every shot is as good as I can make it.
But a tripod also gives stability. That is critical when shooting at slower shutter speeds, where even slight camera movement can blur the picture.
There is an old rule that when buying a tripod, you must choose between three factors: price, weight, and stability. If you buy a cheap tripod, it will either be heavy or unstable. If you want lightness and stability, it will cost more. A valuable lesson I have learned is that it is worth spending more on a tripod.
 10-second blue hour exposure. ISO200, f/9. Shooting this required using a tripod.
Plant Your Tripod Firmly
I am often standing in the sea with waves washing around my shins. That action can move the sand under the tripod, and so the camera can shift during the exposure. By digging the feet into the sand, I can usually get away with multiple second exposures without the camera moving. Even out of the water, the tripod can sink into the wet sand slightly while taking the shot, or move if you walk near it.
On a Tripod, Switch off Image Stabilisation (IS)
Whether turning off IS on a tripod is needed varies by camera. Although my camera’s instructions tell me to do so, I never find it necessary, as the auto setting is so good that it detects when the camera is not moving and deactivates the IS. However, for many systems, it is essential to turn IS off; otherwise, it fights against stillness, resulting in blurred images.
Monopods
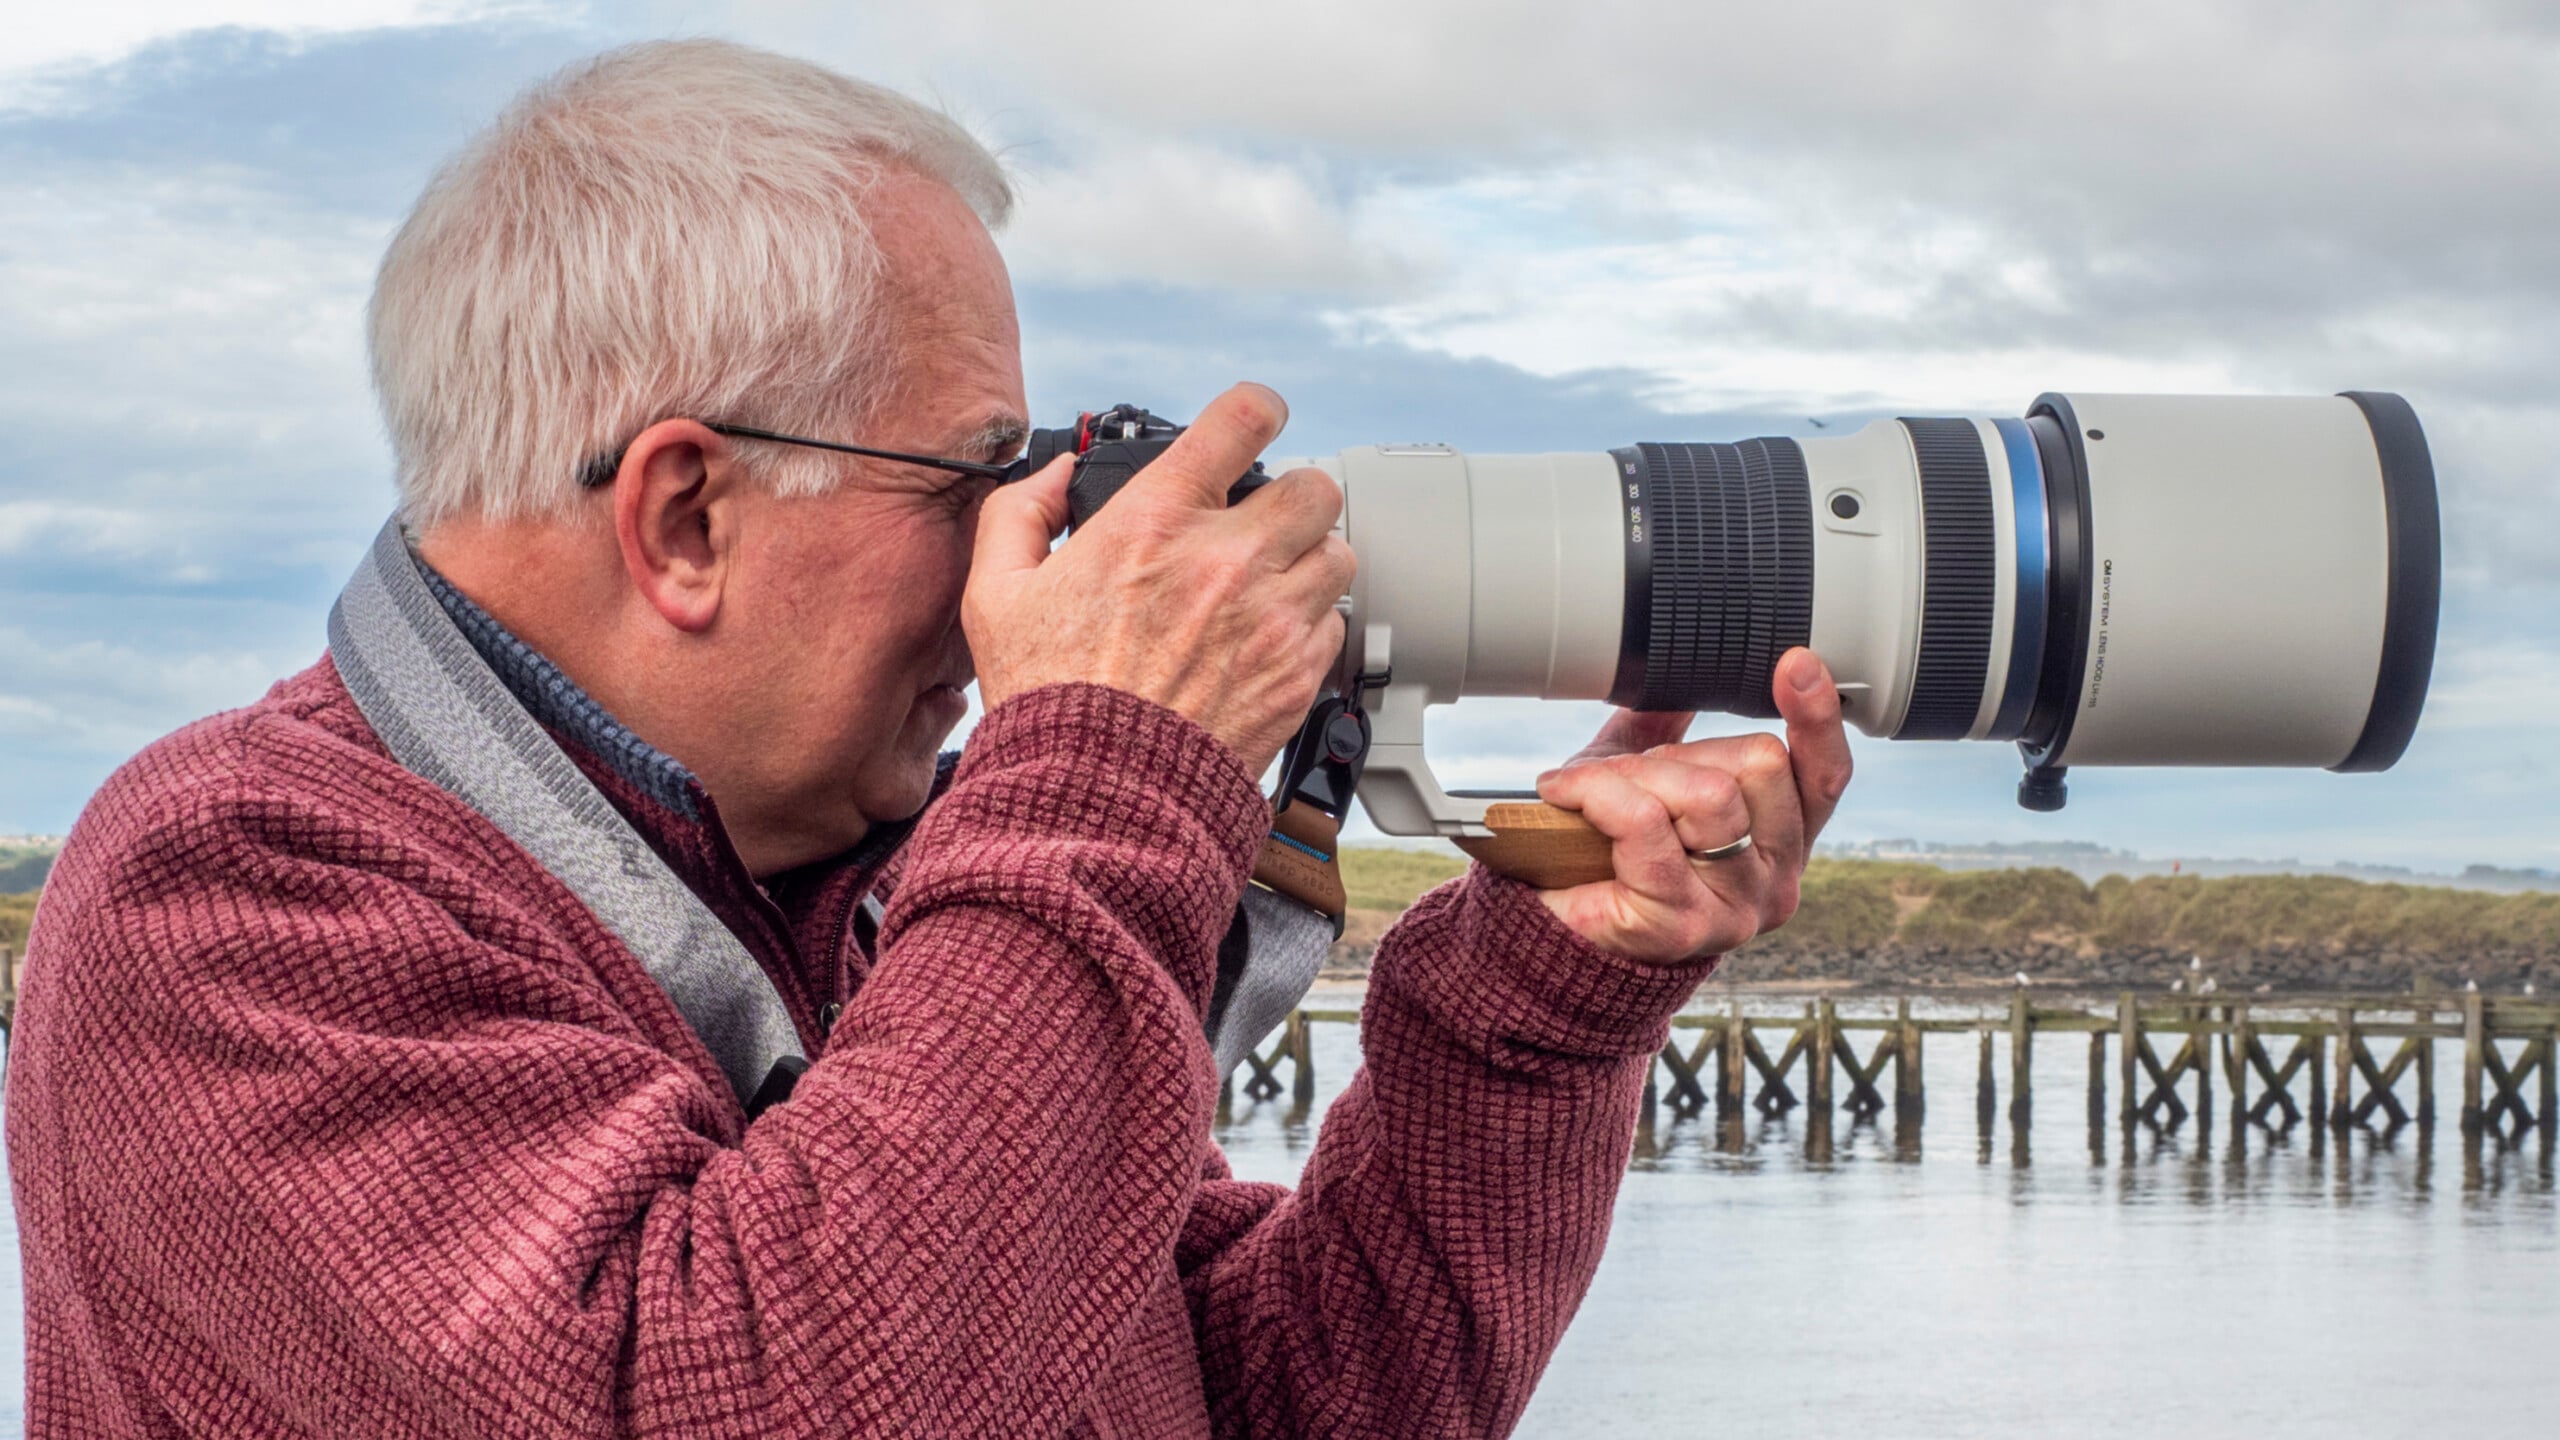
Many camera systems are heavy, especially with a long lens attached. But even with lighter systems, holding a long lens up at eye level can cause muscle aches and twitches over time. A monopod can ease that strain, carrying the camera’s weight while allowing much faster repositioning than is possible with a tripod.
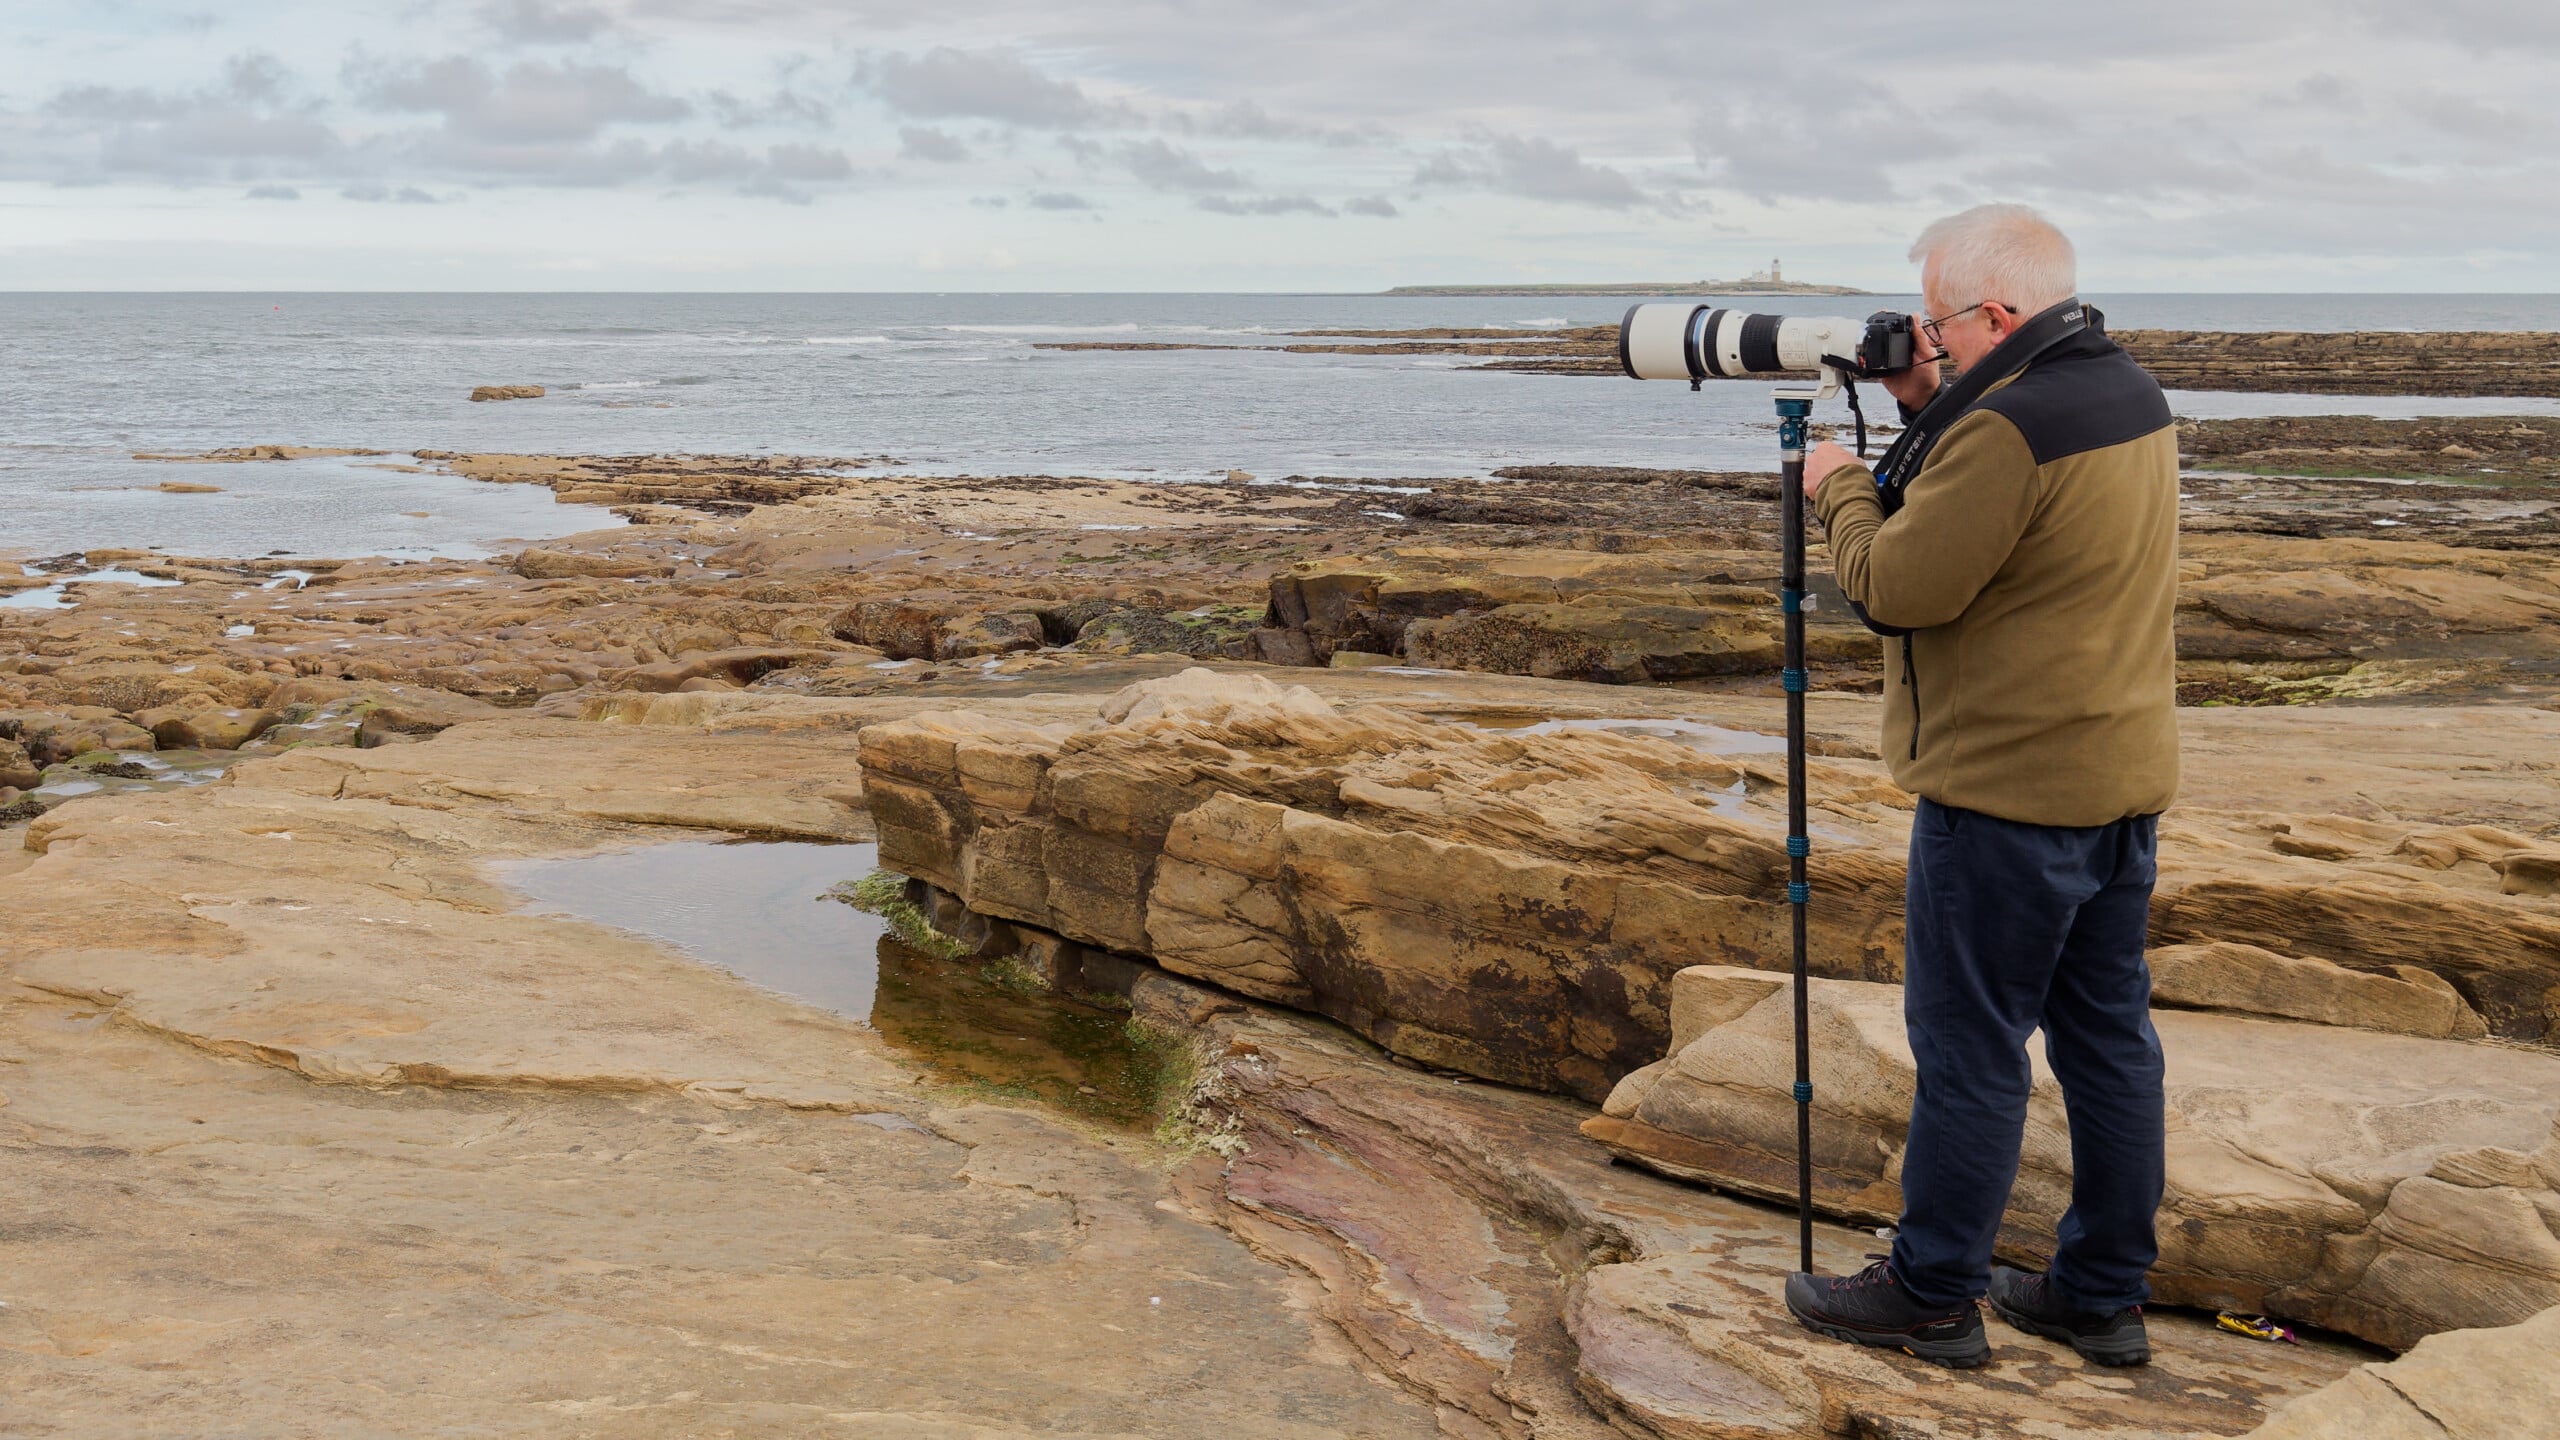 Using a monopod can be helpful even with lighter-weight systems.
Use a Remote Trigger or the Self Timer and Electronic Shutters
No matter how carefully you are releasing the shutter button, some minute mechanical movement of the camera is inevitable. Using a remote trigger — often via a smartphone app or a wired or wireless device — negates that issue. If you do not have that option, then employing the self-timer helps reduce movement.
Using an electronic shutter also eliminates mechanical movement.
Windage and Flagging
I live in the windiest county in England. Consequently, one of the things photographers here must check for is flagging. That is vibration caused by the camera moving in the wind, like a flapping flag, when using a tripod. Even when handheld, the wind can move long lenses with large hoods. Removing the hood can reduce those issues.
Of course, smaller camera systems have a reduced surface area and are less prone to flagging and windage than larger ones.
 Storm Babet brought 60+ mph gusts to where I live. Photographing with a long lens was a challenge.
Poor Quality filters
High-quality filters are expensive. It is tempting to buy cheap packs of filters on an online marketplace. However, investing in the best possible option is worthwhile because cheaper options significantly degrade image quality. They also have heavy color casts. So, unless you intend to shoot low-fidelity images, which some do for artistic reasons, then they are not worth buying.
Filters serve a whole range of purposes. ND (neutral density) filters reduce the amount of light entering the lens, enabling long exposures. GND (graduated neutral density) filters reduce the light from part of the scene and are usually employed to brighten a dark sky. Meanwhile, CPL (circular polarizing filters) remove reflections when the light is at 90° to the camera.
 I spent a lot of money on a UV filter I used here, and it ruined the entire shoot. Look at the lines running through the bokeh. I’ve since learned the lesson to always test filters before using them.
The UV Controversy
Then there are the controversial UV (ultraviolet) filters. They seem to cause more arguments than any other aspect of photography. They cut out the ultraviolet end of the spectrum, which was once necessary to reduce fogging in film; although invisible to the eye, UV light exposed the film. The filter would cut through haze. That is not so critical with digital.
However, consumer cameras, smartphones, and webcams have internal “hot mirror” filters that block UV and IR light to ensure accurate color reproduction. Nevertheless, some filters also remove a small amount of violet light, slightly reducing the highlights in the sky. That can be advantageous for landscape photographers.
However, most people use them to protect the front element of their lens. Meanwhile, other photographers think this is blasphemy and rage about it. They argue that it isn’t what the filters are designed to do, plus they also reduce image quality. Urth, the brand I now use for its exceptional quality and environmental policies, has just released a professional-grade UV filter made of toughened glass, specifically designed to protect your lens’s front element.
My findings from extensive tests with multiple filters from different brands are that great-quality filters do not degrade the image. That is, unless shooting directly into the sun. Then, they can produce artifacts in the image. However, when used with a lens hood, they do provide impact protection for the front element and help prevent scratching.
 The URTH UV filter I used here left no artifacts, and the bokeh was clean.
However, poor-quality UV filters, including some expensive ones from known brands, degrade image quality. The result is either harsh-looking bokeh or, more commonly, soft images. If your images don’t look good, try removing the filter.
 I took two photos of this to demonstrate bokeh to someone. I shot one with a UV filter and one without. Afterwards, I could not tell them apart.
Too Heavy Cropping
As I mentioned above, it’s always best to get the image as right as possible in the camera. Nevertheless, sometimes, it is necessary to crop the photo. You may have a distraction in one corner of the frame that you didn’t notice; the horizon might be a bit wonky; or you are printing onto, say, A4 paper, and your image has a different aspect ratio than you might want to crop. Any interchangeable lens camera on the market today will allow you to print at least an A3 image after that sort of crop.
However, if your subject is too far away and you crop too heavily, there will not be enough pixels to produce a sharp image. Furthermore, atmospheric interference will partially obscure the subject. You might not notice it with your eyes, but your camera will pick it up, and distant objects will become unsharp as a result.
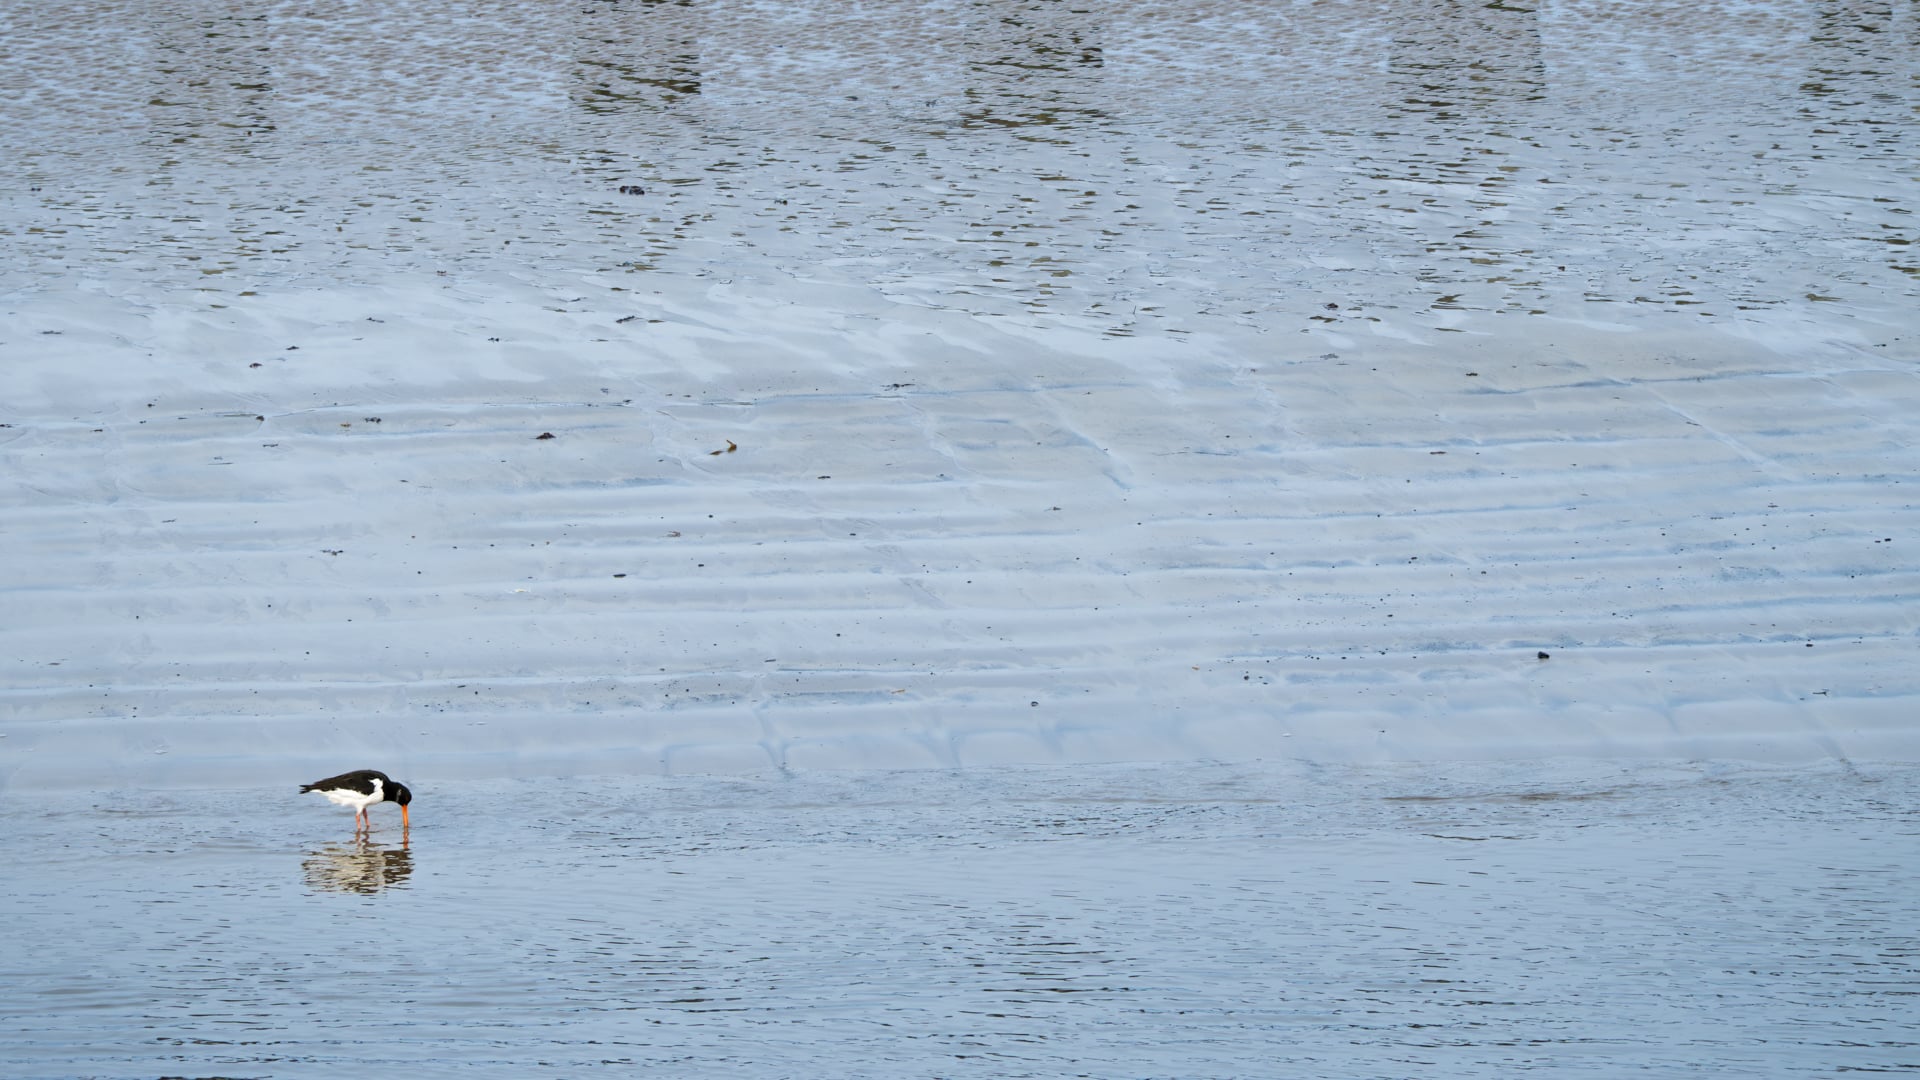 I like minimalist photos with small, solitary subjects. The oystercatcher here would have been far too small to crop the picture to fill the frame.
Next Time
As you can see, there are many causes of blurred photos. There is more than what I have written here. In the next article, we will look at focusing and how it affects image sharpness, along with shutter speed.


 English (US) ·