
 5 hours ago
5
5 hours ago
5
If you’ve ever wanted to skip the design process and just scan an object directly into your 3D printer, then Creality’s Sermoon S1 is worth looking into. This pricey bit of kit makes very good scans of small to large non-organic objects and comes with easy-to-use, AI-assisted clean-up software.
The scanner has a bit of a learning curve and takes patience to use. Its $2,699 price tag makes it too expensive for most makers to use just for the novelty of it, especially when AI modeling software can more easily make replicas from photos snapped with your phone. However, this is a valuable prosumer tool for those who need accurate and precise scans of objects as a jumping off point for CAD software or Blender.
Creality has come a long way since the frustrating CR-Scan Lizard I reviewed four years ago. It’s much easier to operate as a handheld device, though it still needs to be tethered via cable or wifi (with an optional bridge unit) to a computer. It still needs marking dots for the blue laser line mode, but often you can simply place the dots on a turntable rather than the object itself.
If you want a truly handheld, self-contained unit, Creality’s Sermoon P1 is available for $600 more. The P1 trades portability for a slight reduction in speed and accuracy.
The S1 can scan people in NIR mode, but the technique takes practice and a subject willing to stand very still for at least a full minute or two. I asked my husband to scan me and it had trouble with my hair, even when I pulled it into a ponytail. However, a skilled artist would be able to take that scan and fill in the gaps. Creality’s software offered an AI feature to fix my face, but it didn’t work due to the quality of the scan, which seems counterintuitive.
Specifications: Creality Sermoon S1
Swipe to scroll horizontally
Scanning Mode | Blue Laser | NIR Structured Light |
Light Type | Single, 7, and 34-Line Laser | NIR (Near-Infrared) |
Accuracy | Up to .02mm | Up to .08mm/m |
3D Resolution | 0.05-2mm | 0.1-2mm |
Working Distance | 200mm | 1200mm from the subject |
Minimum Scanning Volume | 5x5x5mm | 150x150x150mm |
Scan Speed | ≤ 90fps | ≤ 30fps |
Alignment | Markers/Geometry/Texture | Markers/Geometry/Texture |
Connectivity | Connectivity: Wired USB, Optional WiFi | Connectivity: Wired USB, Optional WiFi |
Color Texture | Supported | Supported |
Output Format | OBJ/STL/PLY | OBJ/STL/PLY |
Required PC | Windows or Mac | Windows or Mac |
Included in the Box: Creality Sermoon S1
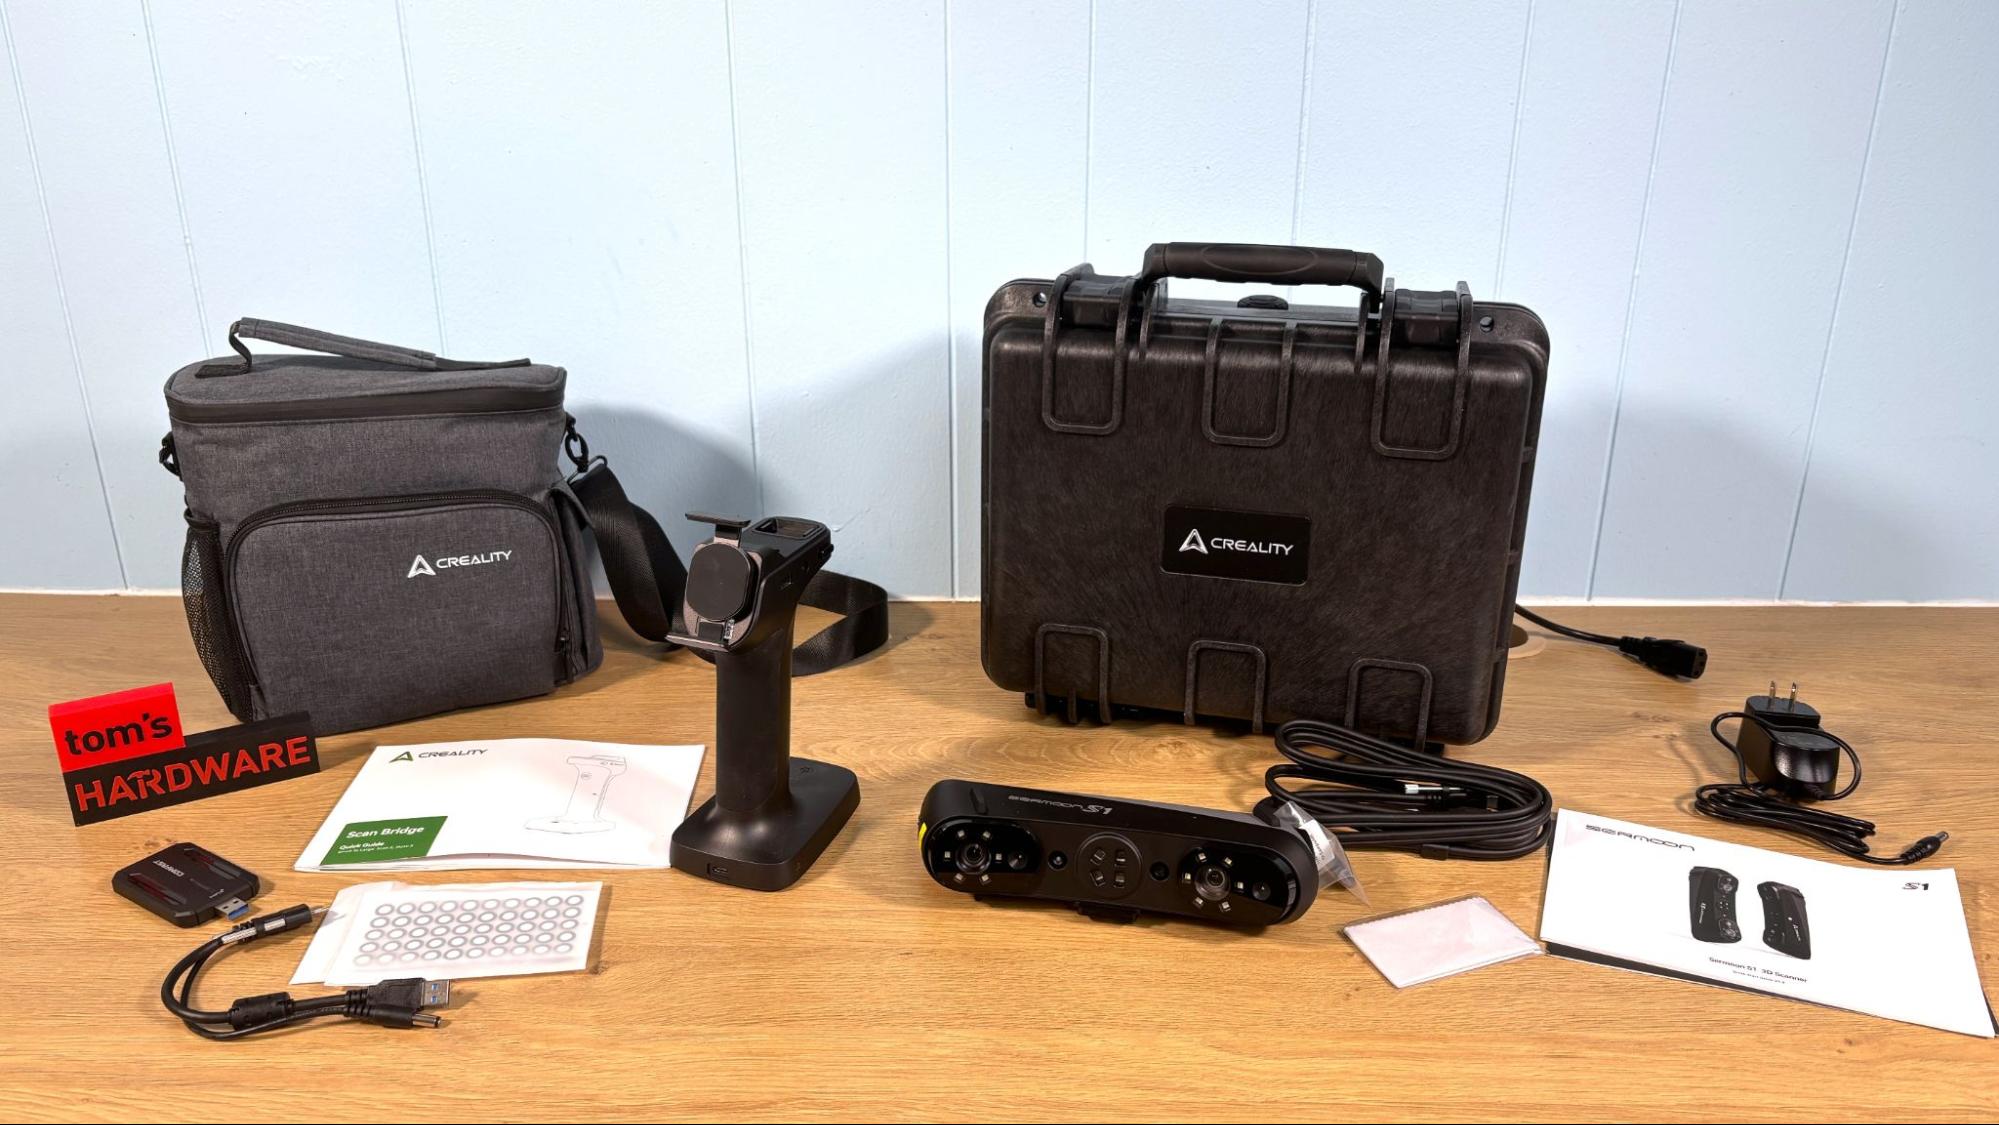
The Creality Sermoon S1 comes with a hard pelican case for travel, plus required cables and a substantial packet of reflective marking stickers.
We also received the optional handheld “Scan Bridge” to provide power and Wi-Fi, which comes with a soft travel bag.
Software is available to download for free on the Creality website.
Design of the Creality Sermoon S1
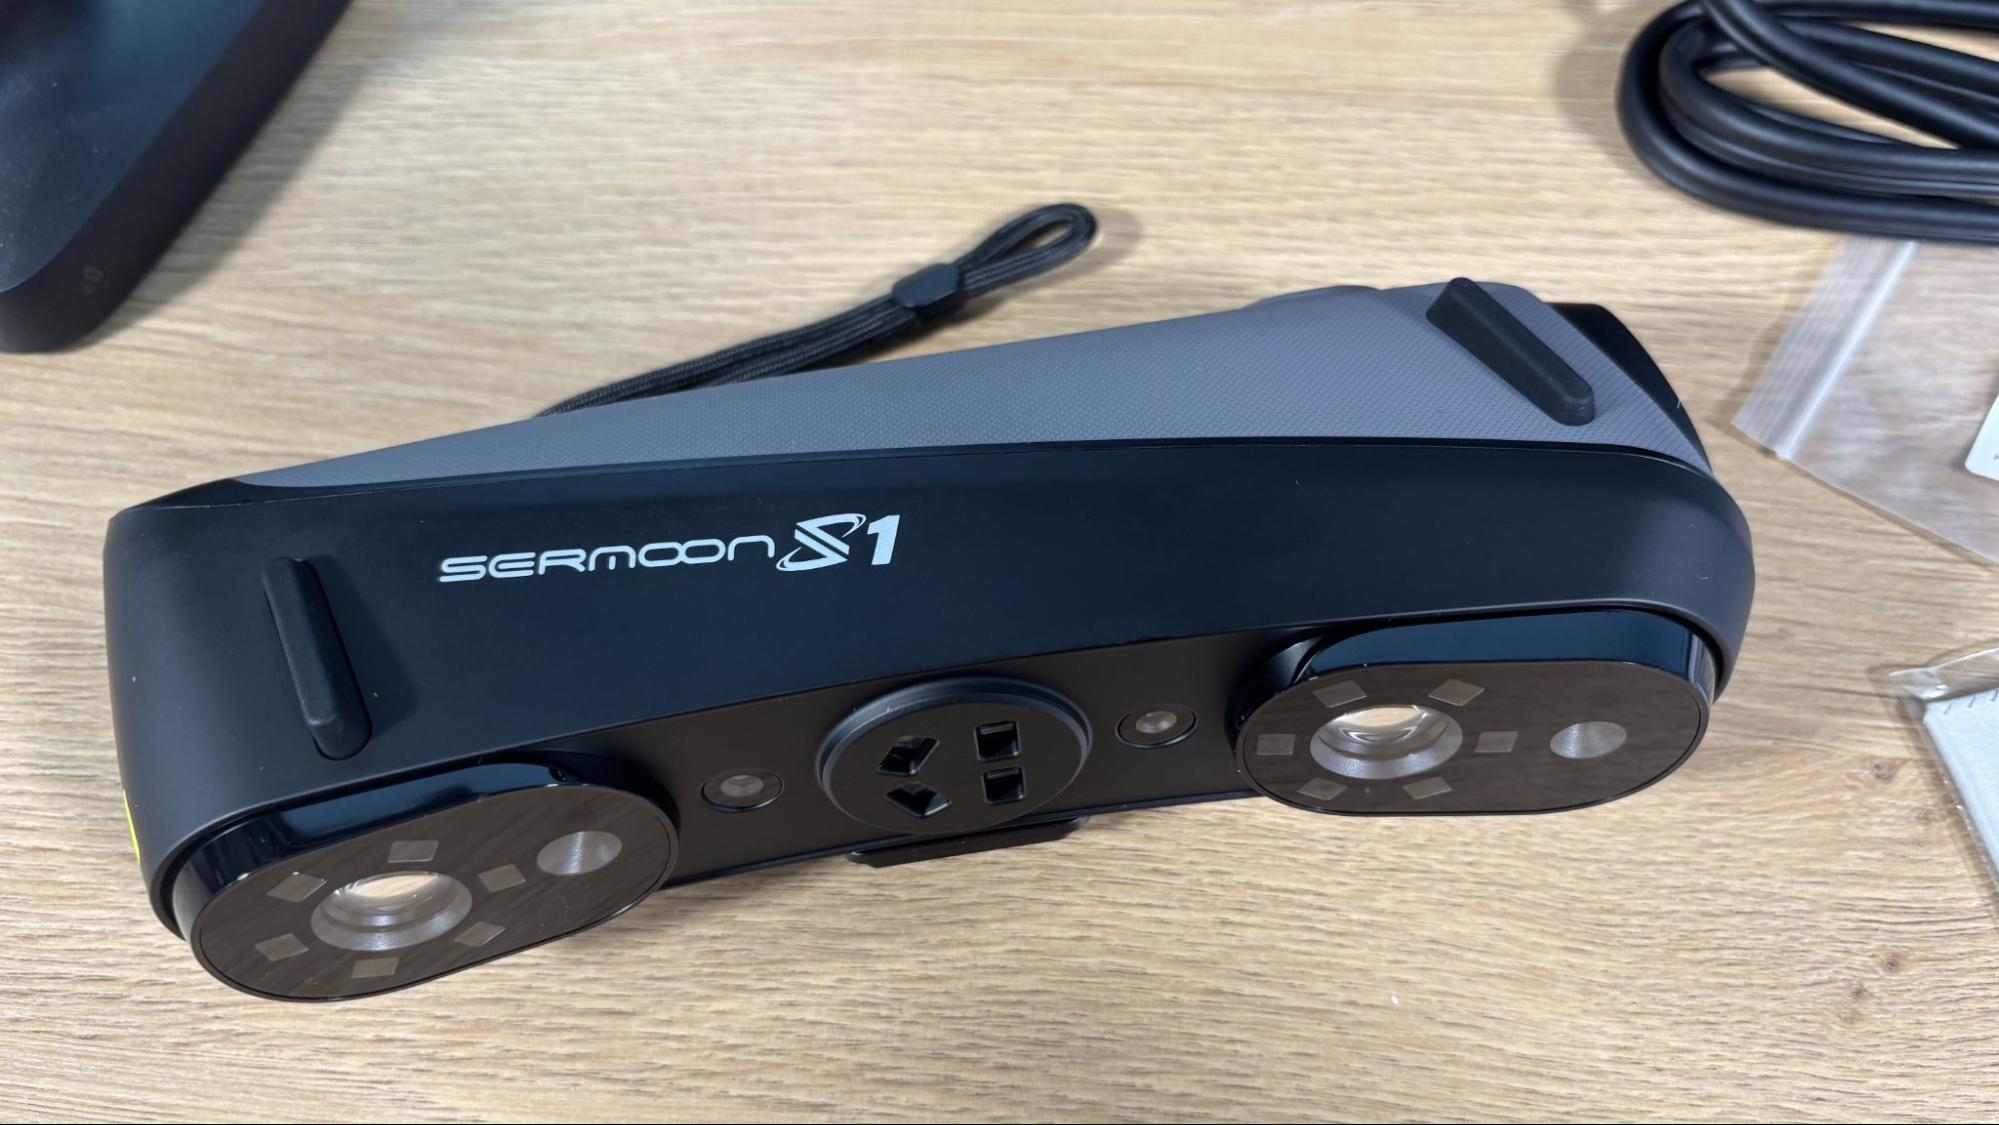
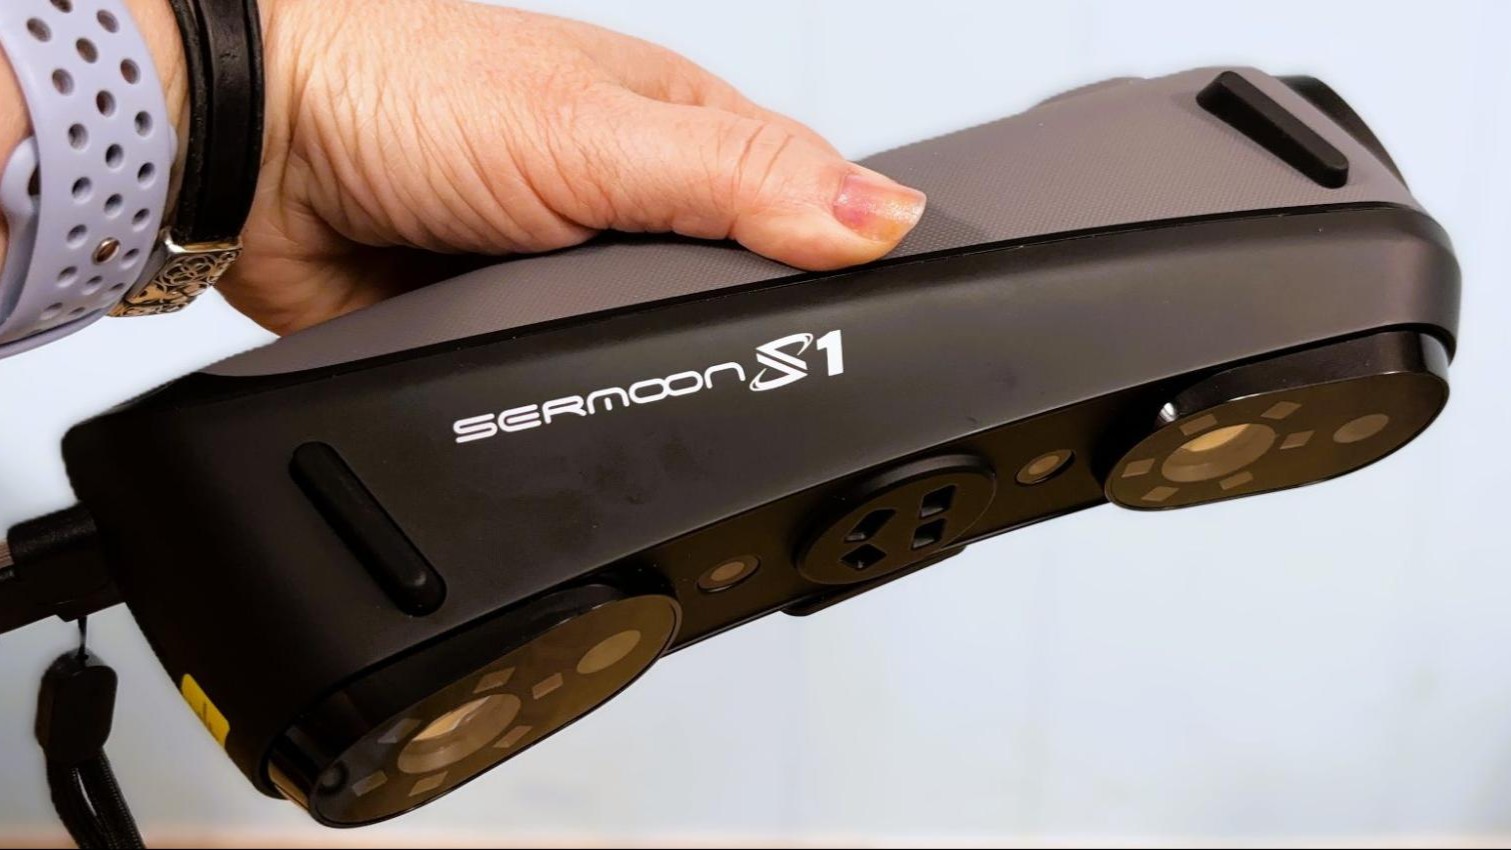
The Creality Sermoon S1 is a handheld scanner that weighs about a pound and looks rather like an old school landline phone receiver with a nonskid grippy surface on the back. An array of lights is on the business end of the scanner. Because there is no screen on the device itself, you will need to plug it into a computer and use the monitor for feedback on your scanning. Creality has a phone app for the Sermoon S1, but it did not work well for me.
The scanner has a play button to start and stop scans, as well as a button to adjust the lights and a toggle for zoom.
The scanner has a quick-release on the bottom to snap into the optional Scan Bridge, and a threaded screw for attaching to a tripod. On its own, the Sermoon requires a power cord for operation; the Scan Bridge has a rechargeable battery.
The computer screen will give you video feedback of the scan, as well as a shaded graphic “heat map” of the screen with an indicator to let you know if you are holding the scanner close enough to the object or moving too quickly.
Getting Started and Calibrating the Creality Sermoon S1
The Creality Sermoon S1 includes a glass calibration board that is used to calibrate the scanner before use. The calibration process involves laying the glass board down on a flat surface and gradually moving the scanner around in a controlled manner. This process takes about 10 minutes, and can be a bit tricky, so moving slowly and gradually is the best move here.
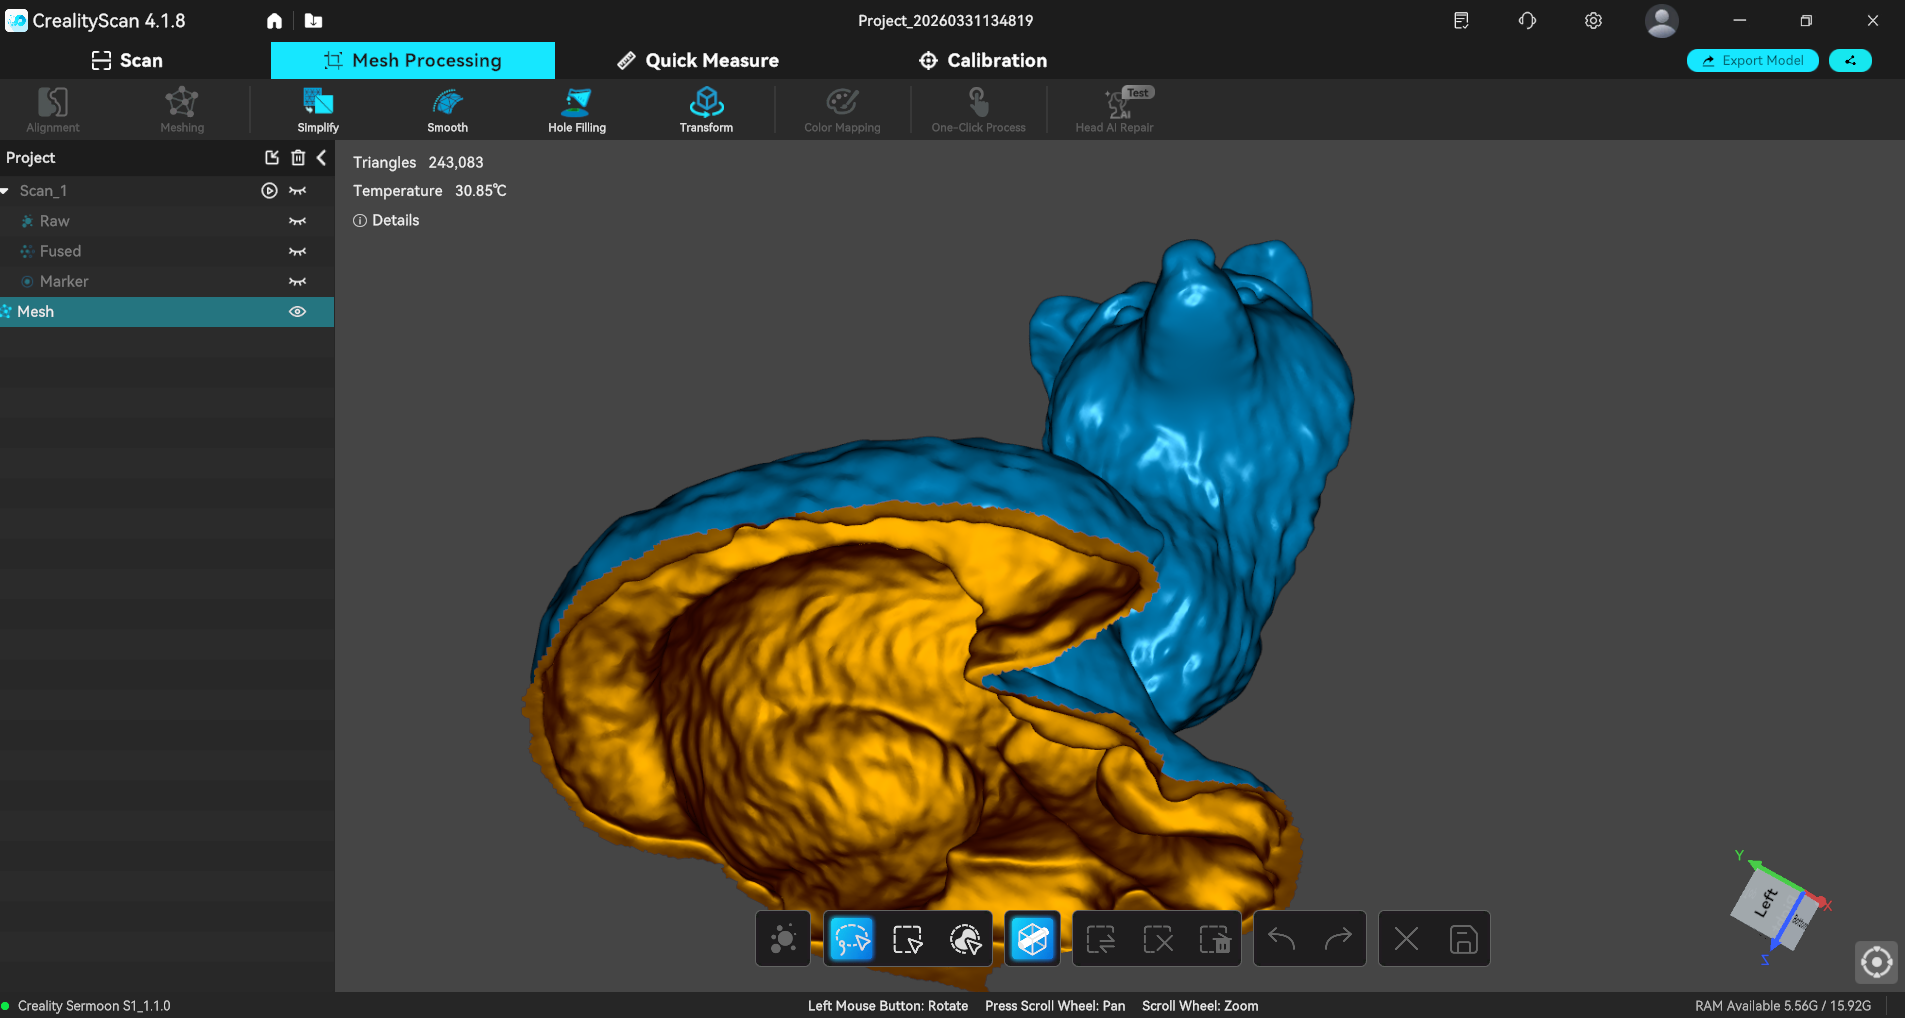
Creality offers free software for the Sermoon S1 called CrealityScan that is compatible with both Windows and macOS. This software is used for scanning, cleaning up, and texture generation.
A “User Guide” section contains helpful tutorials and best practices for various skills, as well as general information about 3D scanning and mesh cleanup.
PC or Mac
The Creality Sermoon S1 is compatible with both Windows and Mac.
Creality suggests the following configurations for Windows: i7-Gen10 CPU, Nvidia GPU (8GB VRAM), 32GB RAM, Windows 10/11(64-bit). Minimum configuration: i7-Gen7 CPU, Nvidia GPU (6GBVRAM), 16GB RAM, Windows 10/11 (64-bit).
And these configurations for macOS: M1/M2/M3/M4 series, 16GB RAM.
CR Studio saves files as proprietary project files, STL, and OBJ. STL and OBJ files can be imported to the modeling software of your choice for further touch-up or transformation.
Blue Laser Line 3D Scanning with the Creality Sermoon S1
The Creality Sermoon S1 uses blue laser line scanning for detailed geometry capture, and offers three different blue laser scanning modes: 34 crossed laser lines, 7 parallel laser lines, and 1 single laser line. The 34 crossed laser line mode is intended for fast scanning on large objects, the 7 laser line mode is best for capturing fine details, and the single laser line is intended for scanning deep holes that would be difficult to capture otherwise.
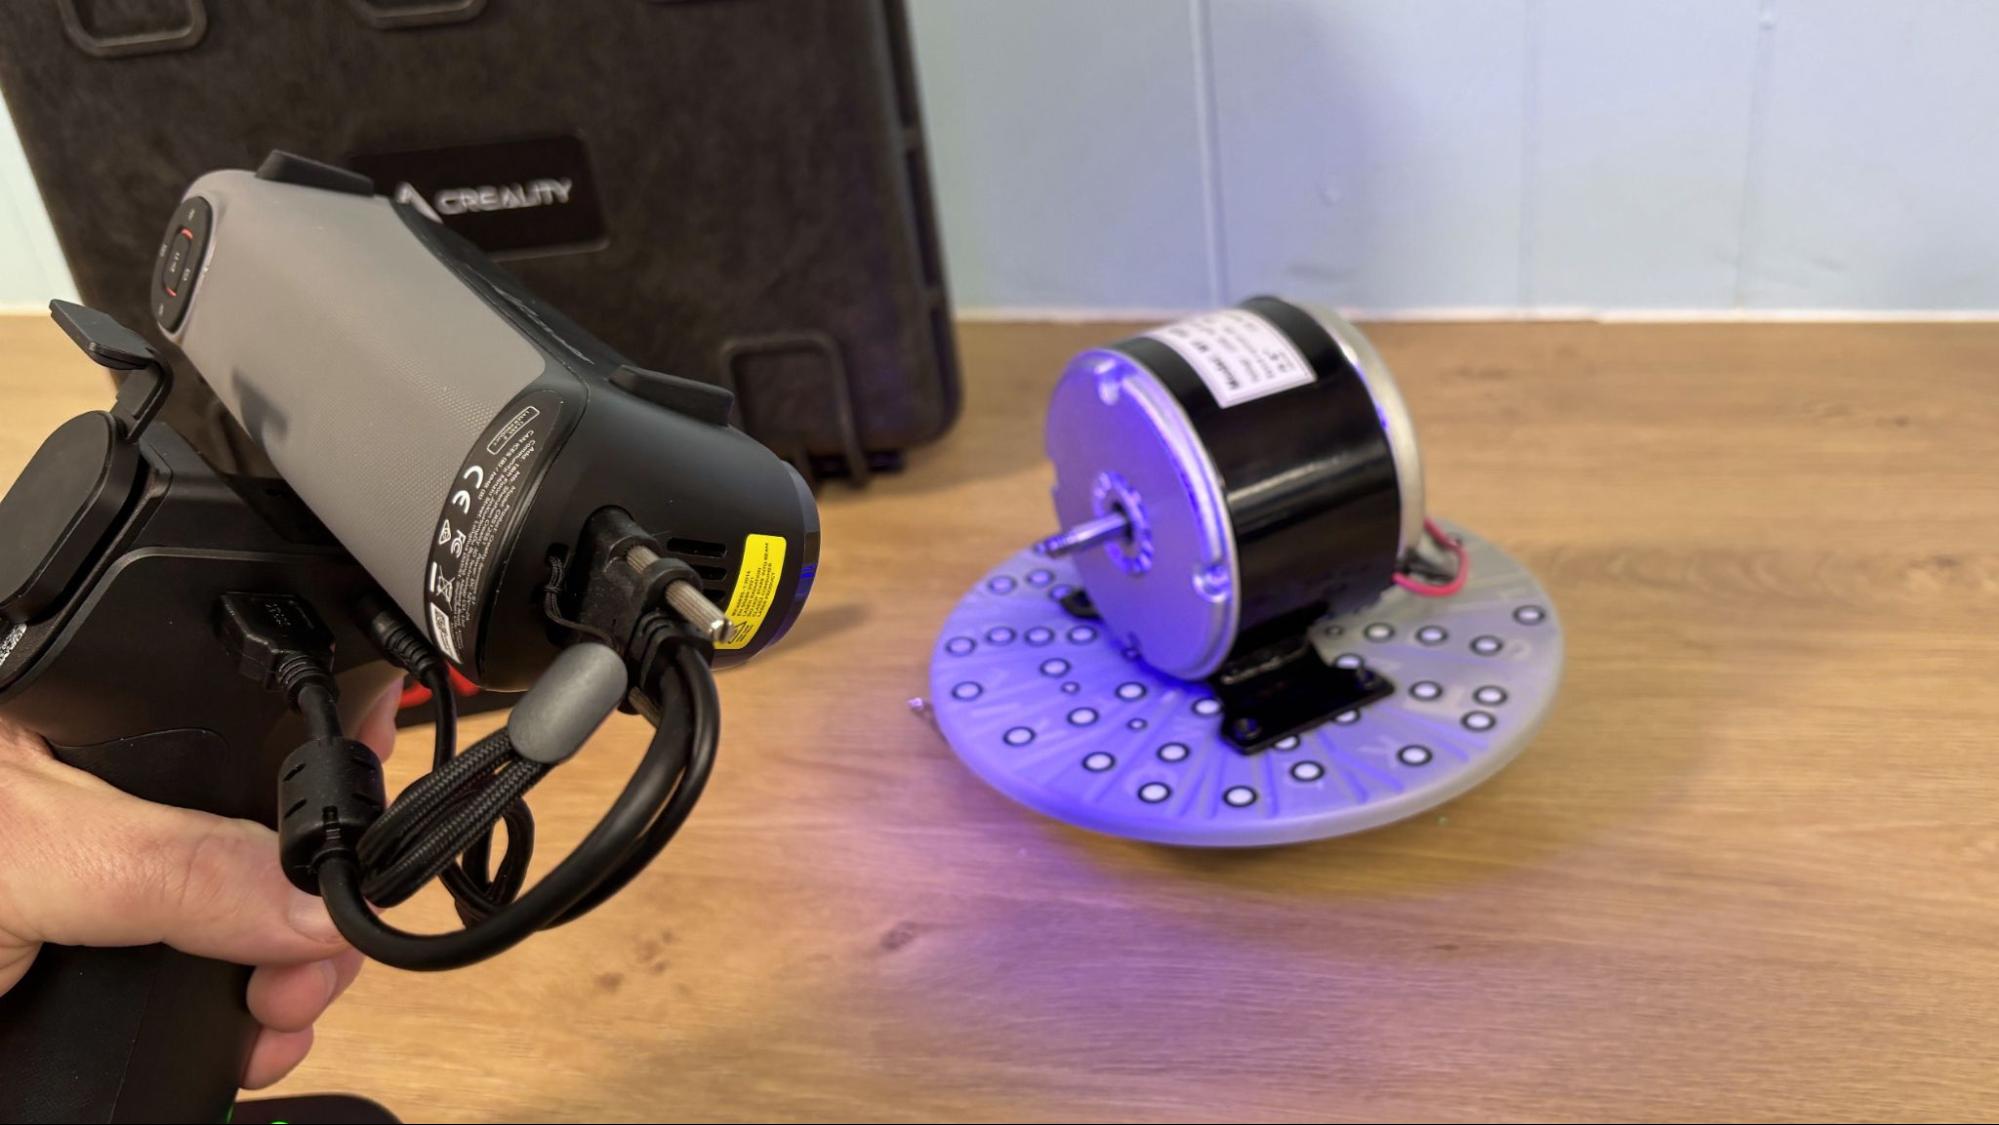
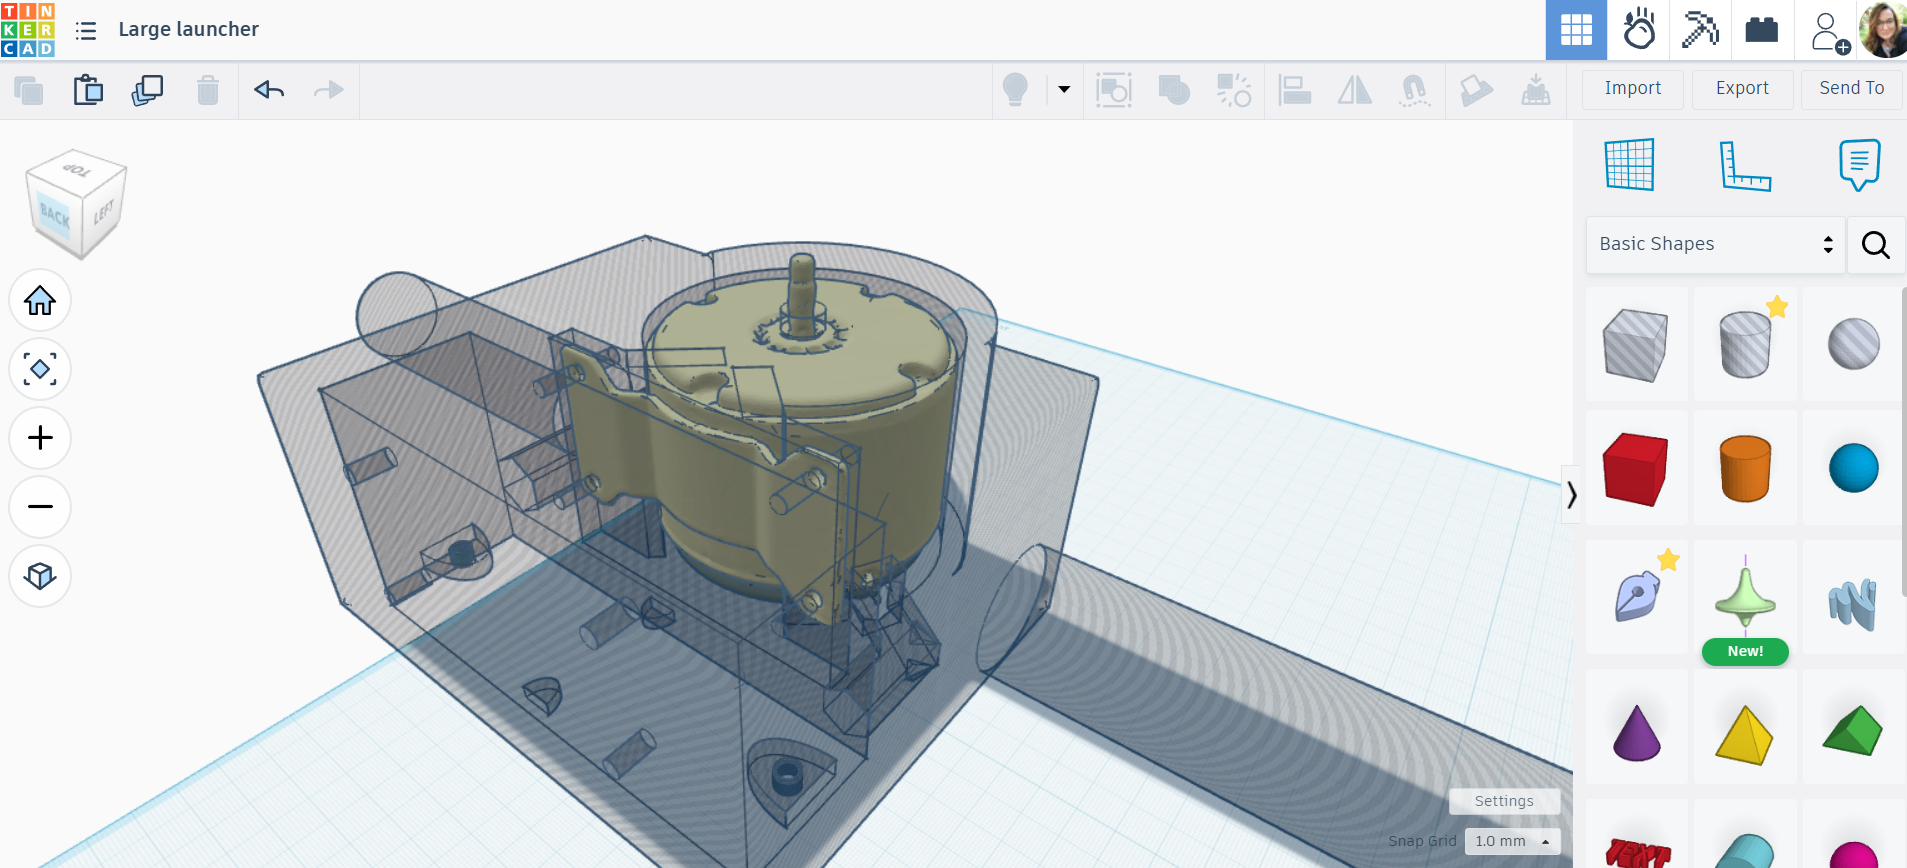
The Sermoon S1 can be used to scan very large objects, like cars, which could then be used to provide detailed measurements for custom parts and accessories. While I didn’t need to do any auto repair while testing the Sermoon S1, we did use it to scan a scooter motor. The scan was dropped into TinkerCad (my software of choice) to design an electric launcher for a giant fighting top I hope to take to Open Sauce this summer.
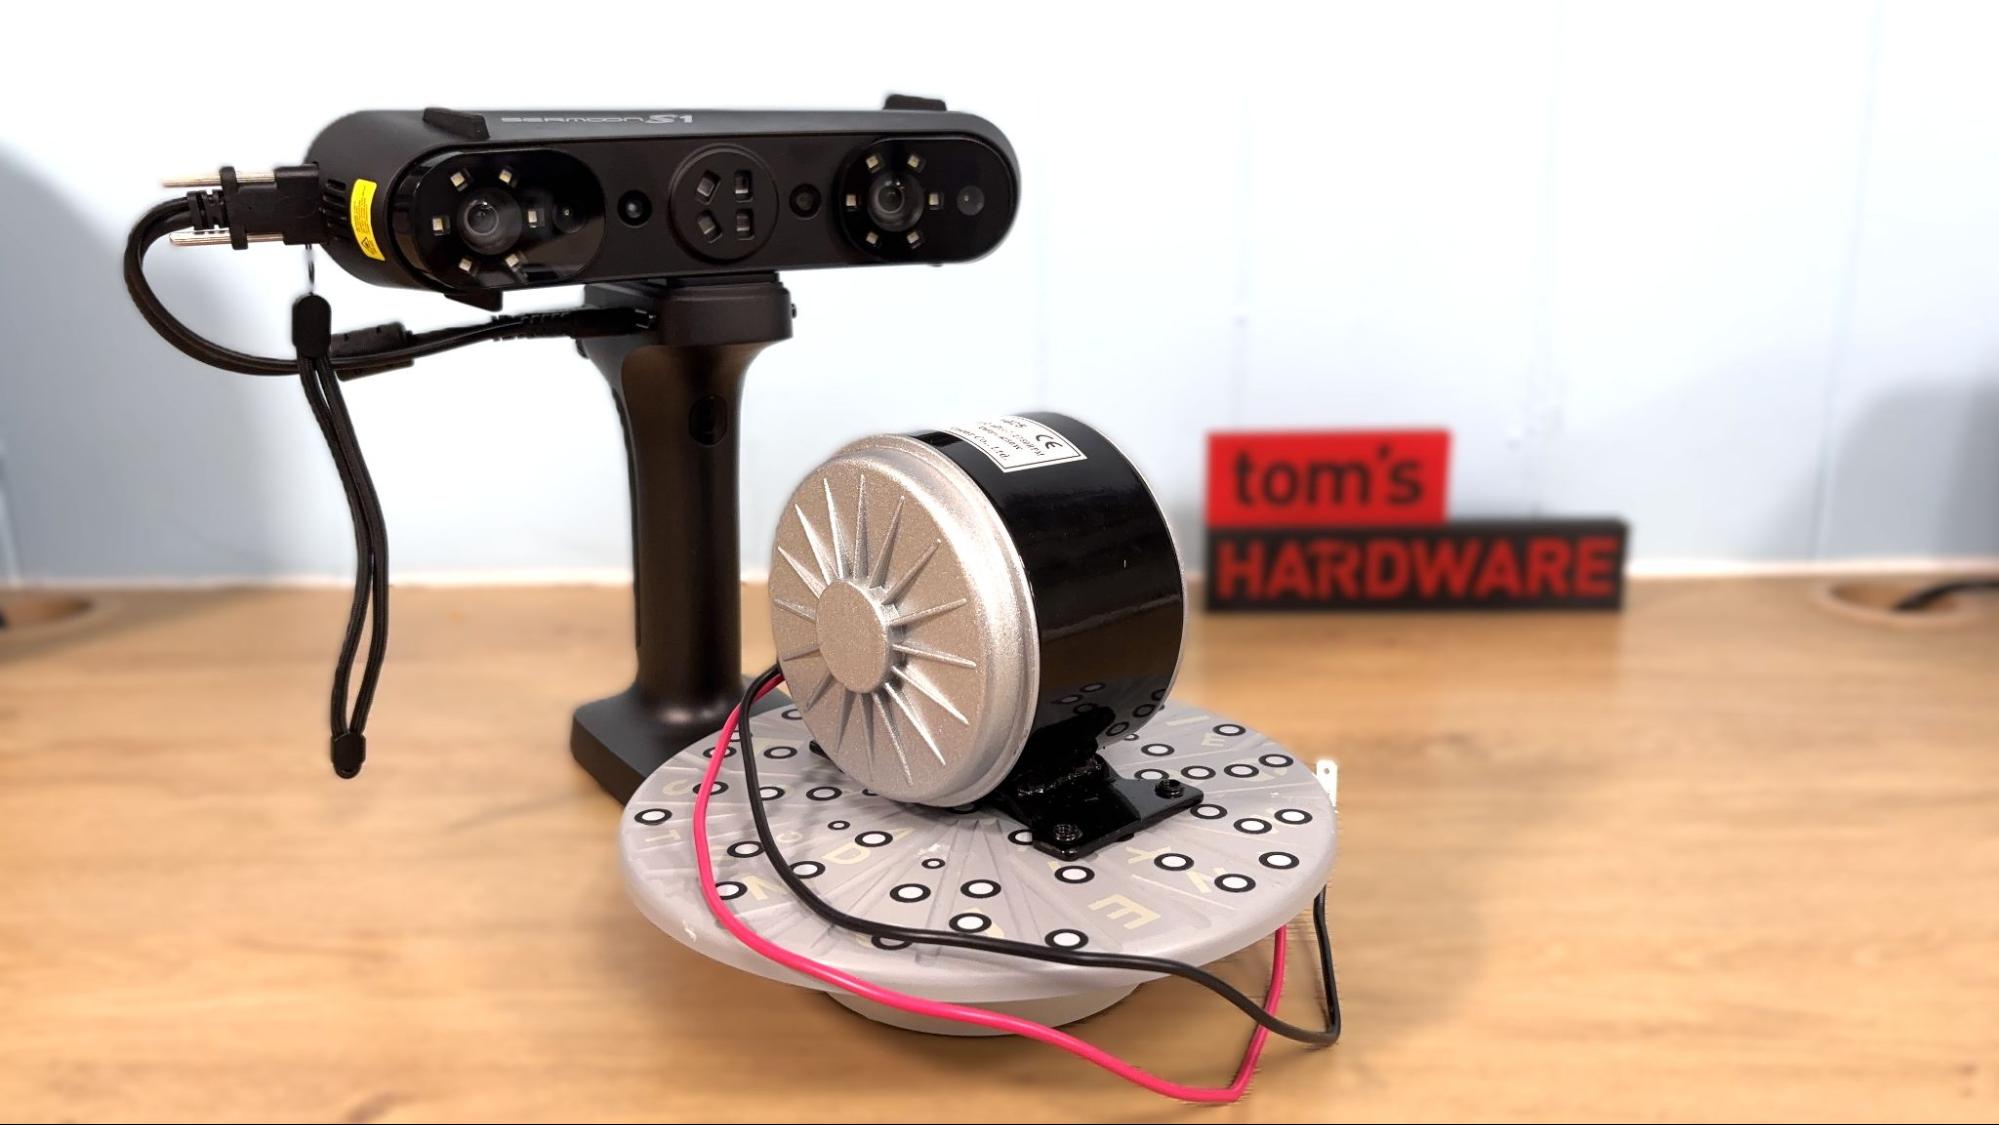
The scanner had no trouble with the reflective metal surface and provided extremely accurate information for placing several screws to hold the motor into the 3D printed housing. I used a small turntable that was provided with the Creality CR Lizard for this job.
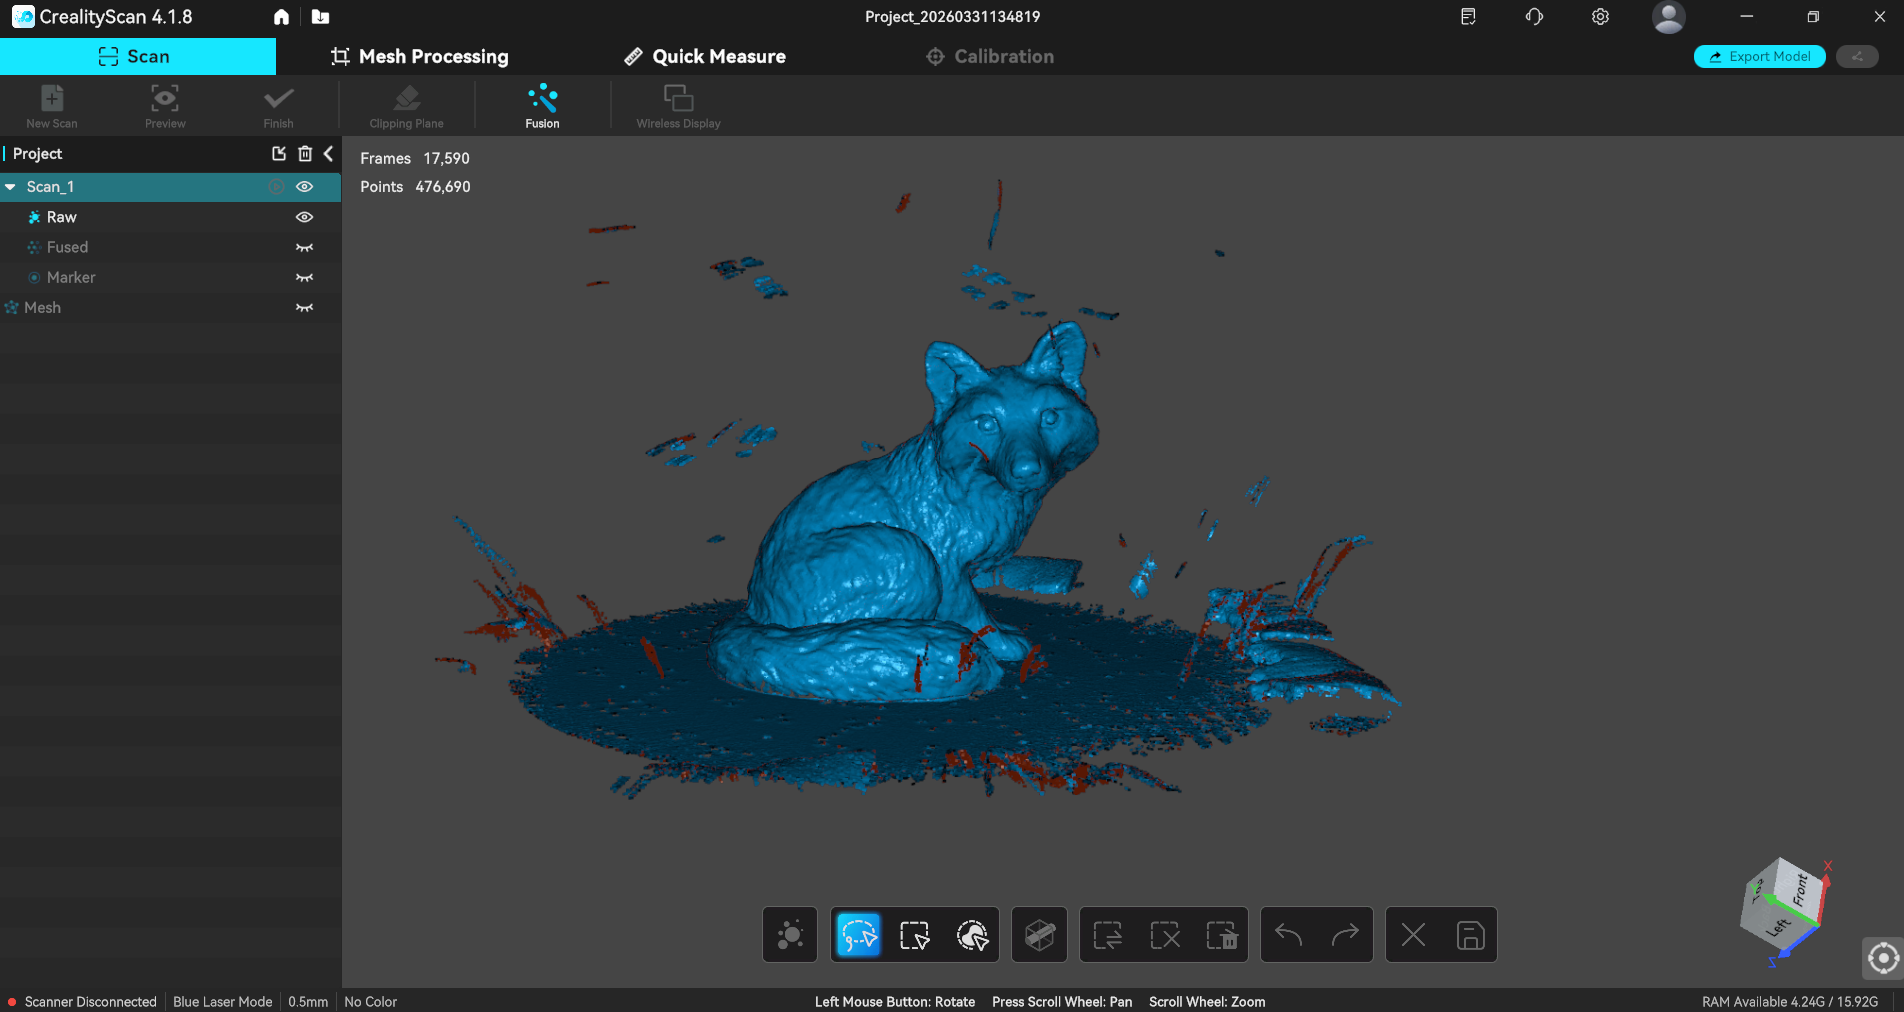
I also scanned this statue of a fox, which is about 9 inches tall, using a large turntable that Yuriy Melnik (Laser 3D CNC) sent over. Melnik is a scanning expert and travels around the country demoing scanners for Creality. The table is 3D printed and randomly covered in the same marking dots that come with the Sermoon S1. The software made quick work of cleaning up the scan thanks to the table. The resulting scan was incredibly detailed and printed out phenomenally on my Bambu Lab H2D in Inland Grey PLA.


NIR with the Creality Sermoon P1
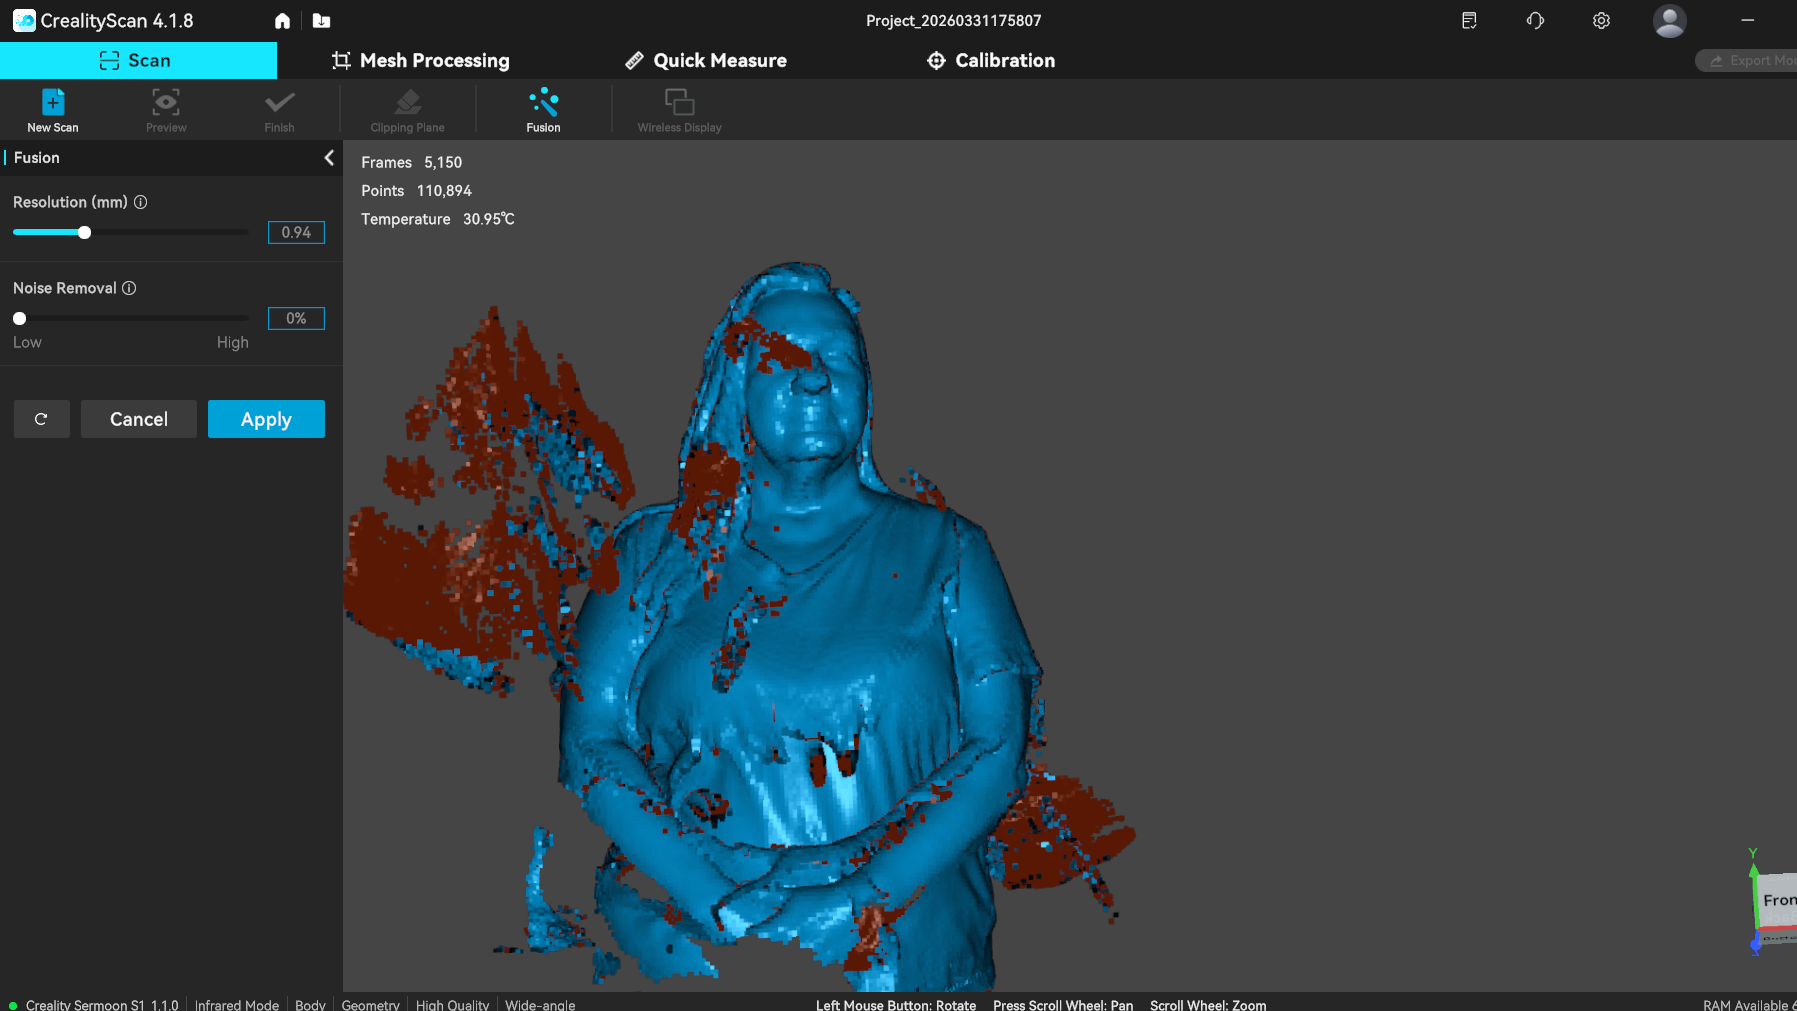
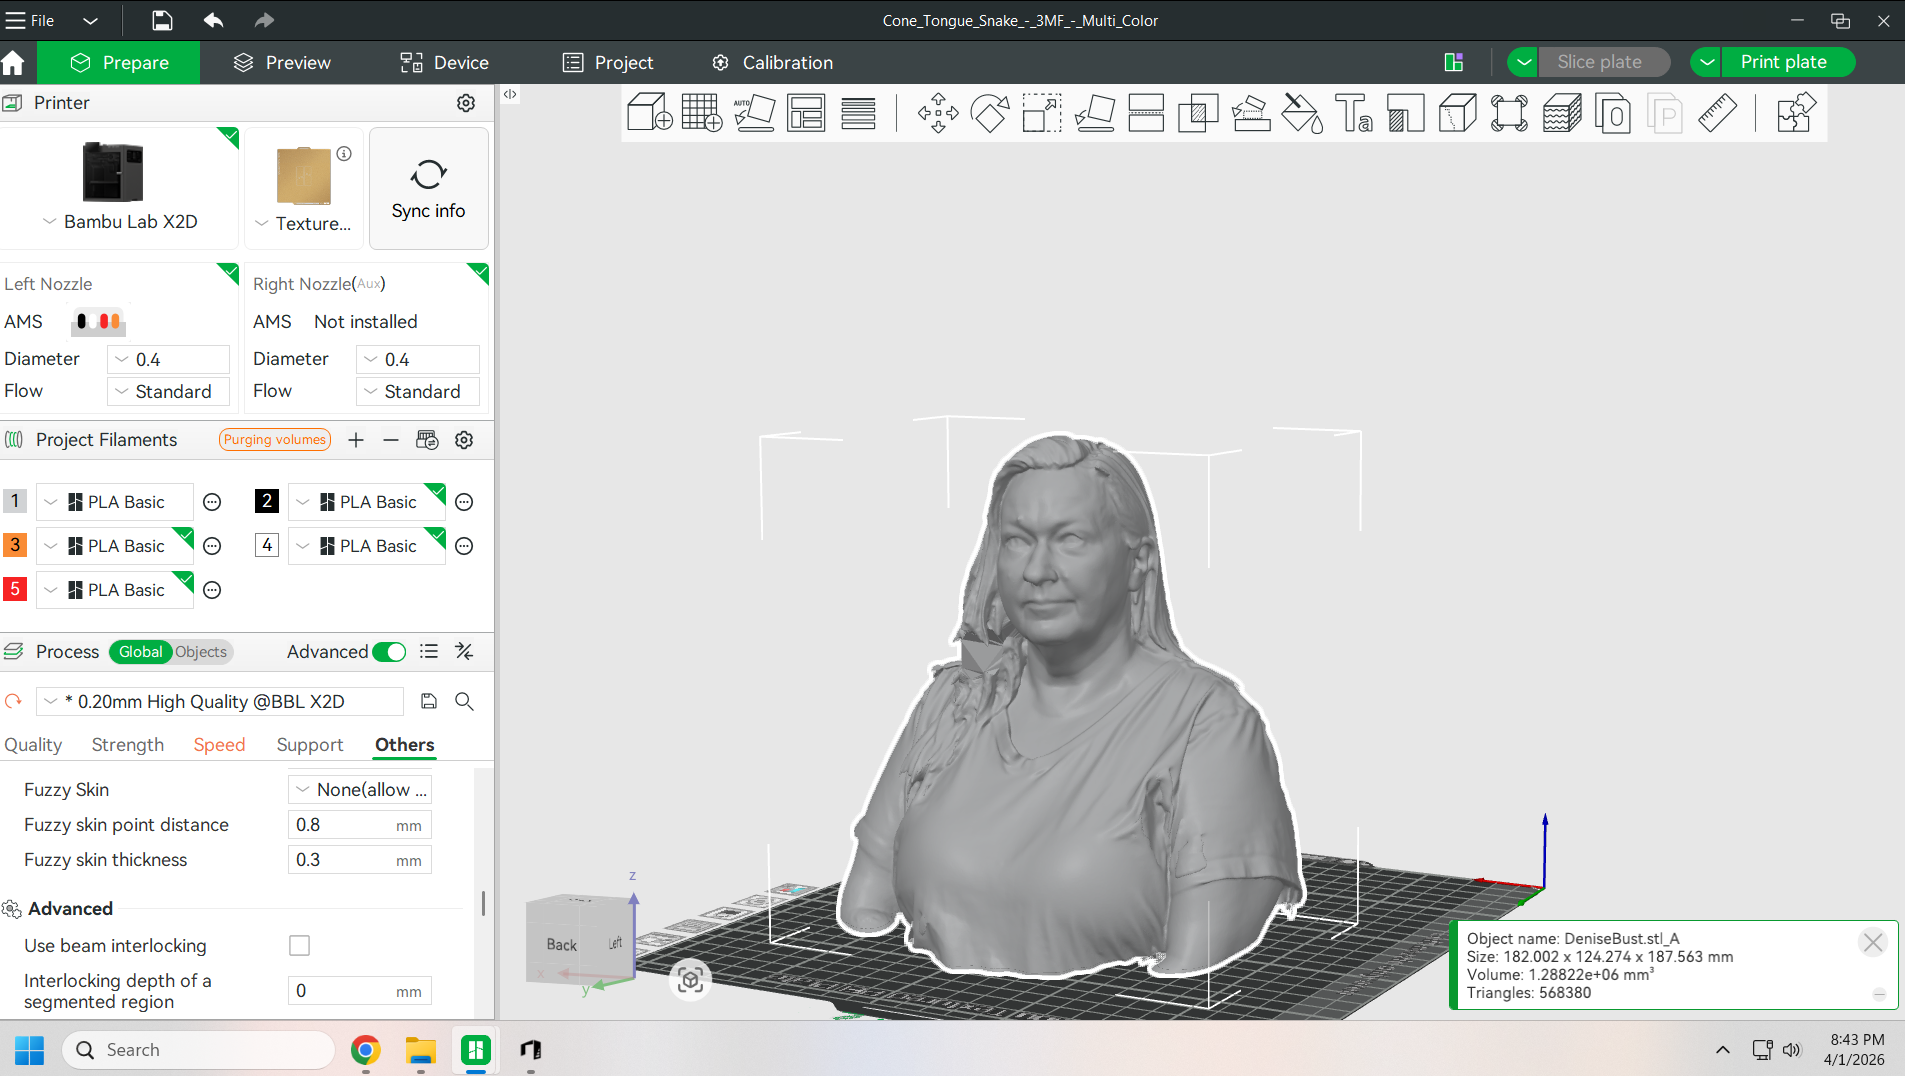
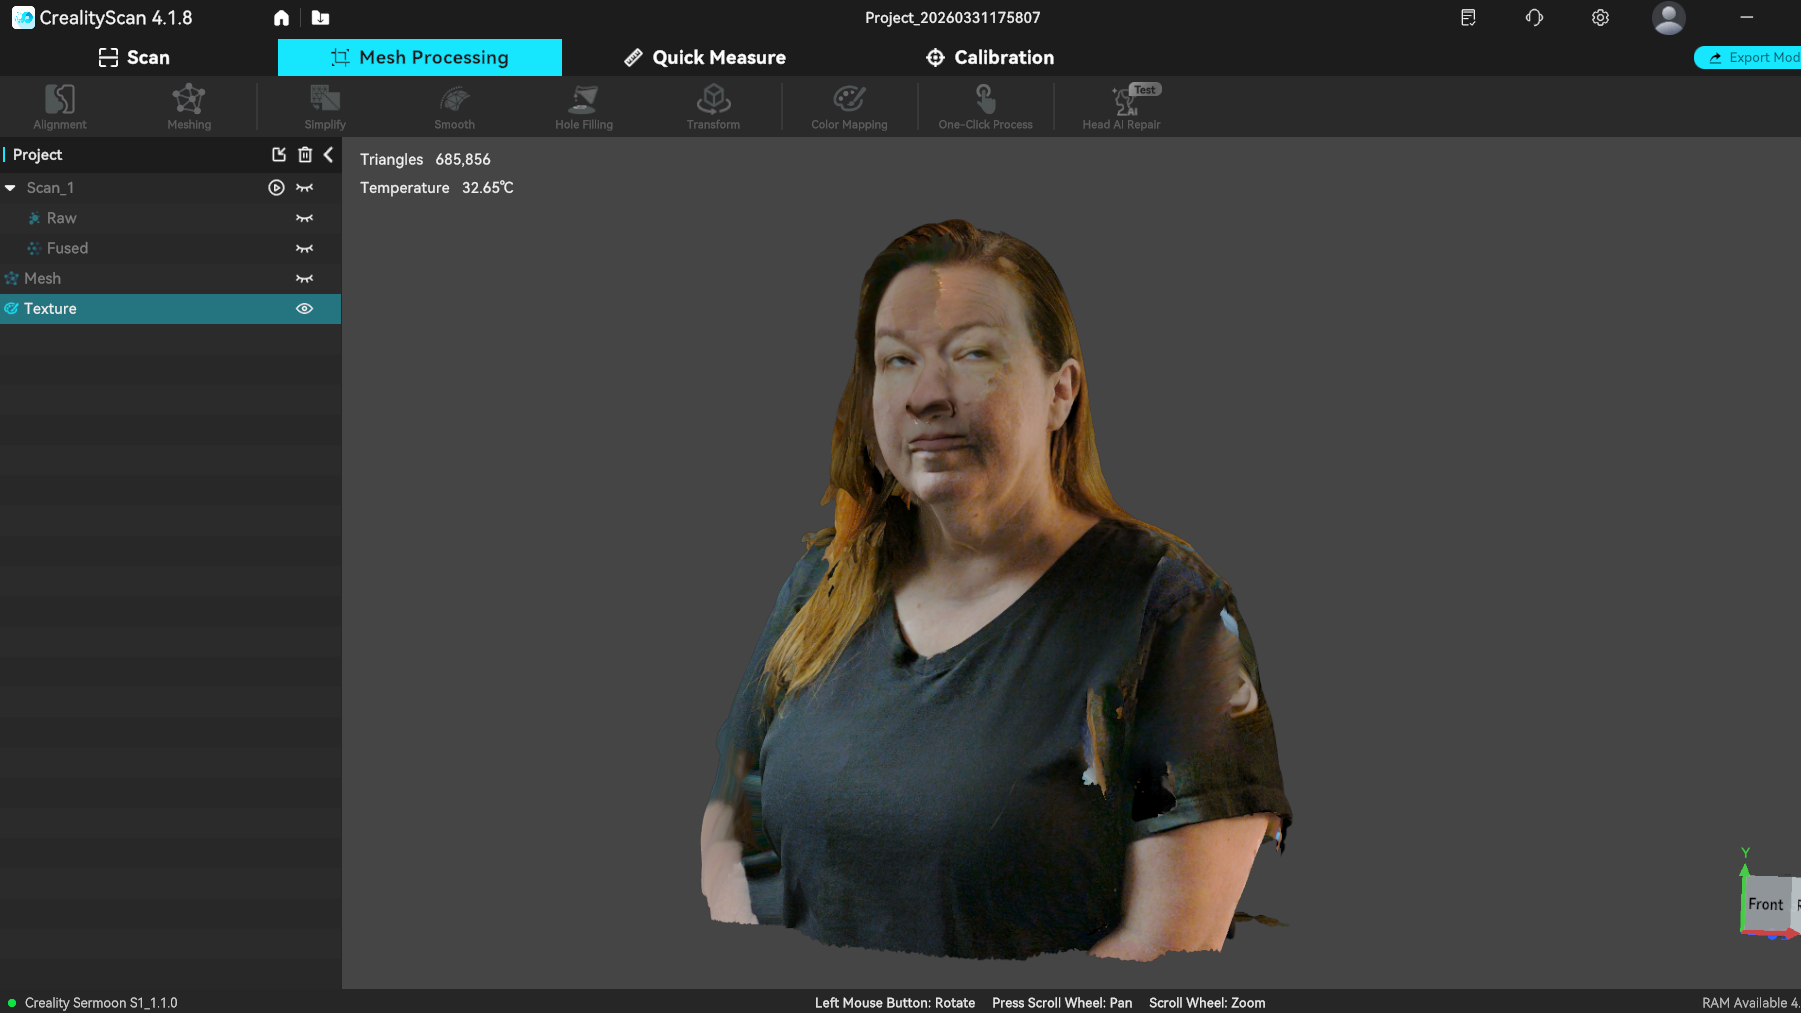
We attempted to scan a person – me – in NIR mode. The NIR is safe to point at people, and is the same technology used in your smartphone’s facial recognition scanner. The light is not visible, and my husband, who operated the scanner, had to rely on watching the computer monitor to see where it was pointed.
Our results were promising, but my hair refused to play nice and would not scan completely. There may be some trick to this type of scanning, and I should probably talk to Yuriy again before attempting any more human scans. Our first attempt was using the Scan Bridge and my laptop, which simply did not have enough memory (or battery life) to handle a large scan. Switching to the PC wasn’t a ton better, but again, a better PC or simply more practice might be needed. If I were more of an artist, I could probably fill in the gaps.
I will show you the color texture this scan produced against my better judgment; it's the last image in this set. It shows potential, but again, it's not perfect.
Bottom Line
The Creality Sermoon S1 is a powerful, high-precision tool that comes with fairly decent software. You’ll still want access to CAD or other graphic design tools to make full use of the Sermoon’s capabilities. After a few days of fiddling around with the scanner, I could really see its potential, but there is a serious learning curve to getting the best results.
Creality has made huge advancements in technology since its first foray into scanning. The software leans heavily on AI to make it easier to use, but there are still limits. You also need to make sure your computer is up to the task.
The scanner was able to handle every surface area we tried, with just the human scan being a bit difficult to complete. It did well on both flat and shiny surfaces and on objects with a lot of texture.


 English (US) ·