
 3 months ago
75
3 months ago
75
If you’re a Mac user, you’re probably familiar with Time Machine, which is Apple’s automated backup solution. Time Machine automatically backs up everyone on your system, including user accounts, system settings, apps, music, photos, emails, and documents. Depending on available resources and network speed, Time Machine usually creates a backup once an hour.
Typically, most users back up their Mac via an external storage device like a USB hard drive. The only drawback to this solution is that your Mac must be connected to external storage for a Time Machine backup to occur. If you have a desktop-based Mac, that’s not an issue. However, if you have a MacBook, chances are that you’re not always tethered to your desk, let alone an external storage device. So, in that case, a network-based Time Machine volume is an excellent wireless solution for keeping up-to-date backups of your system.
Several router manufacturers include built-in support for enabling Time Machine backups with their hardware, including Asus and TP-Link. In this guide, I’ll walk you through enabling a Time Machine backup volume with a TP-Link router, specifically, with a Deco BE63.
Initial external storage setup
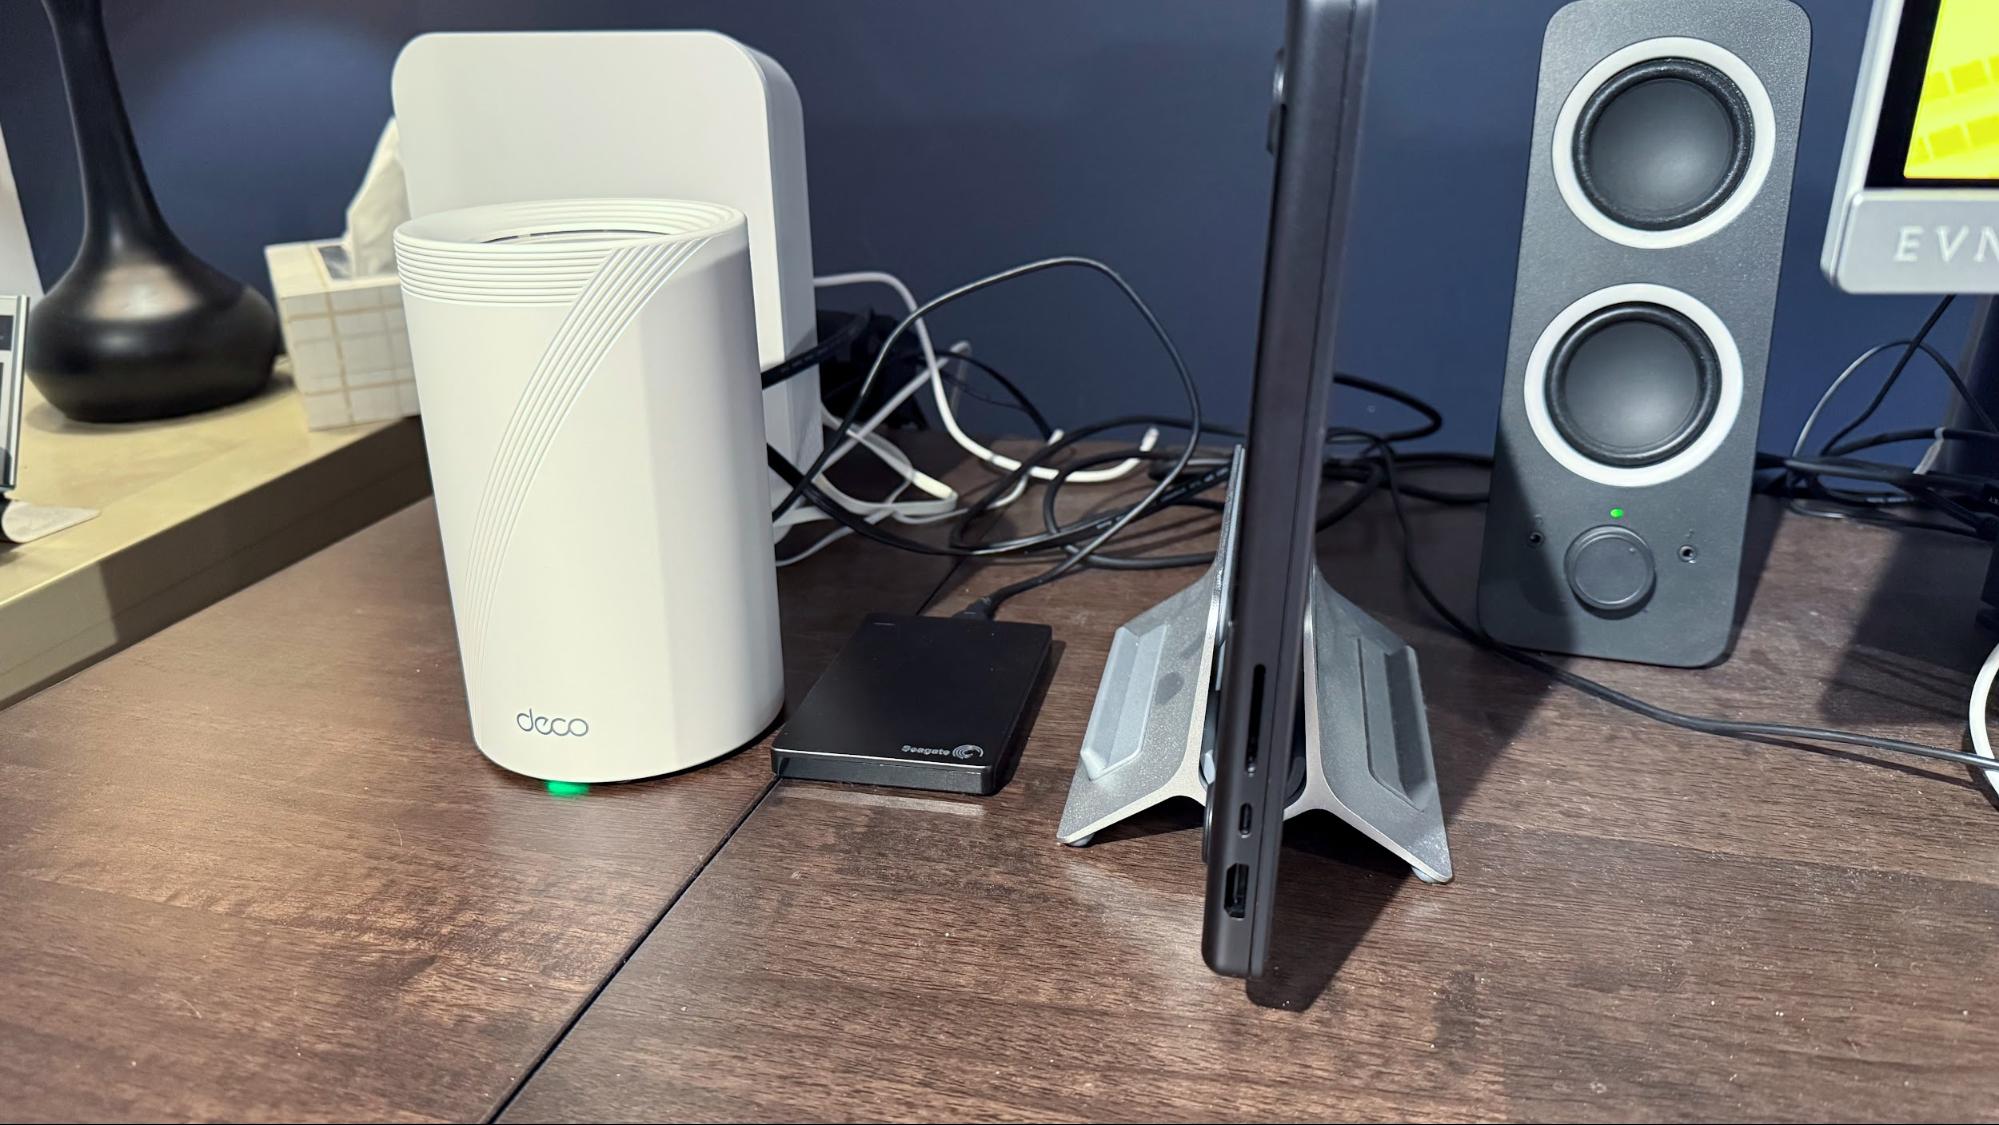
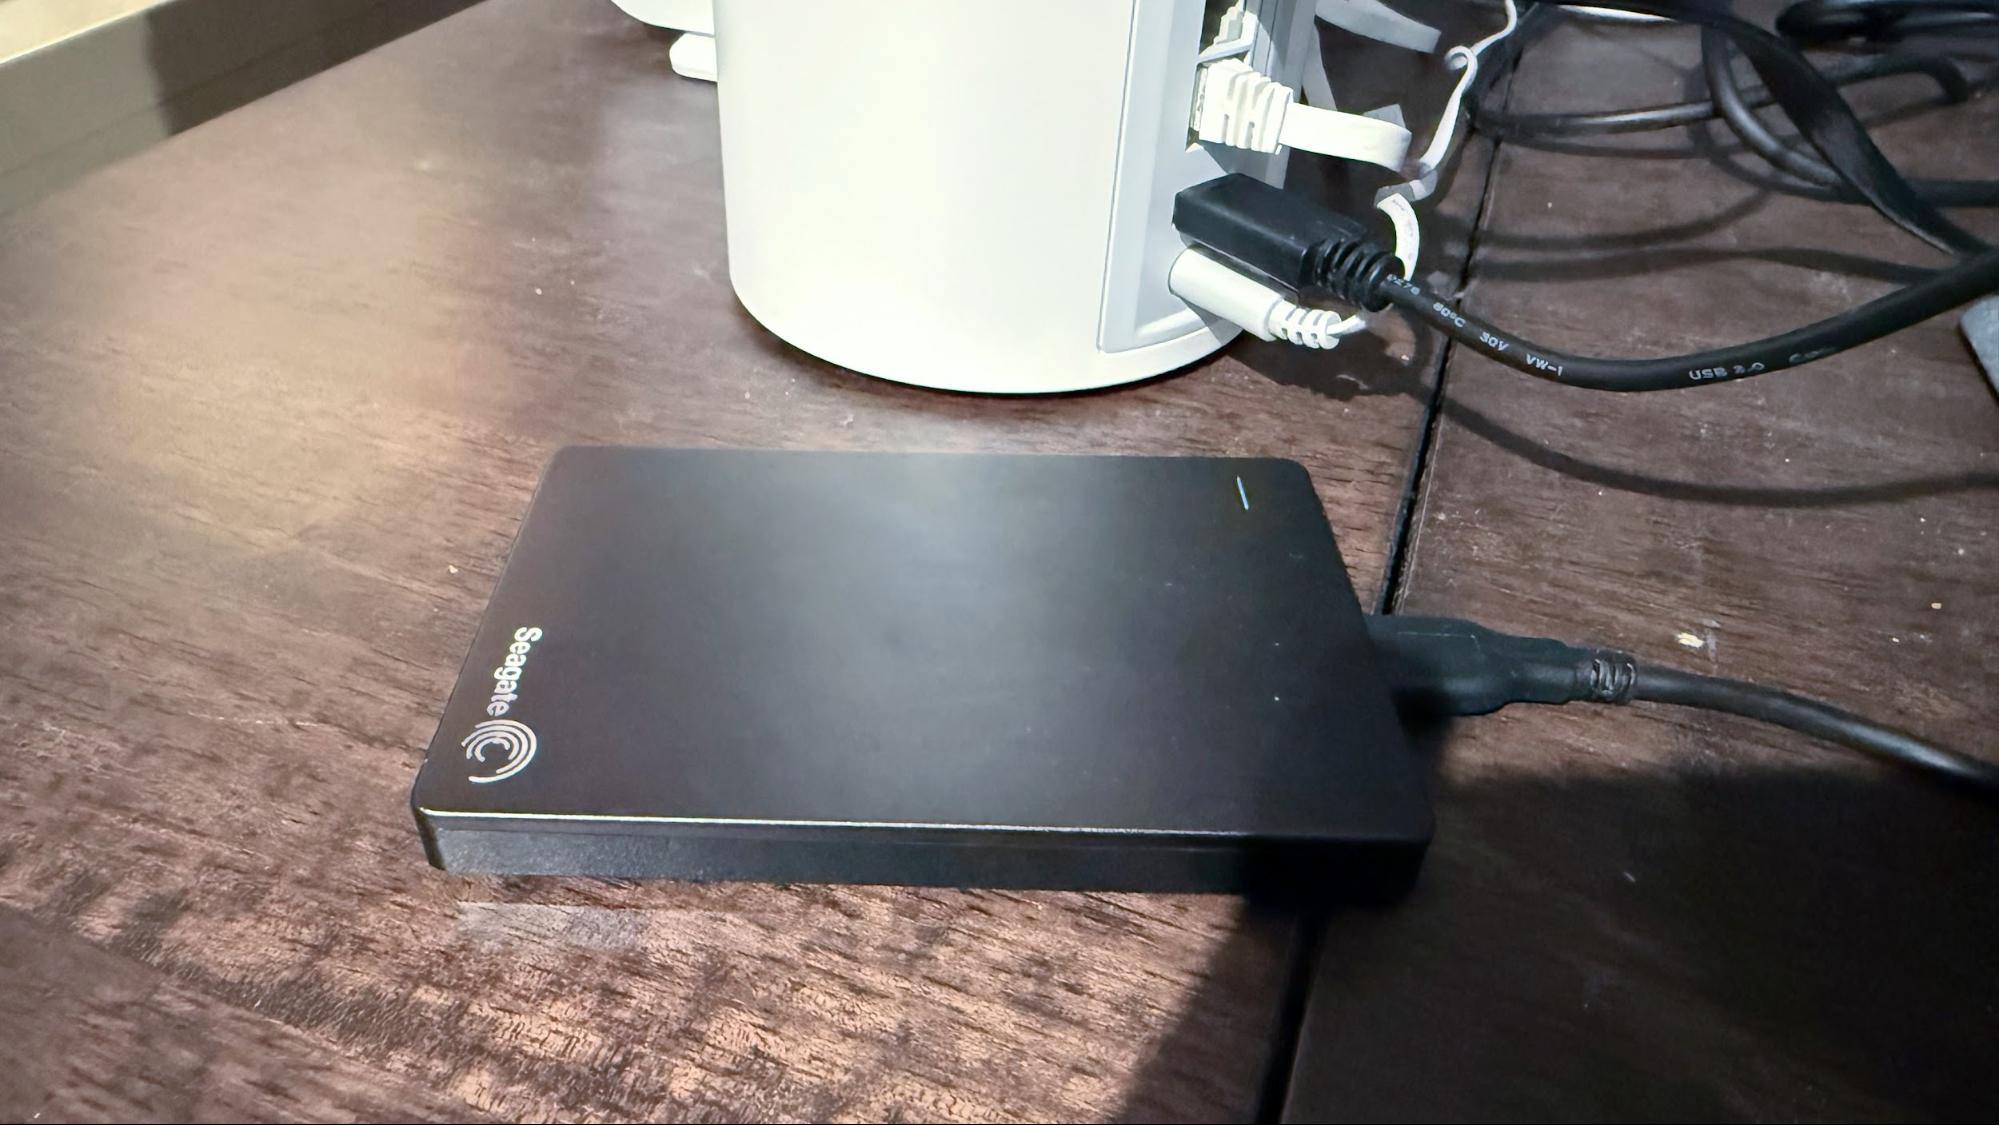
The first thing that you’ll need before even getting to the router portion of setup is an external hard drive. Any hard drive will do, but Apple suggests that you use an external HDD that is twice the size of your Mac’s internal storage. In my case, I have a 14-inch MacBook Pro with a 512GB SSD, and I just so happened to have a 1TB Seagate Backup Plus Portable Drive sitting in my desk drawer.
You’ll want to take whatever external HDD you have and plug it into your Mac. I use an Ivanky Fusion Dock Max 1 Thunderbolt 4 dock when I use my MacBook Pro at my desk, so I plugged the Seagate HDD into a free USB-A port.
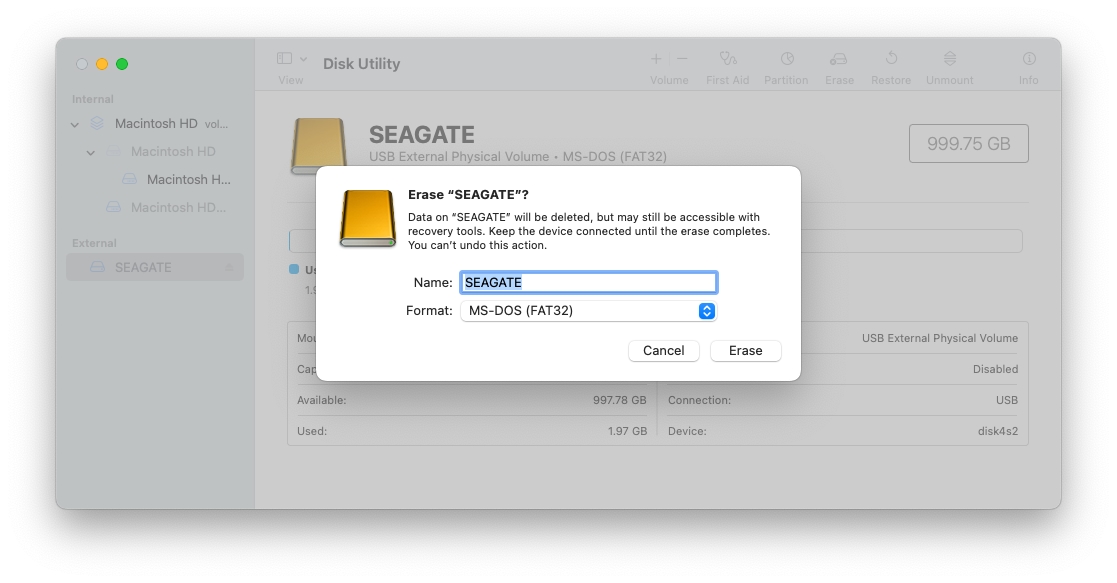
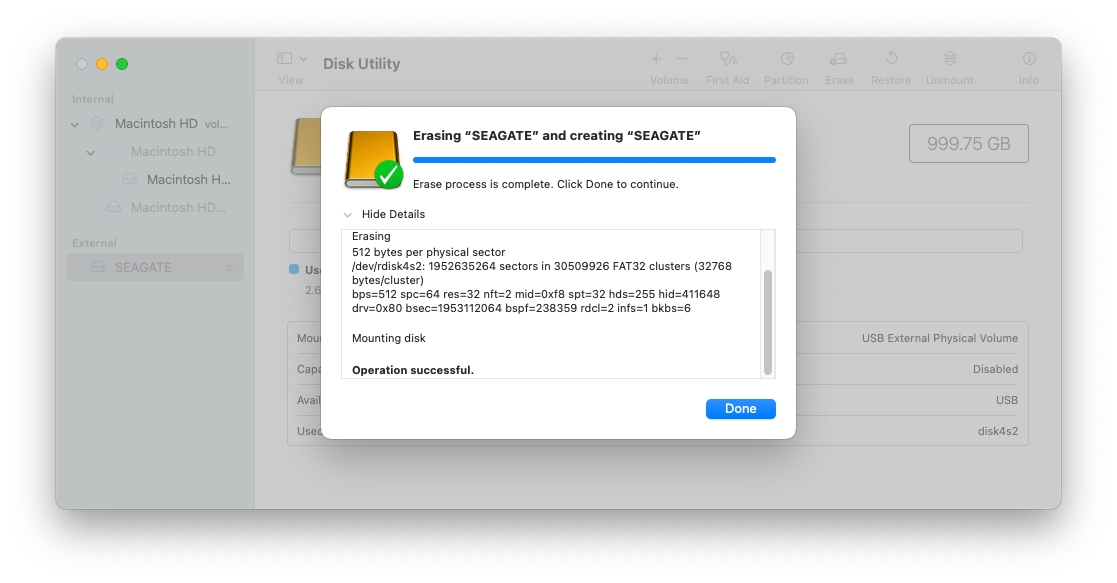
Next, open Disk Utility, select your external HDD from the left pane, and then click Erase from the top menu. You’ll then want to name the volume (I chose Seagate) and choose what filesystem you want (I chose FAT32). After a few seconds, the format should be complete. Next, click Unmount to remove the HDD from your Mac safely.
Setting up the Time Machine backup with your TP-Link router
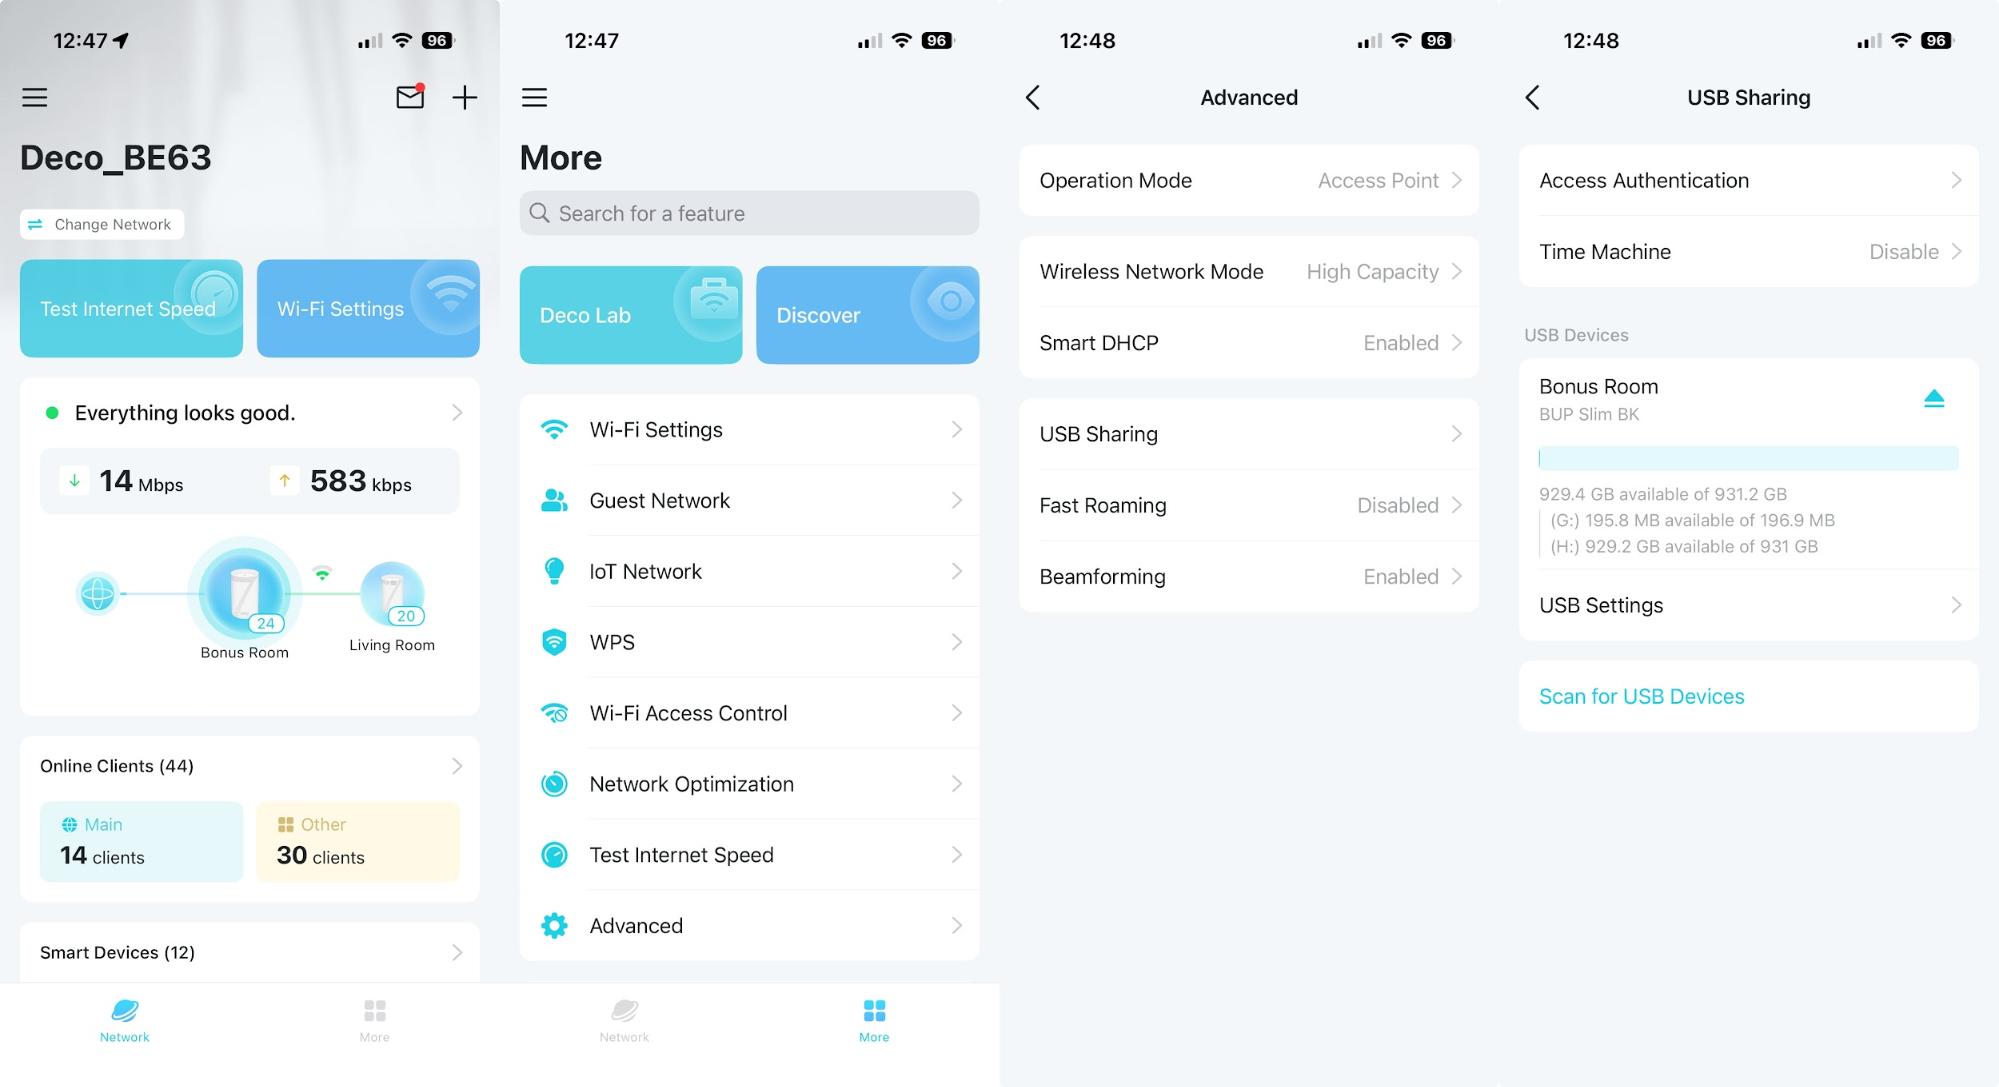
I have a TP-Link Deco BE63 Wi-Fi 7 mesh router that I use for my home network, and each node has a USB 3.0 (Type-A) port. I plugged the Seagate HDD into the USB 3.0 port on my main router, and it spun up, as expected.
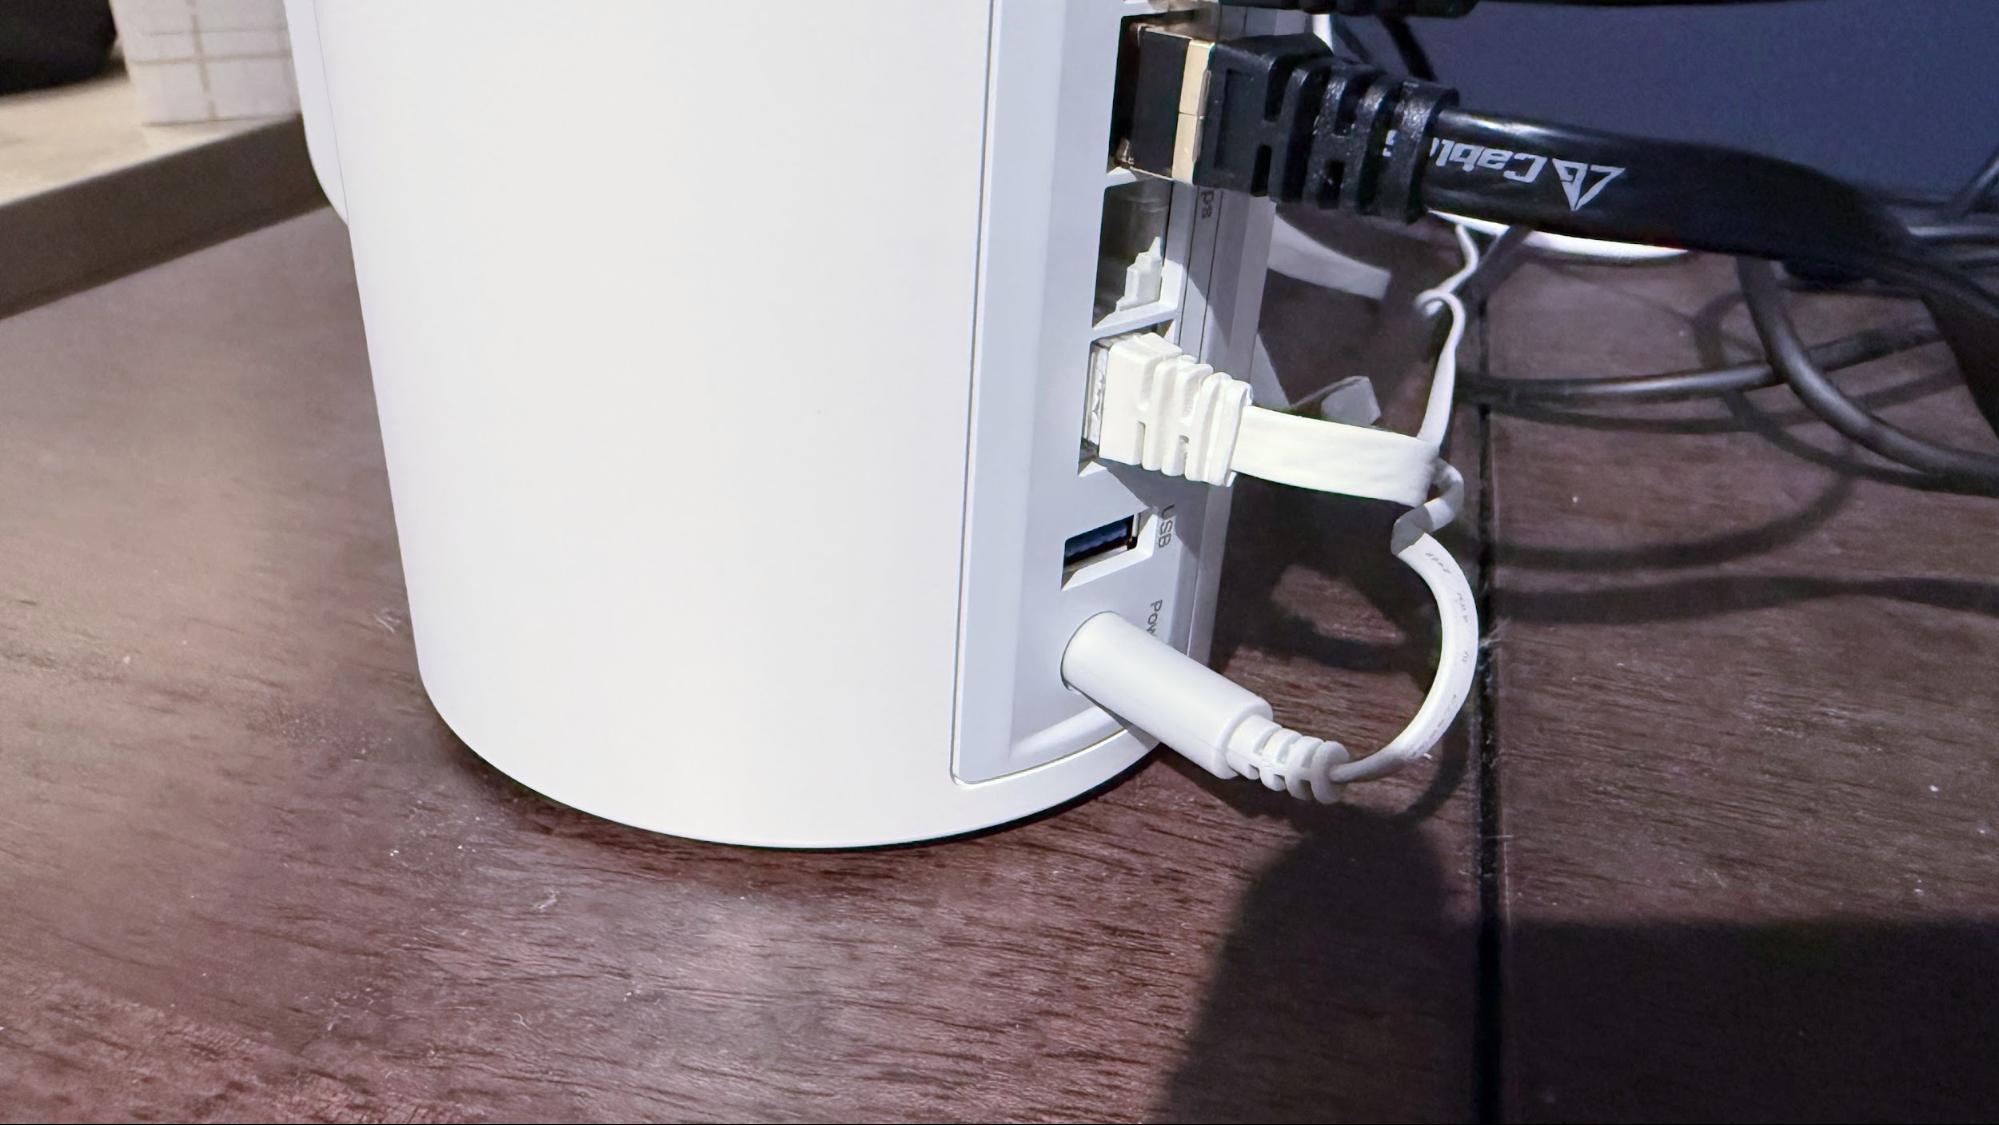
My Deco BE63 is only configurable via the TP-Link Deco app, so I opened the app and tapped on the More tab at the bottom of the homepage. Next, tap Advanced, then USB Sharing. You should see the storage device listed. My Seagate HDD showed up with 931GB free to use. At the top of the page, tap Time Machine, then tap the enable button.
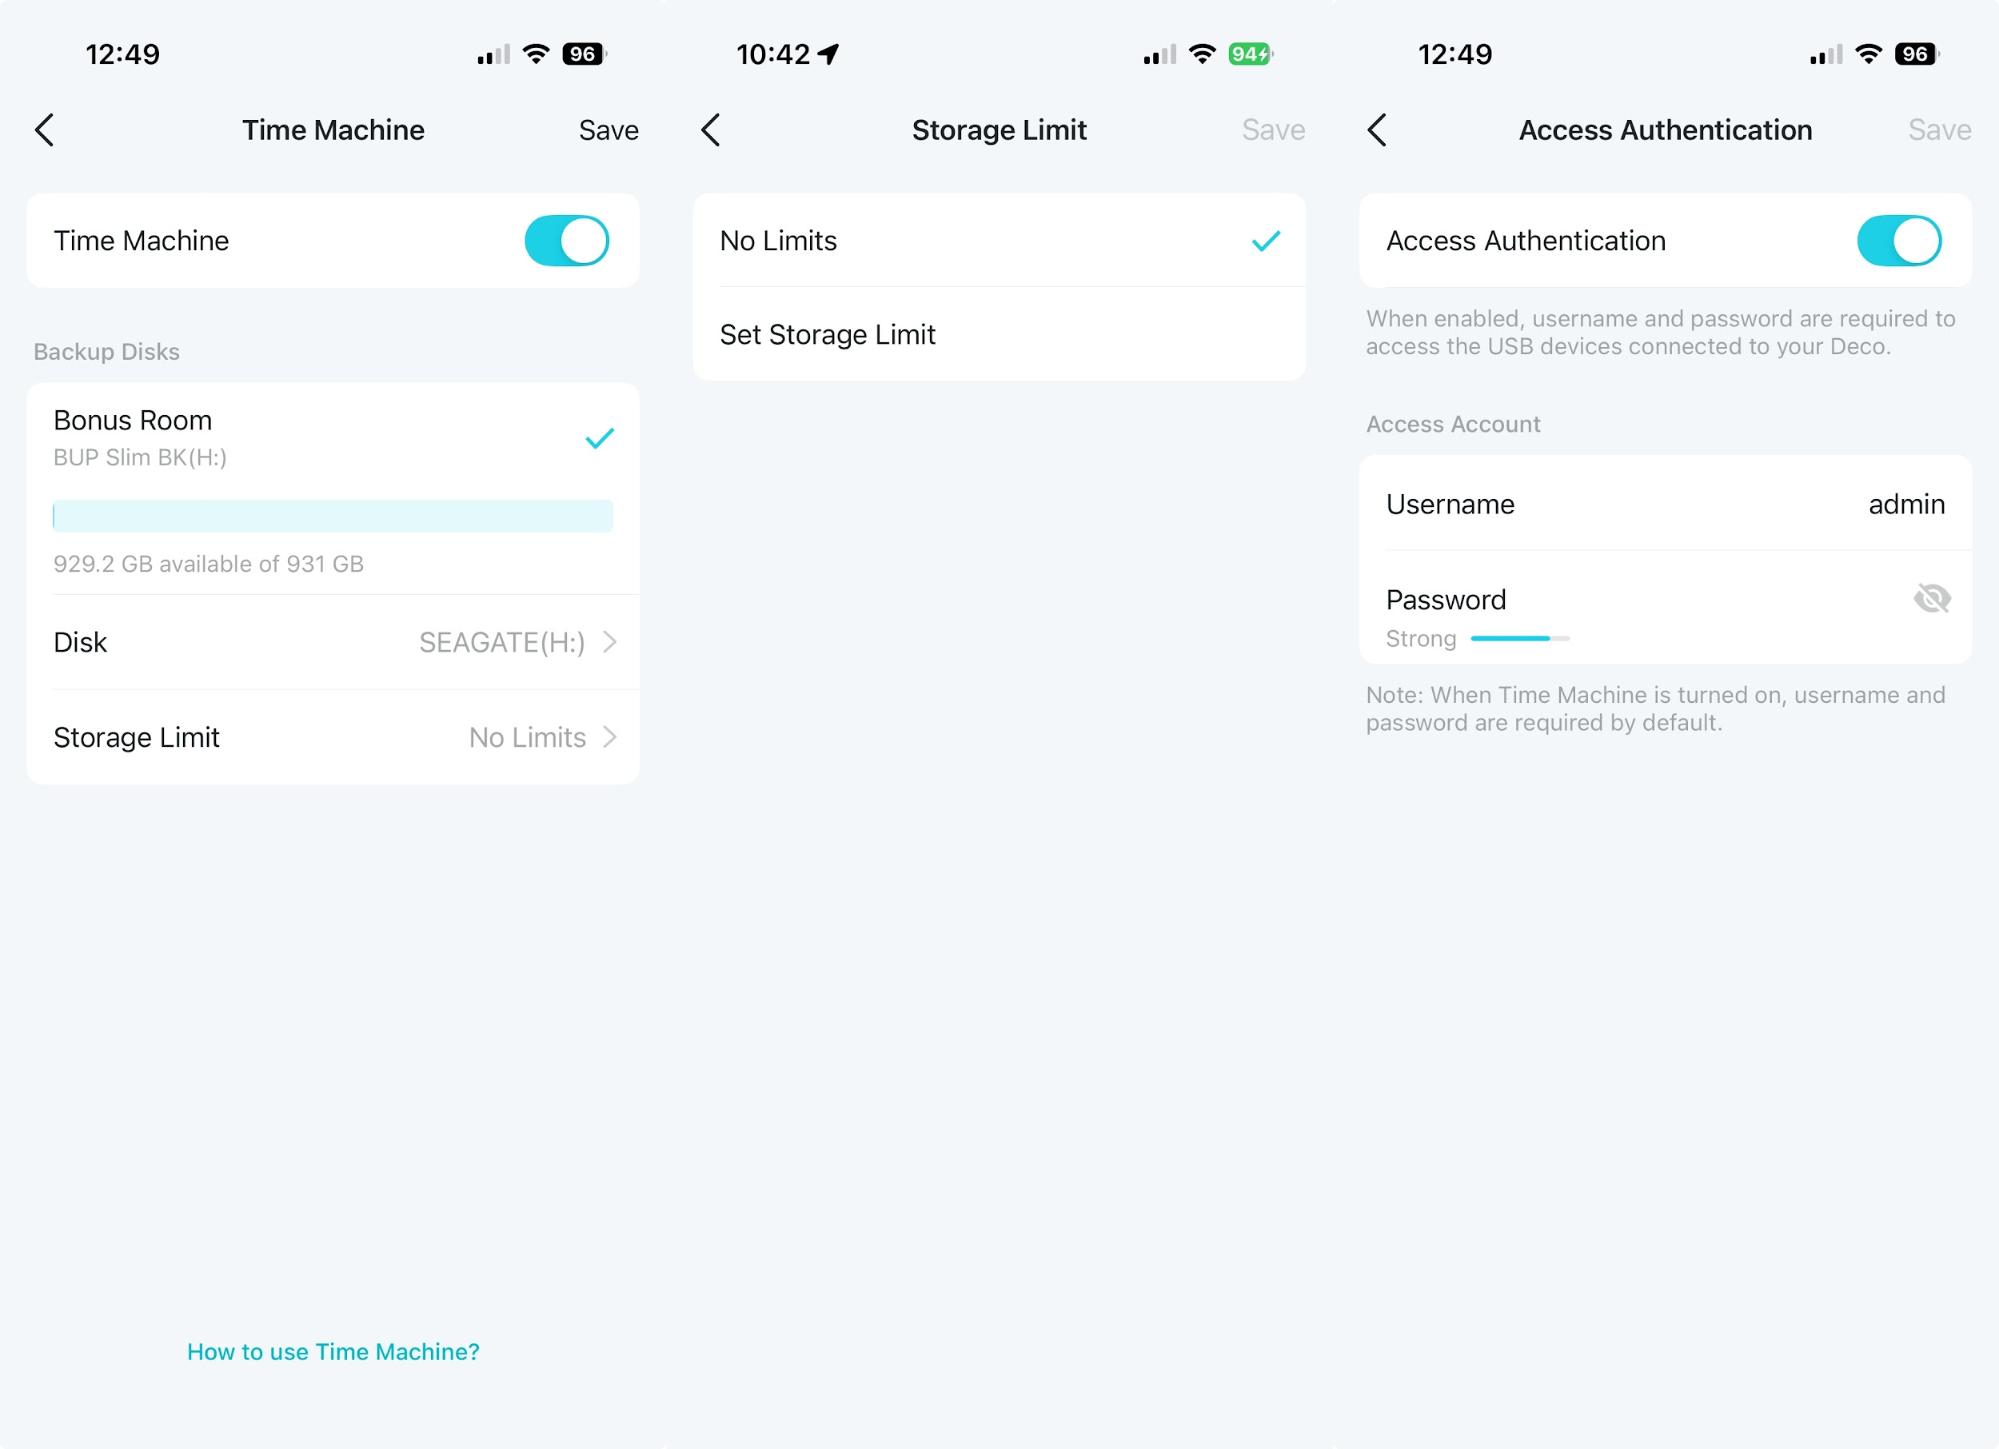
TP-Link will provide you with a default username and password that you’ll need for accessing the Time Machine volume on your Mac, or you can choose one of your liking. If you prefer, you can limit how much of your available storage Time Machine will consume. Since I don’t plan on using the storage for anything else, I left the default settings. Tap Save at the top of the page.
Accessing the Time Machine backup from your Mac
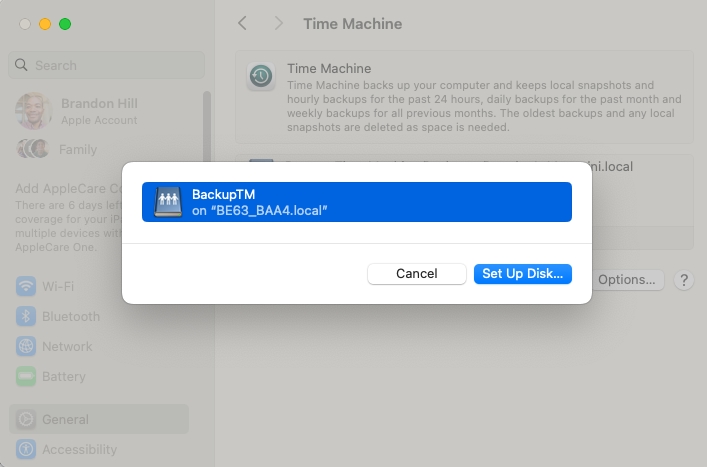
With all the background legwork complete, you should now be able to see and initiate a Time Machine with your Mac, as long as the Mac is connected to your home network (either via Wi-Fi or by a wired connection). Go to System Settings → General → Time Machine. Click the + button, and you should see your new Time Machine volume. In my case, it was named BackupTM on “BE63_BAA4.local.” Click Setup Disk, and macOS will mount the new Time Machine Volume. At this time, you’ll be asked to enter the username and password that were provided during the initial setup.
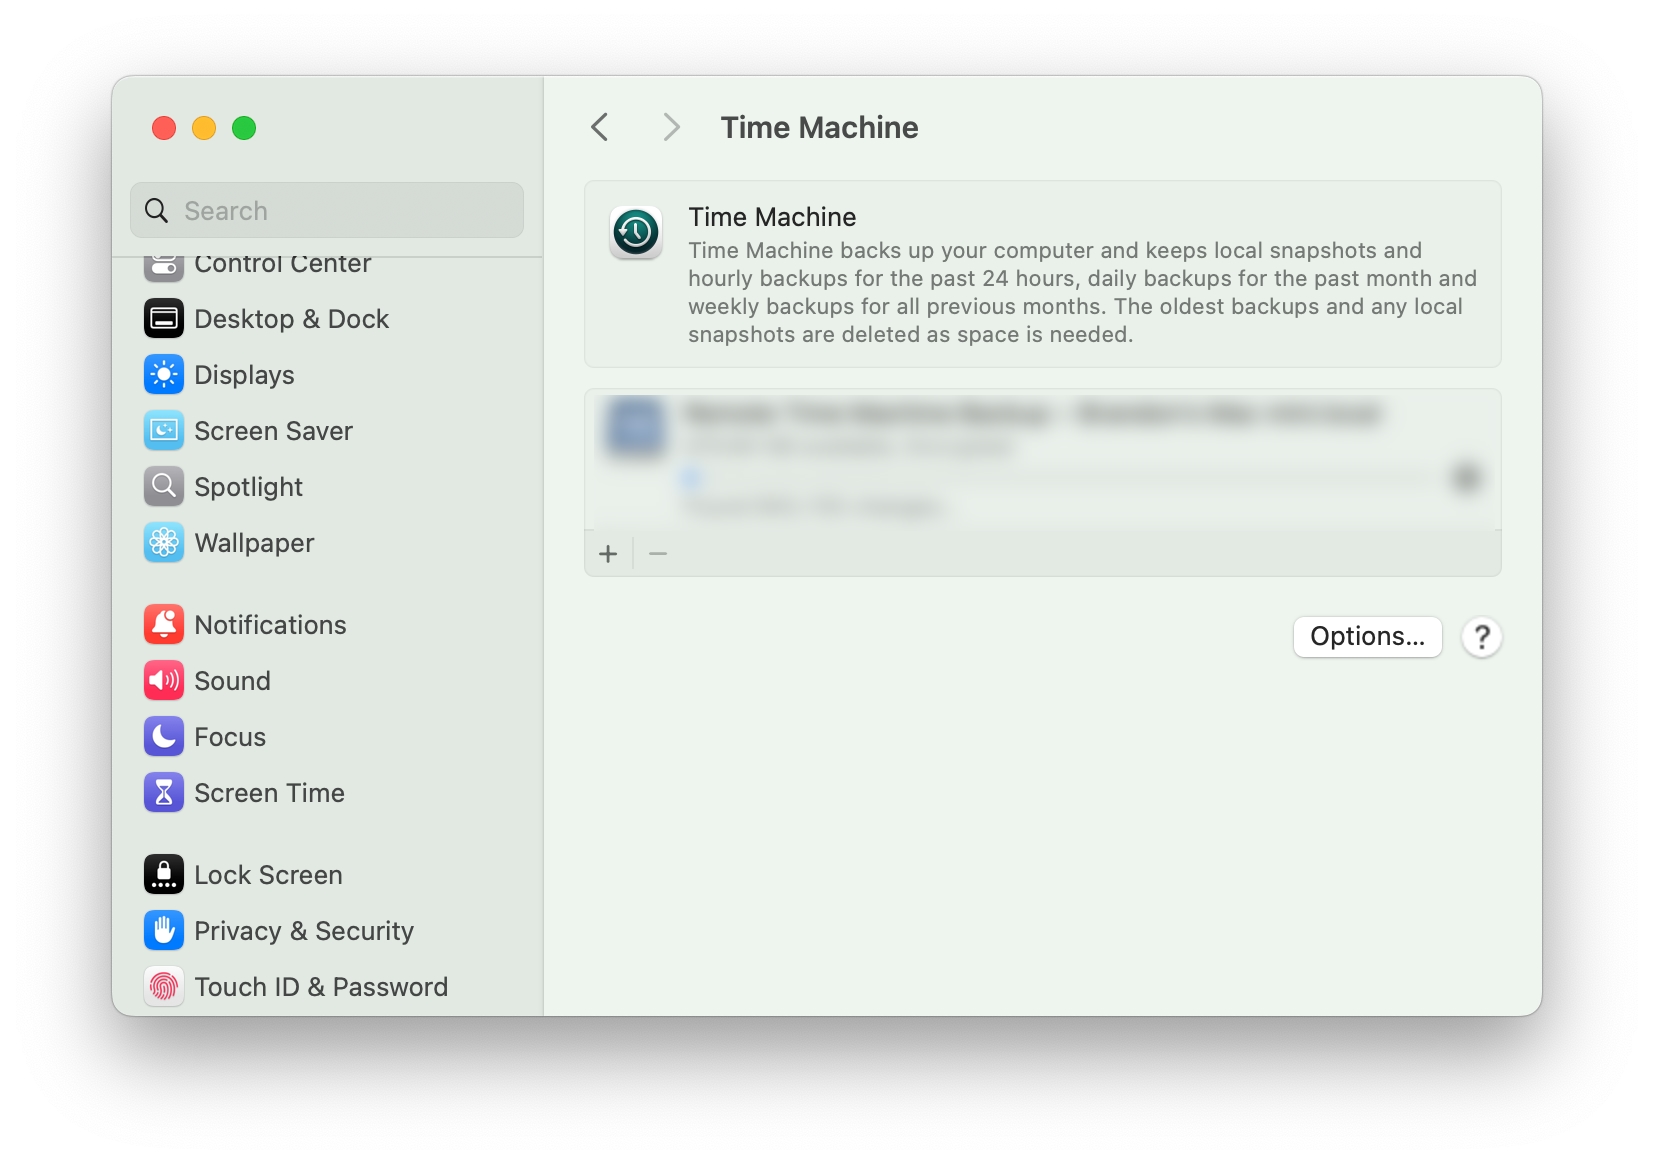
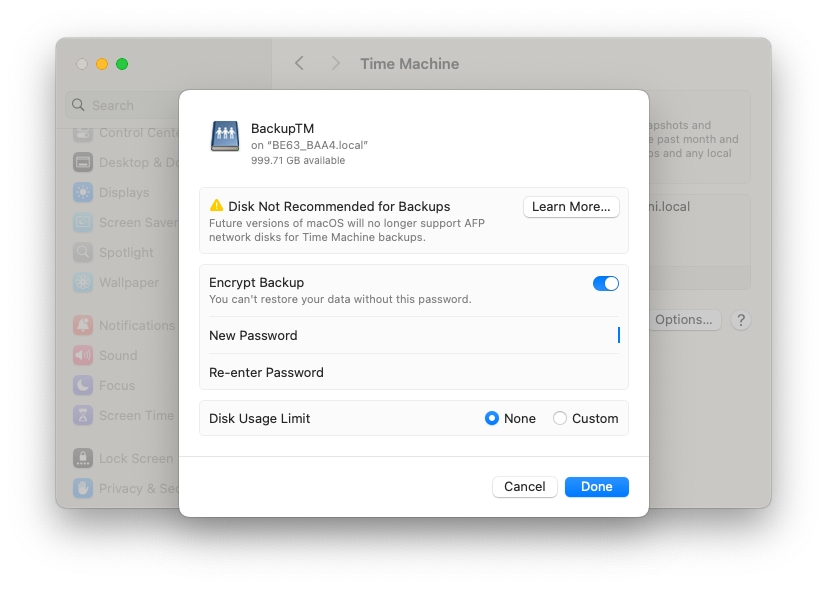
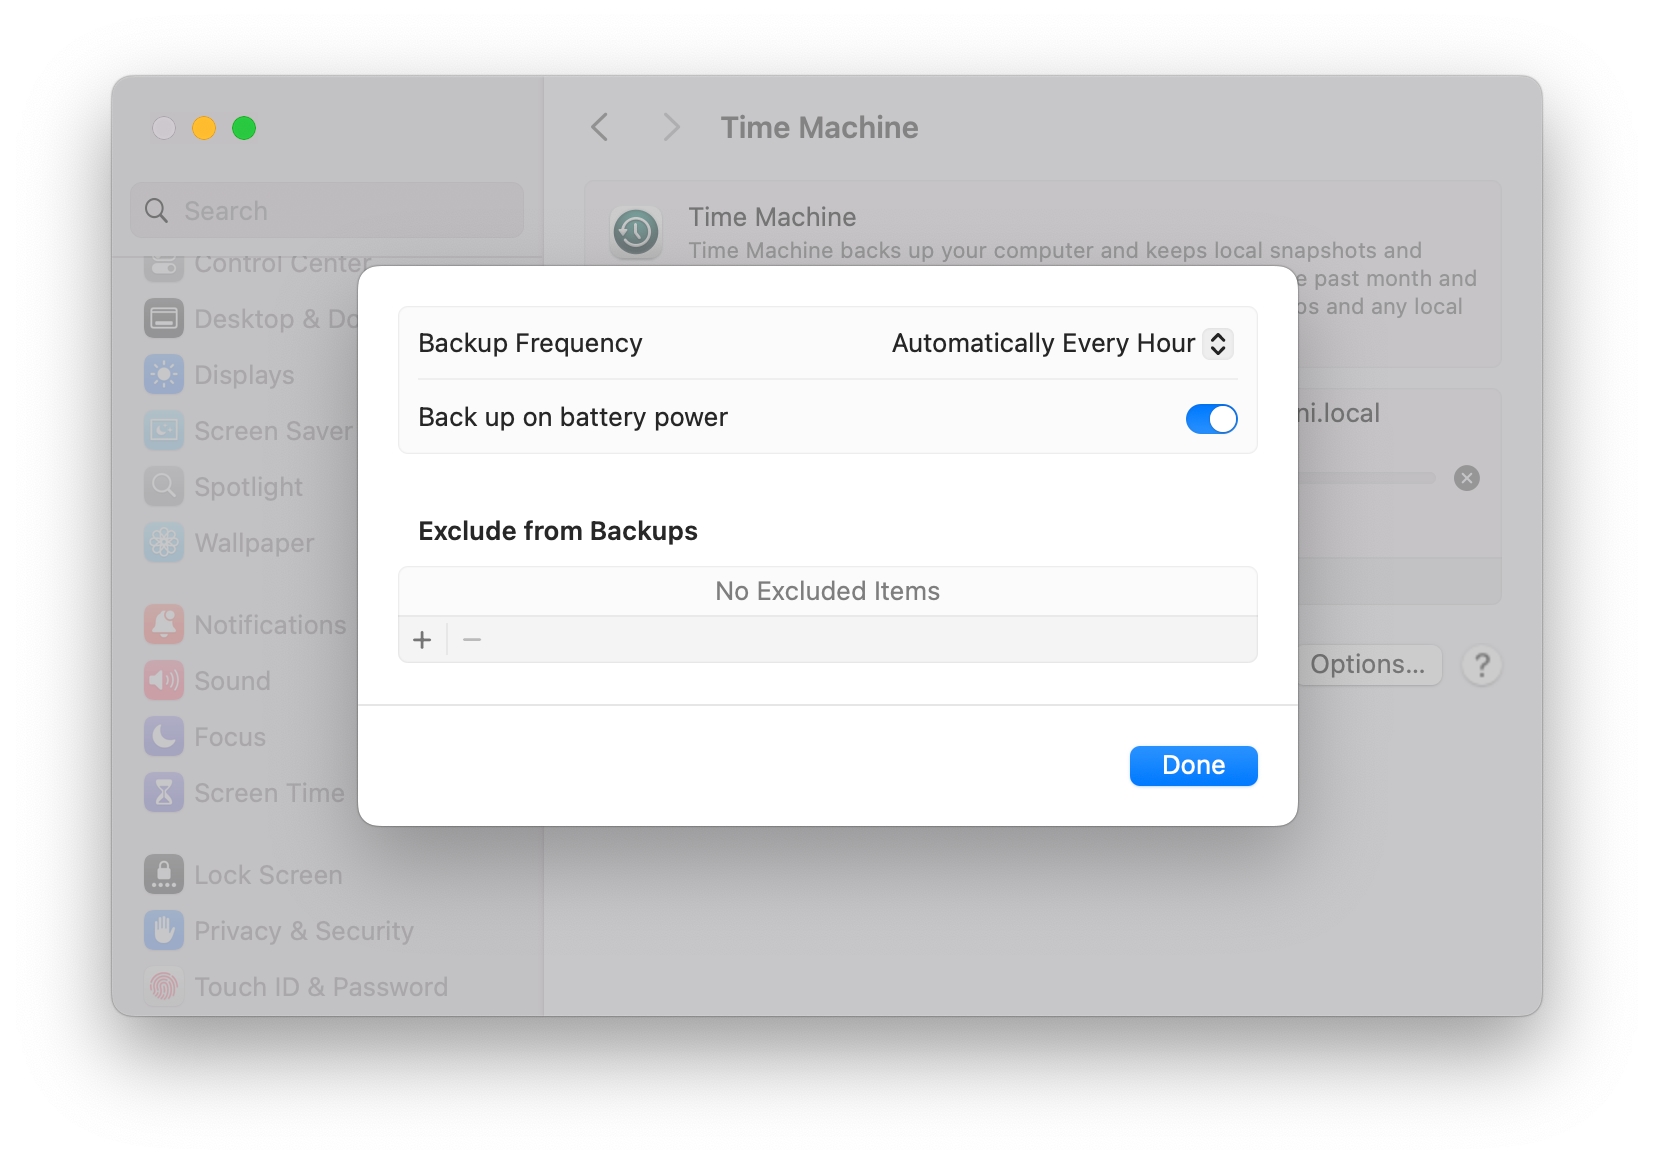
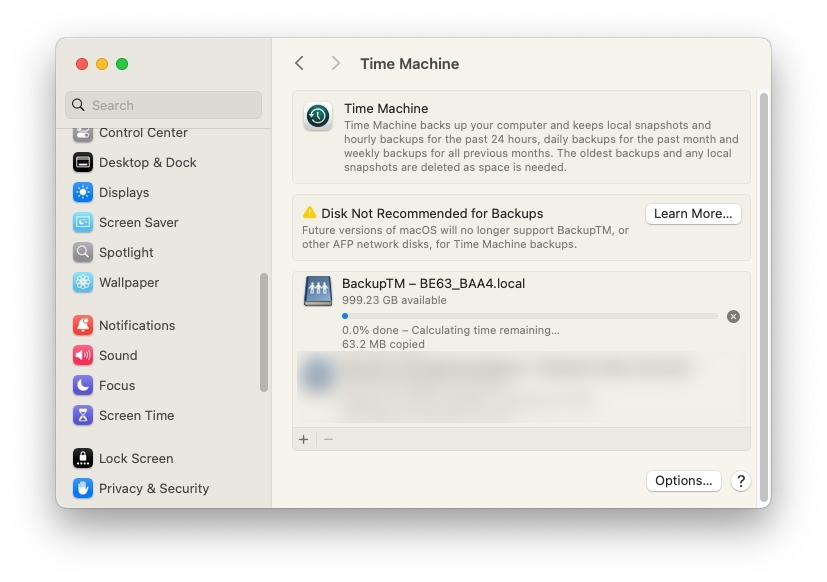
macOS will then mount the drive, and you can choose whether or not to protect your backups with a password. Once you proceed, macOS will perform your first Time Machine backup. You can also take the time to explore the Options button, where you’ll be able to specify if you want to back up while on battery power. Now you can enjoy the peace of mind of wireless backups from your MacBook as long as you’re on your home network.


 English (US) ·