
Landscape photography is arguably one of the most popular genres. However, it comes with one of the biggest challenges that you may never overcome.
Specific environments evoke feelings of awe. Towering mountains, vast open deserts and plains, deep, ancient forests, and oceans can make us marvel at nature’s power. Just the experience of heading out with our cameras to capture the wonder of these settings brings us significant benefits.
Should we even attempt to convey that grandeur in a relatively tiny two-dimensional image? Of course, we should. Why?
Firstly, it is the quest for the impossible. We know that our photos will never match the impressiveness of the situation. But it is a quest. Like King Arthur’s knights seeking the Holy Grail, we keep trying, though we know we will never truly represent the beauty and sublimity of nature. We are always searching for meaning, and humans have an optimistic bias that leads us to strive to achieve what may seem impossible.
Secondly, being in nature is known to benefit our mental and physical well-being in ways that medical science is only beginning to understand. Hospital patients with windows overlooking nature recover more quickly than those facing white walls. Consequently, there are benefits to landscape photography beyond creating a photo.
Proper Prior Planning and Preparation Prevents Poor Photographic Performance
That title is a more polite variation on a slightly profane saying. But it is true. There is much more to taking successful landscape photos than walking out with your camera and hoping for the best. A little forethought will help you decide what you want to capture and how.
Planning and preparation are two different things, although there can be some overlap. Planning starts with thinking about the photograph you plan to take and what you need to achieve it. The preparation is getting yourself ready. I will illustrate this with a real-world example.
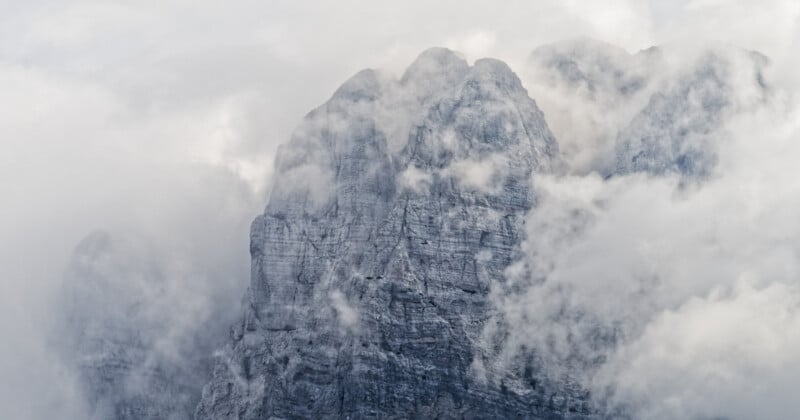
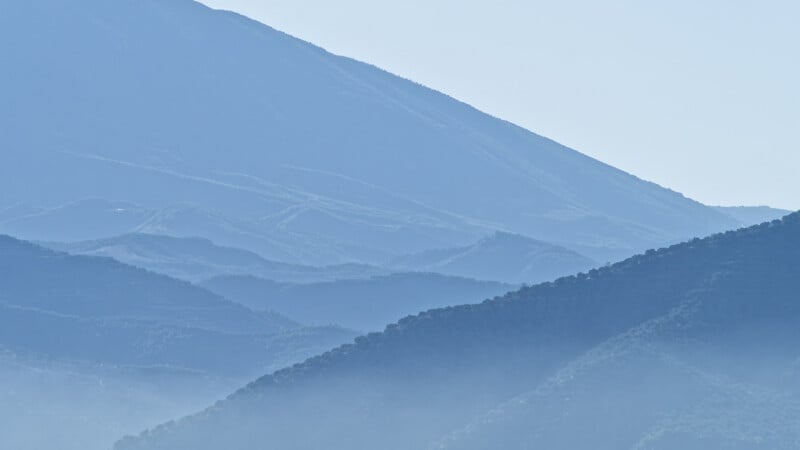
I was in the Albanian Alps and wanted to capture photos of the rugged mountaintops, with clouds drifting around them.
My planning began by considering my location relative to the peaks. I was unable to get the warm, early-morning sun shining obliquely on them. Similarly, during the golden hour, the mountains were shaded as well. So, I had to accept that I would be shooting in the middle of the day.
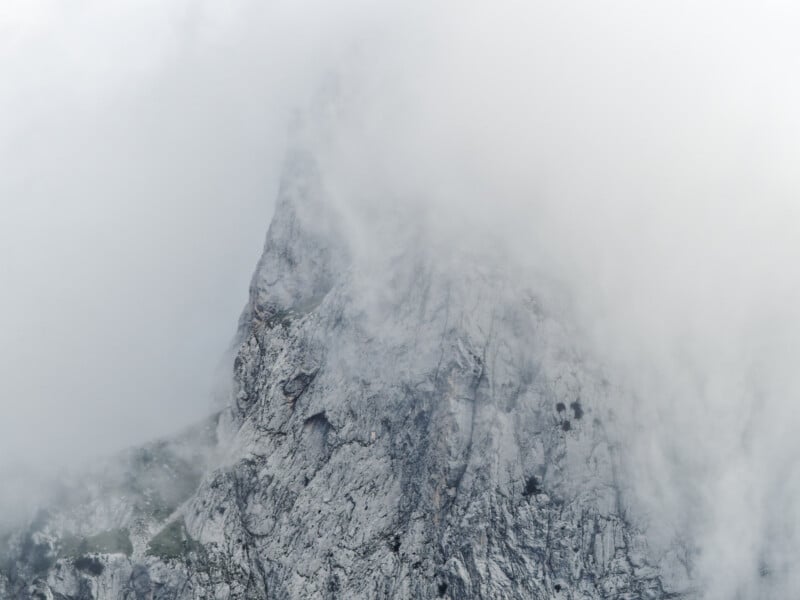
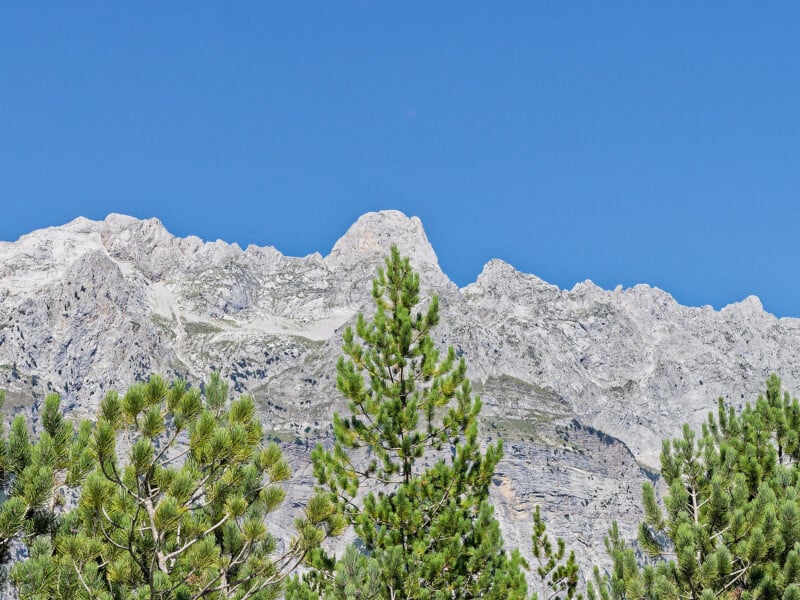
From looking at the Street View feature in Google Earth before I journeyed to the country, I knew that being higher would look better because the trees wouldn’t get in the way. Also, a short exploratory walk showed that looking across at the peaks worked better than having the camera pointing up at them at a sharp angle.
As part of the plan, I decided where I would walk and what equipment I should take.
The preparation goes beyond just making sure there is a memory card in your camera and that the batteries are charged; those are common mistakes.
 Photographed from below, the trees obscured the view. I also needed to wait for the right weather so the clouds would swirl around the peaks.
Appropriate Clothing
My next decision was what to wear.
It was late summer, and Albania had a continental climate. It was hot. Moreover, I would also be walking on rough terrain. Therefore, I chose light clothing, walking shoes, and a hat.
I considered shorts, but long grass can harbor ticks that can carry a range of diseases. In Albania, Lyme disease, tick-borne encephalitis, and even Crimean‑Congo haemorrhagic fever can be caught, although that is unlikely. A few other nasty illnesses were possible, although unlikely. Therefore, I stuck with lightweight walking trousers to protect my legs. Since it’s hot, plenty of water is required, and I invariably carry a small first-aid kit whenever I head out with my camera.
Equipment Planning
I really don’t like carrying excessive camera gear. I see people weighed down by huge camera bags full of extra lenses. Not only is that uncomfortable, but it is also restrictive, restricting mobility. In hazardous conditions, it can also be dangerous as a heavy backpack can change your centre of gravity. Therefore, I don’t do that. I usually carry just my camera and lens. I’ll sometimes have a tripod, but most ancillary gear like filters and batteries will fit in my pockets.
I shoot with Micro Four Thirds cameras. They are far smaller and lighter than other systems, which is a considerable advantage when walking or climbing. Technological advances have long since overcome any historical disadvantages of noise. Furthermore, the crop factor and the resulting shallower depth of field work well with my shooting style. Plus, the cameras are IP53 weather-sealed.
My main cameras are OM-1 variants, but I wanted something even lighter for this expedition, so I bought the smaller OM-5 Mark II.
Usually, I don’t ever change lenses outdoors. I live by the sea, and when I shine a torch at night, I can see thousands of airborne salt and sand particles that I don’t want inside my camera. I carried out the same test in the mountains, and the air was clear of any dust, and the day was still. Therefore, I decided to attach my 12-40 f/2.8 lens to the camera for general landscapes on the way up and swap it for the 40-150 F4 lens for the walk down, when I would be facing the mountains on the other side of the valley.
Although I didn’t need it, I took a spare battery.
I had a Peak Design Travel Tripod with me. I like using a tripod for landscapes because setting it up slows me down and allows me to be very particular about the composition. However, this time, I decided against carrying it because the bright daylight and lack of wind made it unnecessary.
I packed everything in an 18L Peak Design Outdoor Backpack Zip.
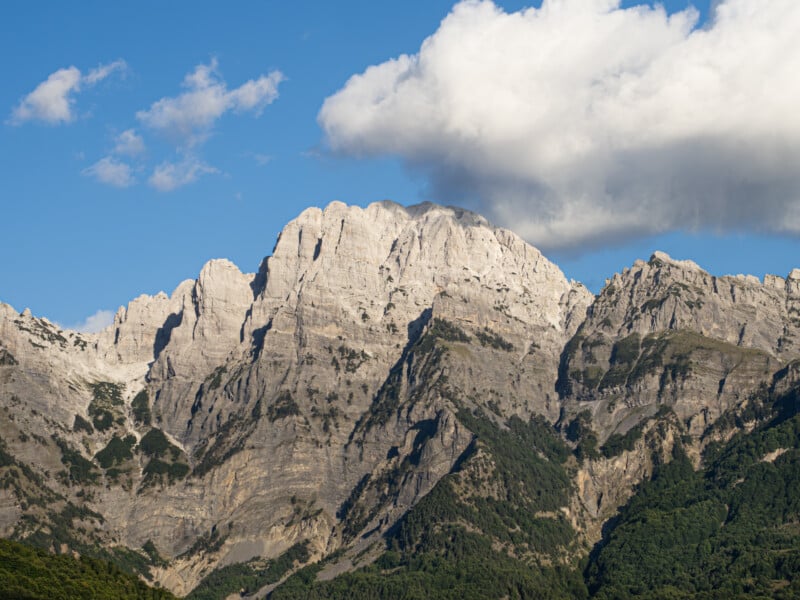 Later in the afternoon, the clouds started to clear from the peaks.
Safety Planning
My route followed an uphill path until I was above the treeline. For safety, I made sure someone else knew where I was going and when I expected to get back. Also, my wife was walking with me.
Techniques for Photographing Landscapes
If you read photography magazines and a lot of blogs, they are prescriptive about how to shoot a landscape.
The generic advice is to head out in the golden hour at either end of the day with your camera and a wide angle lens, get close to foreground interest, look for leading lines, use a smaller aperture, maybe f/8 or f/11, and apply the rule of thirds, focus on the hyperfocal distance or grossly simplified as a third of the way into the frame. Also, a polarizing filter will help make the sky a deeper blue.
Indeed, that does work. However, it isn’t the only approach. As in the example above, using a longer lens works, too. You can also play with symmetry and other compositional techniques. In some cases, a minimalist shot where neither foreground interest nor leading lines are necessary. Many landscape photographers want it to be cloudy and have something against clear blue skies. However, that can enhance a photo’s minimalist feel.
Look for changes in lighting. With wide-open vistas, parts of the landscape may be illuminated by the sun, while clouds shade other areas. If so, and there is plenty of contrast, try reducing the exposure to emphasise that difference.
You don’t have to restrict yourself to the golden hours. The blue hours just before dawn or after sunset can produce just as compelling photos. So can the midday sun, as when it shines through the forest canopy. Bad weather can also produce excitingly moody pictures, and the landscape can be lit by moonlight.
Graduated ND filters are great for reducing sky brightness, thereby increasing the range of visible tones in the scene. ND1000 filters can be great for extending exposure duration and thus emphasizing cloud movement. I often use a physical filter combined with my camera’s built-in LiveND feature to achieve exposures of a minute, even in bright daylight in Manual mode.
Also, consider mixing landscapes with other genres. Consider including people or wildlife in the shot. Alternatively, look for features that create abstract scenes.
Moreover, experimenting by adding out-of-place items to the photo. That can give a surrealist result and thus make fascinating photos. Not everyone will get it, but it is essential to photograph for yourself rather than be a people-pleaser.
 There’s always more than ove way to photograph a scene.
Shoot it One More Time
Landscapes are dynamic. I have photographed the landscape where I live more times than I can remember, and in doing so have learnt what works well and what doesn’t. Moreover, even if you travel to the exact location at the same time every day and place your camera in the same spot, there will still be changes due to the sun’s or stars’ positions, the seasons, and the weather. That variety challenges us and helps us to develop our photographic skills. So, returning to a scene and exploring it with a camera repeatedly helps hone your skills. Importantly, that knowledge is transferable to other locations.
In Conclusion
Landscape photography is as much about the adventure as it is about achieving the shot. Imagination, exploration, and experimentation are key to improving at landscapes. Remember, it is a quest, and the photo you shoot now will help you to get an even better one next time.


 English (US) ·