
 1 month ago
12
1 month ago
12
Thermalright is well known by PC enthusiasts for pushing the bar in terms of both performance and value with its low-cost air coolers. I consider their Phantom Spirit 120 to be one of the best air coolers on the market when you consider performance, cost, and noise levels.
With this review we’re looking at Thermalright’s latest entry in the fan-favorite Peerless Assassin series of air coolers. There are a few different models of the Peerless Assassin currently on the market, paired with either 120mm or 90mm fans depending on the version in question. As the name of this model implies, what sets the Peerless Assassin 140 apart from the other variants on the market is the use of a larger heatsink and the use of a 140mm middle fan, instead of the 120mm fans used on other units.
Does the PA140 have what it takes to make our list of best coolers? Let’s take a quick look at the unit’s specifications, then we’ll dive into its features and the benchmarks.
Cooler specifications
Swipe to scroll horizontally
| Cooler | Thermalright Peerless Assassin 140 |
| MSRP | $39.90 USD |
| Heatsink Material | Aluminum |
| Rated Lifespan | Unlisted |
| Socket Compatibility | Intel Socket LGA 1851/1700/1200/115x AMD AM5 / AM4 |
| Average Maximum TDP (Our Testing) | ~246W with Intel’s i7-14700K |
| Heatsink Dimensions | 158 mm (H) x 157 mm (W) x 140 mm (L) |
| Warranty | Unlisted |
Packing and included contents
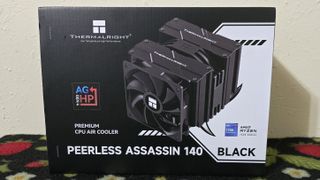
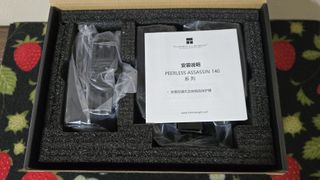
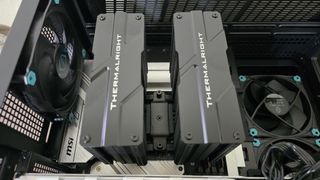
The Peerless Assassin 140 arrives in a black and white box, with molded foam and plastic coverings to protect the heatsink and fans. The accessories are contained in a small cardboard box, placed in between the two heatsink towers.
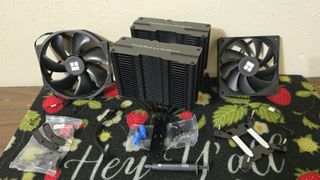
Included with the cooler are the following:
- 120mm fan and 140mm fan
- Tube of Thermalright TF7 thermal paste
- Dual tower heatsink with six heat pipes
- Mounting for modern Intel and AMD platforms
- Installation Manual
- PWM splitter cable
Features of the Assassin X 120 R SE
▶ Six 6mm copper heatpipes
To move heat away from the CPU into the heatsink, the Peerless Assassin utilizes six copper heatpipes.
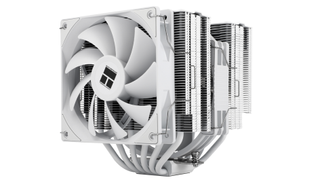
▶ Available in black or white
The model we’re reviewing today is black, but there is also a white version available for those who desire a different aesthetic.
▶ Thermalright TF7 thermal grease
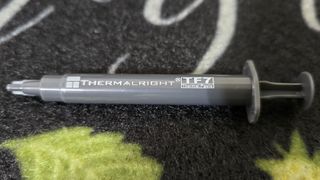
Thermalright includes a tube of its TF7 thermal paste. This isn’t the best thermal paste available, but it works rather well – in our thermal paste testing, it’s less than 2 degrees Celsius behind the best-performing pastes we’ve benchmarked.
▶ Low price
Thermalright is known for having some of the best prices on the market for cooling equipment. The Peerless Assassin continues this tradition, with an MSRP of $39.90. If you’re really on a tight budget, you might even be able to find it for a lower price in the future – sales of Thermalright products on Amazon are quite frequent.
▶ RAM Clearance
The Peerless Assassin’s 120mm side fan rests above most RAM DIMMs. But if you have particularly tall DIMMs, you may need to raise the front fan a few millimeters.
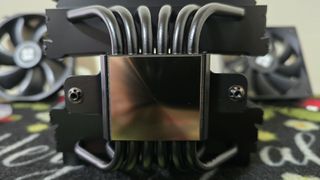
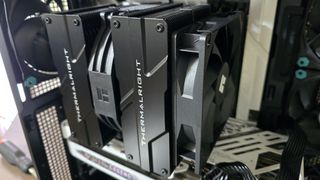
▶ Heatsink photo
Some of y’all like to see the design of the heatsink and its fins, so I’ve included a photo below.

▶ Hybrid 120mm and 140mm fans
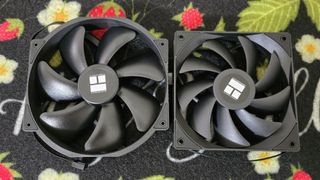
There’s more to a cooler than just the heatsink or radiator. The bundled fans have a significant impact on cooling and noise levels, as well as how the cooler looks in your case. The Peerless Assassin 140 uses a hybrid fan setup, with a 120mm TL-C12B V2 fan on the side of the unit and a 140mm TL-D14CB in the middle.
Swipe to scroll horizontally
| Model | Thermalright TL-C12B V2 120mm | TL-D14CB 140mm |
| Dimensions | 120 x 120 x 25mm | 140 x 140 x 27 |
| Fan Speed | Up to 1500 RPM ± 10% | Up to 1500 RPM ± 10% |
| Air Flow | Up to 66.17 CFM | Up to 77.8 CFM |
| Air Pressure | Up to 1.53 mmH2O | Up to 2.09 mmH2O |
| Bearing Type | S-FDB | S-FDB |
| Lighting | None | None |
Testing Methodology, and how my testing differs from the competition
If you’ve been reading my reviews for a while, you’ll know that I do a few things to ensure my results are useful. To begin, I strictly regulate the ambient temperature to 23 degrees C during testing. I do not accept results at 22 or 24C as valid, even though in theory there won’t be much of a difference.
Some reviewers test CPU Coolers on an open test bench, the idea being to remove any variables other than the cooler. The problem with this type of testing is that with typical usage – you know, with an enclosed case – the ambient temperature within will be higher than that of outside air, which adds difficulty to the cooler’s job.
Some test CPU coolers using a thermal plate instead of using a CPU. This suffers from all the drawbacks of open bench testing, but also doesn’t effectively emulate the heat from a CPU. A thermal plate generally evenly distributes heat, with a low overall thermal density.
CPUs, on the other hand, have most of their heat generated in concentrated hotspots. This is much more difficult to cool. The best way to explain the difference is this: A thermal plate is like a cigarette lighter, you can take that flame and put it against your hand for a quick moment and while uncomfortable – you won’t be hurt seriously. On the other hand, a CPU is like a concentrated butane torch lighter that produces a blue flame – if that touches your skin at all, you’re in for a painful time. Older CPUs are also poor candidates for cooler testing for the same reason – they were produced with larger manufacturing processes and may have lower thermal density in their hotspots as a result.
The problem with CPU-only testing
Testing with CPU-only loads provides good and useful information, but it doesn’t paint a complete picture of how a cooler will perform. Many workloads, especially gaming, will stress both the CPU and GPU. The heat added from the GPU increases the difficulty of cooling the CPU in these scenarios.
To test how well a CPU’s cooler will perform in these situations, I’ve added two tests – one with a light CPU and one with a moderate CPU load, both while running a full load on the GPU.
Testing configuration – Intel LGA1700 platform
Swipe to scroll horizontally
| CPU | Intel Core i7-14700K |
| Motherboard | MSI Z790 Project Zero |
| Case | MSI Pano 100L PZ Black |
| System Fans | Iceberg Thermal IceGale Silent |
| PSU | Silverstone HELA 1300 |
There are many factors other than the CPU cooler that can influence your cooling performance, including the case you use and the fans installed in it. A system's motherboard can also influence this, especially if it suffers from bending, which results in poor cooler contact with the CPU.
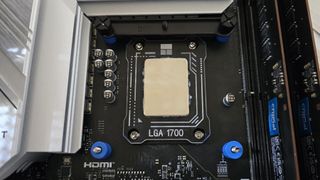
To prevent bending from impacting our cooling results, we’ve installed Thermalright’s LGA 1700 contact frame into our testing rig. If your motherboard is affected by bending, your thermal results will be worse than those shown below. Not all motherboards are affected equally by this issue. I tested Raptor Lake CPUs in two motherboards. And while one of them showed significant thermal improvements after installing Thermalright’s LGA1700 contact frame, the other motherboard showed no difference in temperatures whatsoever! Check out our review of the contact frame for more information.
LGA 1700 Installation
1. Place the backplate against the rear of the motherboard, underneath the socket.
2. Place the blue rubber standoffs on top of the CPU cooler mounting holes.
3. Place the mounting bars on top of the blue standoffs, and secure them with the included screws.
4. Apply the included Thermalright TF7 thermal paste to the top of the CPU. If you’re unsure of how to do this, check out our guide on the best practices for applying thermal paste.
5. Place the heatsink on top of the CPU, and secure it with a screwdriver.
6. Attach the fans to the heatsink using the included fan clips, and then connect the fans to the PWM splitter cable.
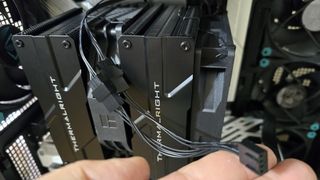
7. Connect the PWM splitter cable to your motherboard, and installation is complete.


:quality(85):upscale()/2024/10/17/848/n/1922729/9dece426671163b35dcb11.60305022_.jpg)


 English (US) ·