
 3 weeks ago
56
3 weeks ago
56
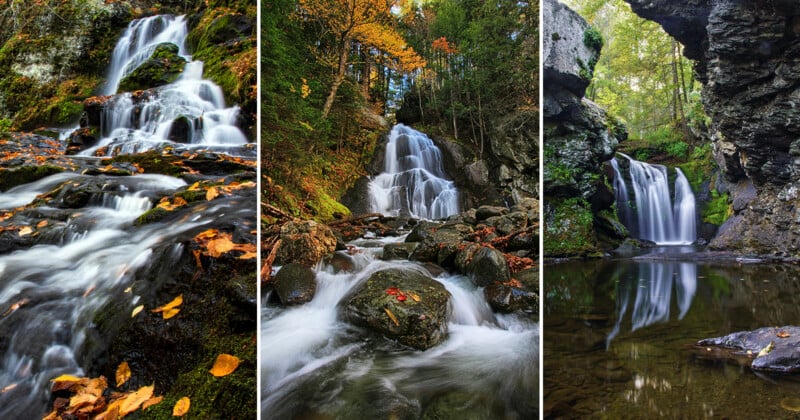
New to waterfall photography? Learn how to choose your gear, find great locations, work with changing light, and use your camera settings to capture waterfalls in different ways. We’ll also cover the basics of staying safe around the water and creating that signature silky water effect.
Waterfalls are some of the most rewarding subjects for landscape photographers because they offer movement, texture, and atmosphere while remaining in one place long enough to explore different compositions. You don’t need expensive equipment or a famous waterfall to get started. With a camera, a few basic accessories, and an understanding of how to work safely around water, you can create everything from crisp, detailed images to smooth long exposures.
The trick is learning to look beyond simply photographing the waterfall itself. The surrounding rocks, trees, moss, mist, reflections, and changing light can all become part of the photograph. Once you start looking at the entire scene rather than just the falling water, even a small local waterfall can give you plenty to photograph.
Start With the Gear You Already Have
You don’t need a specialized camera or collection of lenses to photograph waterfalls. An interchangeable-lens camera with a kit lens can produce great results, and even many advanced compact cameras and smartphones offer enough control to experiment with different shutter speeds. Before spending money on new equipment, learn what your current camera can do and practice changing the settings that control how motion appears in your photographs.
A wide-angle lens is useful for photographing a waterfall within its surrounding landscape because it lets you fit more of the scene into the frame. A telephoto lens, which lets you photograph distant subjects with a narrower field of view, can instead isolate sections of the falls or compress distant elements. If you only have one lens, learn how to work with it before worrying about buying another.
A sturdy tripod becomes particularly useful when you want to experiment with slower shutter speeds. A tripod keeps the camera still during a long exposure, which prevents the entire photograph from becoming blurry because of camera movement. It also gives you more time to carefully compose the photograph instead of trying to frame and shoot quickly while holding the camera.
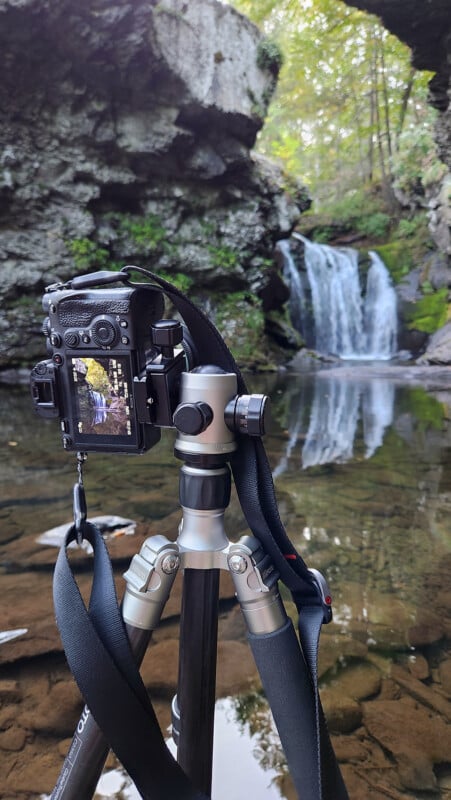
A circular polarizing filter, often called a CPL, is another worthwhile addition because it can reduce reflections from wet rocks and water while allowing you to see more detail in the scene. Neutral density, or ND, filters are also useful for creating the silky, blurred appearance often associated with waterfall photography. An ND filter works somewhat like sunglasses for your lens by reducing the amount of light entering the camera. This allows you to use a slower shutter speed without making the photograph too bright, even in daylight.
If you’re set on building a dedicated waterfall photography kit, my ideal setup is fairly simple. I prefer a lens with a field of view around 16mm, paired with a mirrorless camera, a sturdy tripod, a remote shutter release, a circular polarizing filter, and an ND filter. You can add other filters to your kit, but I consider the CPL the most important because it helps control reflections from wet rocks and moving water while bringing out detail and color that glare can otherwise hide. An ND filter becomes particularly valuable when you want longer exposures and to intentionally blur the movement of the water. That silky look you see in many waterfall photographs is often created by adding an ND filter, so if that’s the look you want, it’s definitely worth adding one to your kit.
If you’re buying a filter for the first time, you’ll need to know what size filter your lens takes. This refers to the diameter of the front of the lens where the filter screws on. The size is usually printed on the front of the lens next to a small circle with a line through it, such as “⌀67mm.” When buying a filter, look for that same number. For example, if your lens says “⌀67mm,” you’ll want a 67mm filter. Just be careful not to confuse this number with your lens’s focal length. A lens might be 16-35mm, for example, but that doesn’t mean it takes a 35mm filter. Filter size is a separate measurement and is marked with the ⌀ symbol. If you get stuck, search online for your specific lens model or ask your local camera shop for help.
Other simple accessories can make a major difference. Carry extra batteries and memory cards, several microfiber cloths for dealing with spray from the waterfall, and some form of protection for your camera and bag. These inexpensive items can save a lot of frustration when you’re working in a wet environment.
Find Waterfalls Worth Photographing
You don’t have to travel across the world to a famous waterfall to find a good subject. State parks, national forests, local parks, hiking trails, and even smaller unnamed cascades can provide excellent opportunities. In fact, a smaller waterfall can sometimes be a better place to learn because you can spend more time experimenting without feeling like you need to capture an iconic postcard view.
Maps, hiking apps, park websites, and local photography communities can all help you discover locations. Search for terms such as “waterfall,” “cascade,” or “falls” when exploring maps, and look at trail descriptions and photographs from other hikers to get a sense of what you’ll find. Satellite imagery can also be useful because you may be able to spot streams, rivers, and changes in elevation that aren’t obvious from a regular map.
Pay attention to when a waterfall is at its best. Snowmelt and recent rainfall can dramatically increase water flow, while some waterfalls may become little more than a trickle during dry periods. Seasonal changes can also transform the surrounding landscape, whether that means spring greenery, summer foliage, autumn color, or winter ice. If you’re hoping to photograph a particularly powerful waterfall, checking recent rainfall and seasonal water conditions can be just as important as choosing the location.
Before heading out, research the trail, access, parking, closures, and expected conditions. A waterfall that looks spectacular in a photograph may require a difficult or unsafe approach. Knowing how far you have to hike and what the terrain is like can also help you decide what gear is practical to carry. There is little benefit to bringing a heavy bag full of equipment if getting to the waterfall requires a difficult hike over rough terrain.
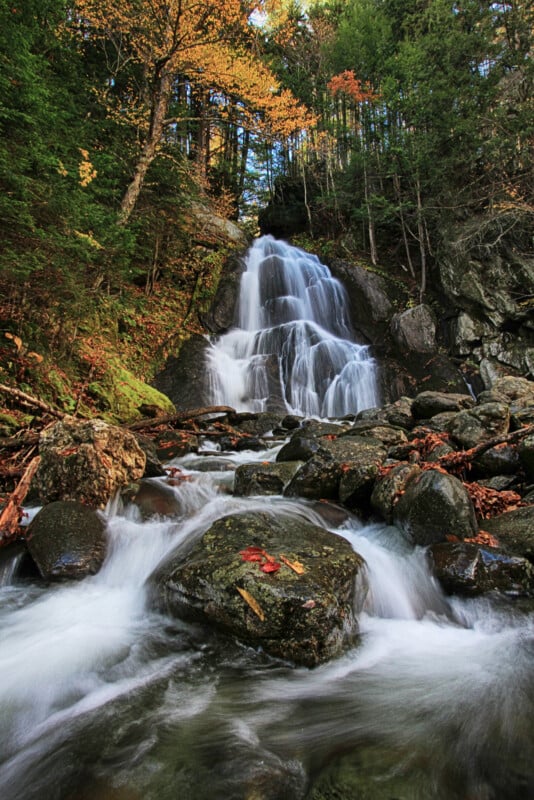
When to Go: Light Matters
Light can completely change the way a waterfall looks, so don’t assume that a bright, sunny day will automatically give you the best conditions for photography. In fact, overcast days can often be ideal because clouds act as a natural diffuser, softening the sunlight and reducing the harsh contrast between bright white water and darker rocks. This makes it easier to retain detail throughout the scene and can produce a more evenly exposed photograph.
The light can have such a significant impact on your waterfall photographs that, if you have the flexibility to choose when you visit, it’s worth paying attention to the forecast. I particularly look for partly cloudy conditions that are just on the edge of becoming overcast. This can give you the best of both worlds: enough cloud cover to soften harsh light while still leaving opportunities for warmer sunlight to illuminate the waterfall and surrounding landscape.
Large, passing clouds can make these conditions especially interesting because the light is constantly changing. When a cloud moves over the sun, the scene can become softer and more evenly lit, while a break in the clouds can suddenly bring warm, directional light back into the landscape. I find this sweet spot particularly rewarding because the cloud cover can help preserve detail in the bright water while breaks in the clouds can create dramatic highlights and depth.
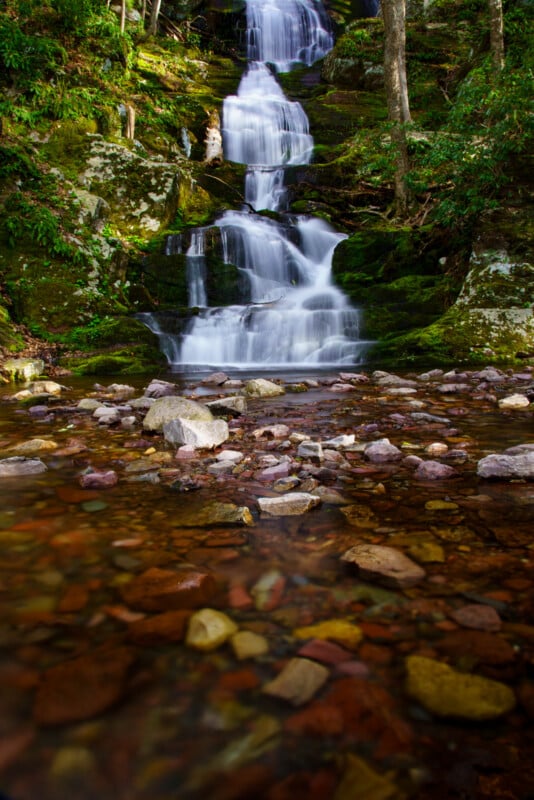
In autumn, I especially like photographing waterfalls in the early morning, just after sunrise, or in the late afternoon, just before sunset; we call this the golden hour. Cooler mornings can bring mist hovering around the water, creating an atmospheric scene as the falls and surrounding landscape slowly emerge. In the afternoon, lower-angle sunlight can filter through the trees and illuminate colorful fall foliage around the waterfall, making the reds, oranges, and yellows stand out against darker rocks and flowing water.
Direct sunlight can be much more difficult to work with, particularly around midday when the sun is high overhead. Bright patches of water can become overexposed while the rocks and surrounding forest remain deep in shadow, creating a level of contrast that your camera may struggle to capture in a single exposure. Early morning and late afternoon light is generally softer and can add more dimension to the scene, while sunlight filtering through trees can create highlights that draw attention to particular sections of the waterfall.
The weather itself can also become part of the photograph. Rain darkens rocks and foliage, making their colors appear richer, while mist and spray can add atmosphere around the falls. If the rain is light enough to work safely, these conditions can create images that feel very different from those captured on a clear day.
Instead of planning your waterfall photography around finding perfect weather, pay attention to what the available light is doing to the scene. Look for areas where the light adds depth, reveals texture, or separates the waterfall from its surroundings. Sometimes that means taking advantage of soft, even light on an overcast day, while other times a brief break in the clouds or a shaft of sunlight can create the most interesting photograph. The goal is to work with the light you have rather than waiting for conditions that may never arrive.
Put Safety Before the Photograph
Waterfalls can be deceptively dangerous. The rocks around them are often wet and extremely slippery, and fast-moving water can be much more powerful than it appears. Even surfaces that look dry can have a thin layer of moisture or algae that makes them surprisingly difficult to stand on.
Don’t climb onto wet rocks or stand near edges simply to get a better composition. Stay away from plunge pools and strong currents, and never assume that a shallow-looking section of water is safe to cross. Water levels can also rise quickly after heavy rain or upstream storms, sometimes even when conditions at the waterfall itself don’t appear particularly severe.
Your camera should never take priority over your footing. If reaching a particular perspective requires an unstable position, find another composition. A photograph isn’t worth a fall, and some of the best waterfall images can be made from a safe distance. If you find yourself concentrating more on protecting your camera than on where you’re putting your feet, that’s a good indication that you’ve moved farther into the danger zone than you should.
Pay attention to posted warnings and stay on designated trails where required. If an area is closed or a trail is marked as dangerous, don’t ignore those restrictions because you think the photograph will be worth it. When possible, photograph with another person, particularly when exploring unfamiliar terrain.
It’s also worth remembering that the safest-looking route on the way in may not feel the same on the way out. Wet rocks can become even more slippery, daylight can disappear, and fatigue can affect your footing. Give yourself enough time to leave safely rather than staying until you’re rushing to get back.
Dress for the Waterfall
Waterfall environments are often wet even when it isn’t raining. Mist and spray can leave rocks, trails, and surrounding vegetation damp and often cooler than you expected, so dress for the conditions you expect to encounter at the falls rather than simply looking at the weather forecast. You may stay relatively dry on the trail but end up standing in a cloud of mist once you reach the base of the waterfall.
Wear footwear with good traction and choose clothing that can handle getting wet. Waterproof or water-resistant outer layers are particularly useful, while quick-drying clothing is preferable to cotton when conditions are cool. Your footwear is especially important because you’ll often be walking over uneven ground and potentially slippery surfaces while carrying camera equipment. Shoes or boots with good traction can help you stay stable, but they aren’t a substitute for being careful about where you step.
I also recommend carrying a waterproof bag or pack liner with a dry change of clothing, particularly for longer hikes. Even if you never need it, having a dry layer available can make a big difference when conditions change. A small towel can also be surprisingly useful for drying your hands or dealing with unexpected spray.
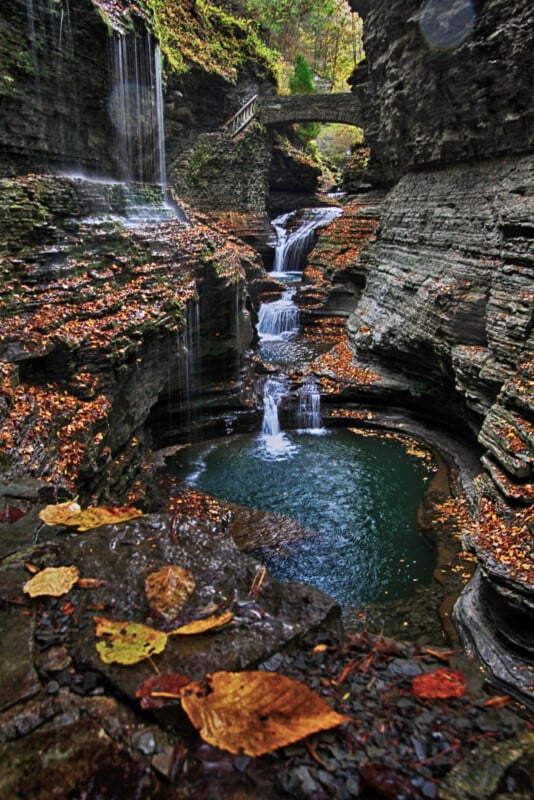 You can see the blurry spots from water droplets on my lens near the top of this photo.
Keep Your Camera and Gear Dry
Your camera doesn’t need to be completely submerged to be affected by water. Continuous spray can accumulate on the body, lens, and controls, while droplets on the front element can ruin an otherwise sharp photograph. Even a single large drop in the wrong place can turn a beautiful long exposure into a blurry mess.
A waterproof camera cover can help during heavy spray or rain, while a lens hood provides some protection for the front element. Keep several microfiber cloths accessible so you can quickly wipe away droplets without digging through your bag. It is often helpful to check the front of your lens between exposures because spray can build up gradually without being obvious when you’re looking through the viewfinder.
Your camera bag also deserves some attention. Many bags include rain covers, but these often provide less protection than photographers expect. They can leave portions of the bag, including the straps and back, exposed. For particularly wet conditions, I prefer carrying a large dry bag that can accommodate my camera bag entirely.
When you’re moving between shooting locations, put the camera away rather than carrying it exposed to continuous spray. It’s easier to keep the equipment dry than to deal with water once it’s inside. Also be careful when changing lenses or opening your camera bag around heavy spray. The less opportunity you give water to get inside the camera or lens, the better.
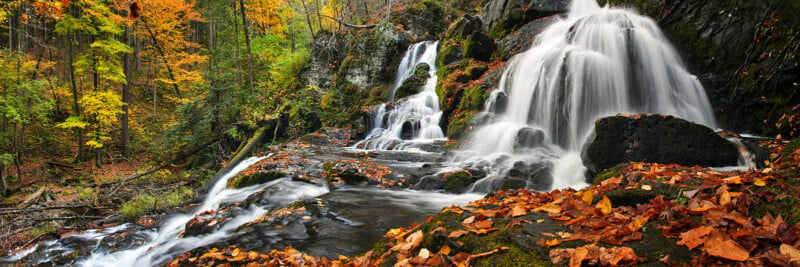
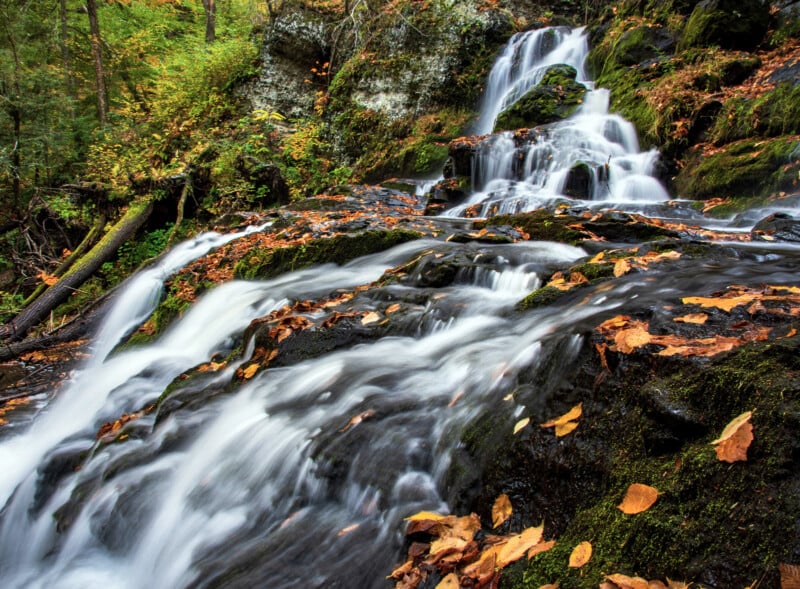
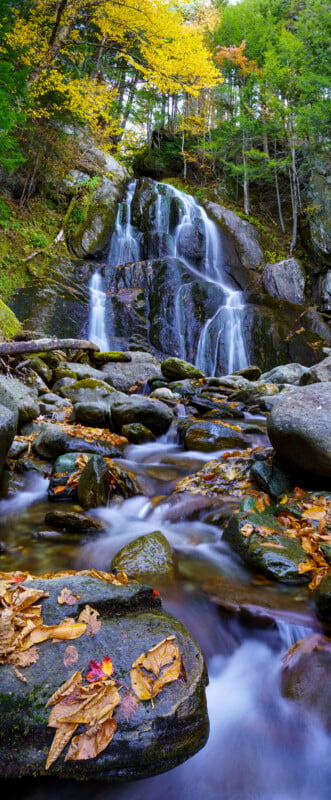 I have photographed this same waterfall many times. This year, many fallen leaves covered the exposed rocks. So I created a vertical panoramic photo as my composition. This let me highlight the leaves and movement of the rocks through the frame.
Walk Around Before You Set Up
One of the easiest mistakes beginners make is finding the first obvious viewpoint, setting up the tripod, and immediately photographing the waterfall. Because waterfalls are such obvious subjects, it’s easy to assume that the best photograph must come from wherever you first see the falls.
Instead, take some time to explore the scene from a safe position. Look at it from different heights and angles, and move closer or farther away when the terrain allows. Look for foreground elements such as rocks, moss, leaves, pools, and smaller cascades that can help lead the viewer toward the main waterfall.
Try both horizontal and vertical compositions. A vertical frame may emphasize the height of a tall waterfall, while a horizontal composition can give more context to the surrounding landscape. The waterfall doesn’t always have to dominate the frame, either. Sometimes the most interesting photograph is a wider landscape where the falls become one element within the scene.
Look around for things like autumn color, flowers, ferns, interesting rock formations, or structures that can help anchor the falls within their environment. Don’t be afraid to change your position rather than relying entirely on zooming your lens. Moving a few feet can dramatically change the relationship between the waterfall and the foreground. Just make sure you’re doing so from a stable, safe location.
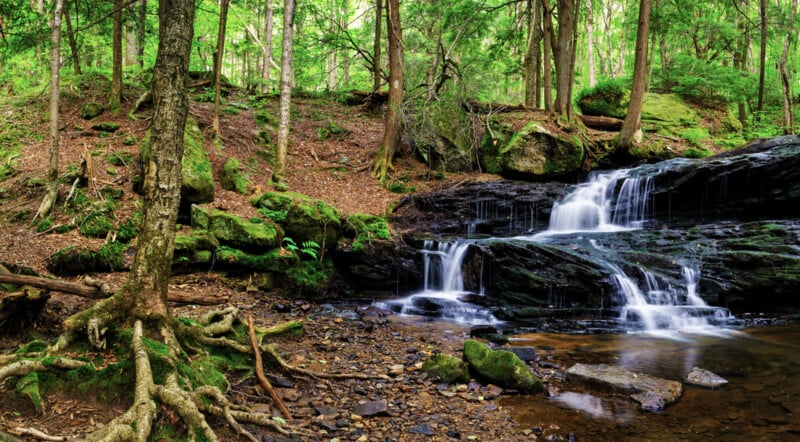
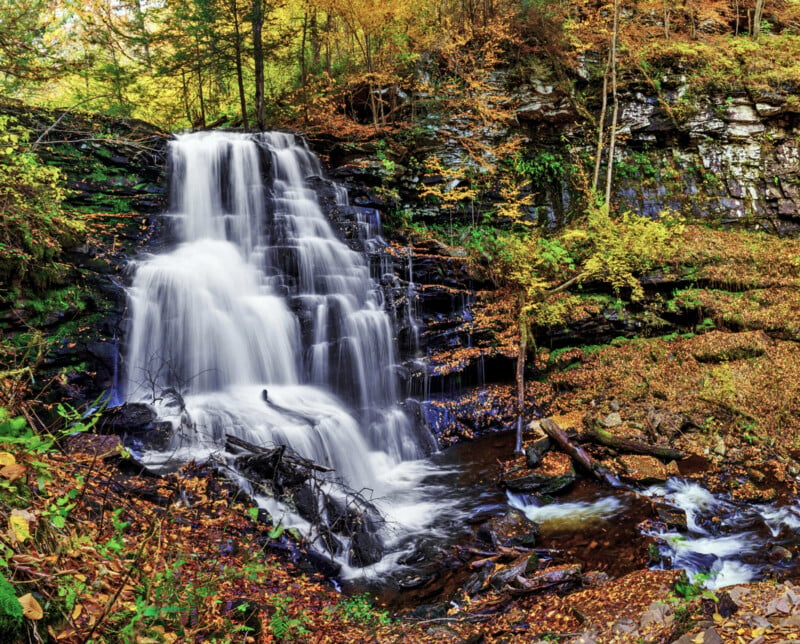 Heavy storms made the scenery at this waterfall very chaotic looking with downed branches and leaves. So I photographed it from afar to show off all of the textures and colors.
Understand Shutter Speed
Shutter speed is one of the most important creative controls in waterfall photography because it determines how the movement of the water appears.
Shutter speed is simply how long your camera’s shutter remains open to record the photograph. A fast shutter speed, such as 1/500 second, captures a very short moment and can freeze individual droplets and splashes. A slower shutter speed keeps the shutter open longer, allowing the movement of the water to appear blurred.
The faster the water is moving, the less time you generally need to create visible motion blur. A fast shutter speed can preserve the individual shapes of splashes and droplets, while a moderately slower shutter speed can create flowing streaks while retaining some texture. Longer exposures can smooth the water into the familiar silky appearance often associated with waterfall photography.
As a starting point, try experimenting with everything from roughly 1/500 second for freezing movement to several seconds for heavily blurred water. The exact shutter speed that works will depend on how quickly the water is moving, how much light is available, and the effect you want.
Don’t assume that the slowest shutter speed will produce the best photograph. A waterfall can lose its texture and character if the water becomes completely featureless. Try several exposures and choose the one that best represents the movement you see.
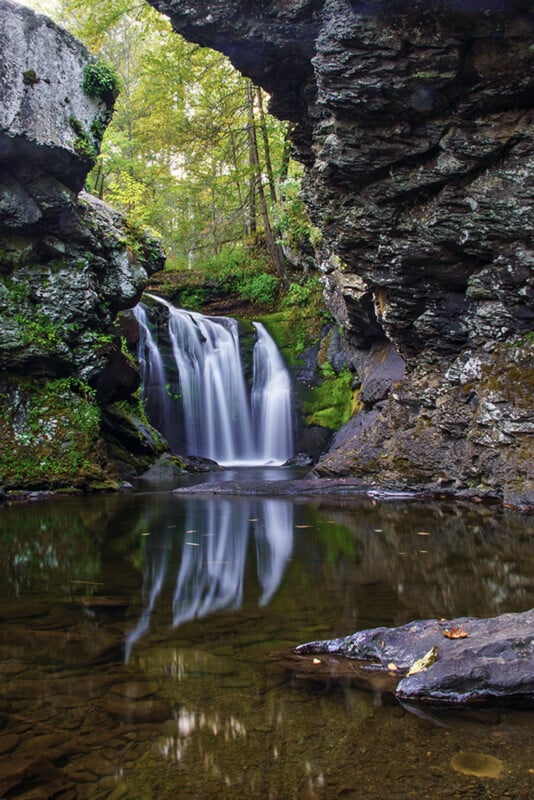
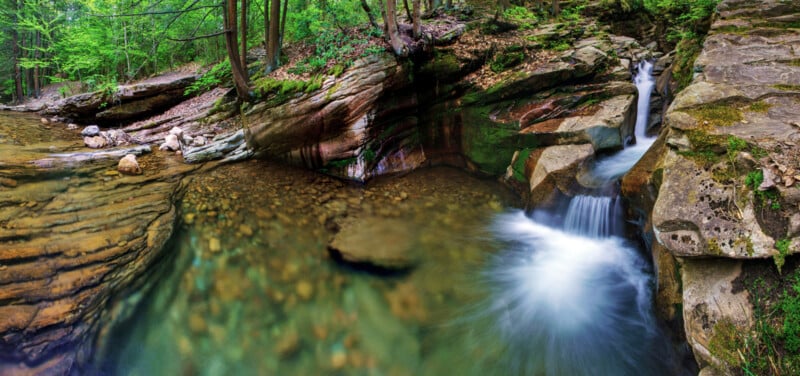 The water was so clear in this little pool at the base of the waterfall, and the trails of falling water spread across the surface like a star, that I wanted to make it the focus of the photograph. I played with different shutter speeds and compositions until I found the right balance between showing the movement of the falls and preserving the detail in the pool. Don’t be afraid to “play” and try different settings as you explore.
Choose a Camera Mode That Lets You Control Shutter Speed
To intentionally control how much movement appears in the water, you’ll need a camera mode that lets you control shutter speed. If you’re new to photography, Shutter Priority mode is an easy way to start. Depending on your camera, this may be labeled “S” or “Tv.” In this mode, you choose the shutter speed, and the camera automatically chooses an aperture it believes will produce a properly exposed photograph.
This makes Shutter Priority useful when your main goal is learning how shutter speed changes the appearance of the water. You can choose 1/500 second, take a photograph, and then gradually slow the shutter to 1/125, 1/30, 1/2 second, and eventually several seconds to see how the movement changes.
Once you’re more comfortable with exposure, Manual mode gives you greater control. In Manual mode, you choose both the shutter speed and aperture, while also controlling ISO. This is particularly useful for waterfall photography because you can decide exactly how much motion blur you want while keeping your other settings consistent.
If you’re using a tripod and shooting a landscape, a good starting point in Manual mode is ISO 100 and an aperture around f/8 to f/11. ISO controls how sensitive the camera is to light, while aperture controls how much light passes through the lens and affects how much of the scene appears in focus. From there, shutter speed becomes your primary creative control for determining how the water moves.
Use a Tripod to Slow Down
A tripod lets you use slower shutter speeds without introducing camera shake. When the shutter stays open for half a second, two seconds, or longer, even a small movement from your hands can make the entire photograph blurry. The tripod keeps the camera fixed so that only the moving parts of the scene, such as the water, appear blurred.
Start with a low ISO and an aperture somewhere around f/8 to f/11, then adjust the shutter speed to control how the water moves. If there is too much light to achieve the shutter speed you want, an ND filter can give you additional control. The filter reduces the amount of light entering the camera, allowing you to keep the aperture and ISO where you want them while using a longer shutter speed.
Once your camera is on the tripod, avoid touching it while the photograph is being taken. A remote shutter release is useful because you can press the shutter without physically touching the camera. If you don’t have a remote, your camera’s self-timer can accomplish the same basic goal by giving the camera a few seconds to settle after you press the shutter button.
A tripod is not always necessary. If you’re photographing a waterfall with a fast shutter speed in good light, you can often work handheld. But once you begin experimenting with longer exposures, a stable tripod becomes one of the most useful pieces of equipment in your bag.
If your camera has image stabilization, you may also want to check the manufacturer’s recommendations for using stabilization while the camera is mounted on a tripod. Some cameras handle this automatically, while others may benefit from having stabilization turned off during certain tripod-mounted exposures.
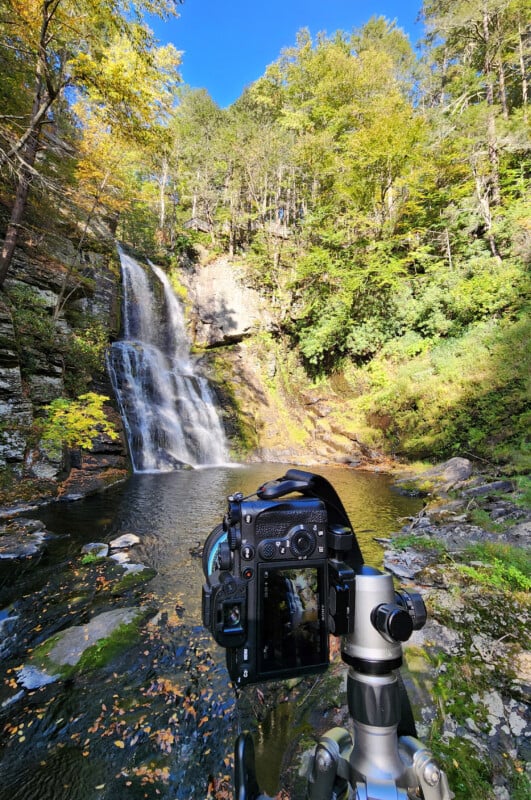
Use a Polarizing Filter Around Water
A circular polarizing filter can be especially useful at waterfalls because it controls reflections from wet surfaces.
When light hits wet rocks and water, some of that light reflects directly toward your camera and can create bright glare that hides the detail underneath. A CPL can reduce some of those reflections, allowing more of the texture and color of the rocks or water to show through.
Rotate the filter while looking through the viewfinder or at the screen and watch how the reflections change. In some situations, reducing glare can reveal the texture of rocks beneath shallow water or make wet foliage appear richer. This is one reason I consider a CPL such an important filter for waterfall photography.
A CPL can also deepen blue skies, although that effect varies depending on your angle to the sun. It also reduces the amount of light reaching the sensor, which can be helpful when you want to slow your shutter speed.
Don’t treat a polarizer as something that should automatically be left on for every photograph, though. Use it based on what it is doing for the particular composition. Sometimes reducing reflections creates a stronger photograph, while in other situations those reflections are an important part of the image.
Know When to Add an ND Filter
Neutral density filters are essentially sunglasses for your lens. They reduce the amount of light entering the camera, allowing you to use slower shutter speeds in bright conditions. Unlike a polarizing filter, an ND filter is designed primarily to reduce the overall amount of light rather than specifically control reflections.
This becomes useful when you want smooth water, but the scene is too bright to achieve a long enough exposure with your normal settings. An ND filter can give you several additional stops of control without changing your aperture or ISO.
For example, you might want to photograph a waterfall at f/8 and ISO 100 but find that the resulting shutter speed is still too fast to create the amount of blur you want. Adding an ND filter blocks some of the light, allowing you to slow the shutter speed while keeping those other settings the same.
ND filters come in different strengths. A lighter ND filter reduces light by a smaller amount, while a stronger ND filter lets you use much longer exposures. You don’t necessarily need the darkest ND filter available. Start with a moderate strength and learn how different densities affect your exposure.
Remember that the goal isn’t simply to make the exposure as long as possible. In many situations, a shorter exposure that retains some water texture will create a more compelling image than an extremely long exposure that turns the falls into a featureless white blur.
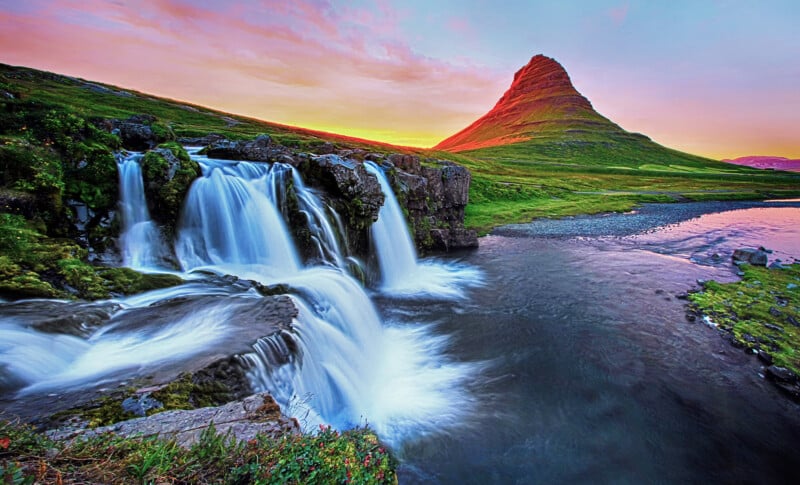 This older photo from 2016 is a great example of why the gear you use is only one part of creating a strong photograph. Location, composition, light, and knowing how to use your camera settings can matter just as much, if not more. I photographed this with a Canon 7D and EF 10-22mm at 10mm, using a 1.6-second shutter speed, f/16, and ISO 200 for a silky water effect.
How to Create the Silky Water Look
The smooth, silky appearance you often see in waterfall photographs is created by using a slower shutter speed. Instead of freezing the water in a single instant, the camera’s shutter stays open longer and records the movement of the water as it flows. Because the water is constantly moving while the shutter is open, that movement is recorded as a soft blur.
The first step is choosing a camera mode that lets you control shutter speed. If you’re a beginner, Shutter Priority mode, usually labeled S or Tv, is an easy place to start. Choose a slower shutter speed and let the camera automatically select the aperture. If you’re comfortable with Manual mode, you can control the shutter speed, aperture, and ISO yourself.
Start with a shutter speed around 1/2 second and take a photograph. Then try 1 second, 2 seconds, and 4 seconds, if your camera allows it. Look at how the water changes with each exposure. A shorter exposure will retain more texture and detail, while a longer exposure will make the water progressively smoother.
No single shutter speed creates the “correct” silky water look. It depends on the available light, how quickly the water is moving, and how much texture you want to keep. Fast-moving water may only need a fraction of a second to create significant blur, while slower-moving water may require several seconds.
Because you’re using a slower shutter speed, the camera needs to remain completely still while the photograph is being taken. This is why a tripod is so important. Once your camera is mounted, use a remote shutter release or your camera’s self-timer to take the photograph without touching the camera. If your camera or lens has image stabilization, check the manufacturer’s recommendations for using it on a tripod.
You may also run into a problem when shooting during daylight: there may simply be too much light to use the slow shutter speed you want. Even at a low ISO and an aperture such as f/8 or f/11, the photograph can become too bright before you get enough motion blur.
This is where a neutral density, or ND, filter comes in. An ND filter reduces the amount of light entering the lens, allowing you to keep the shutter open longer without overexposing the photograph. Think of it as putting sunglasses over your lens. The darker the ND filter, the more light it blocks and the longer you can make your exposure.
For example, you might find that your camera can only use a shutter speed of 1/4 second before the waterfall becomes too bright. Adding an ND filter can allow you to extend that exposure to 1 second, 2 seconds, or longer, depending on the strength of the filter and the available light.
Don’t assume that a longer exposure will always produce a better photograph. If you leave the shutter open for too long, the water can become a featureless white blur and lose the texture that makes the waterfall interesting. Try several shutter speeds and choose the one that gives you the amount of movement you like.
Once you’re comfortable with Shutter Priority, you can move to Manual mode and take more control over the entire exposure. A good starting point is a low ISO, such as ISO 100, and an aperture around f/8 to f/11. From there, adjust the shutter speed to control the amount of motion in the water and use an ND filter if you need to reduce the available light.
The goal isn’t simply to make the water as smooth as possible. It’s to decide how you want the water to look and use shutter speed, a tripod, and an ND filter when necessary to create that effect.
Don’t Chase Only the Silky Water Look
The classic waterfall photograph with smooth, flowing water is popular for a reason, but it is only one way to photograph a waterfall. Once you’ve learned how to create that look, experiment with other shutter speeds so you can see how dramatically the same waterfall can change.
Try freezing the movement with a fast shutter speed to capture individual droplets and splashes. Use a moderately slow exposure to retain some texture while showing movement. Photograph small sections of the waterfall with a telephoto lens, or look for abstract patterns in the water as it moves over rocks.
You can also incorporate movement elsewhere in the frame. Wind-blown leaves, mist, and surrounding vegetation can become part of the composition rather than distractions. A slightly longer exposure might blur those elements while keeping stationary rocks and other parts of the scene sharp.
The goal isn’t to make every waterfall look the same. Use shutter speed and composition to decide how you want the movement to appear and what you want the photograph to communicate.
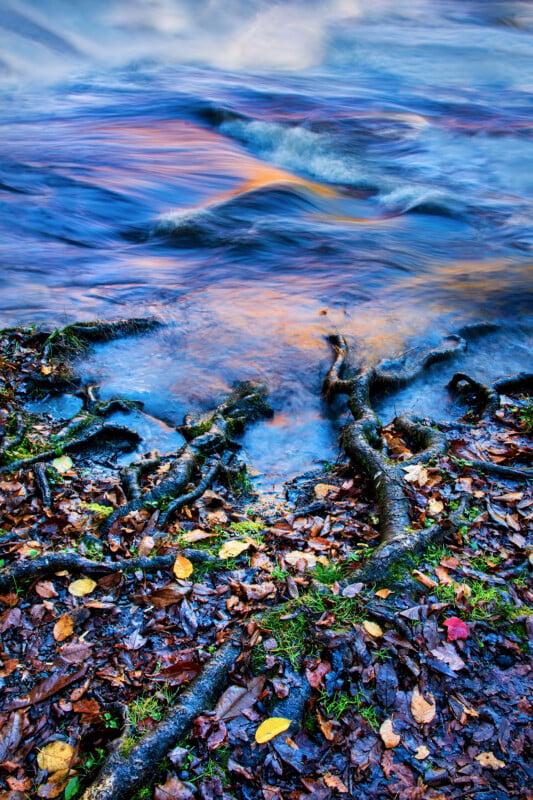 At this waterfall, sunrise glinting off the water drew my eyes to the roots and fallen leaves.
Explore Details and Smaller Cascades
A waterfall doesn’t have to be photographed in its entirety. Once you’ve made a wider photograph showing the whole scene, start looking for smaller compositions within it.
Look for details in the water, patterns created by rocks, moss-covered surfaces, leaves caught in the current, and small cascades surrounding the main fall. These details can produce more intimate photographs and are often easier to compose than a large scene.
A telephoto lens can be particularly useful here, allowing you to isolate small sections of the waterfall and remove distracting elements from the frame. If you don’t have a telephoto lens, you can still find these compositions by moving closer when it is safe to do so or cropping the image later.
These photographs can also help tell a more complete story of the location. Instead of returning with a collection of nearly identical wide shots, you can create a series that shows the larger landscape along with the smaller details that make the waterfall unique.
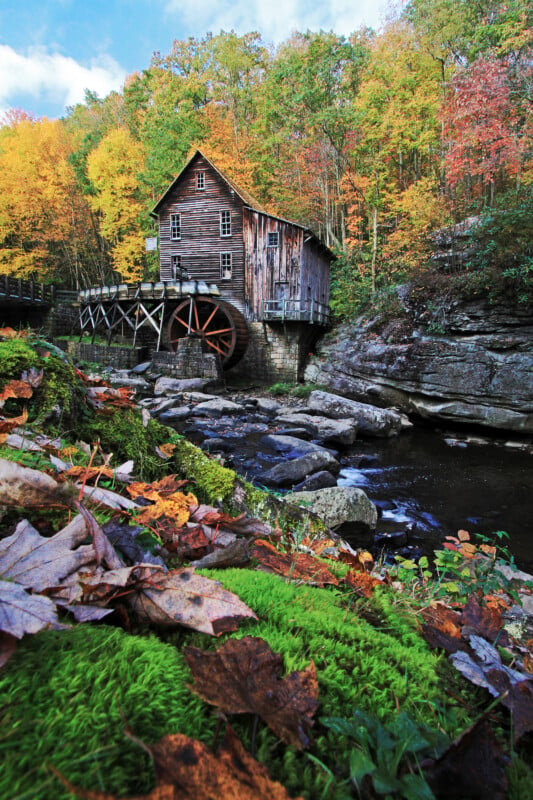
Give the Waterfall Time to Reveal Itself
One of the biggest advantages of waterfall photography is that you don’t have to rush. The waterfall will still be there while you experiment with different compositions, focal lengths, shutter speeds, and perspectives.
Once you’ve made the obvious photograph, stay for a while. Watch how the light changes and pay attention to how the water moves through the scene. Try a different angle, change from horizontal to vertical, or look for a smaller detail that you didn’t notice when you first arrived.
You may discover that the photograph you planned to make isn’t actually the most interesting one available. Sometimes a small change in perspective or shutter speed can completely alter the image, and giving yourself time to experiment is one of the best ways to learn.
Waterfall photography isn’t only about making water look silky. It is about learning how light, movement, perspective, shutter speed, and composition can change the way a place feels in a photograph. The more time you give yourself to observe and experiment, the more likely you are to come home with images that capture something unique about the waterfall rather than simply documenting that you were there.
Image creditsPhotographs by Kate Garibaldi
Affiliate Disclosure PetaPixel articles may include affiliate links; we may earn a commission if you buy through one.





 English (US) ·