
 4 months ago
53
4 months ago
53
Argon40 is no stranger to the Raspberry Pi community or Tom’s Hardware. Its most recent foray was the Argon One V5 case, a cooling and storage setup for the Raspberry Pi 5. Let's cut to the chase, Argon40 makes great cases that I have long compared to sci-fi props (they scream The Expanse), but for its latest product, the ArgonOne Up, Argon40 has eschewed the sci-fi and grounded a product in the here and now, and it is something that many have longed for: A Raspberry Pi laptop.
The ArgonOne Up doesn’t use any old Raspberry Pi; it uses the Raspberry Pi Compute Module 5 (CM5), and that means we have a laptop that we can easily upgrade by removing the CM5 and swapping in a new one. Perhaps someday, even a CM6 will work. We also have an M.2 slot for PCIe-based storage or an AI accelerator. Or if you are Jeff Geerling, a PCIe breakout for a GPU.
I’ve been given access to a pre-production unit, on which this review is based. There are some areas where my unit will differ from others. The finish may be a little different, and the shipping software should be more finalized. I’ll point things out as I go through the review.
Units will first be available via crowdfunding, starting at $300 for a super early bird base unit that does not include a Raspberry Pi Compute Module 5, M.2 storage, or power supply. The $420 Core unit, with an 8GB CM5 and 256GB NVMe SSD, along with a GPIO breakout, is where the smart money is spent, but be quick as once the early bird perks are gone, the price goes up to $450. Backers should receive their units October - November 2025. All prices exclude shipping and taxes.
Swipe to scroll horizontally
Super Early Bird | $300 | ArgonOne Up only, no CM5 or NVMe storage. |
Early Bird | $330 | ArgonOne Up only, no CM5 or NVMe storage. |
Normal Backer | $350 | ArgonOne Up only, no CM5 or NVMe storage. |
Core Unit Early Bird | $420 | ArgonOne Up, 8GB CM5 256GB NVMe, GPIO Module. |
Core Unit Normal Backer | $450 | ArgonOne Up, 8GB CM5 256GB NVMe, GPIO Module. |
It would be remiss of me not to remind you that backing any crowdfunding project is not like purchasing a retail product. You are putting your money into a project because you believe in its success, not purchasing a retail product.
With that out of the way, let's take the ArgonOne Up for a testdrive.
The look and feel of the ArgonOne Up
Swipe to scroll horizontally
Dimensions (HxWxD) | 20 x 315 x 223 mm | Row 0 - Cell 2 |
Weight | 1.29 KG | Row 1 - Cell 2 |
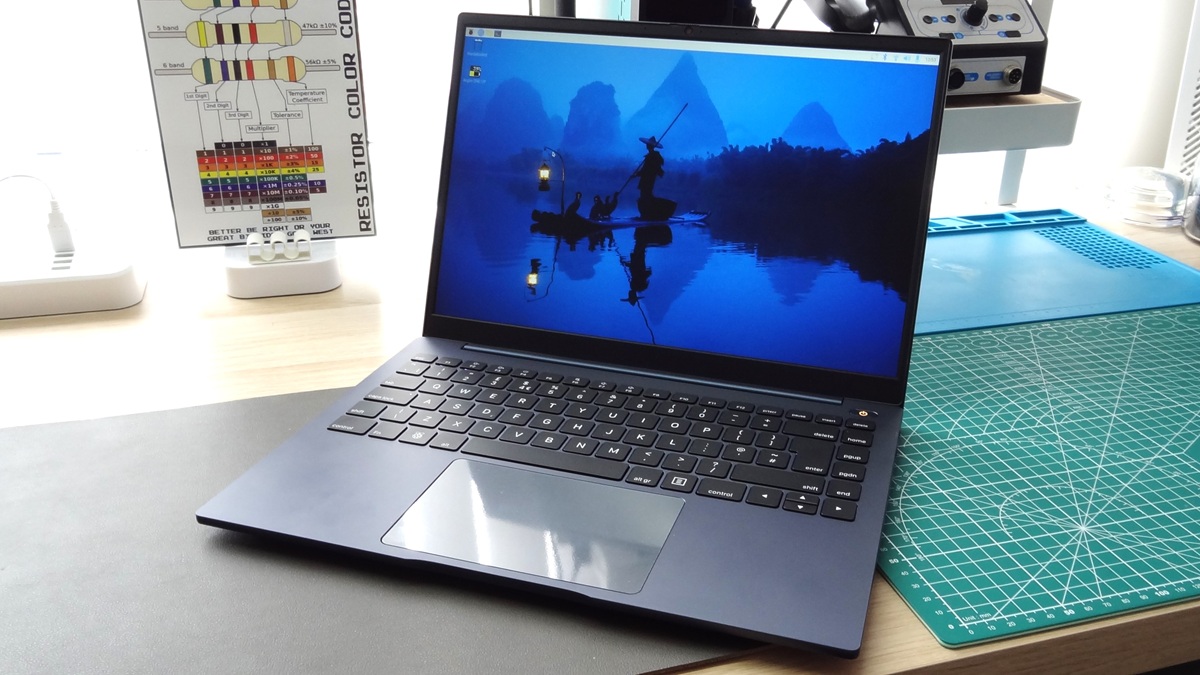
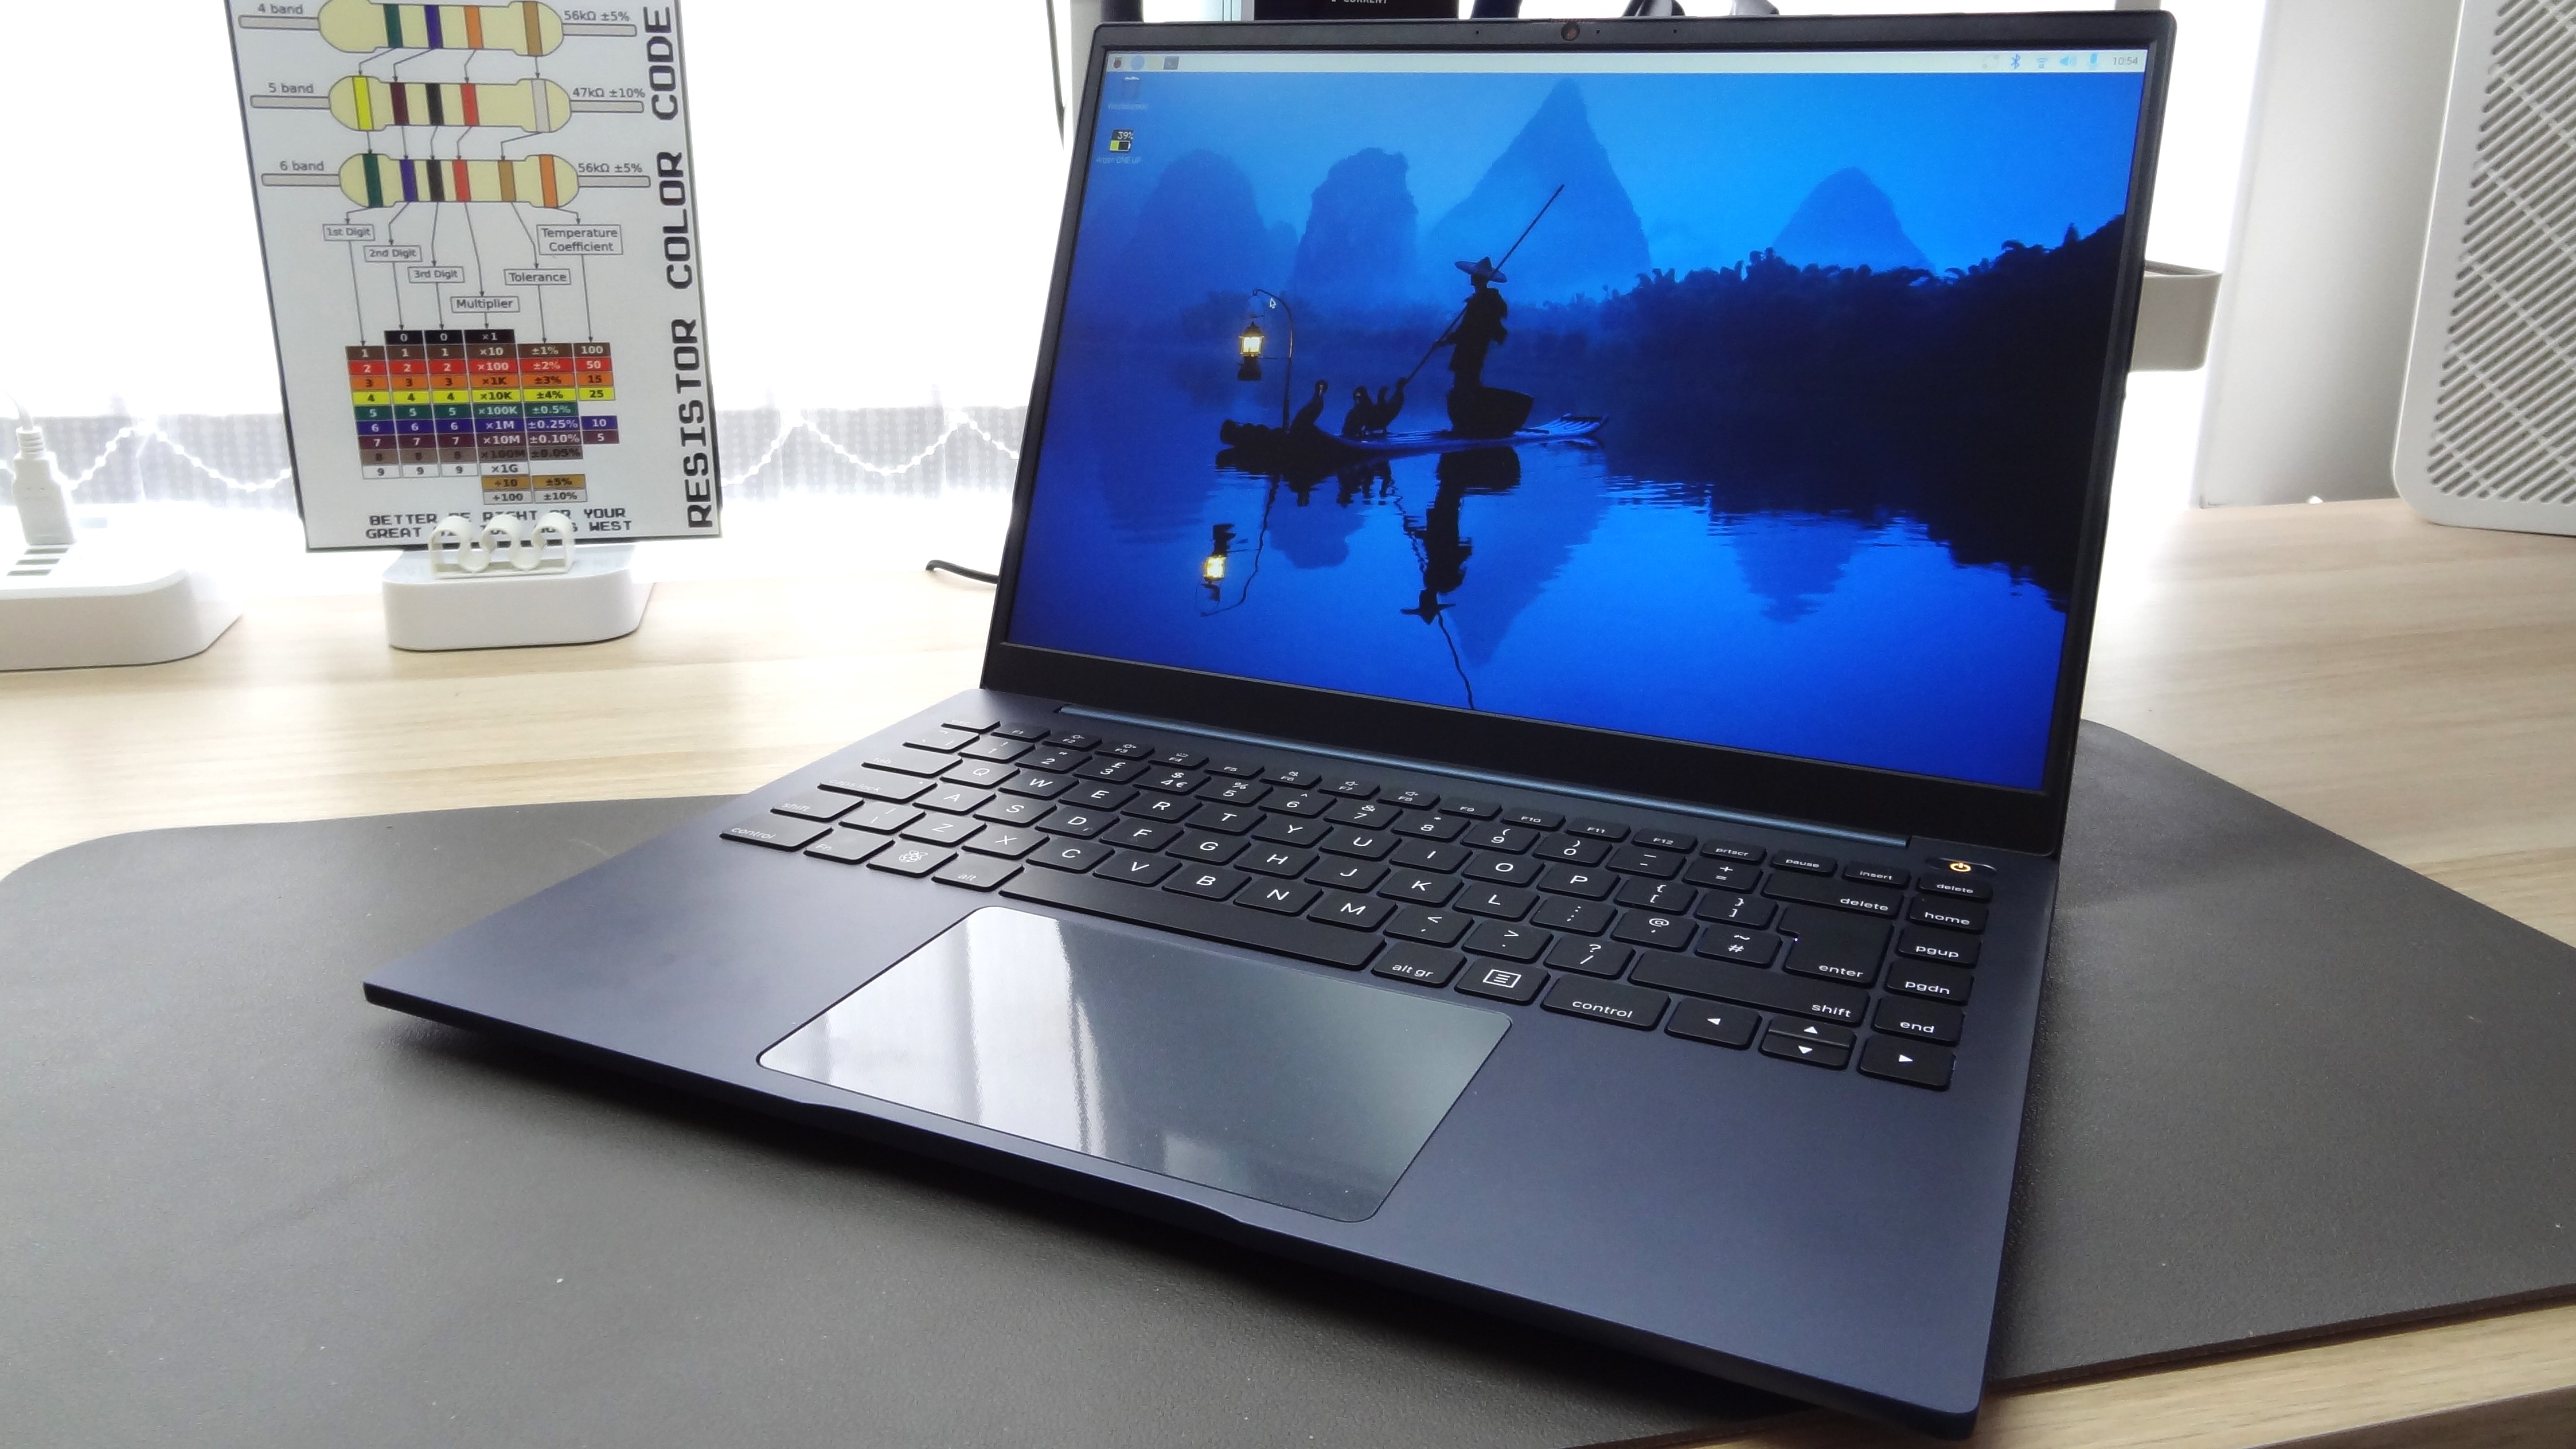
The ArgonOne Up feels great. The cool metallic slate gray finish is fingerprint resistant, and the thin chassis feels good in the hand. The keyboard is ok, using chiclet keys that work well for those who are used to working on a laptop. Personally I prefer a mechanical keyboard, or the keyboard on my Lenovo X220, but the ArgonOne Up’s keyboard is perfectly serviceable. It is also nice to know that there will be different keyboard layouts. Argon40 shipped me a UK keyboard layout. I have also received a second unit, this time with a US layout. The keyboard features the Raspberry Pi logo on the Windows / Super key. A nice touch that signifies the kit at the heart of it. One thing to note in my pre-production unit is that the keyboard is always illuminated, which will be addressed in production models.The trackpad is serviceable, and feels responsive for most tasks. You can tap or click the trackpad for mouse clicks.
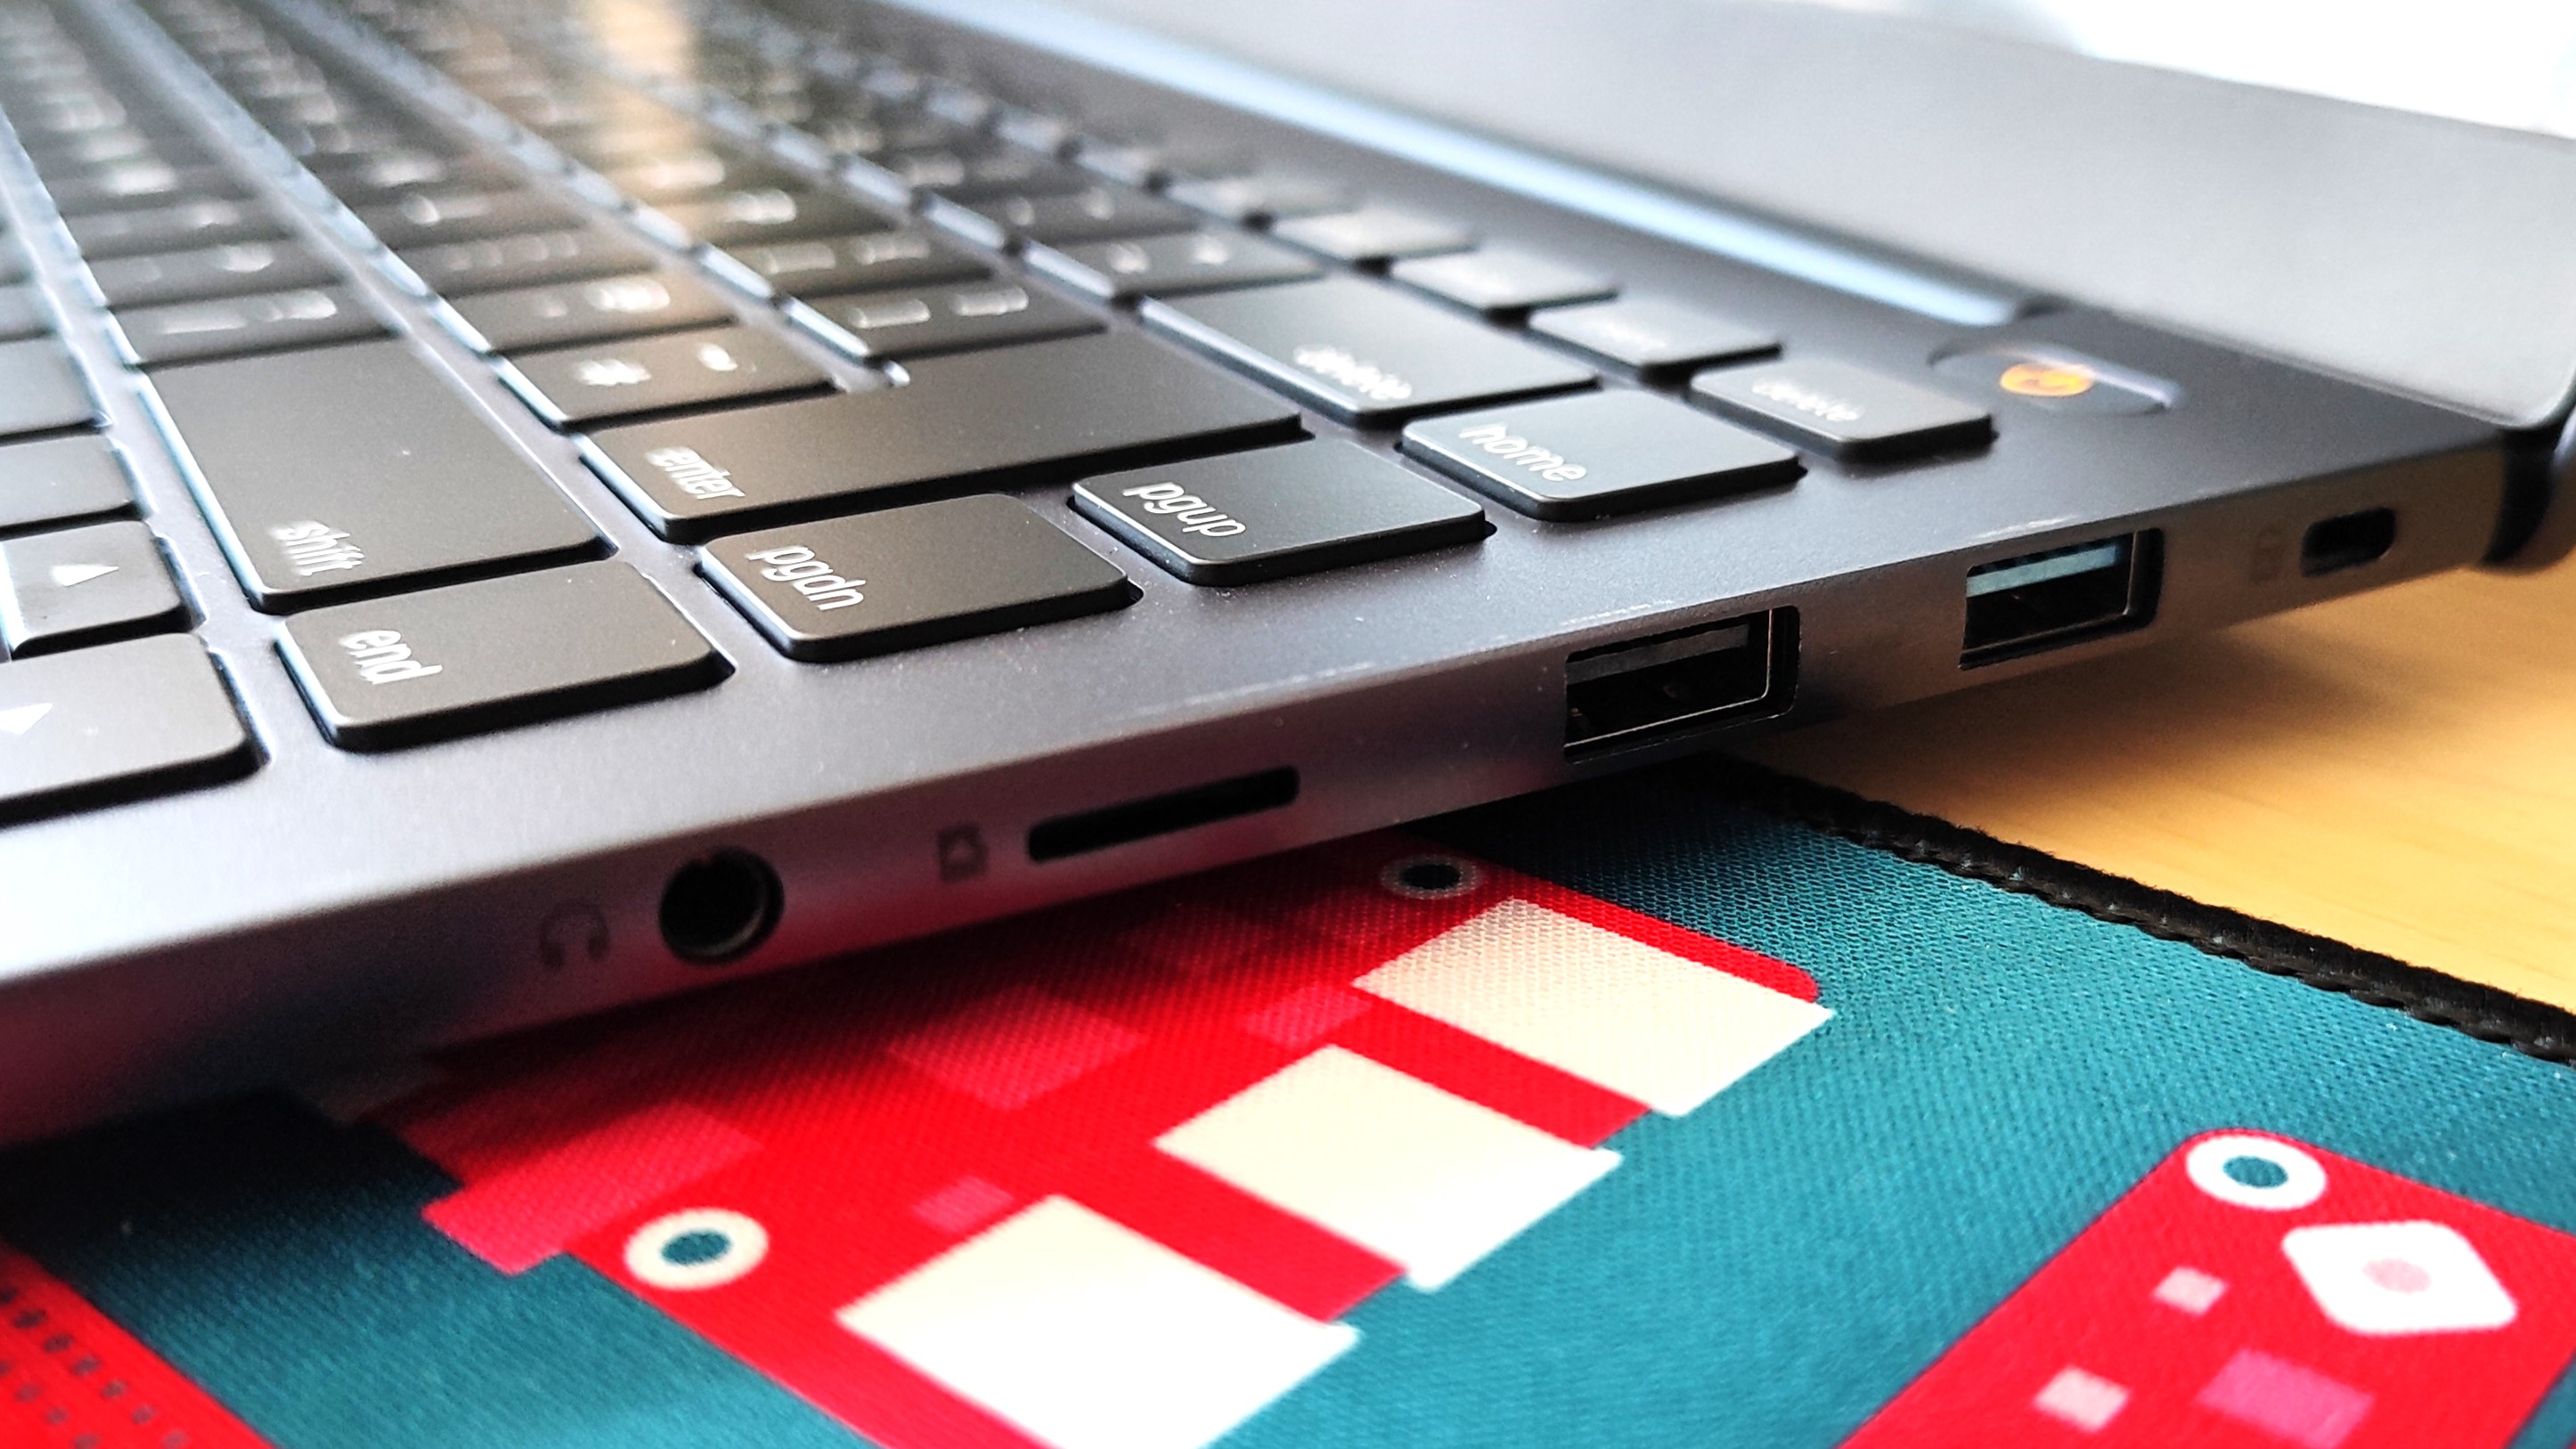
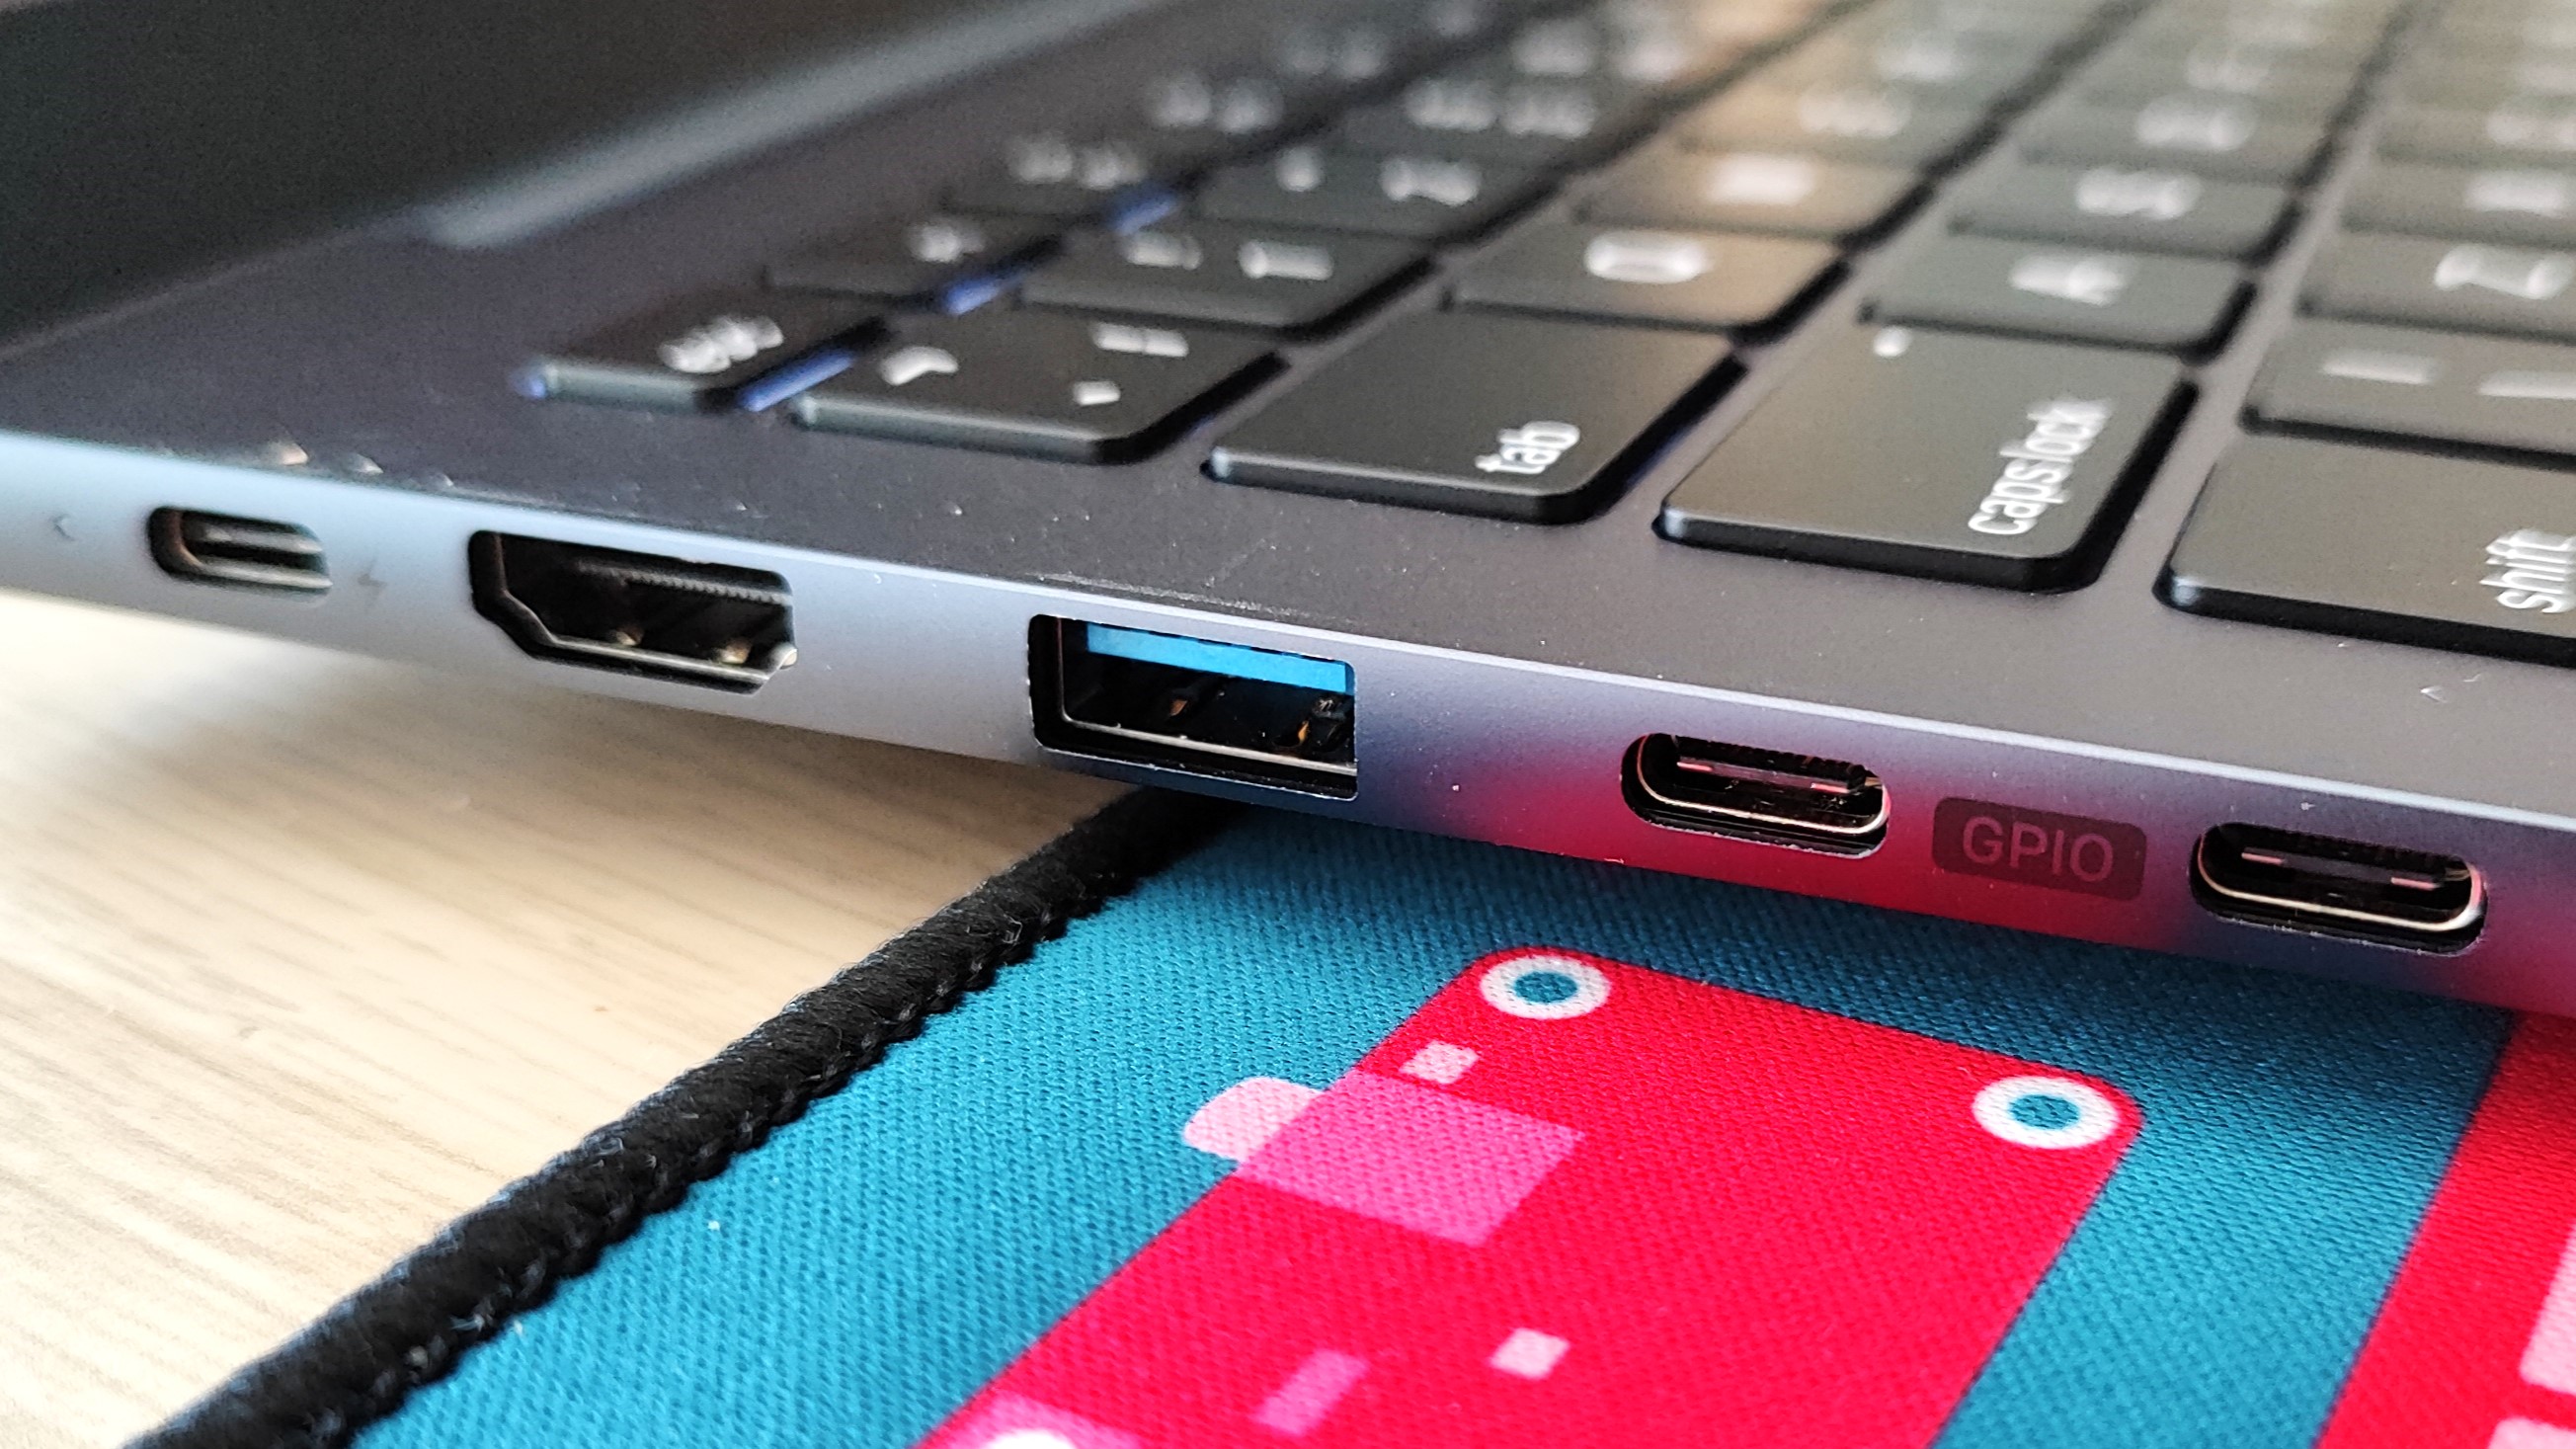
Ports are on the left and right hand side of the laptop. On the right we have a Kensington lock point, two USB 3 type A ports, microSD, 3.5mm headphone jack. The microSD slot is an interesting feature. Yes we can use it for storage, but we can also boot a CM5 without eMMC storage (Compute Module 5L, CM5L) from microSD.
On the left side we have a USB type C port for charging, full-size HDMI port and two USB type C ports which are used for an external GPIO breakout box (I’ll get to that later), and they can also be used for USB 2 speed connections via USB Type C.
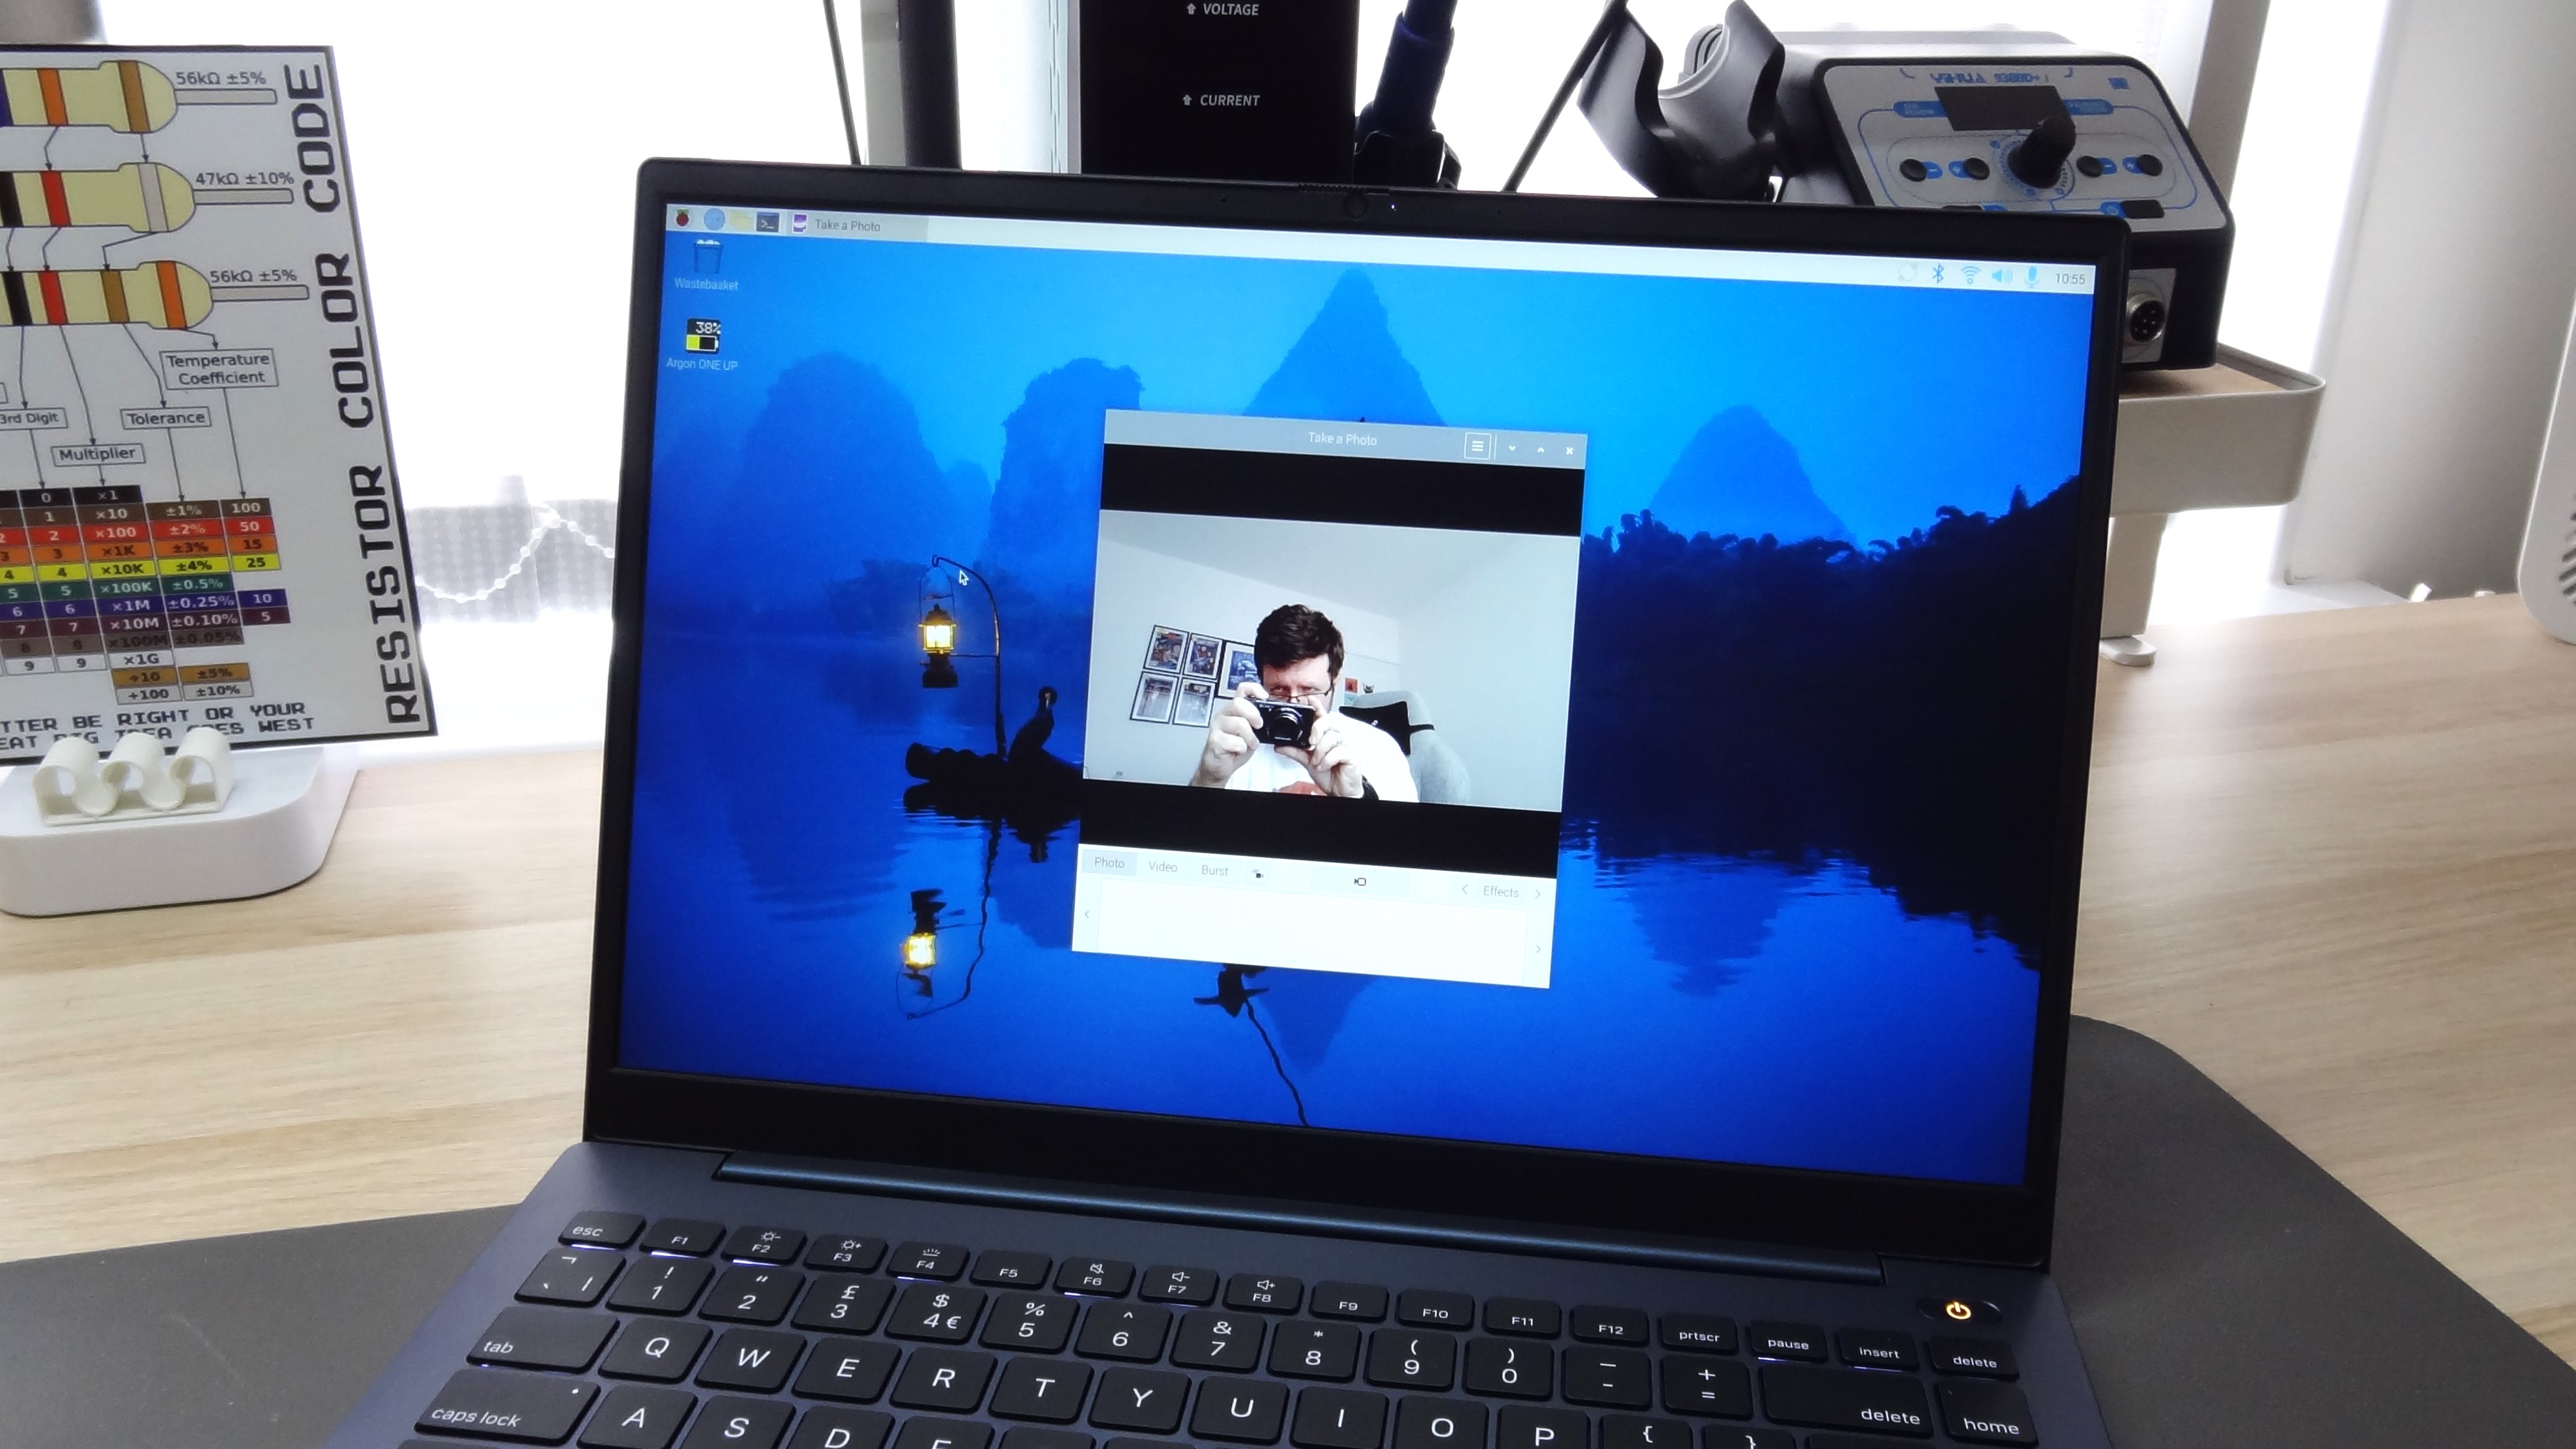
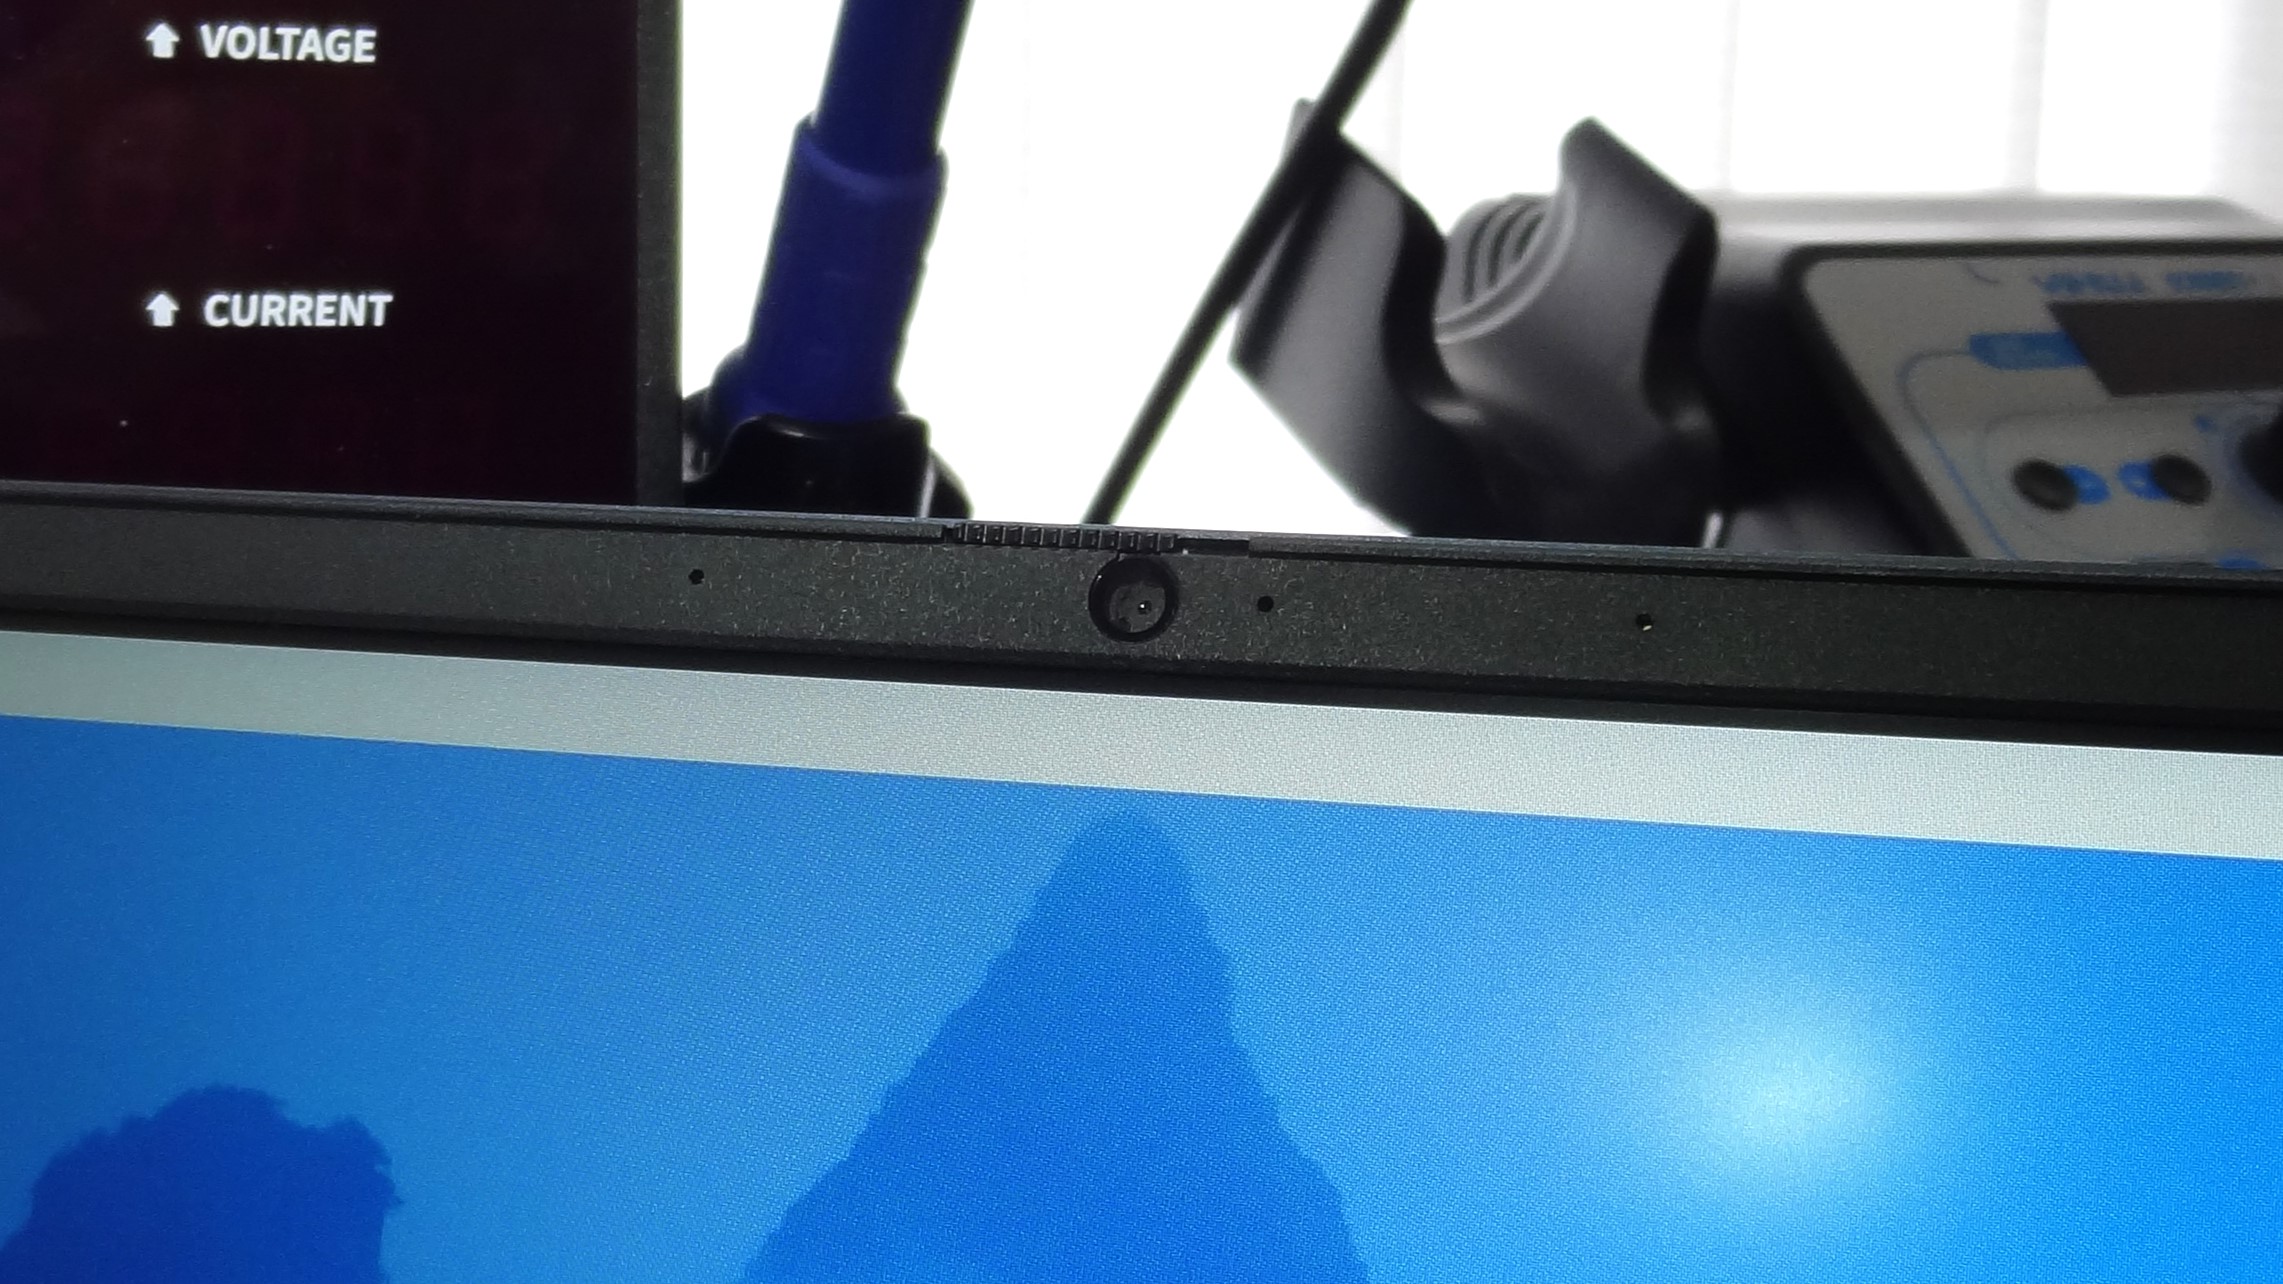
Just above the screen is a USB webcam with a privacy window. Being a USB webcam, it cannot be used with Picamera2, rpicam-apps or other applications designed for the official Raspberry Pi Camera. I’m ok with this. The webcam provides a good image, and it can be used for video calls and AI applications.
Screen and Audio performance
The 14 inch LCD screen has a matte finish and runs at a resolution of 1920 x 1200 (a 16:10 ratio) and I’ll be honest, it looks pretty good. It's not one of the best monitors, but it is not one of the worst. At half brightness the display is legible and perfectly functional for most tasks, but in order to get the best you’ll need to up the brightness to 80-90% and take a hit on battery life. During my tests I set the screen to 50%, but it seems that powering off the unit, then powering back on the next day, the screen defaulted back to 100%. Annoying but not a deal breaker.
Audio is ok at best. I won’t be sitting down to watch The Prodigy’s Glastonbury 2025 set, but for general YouTube videos, music while I work, I can work with this audio output. The 3.5mm output and Bluetooth connectivity mitigate the audio output of the ArgonOne Up so I wouldn’t worry about it.
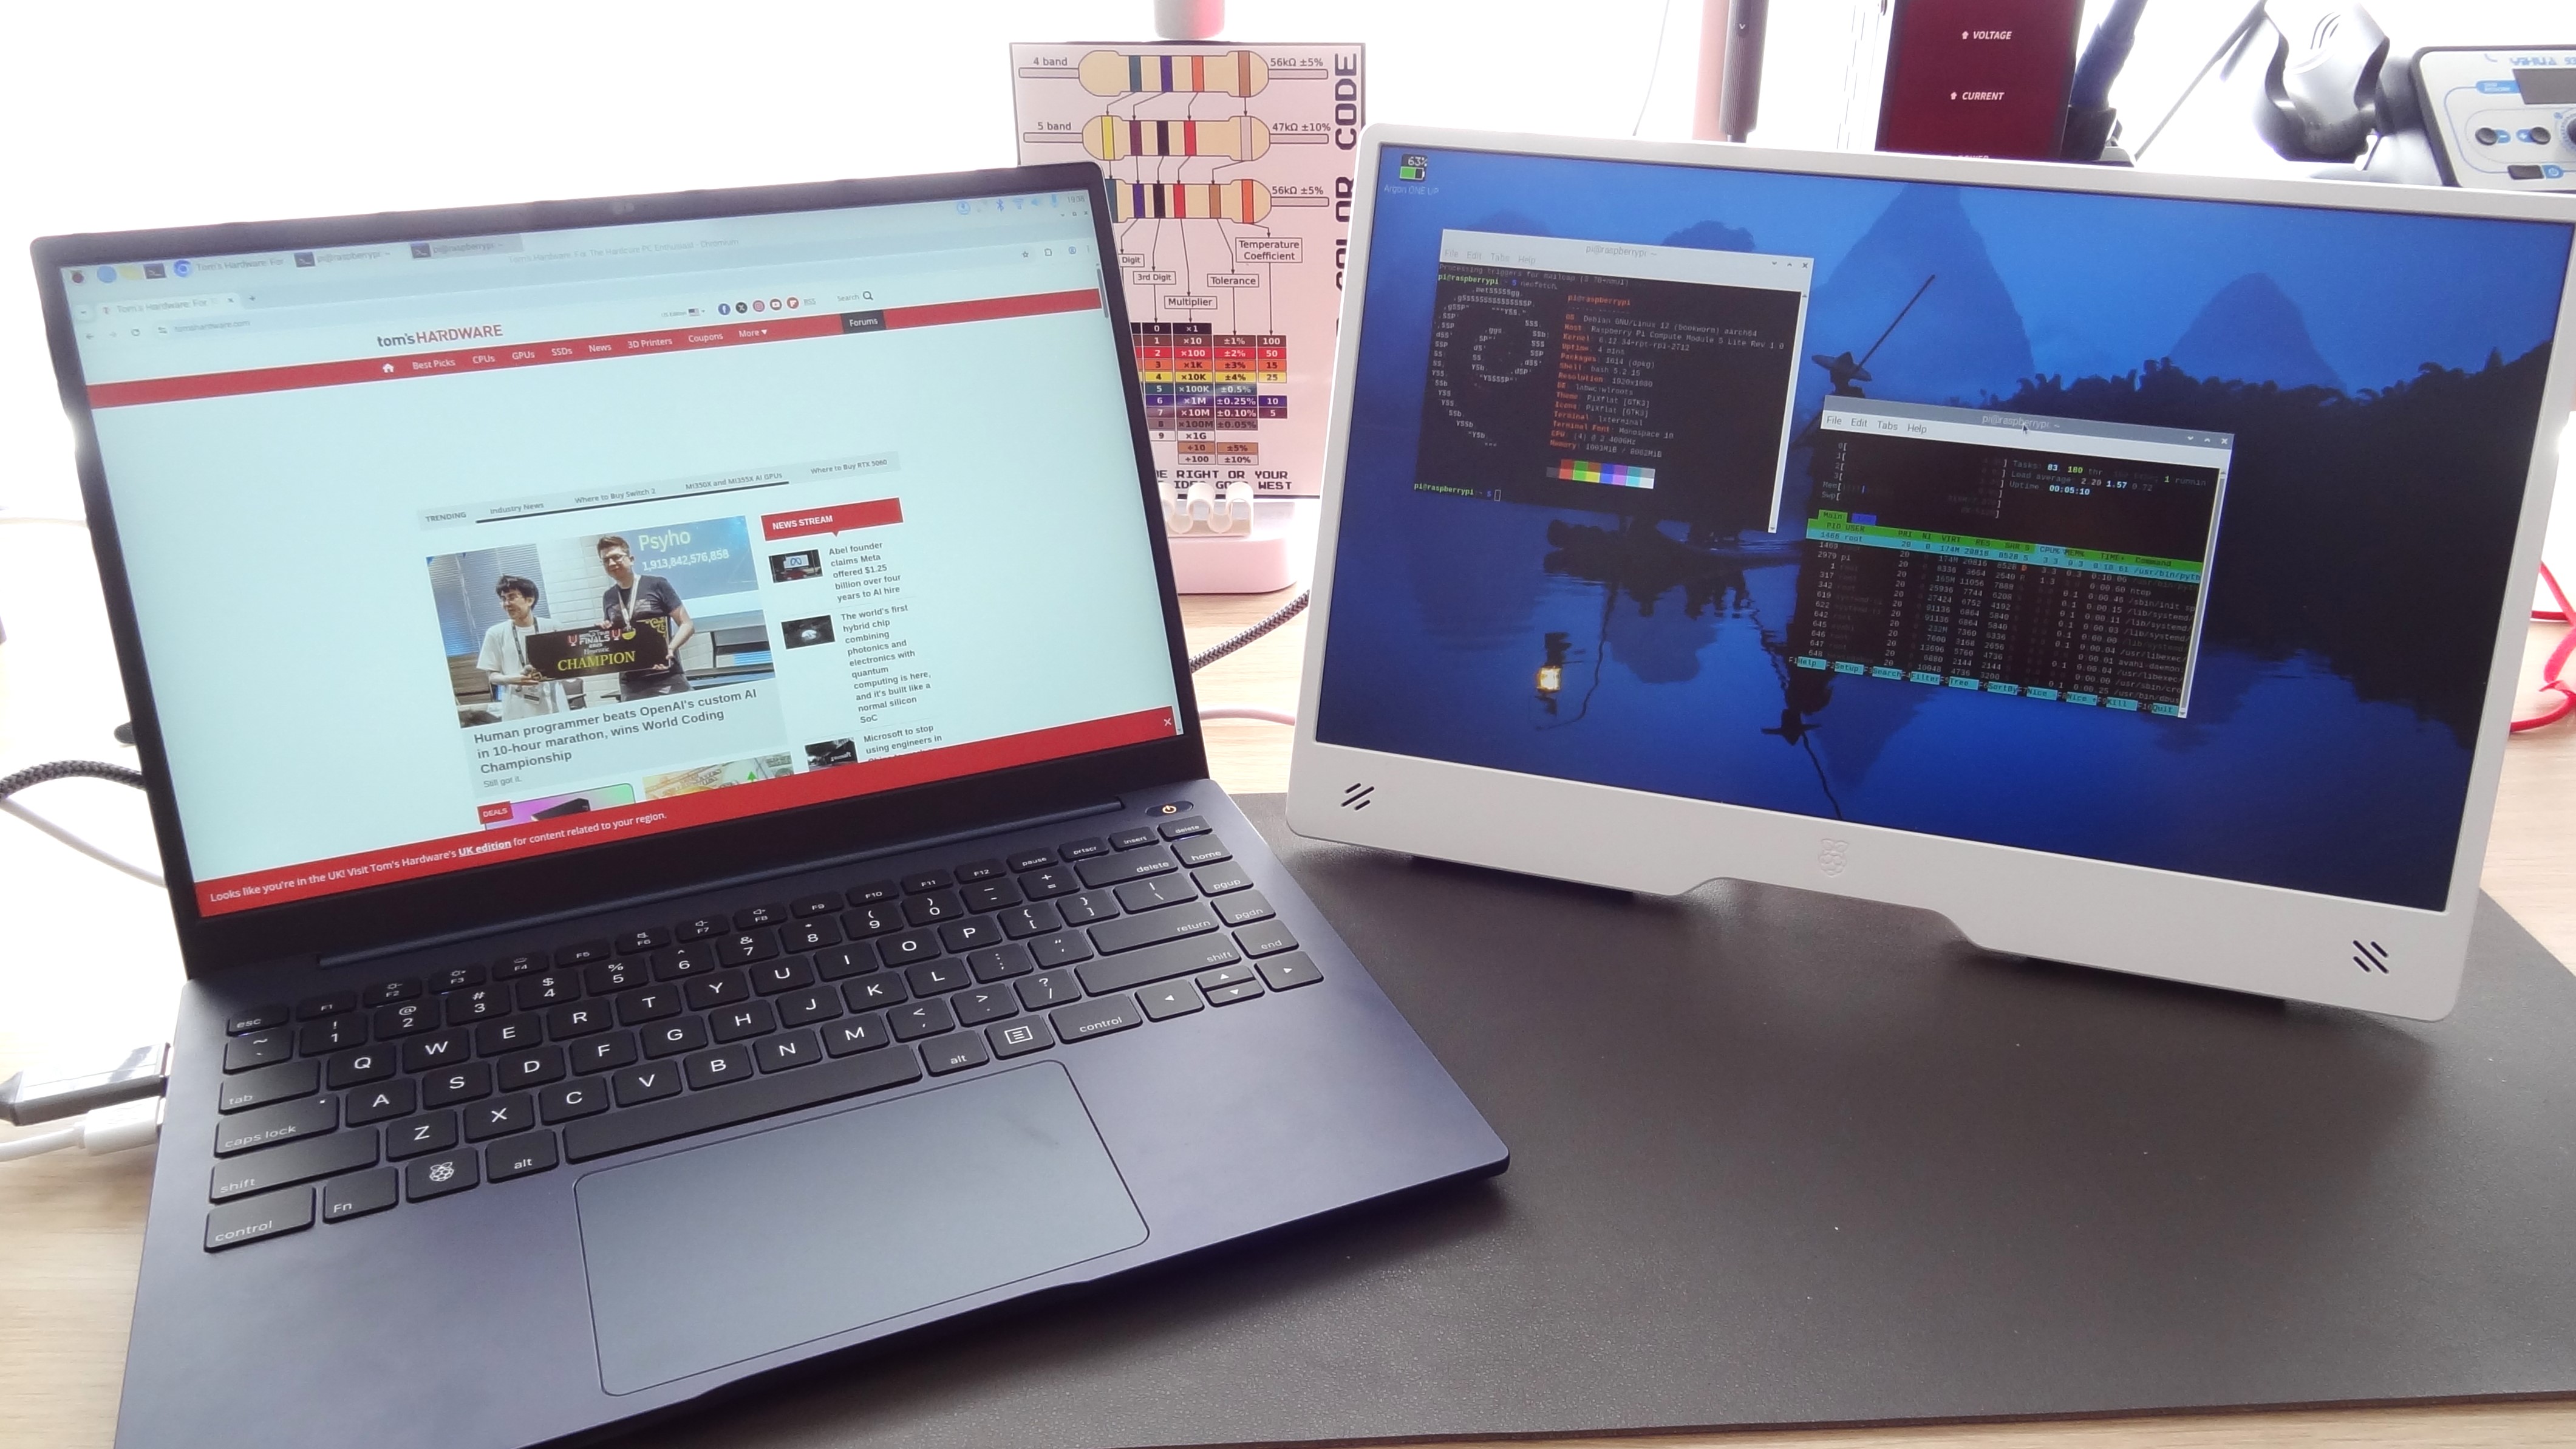
The ArgonOne Up has an HDMI port and that means we can use dual screens with our Raspberry Pi laptop.Yes we can be productivity road warriors with some of the best portable monitors. The fullsize HDMI port is most welcome, and I connected the official Raspberry Pi 1080P Monitor. Raspberry Pi OS saw it, and after a few tweaks, it was set up to double my productivity or just watch YouTube videos while I should be working. The CM4 and CM5 are capable of outputting to dual 4K displays, sadly I do not have one to hand for testing.
Webcam Performance
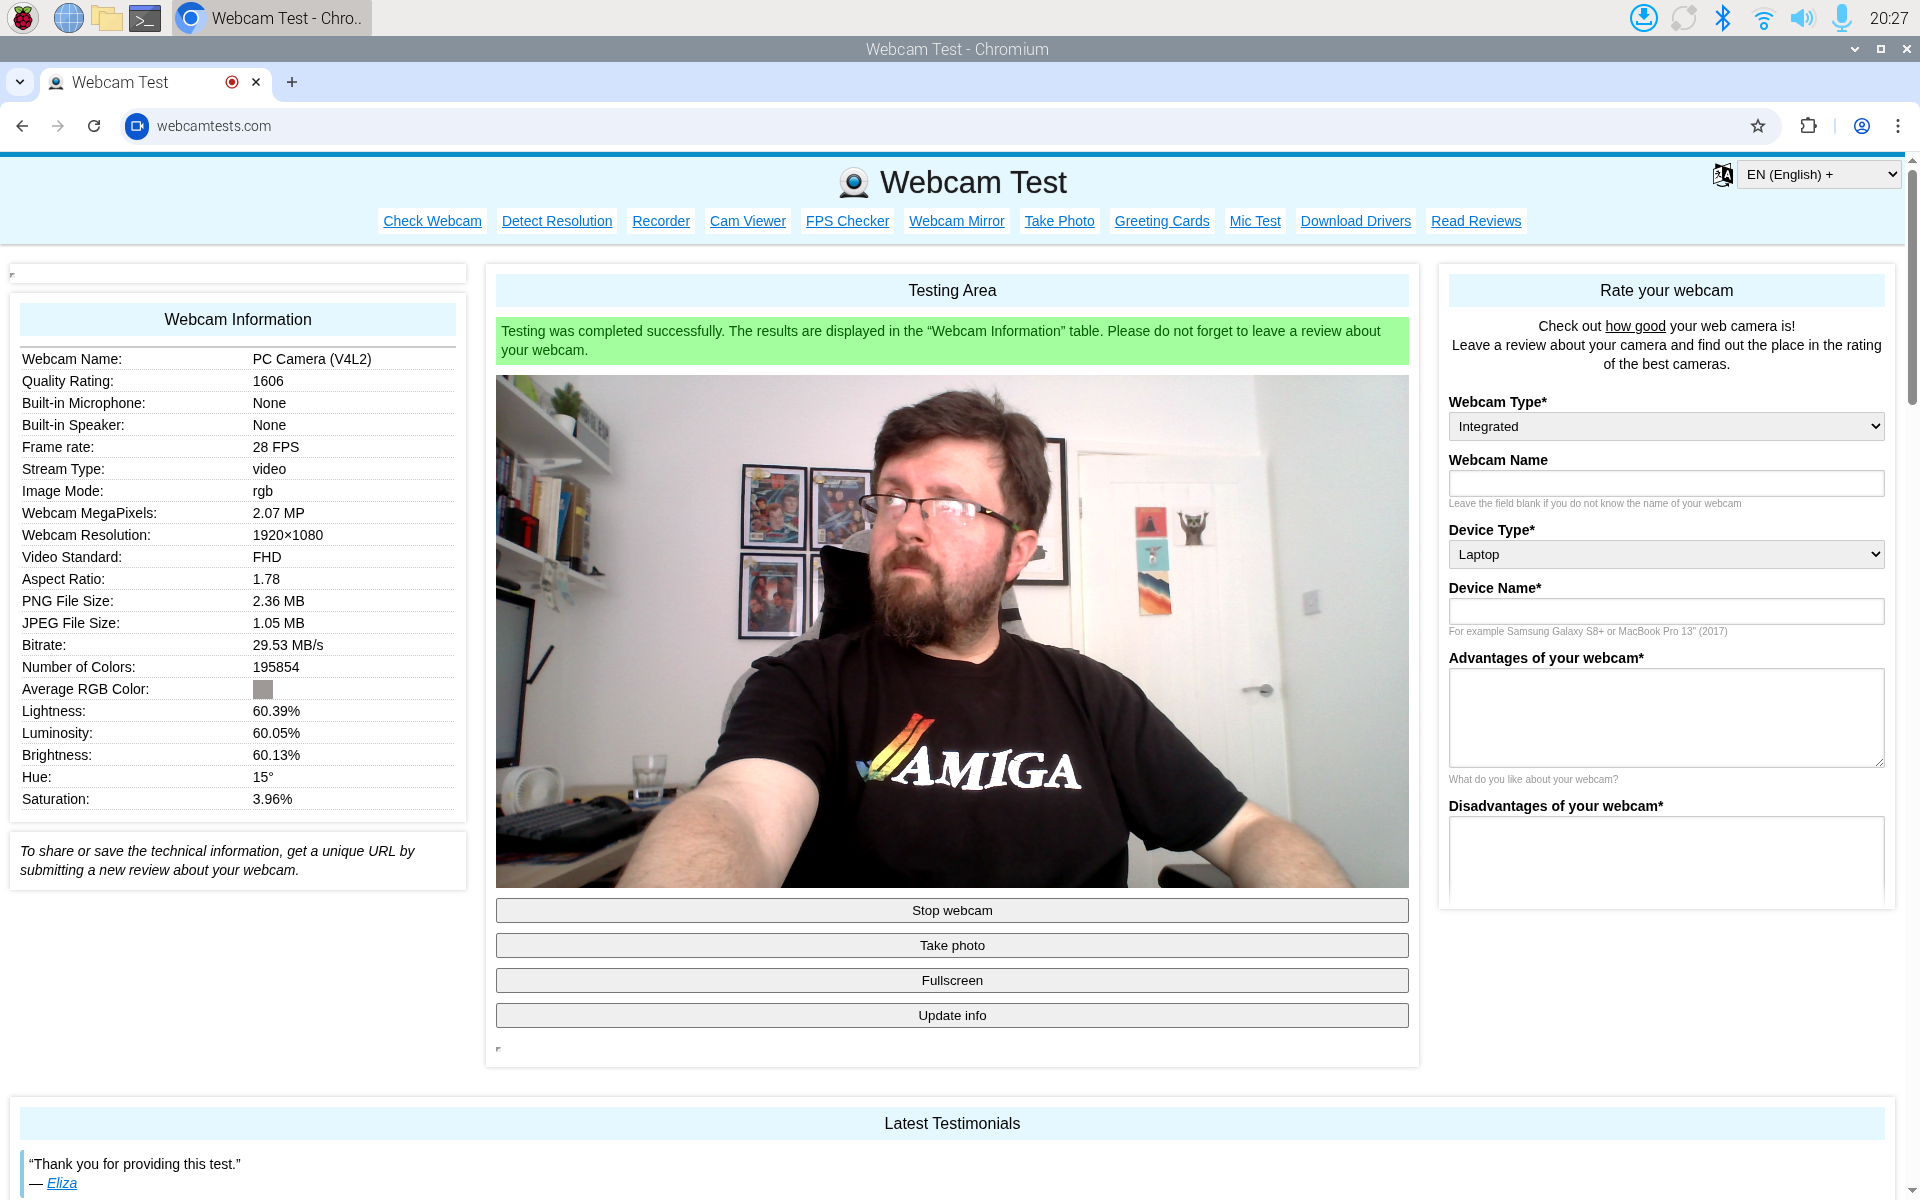
The built-in 2MP 1080P USB webcam does a good enough job for video calls etc. It isn’t flawless, but it gets the job done. Because it is a USB webcam, and not a Raspberry Pi official camera, you cannot use the official Raspberry Pi camera software for Bash or Python, but it can be used in AI object identification projects. Using webcamtests.com I was able to get a good image with some dips to the FPS if I got animated. Just sitting there and talking to the camera, all was good.
Can I swap the CM5 for another variant?
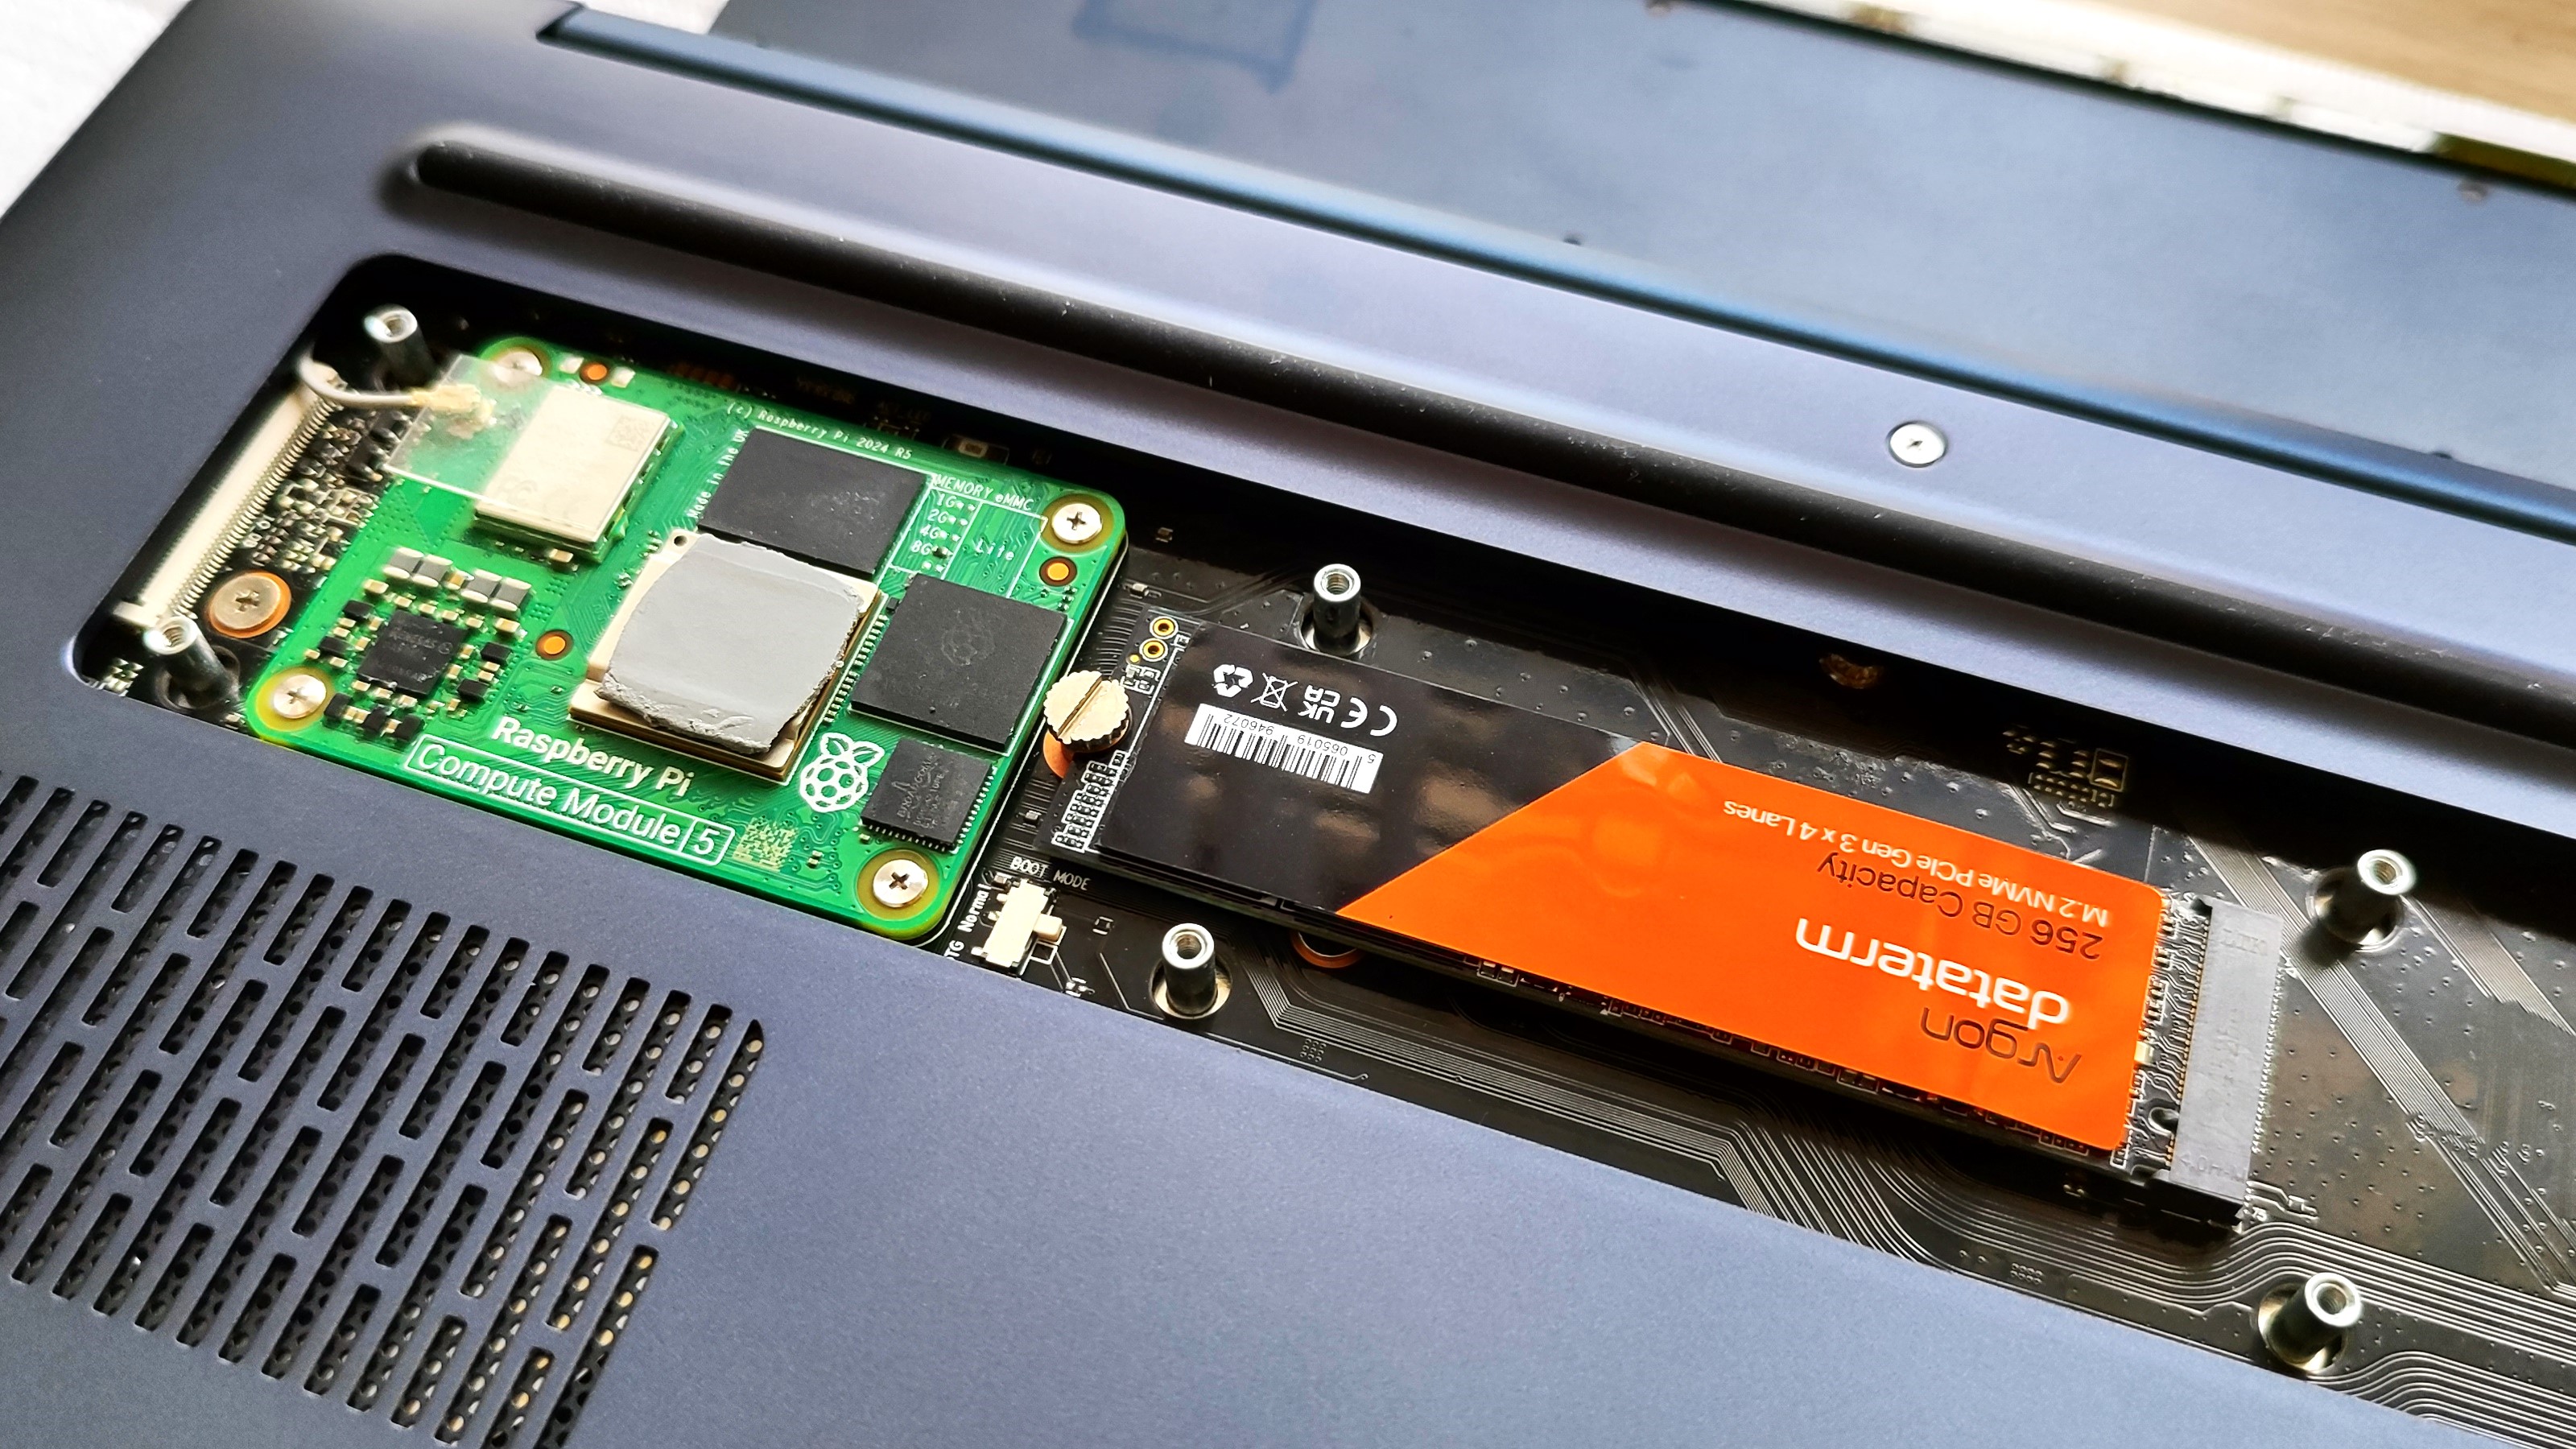
Yes! You’ve got a user upgradable laptop, all you need to do is swap the CM5 for a different model. Heck, if Raspberry Pi retains the two 100-pin high density connectors introduced for the CM4, the CM6 may be a viable upgrade path in the future. The Compute Module is secured in place with four machine screws, and the friction from the two 100-pin high density connectors.
You’ll need to remember that your CM5 will need Wi-Fi, and that the CM5 Lite is the most viable option. Why? The CM5 Lite does not come with any onboard eMMC storage. The CM5 comes with eMMC and this prevents the use of microSD storage. So if you want to use microSD cards with your ArgonOne Up, buy the CM5 Lite.
Will Compute Modules from other Raspberry Pi alternatives work? Possibly, but that is a gamble and not something that I am able to test.
Using the GPIO
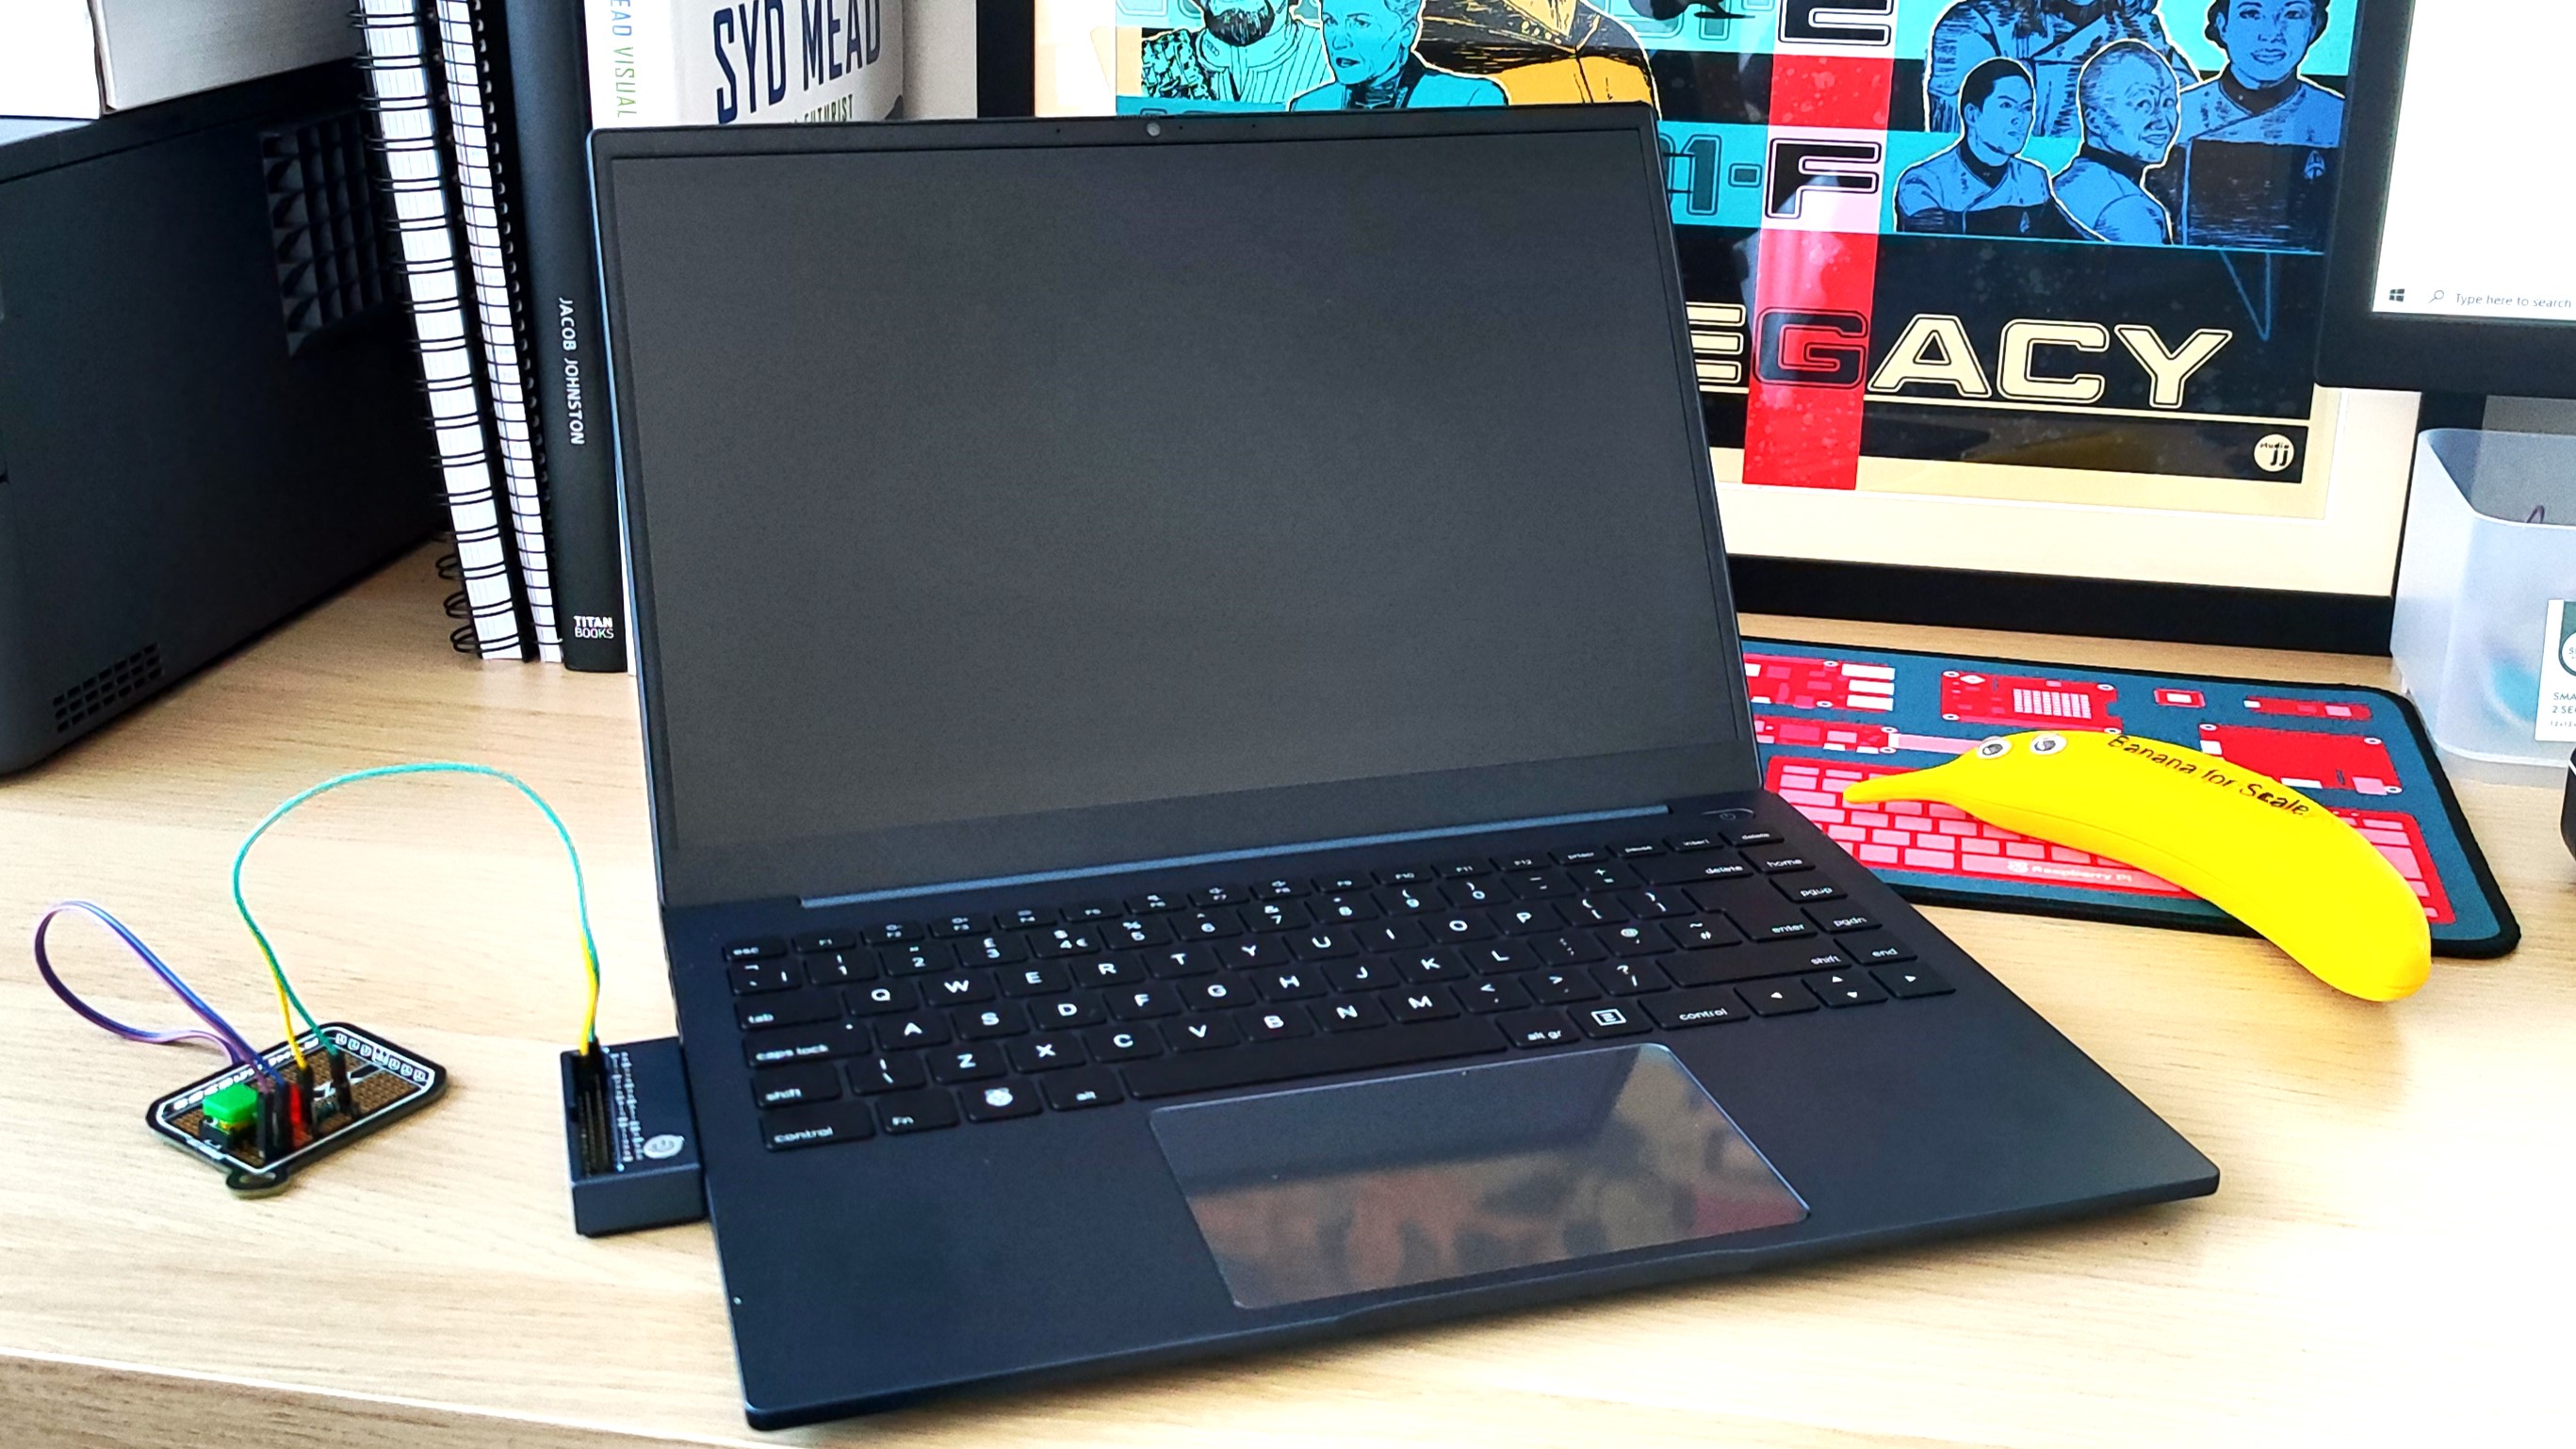
For me, what elevates the Raspberry Pi above other single board computers (SBC) is the GPIO. Essentially, the GPIO (General Purpose Input/Output) is a connection between the real world and the brain of the Raspberry Pi. The GPIO has been used to build thousands of projects since the Raspberry Pi was released, and the Raspberry Pi Compute Module 5 has the same GPIO connections as all Raspberry Pi released in the last decade, but how do we access it on the ArgonOne Up?
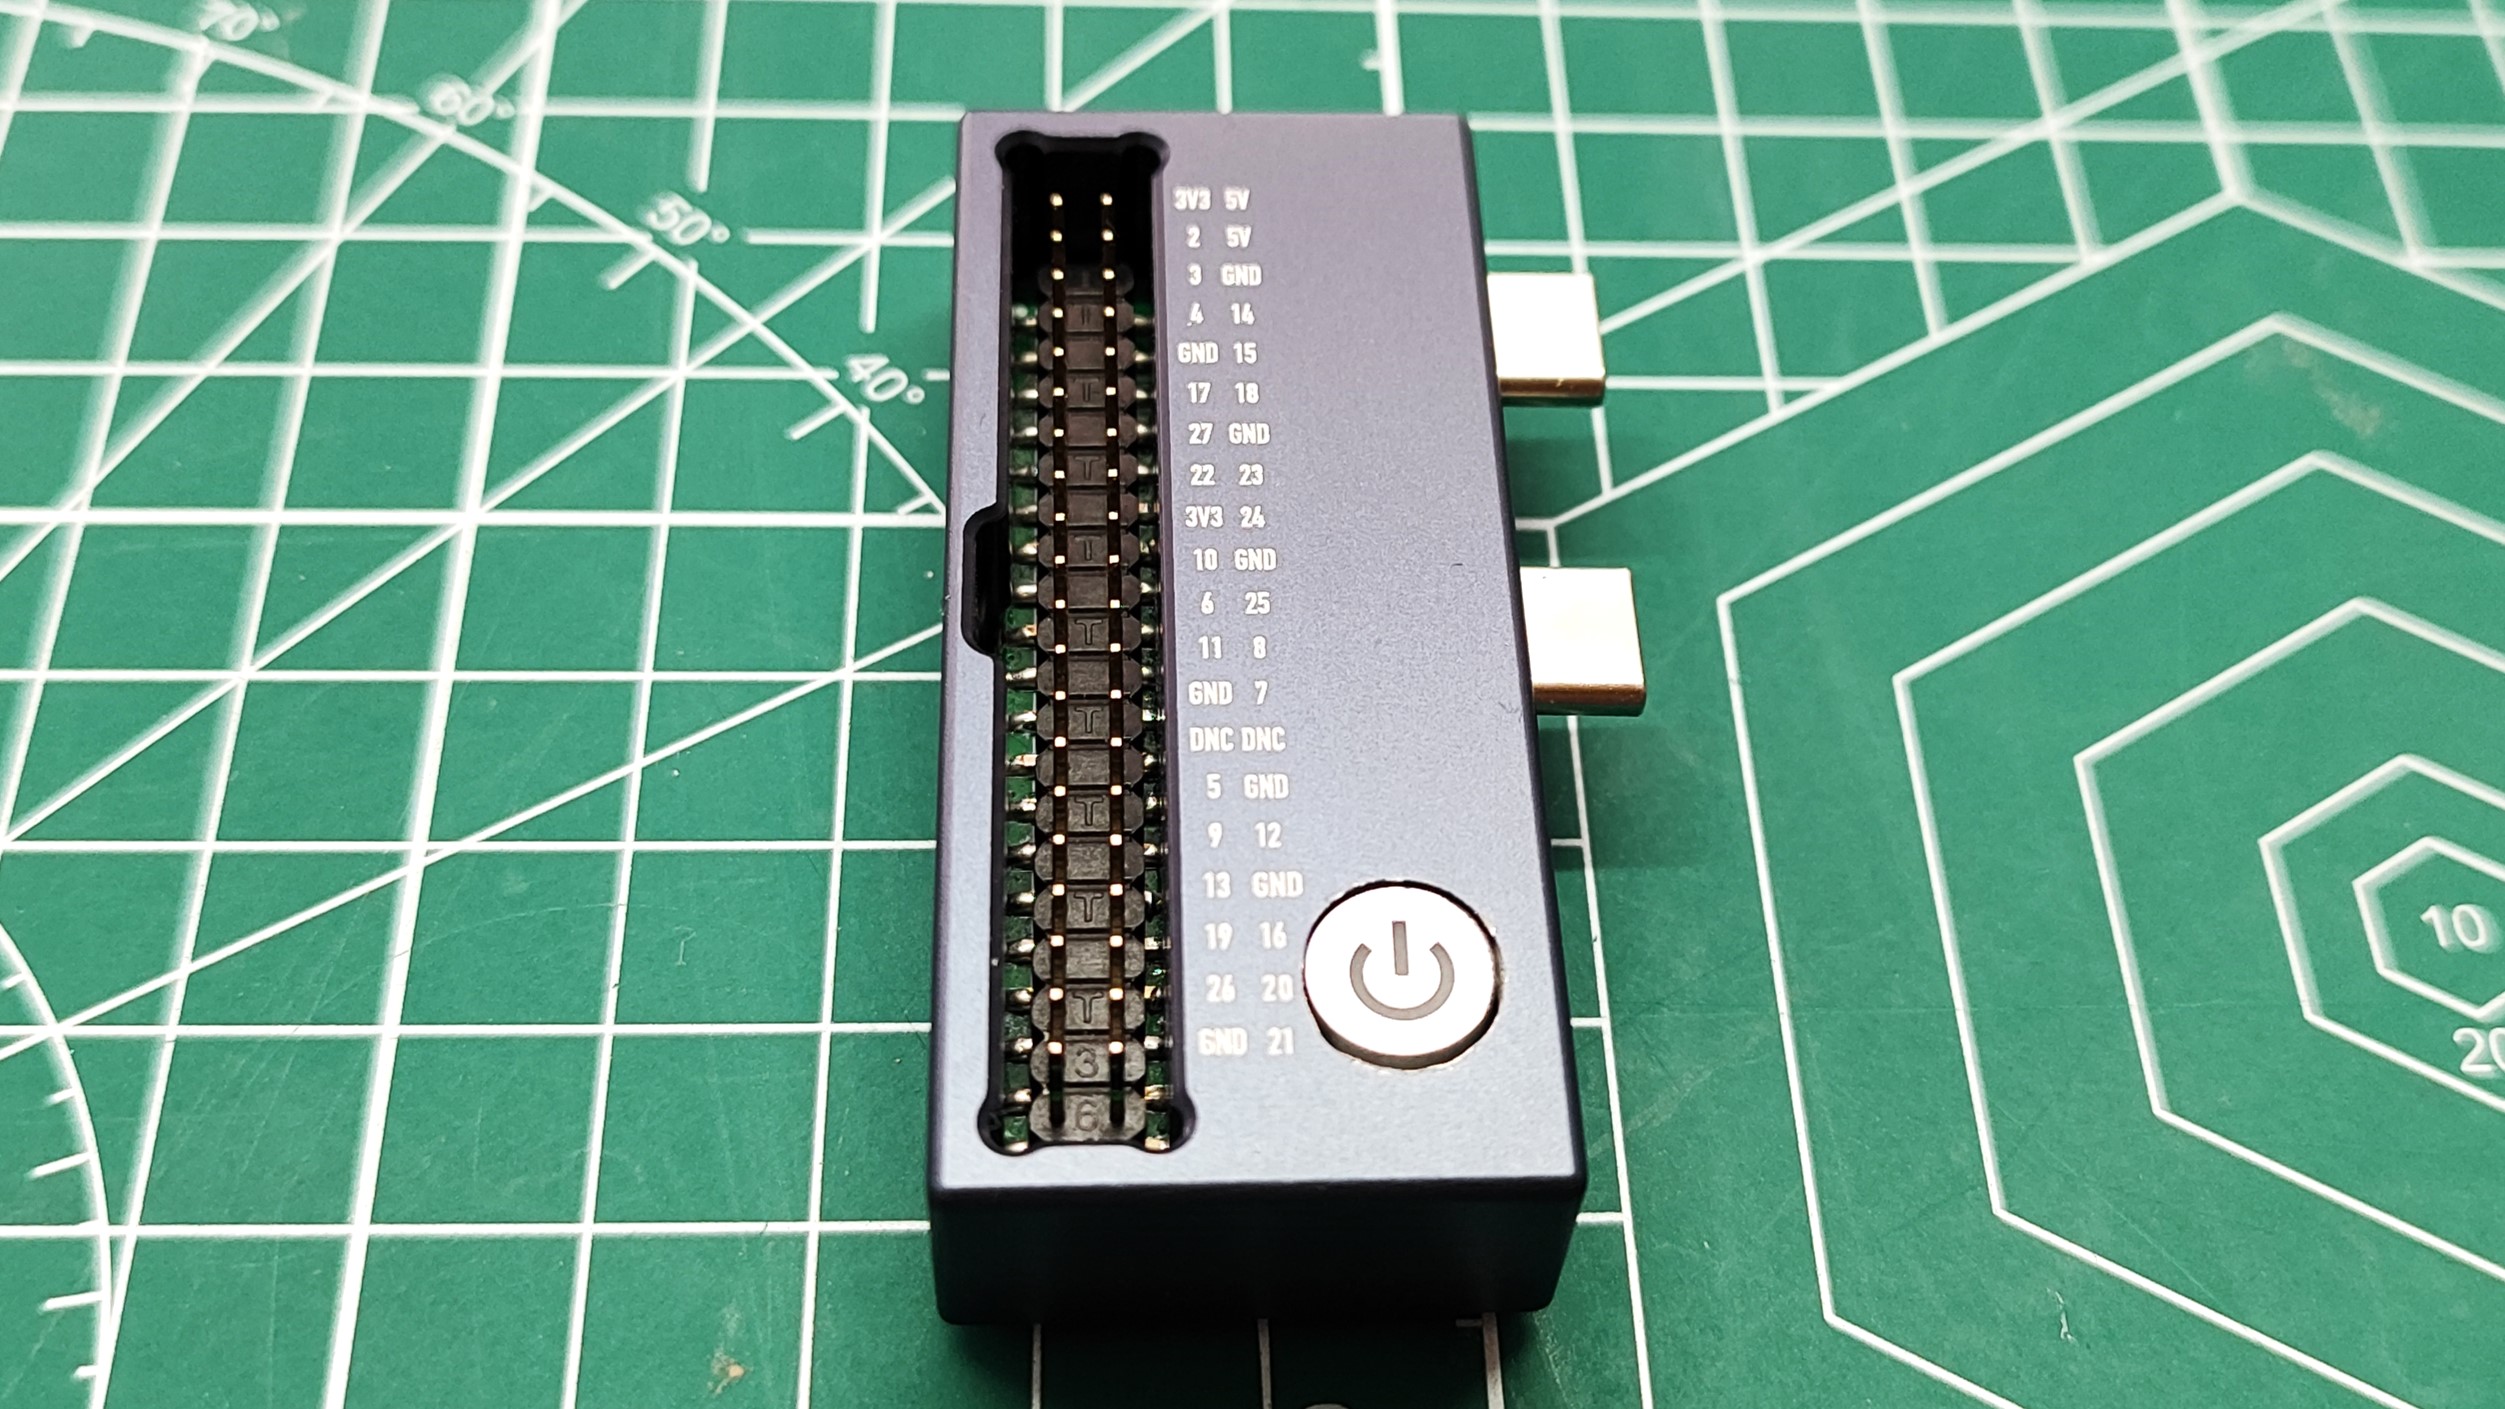
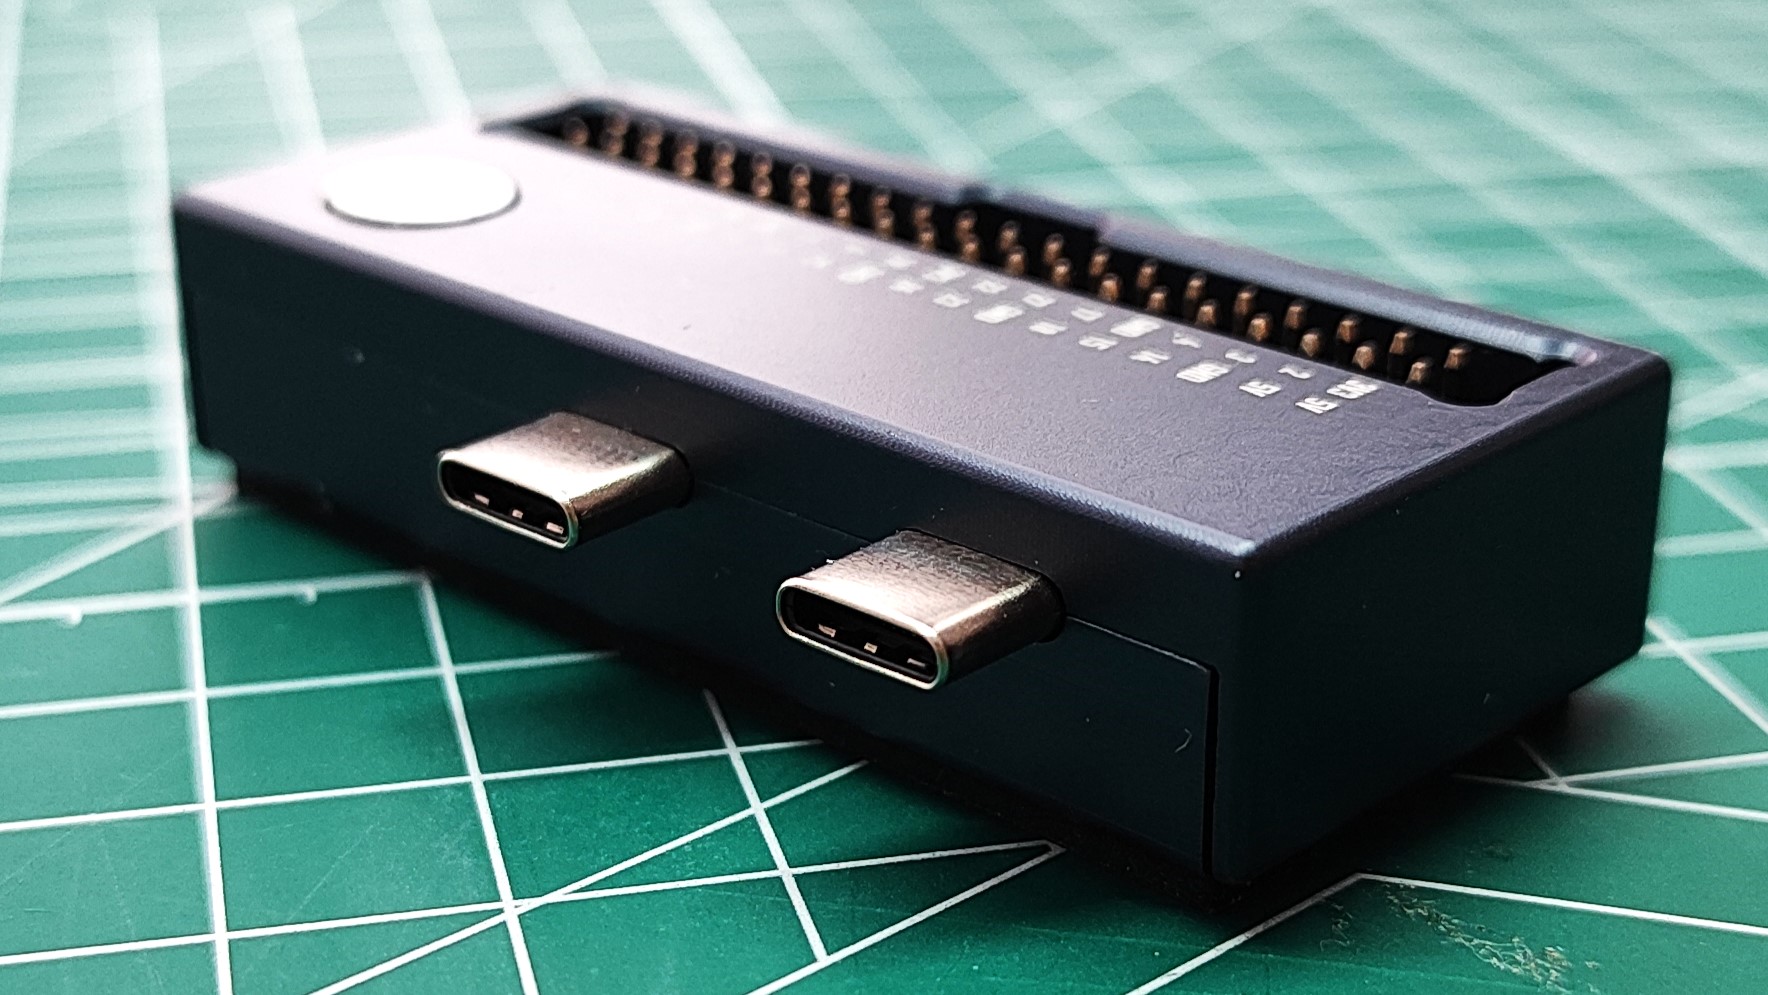
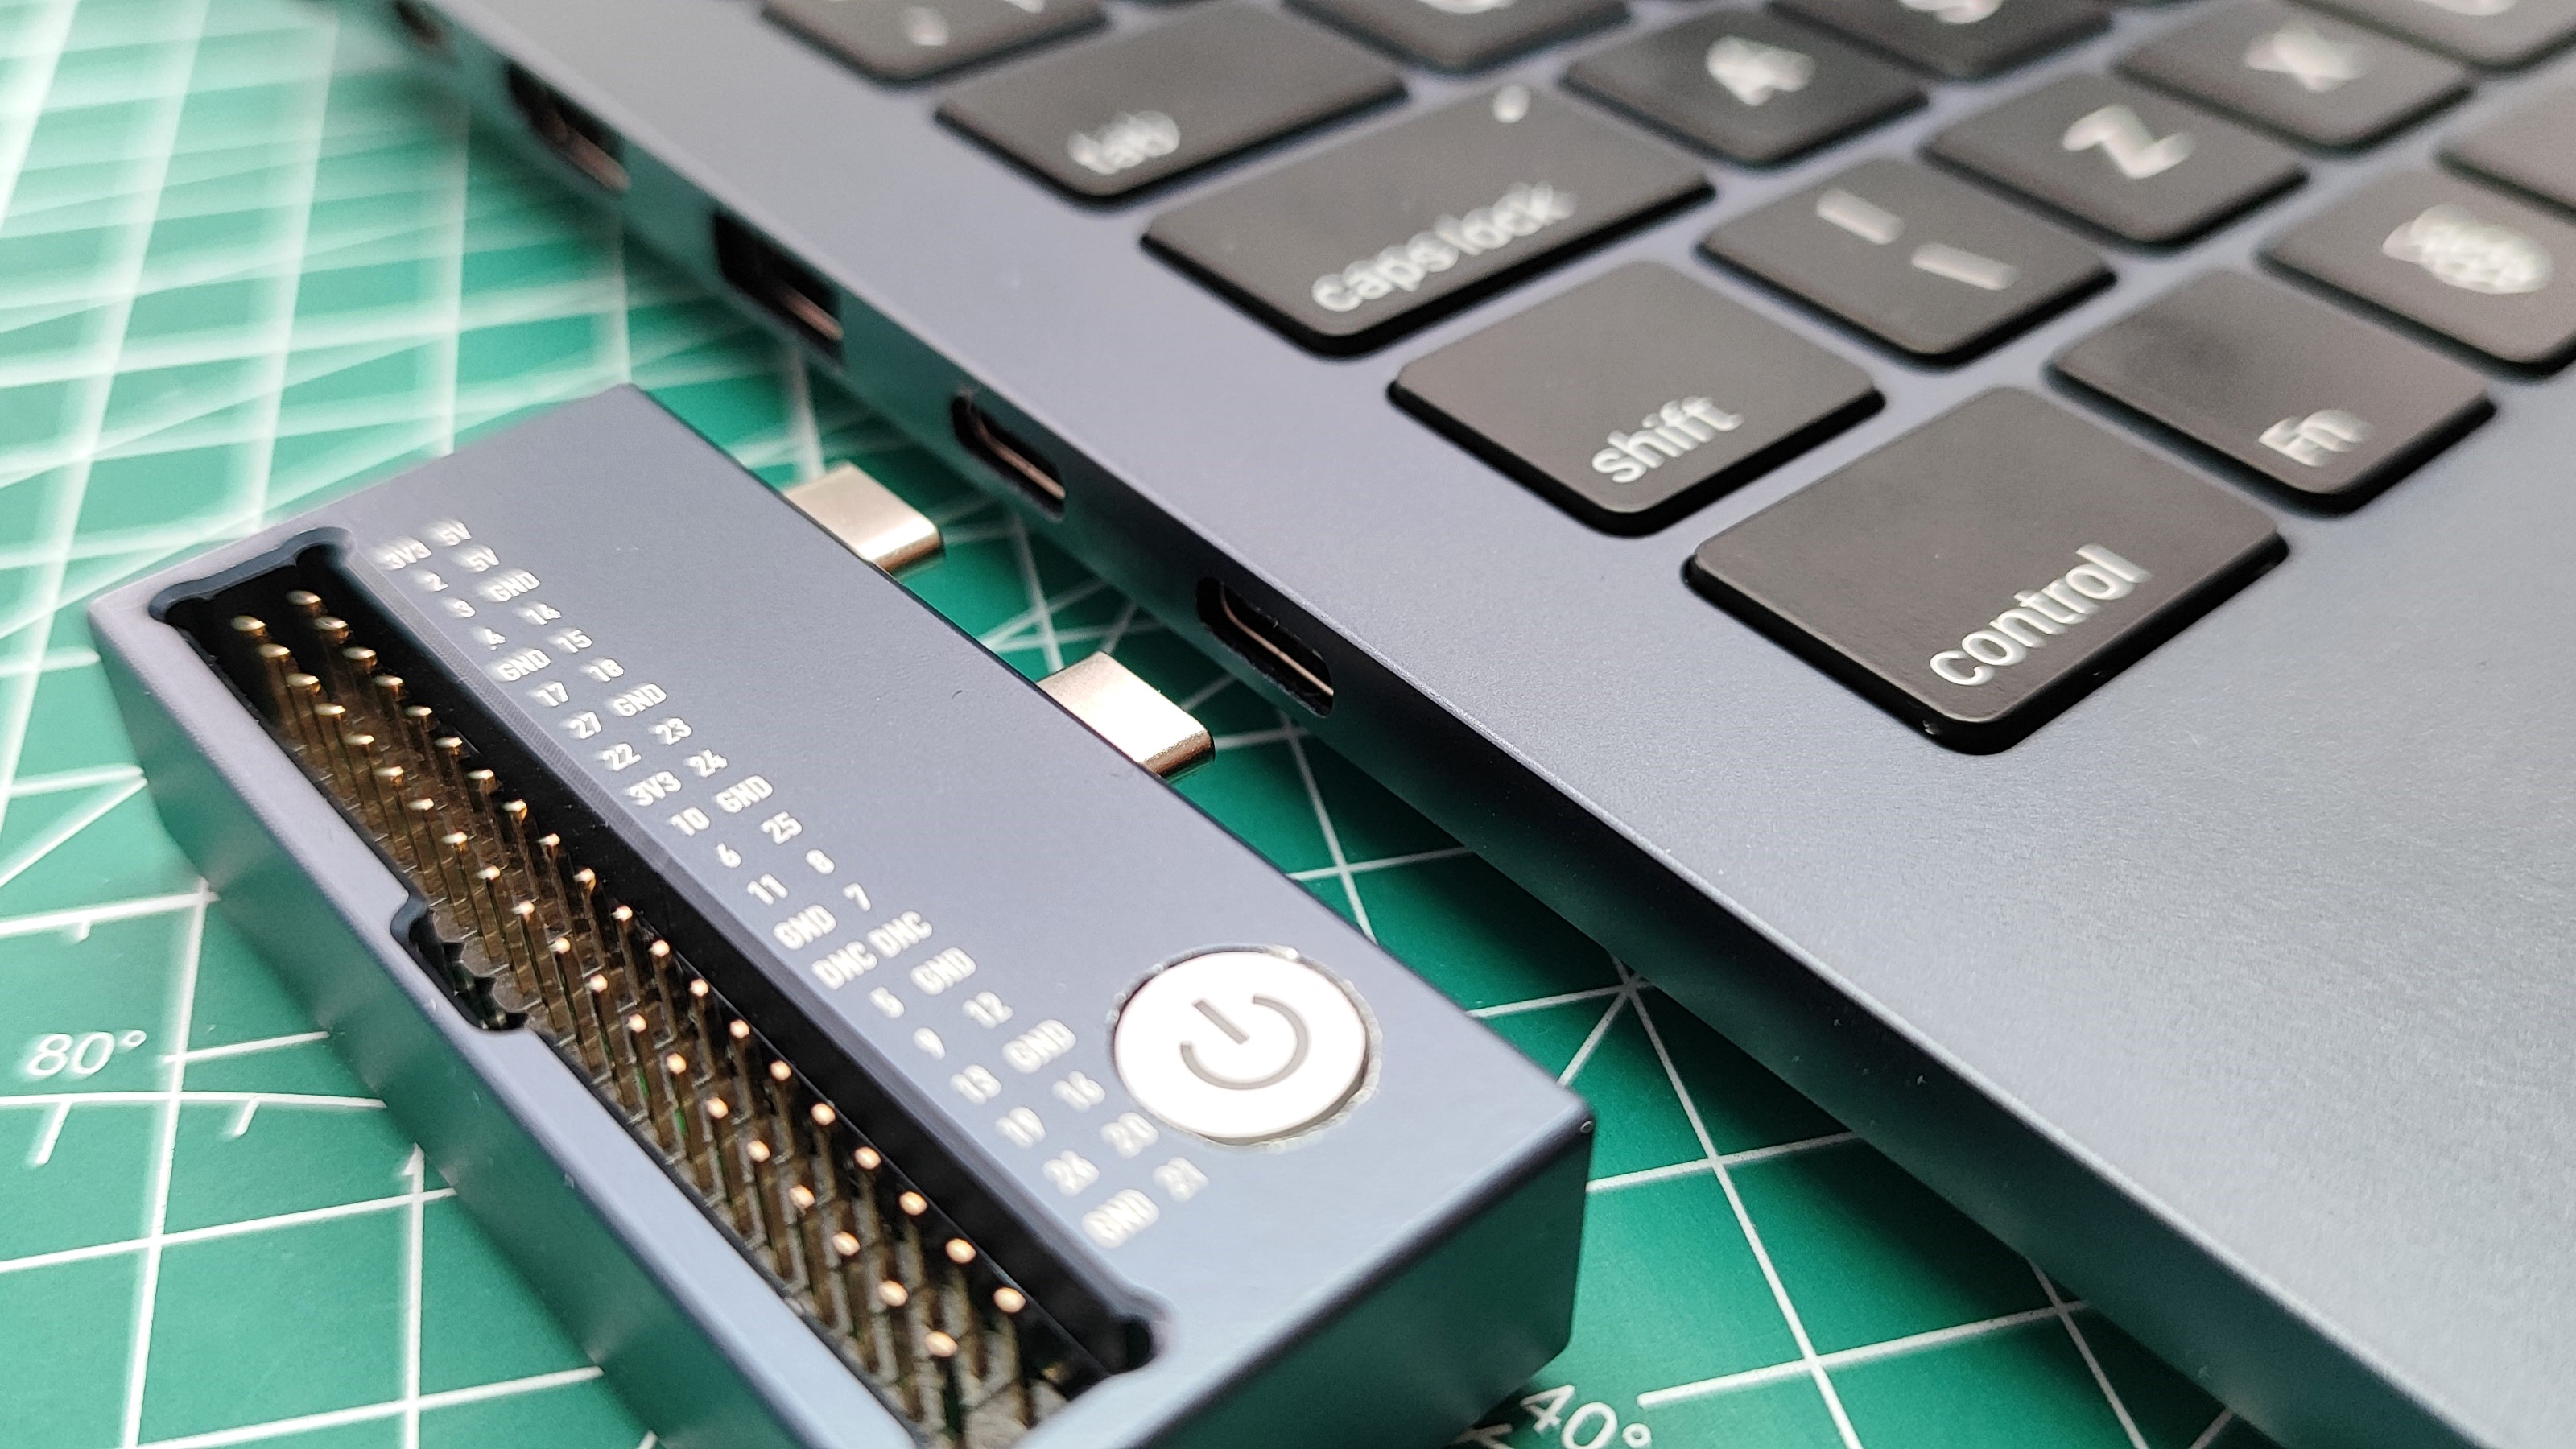
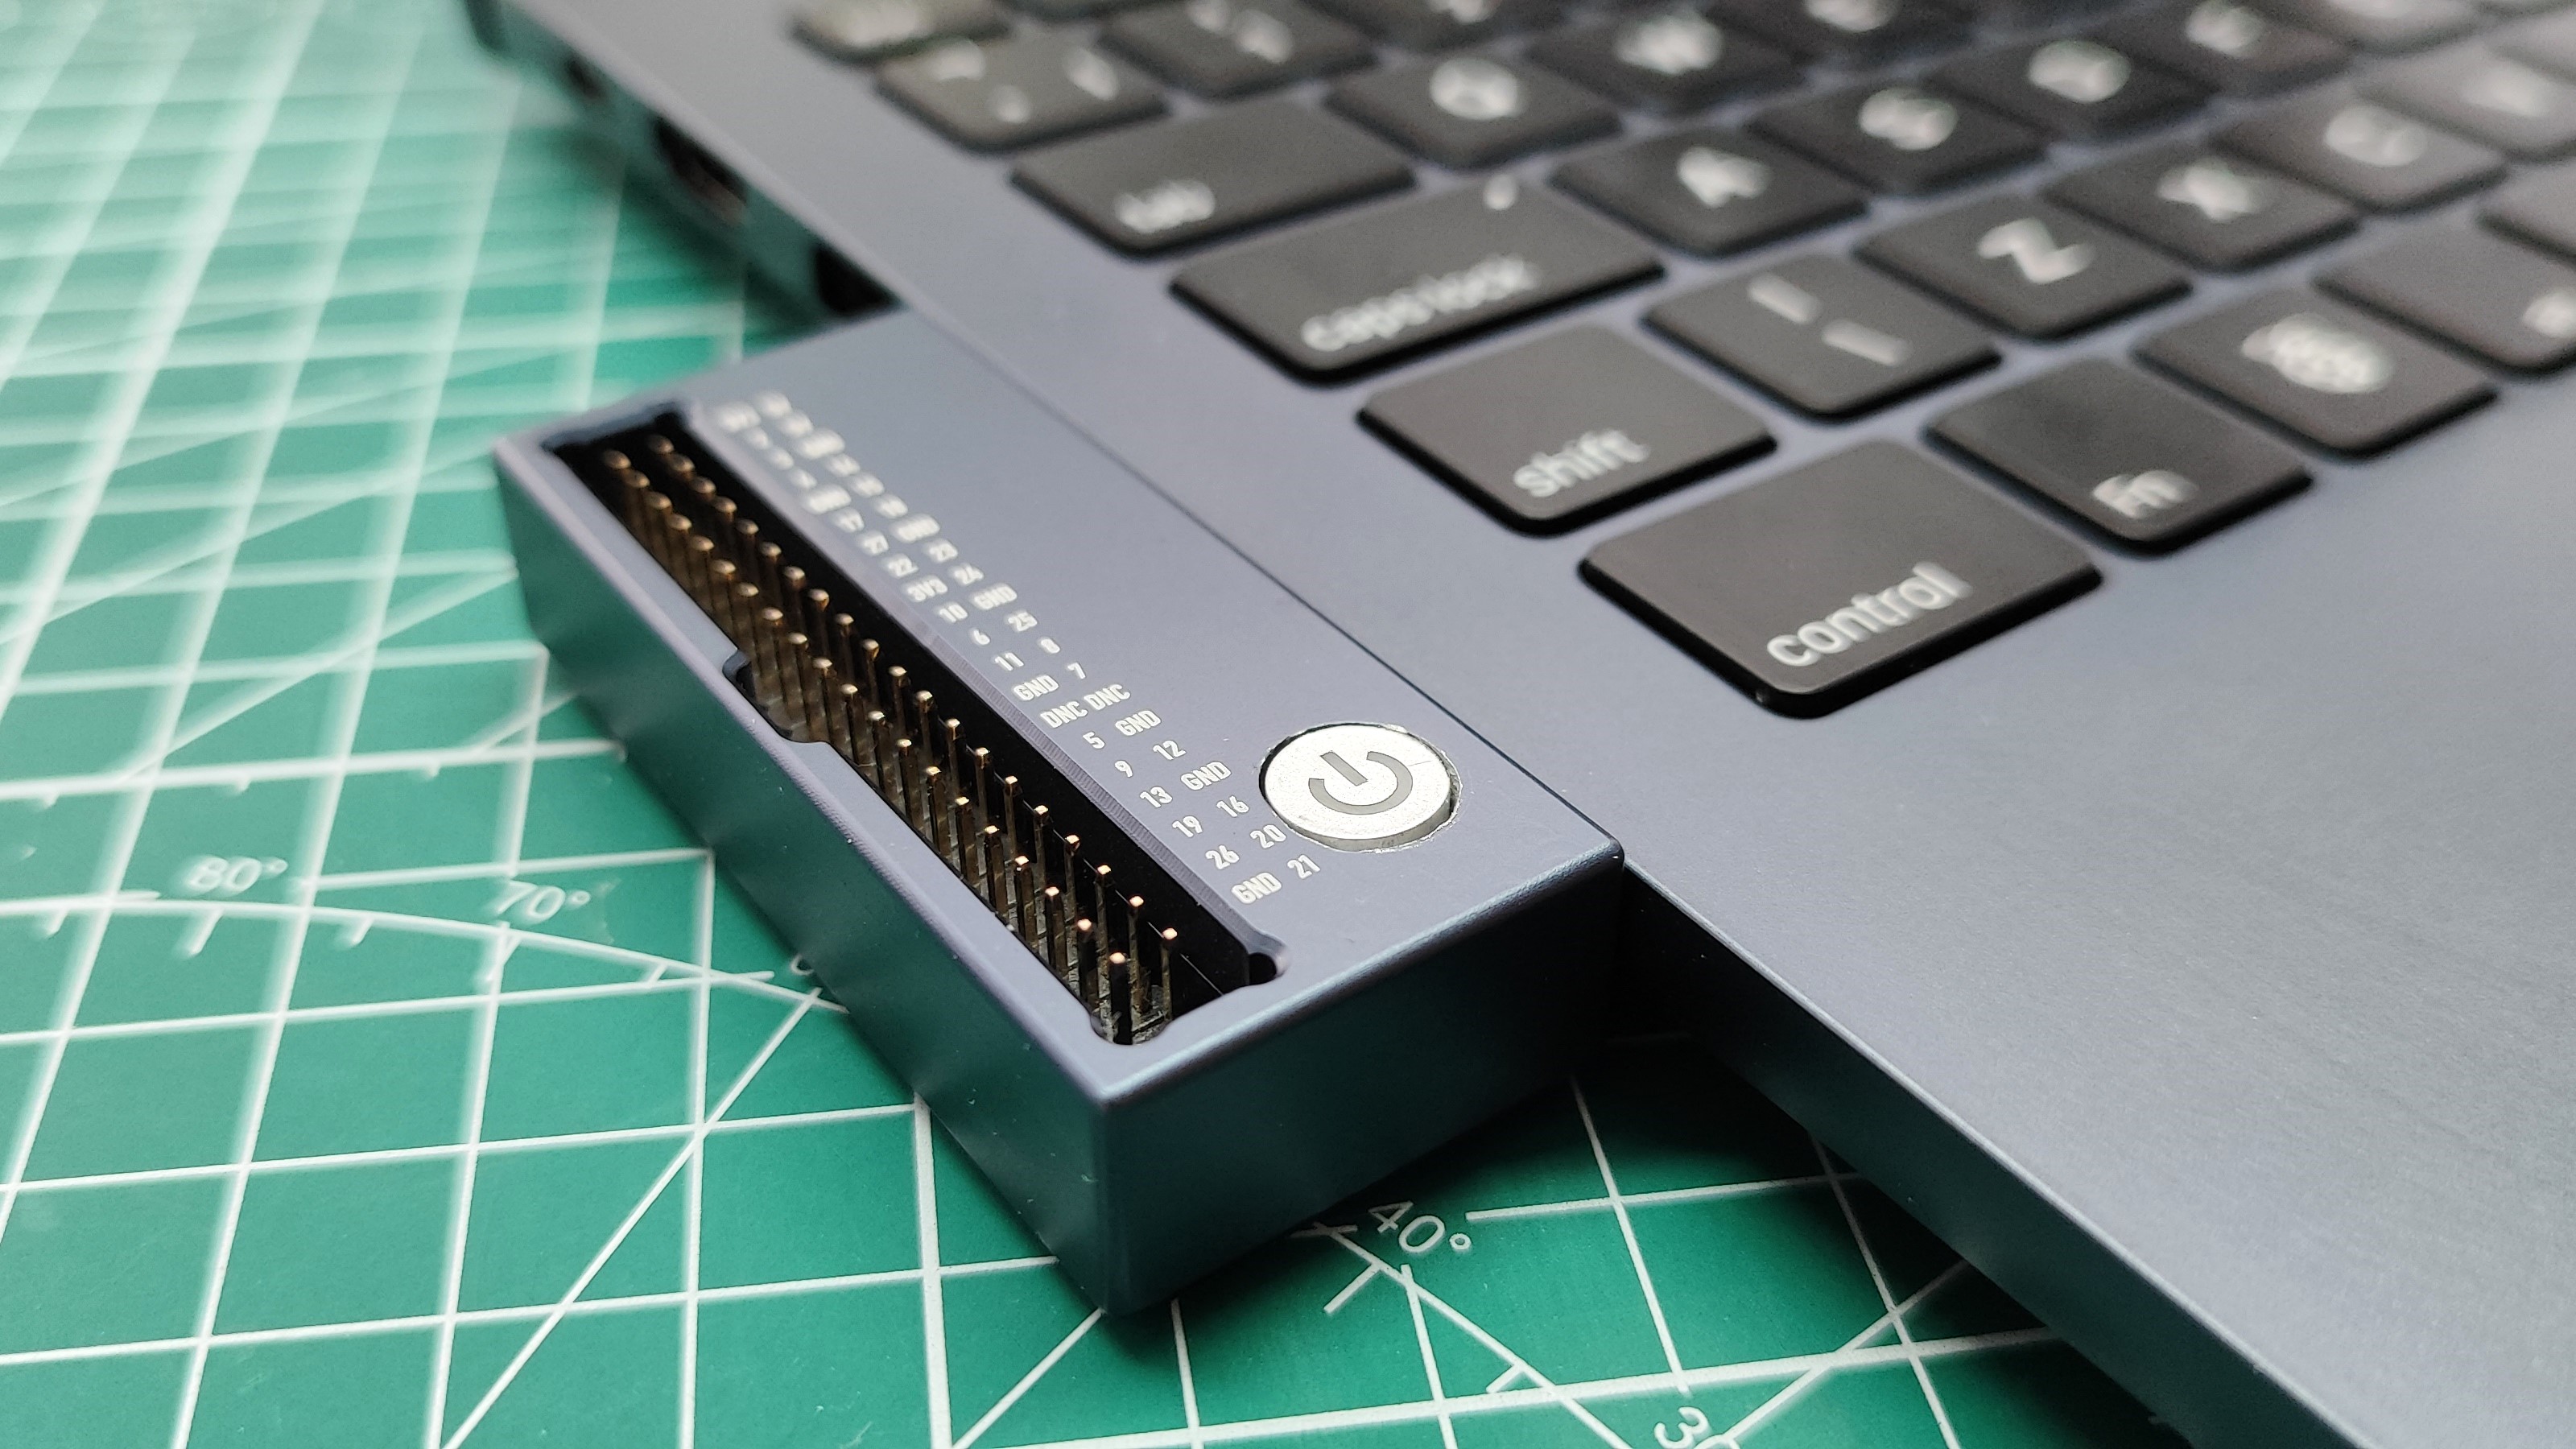
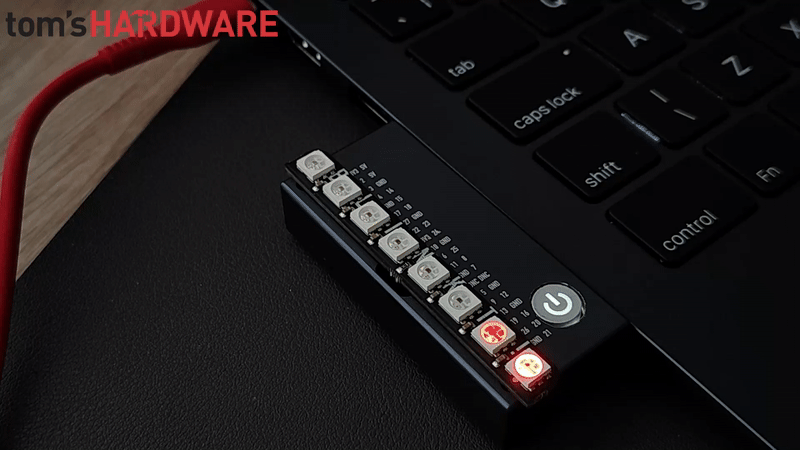
We need a GPIO attachment, which connects to two USB Type C ports on the left hand side. Yes, these two USB Type C ports have a dual function. Normally used as USB 2 Type C ports, they also connect the Compute Module 5 to an external GPIO breakout, which is pin compatible with the Raspberry Pi 5 and most of the previous Raspberry Pi. I plugged in the GPIO and connected up my test circuit, first to the 3V pin and GND for my LED. Why? To make sure that the LED lit up. It didn’t, so I swapped the polarity and it still didn’t light up. I read the email from Argon40, and realized that the 3V and 5V pins are turned off, an added safety feature. So I turned them on via the large button, and after some more polarity switching, I had an LED lit up. Buoyed by that, I disconnected from the 3V pin, and connected to GPIO 17. A few lines of Python later and I had a blinking LED.
Cool, so can we use the best Raspberry Pi HATs and add-ons? Well, possibly. The Raspberry Pi 5 introduced the RP1 chip, responsible for interfacing with the GPIO. In previous Raspberry Pi models, we crudely told the GPIO what to do and while it worked, it was never the proper way to do it. The RP1 introduced a better approach, but it broke compatibility with older Raspberry Pi HATs. There has been work to get your favorite HATs working with the Raspberry Pi 5 and CM5’s RP1, but your mileage may vary.
I did test a Pimoroni Blinkt, an APA102 RGB breakout board and it initially didn’t work. After much Googling and testing I managed to get a script to run using rpi-lgpio. This module is a “bridge” between the older rpi-gpio Python library, and the new way to interact with the GPIO. It isn’t foolproof, but it covers the basics quite well.
The bottom line for the GPIO is that the ArgonOne Up breaks the connections out beautifully, and it is absolutely possible to get GPIO work done. The friction encountered when using the GPIO is squarely down to the underlying OS and the choices made for it.
NVMe Performance
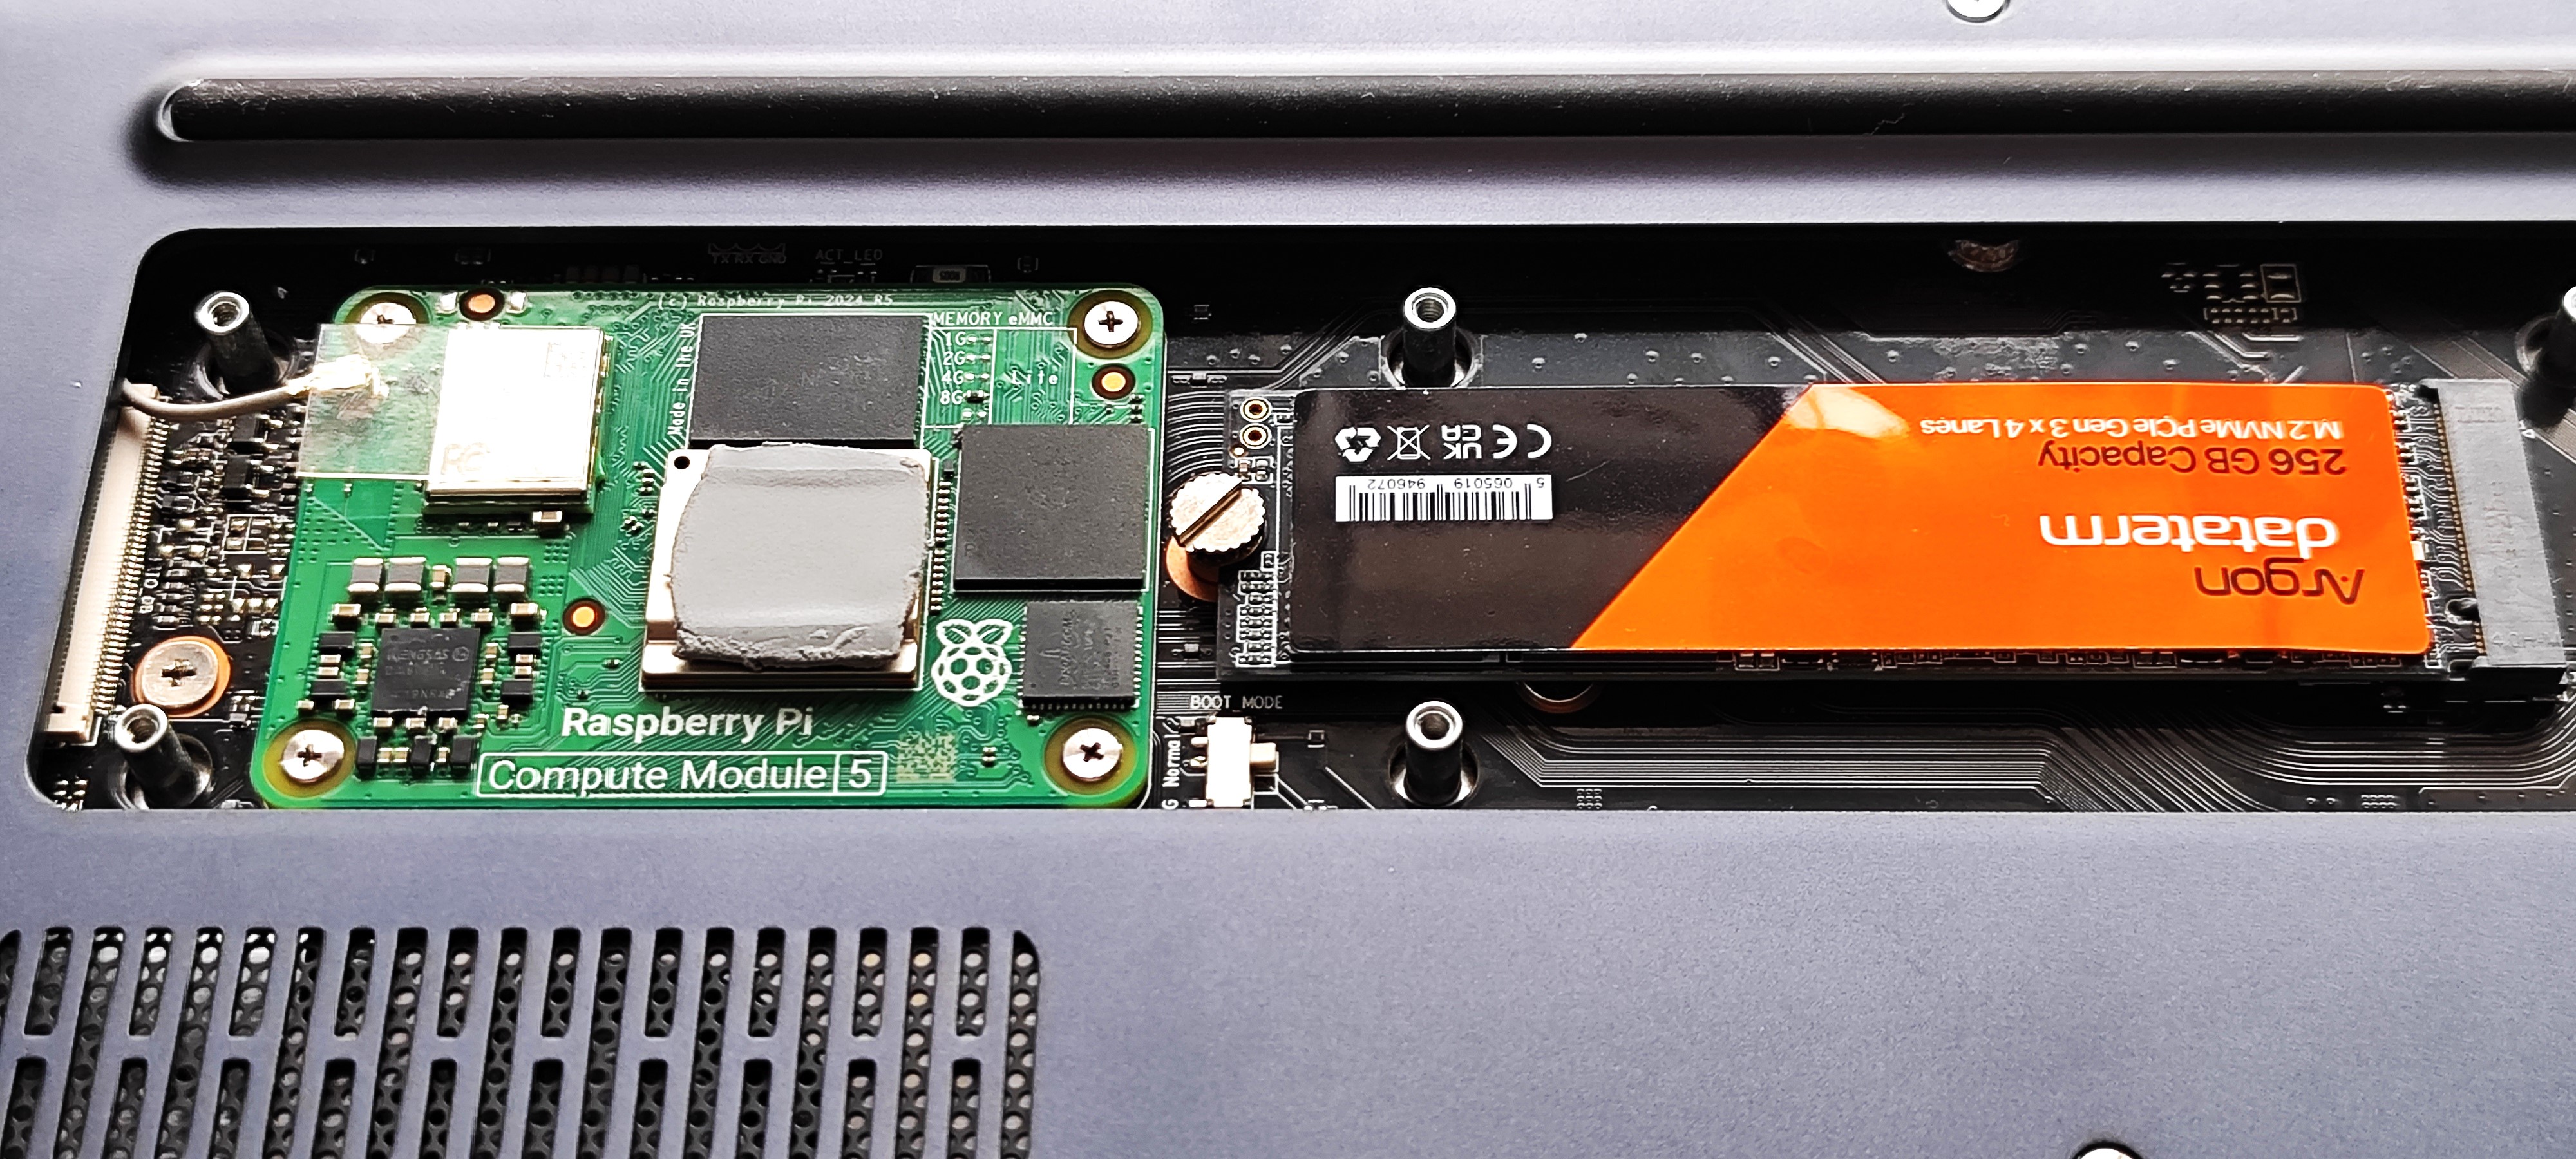
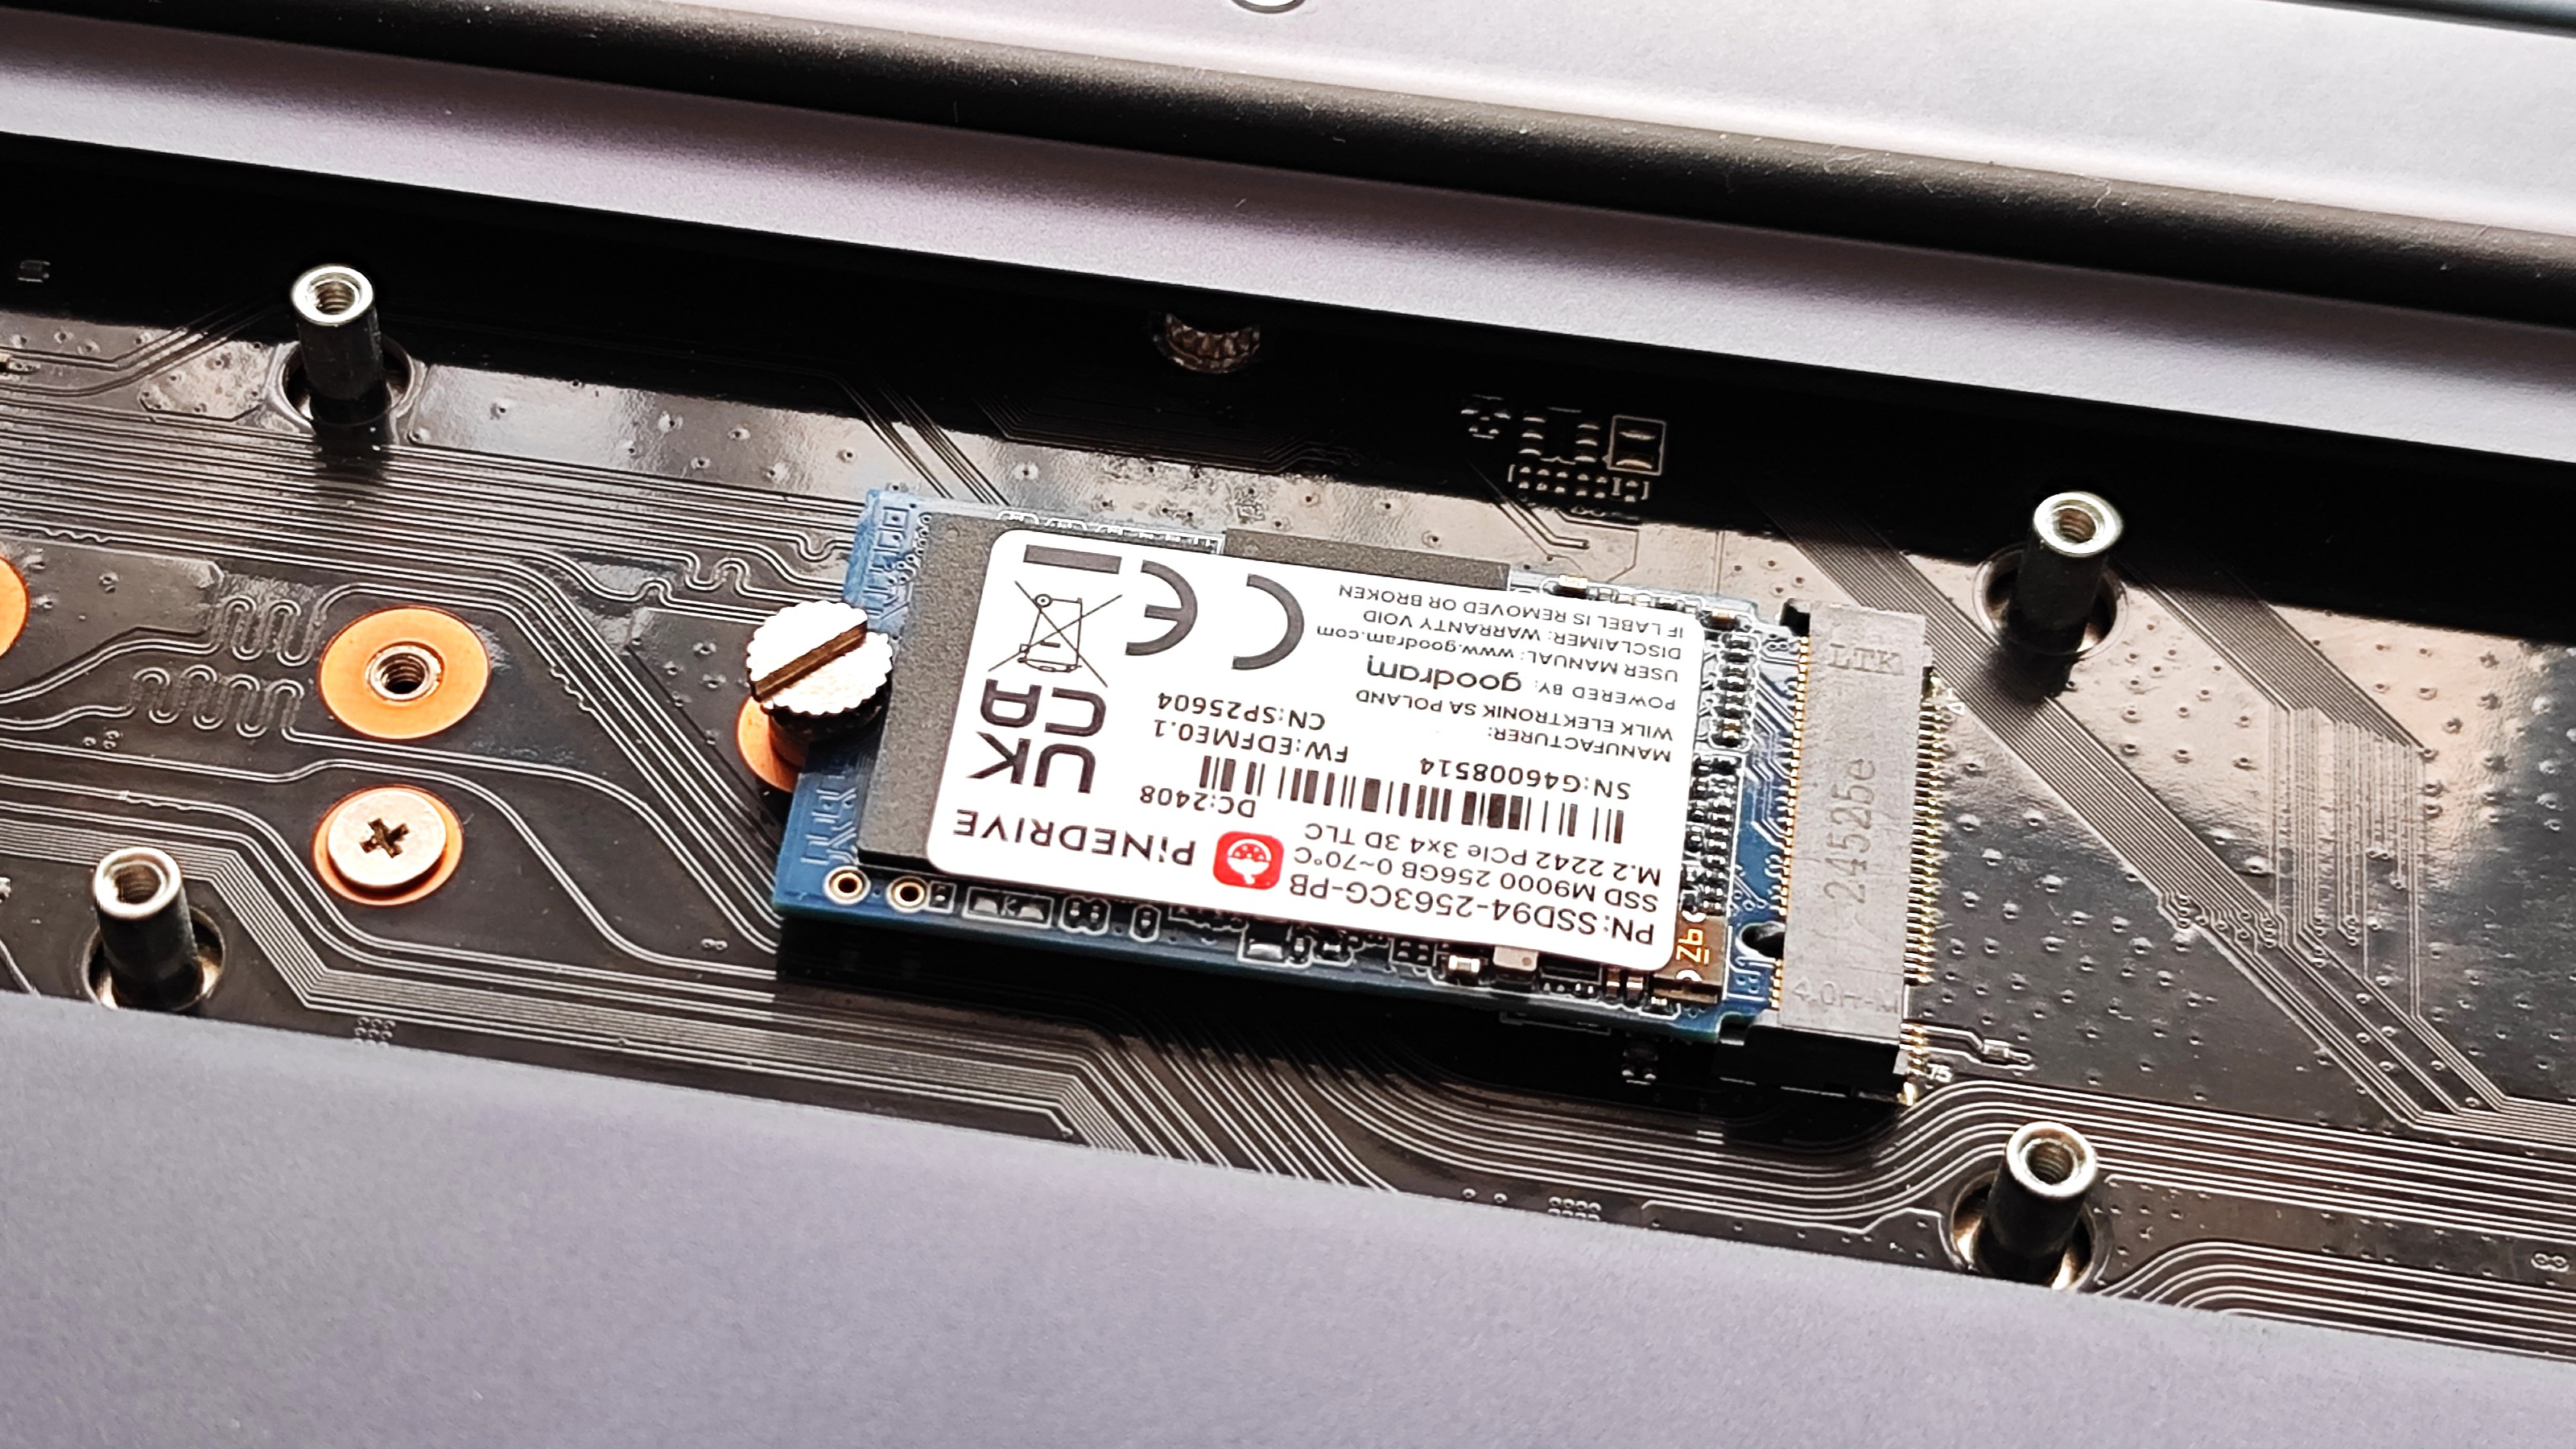
Included in my review unit is a 256GB Argon DataTerm PCIe Gen 3x4 NVMe SSD, and after setting the drive to use PCIe Gen x3 speeds I ran a benchmark using dd to write the contents of the drive to /dev/null. I was not disappointed. I saw 930MB/s transfer, and while you may laugh at this trivial performance, we must remember that this is, in essence, a Raspberry Pi 5 and not a high performance laptop. The bandwidth afforded by NVMe, coupled with the low resource Raspberry Pi OS and fast (for Arm) CPU makes everything feel snappy.
You can use your favorite M.2 2242, 2260 or 2280 NVMe drive inside the ArgonOne Up, but make sure you take the drive’s heatsink off, otherwise it will not fit.
USB Performance
There are a myriad of USB ports around the chassis, some are USB 3, others are USB 2. In my tests, copying a 5.9GB Ubuntu ISO from a USB 3 flash drive to the home directory of the main drive, the USB 3 ports provided 167.9MB/s transfer, versus the USB 2 ports (one USB A port on the right, and the two USB Type C ports on the left) providing 35.6MB/s.
The USB Type C charging port does not provide any USB data transfer capabilities.
Swipe to scroll horizontally
USB 2 | 35.6MB/s | Row 0 - Cell 2 |
USB 3 | 167.9MB/s | Row 1 - Cell 2 |
| Row 2 - Cell 0 | Row 2 - Cell 1 | Row 2 - Cell 2 |
Charging the ArgonOne Up
I drained the laptop’s battery to 0%, effectively until the screen went off. Luckily the laptop’s 4870mAh battery has a protection circuit so no harm will come to the cells — unlike some very early Pi laptops that I tested nearly a decade ago. I then connected the official Raspberry Pi charger and proceeded to charge the ArgonOne Up. To charge the ArgonOne Up, you will need a 45W USB Type C charger. There is a Raspberry Pi official 45W charger, and it looks identical to the 27W, which is where I made a mistake. Initially I was puzzled as to why I couldn’t charge and use the ArgonOne Up. It turns out that 27W is not enough for both. So I swapped to a 45W charger and all was good. Don’t make the mistake that I made, read the label!
Swipe to scroll horizontally
Charging (20V 1.4A, 28W) | 2 hours 6 minutes | Row 0 - Cell 2 |
Battery Life (YouTube) | 5 hours 59 minutes | Row 1 - Cell 2 |
Battery Life (Stress Test) | 4 hours 29 minutes | Row 2 - Cell 2 |

My YouTube battery test consists of playing the LoFi Girl music stream with the screen brightness and volume set to 50%. I saw an impressive 5 hours and 59 minutes of continuous use. I’m pretty happy with that. Sure there are laptops out there with much more impressive longevity, but they aren’t packing a Raspberry Pi Compute Module 5.

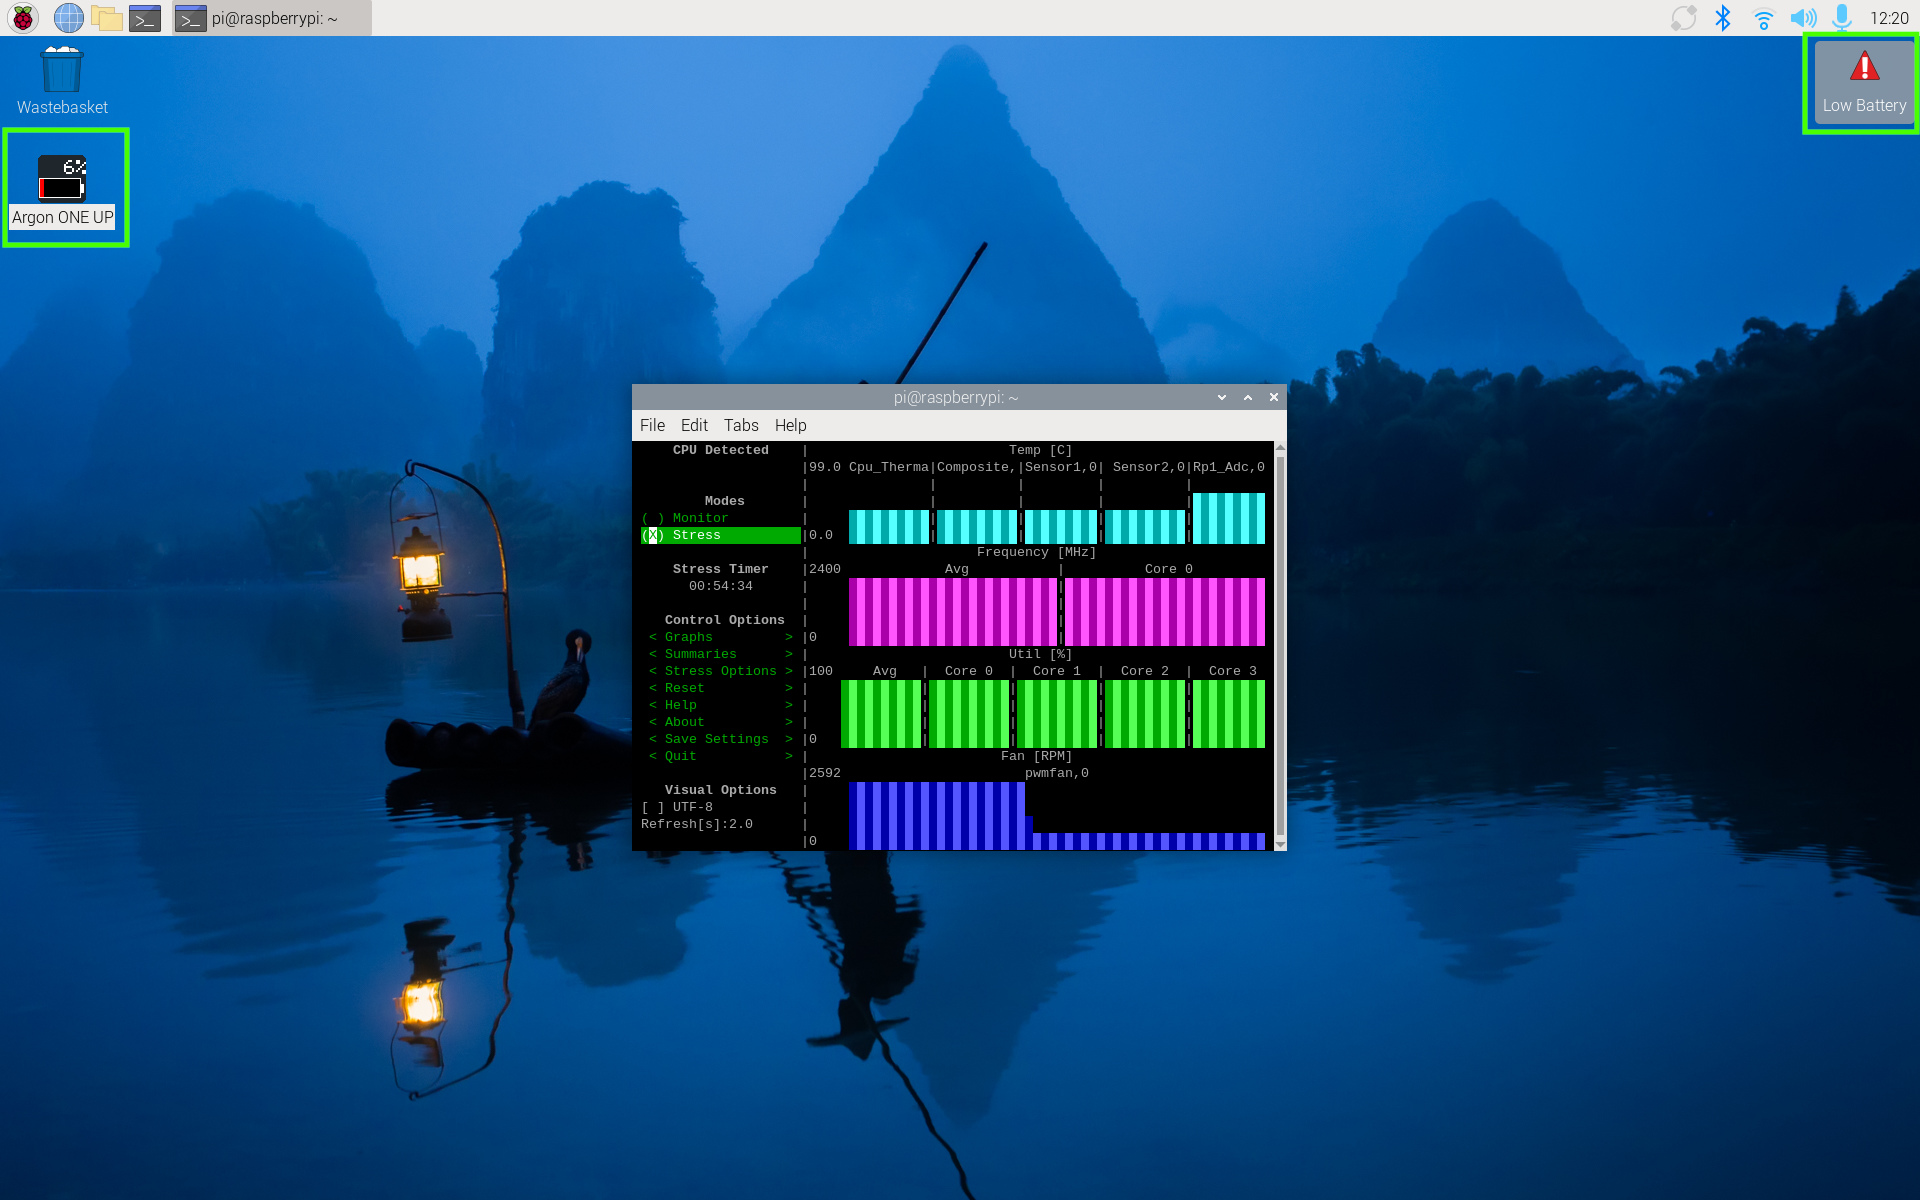
My Stress test consisted of running s-tui and stressing all of the CPU cores. I started with a full charge, and the test stopped with the unit turning itself off. I’ll admit, I was impressed with the stress test lasting 4 hours and 29 minutes. I expected it to burn through the battery in two hours, max!
Thermal Performance
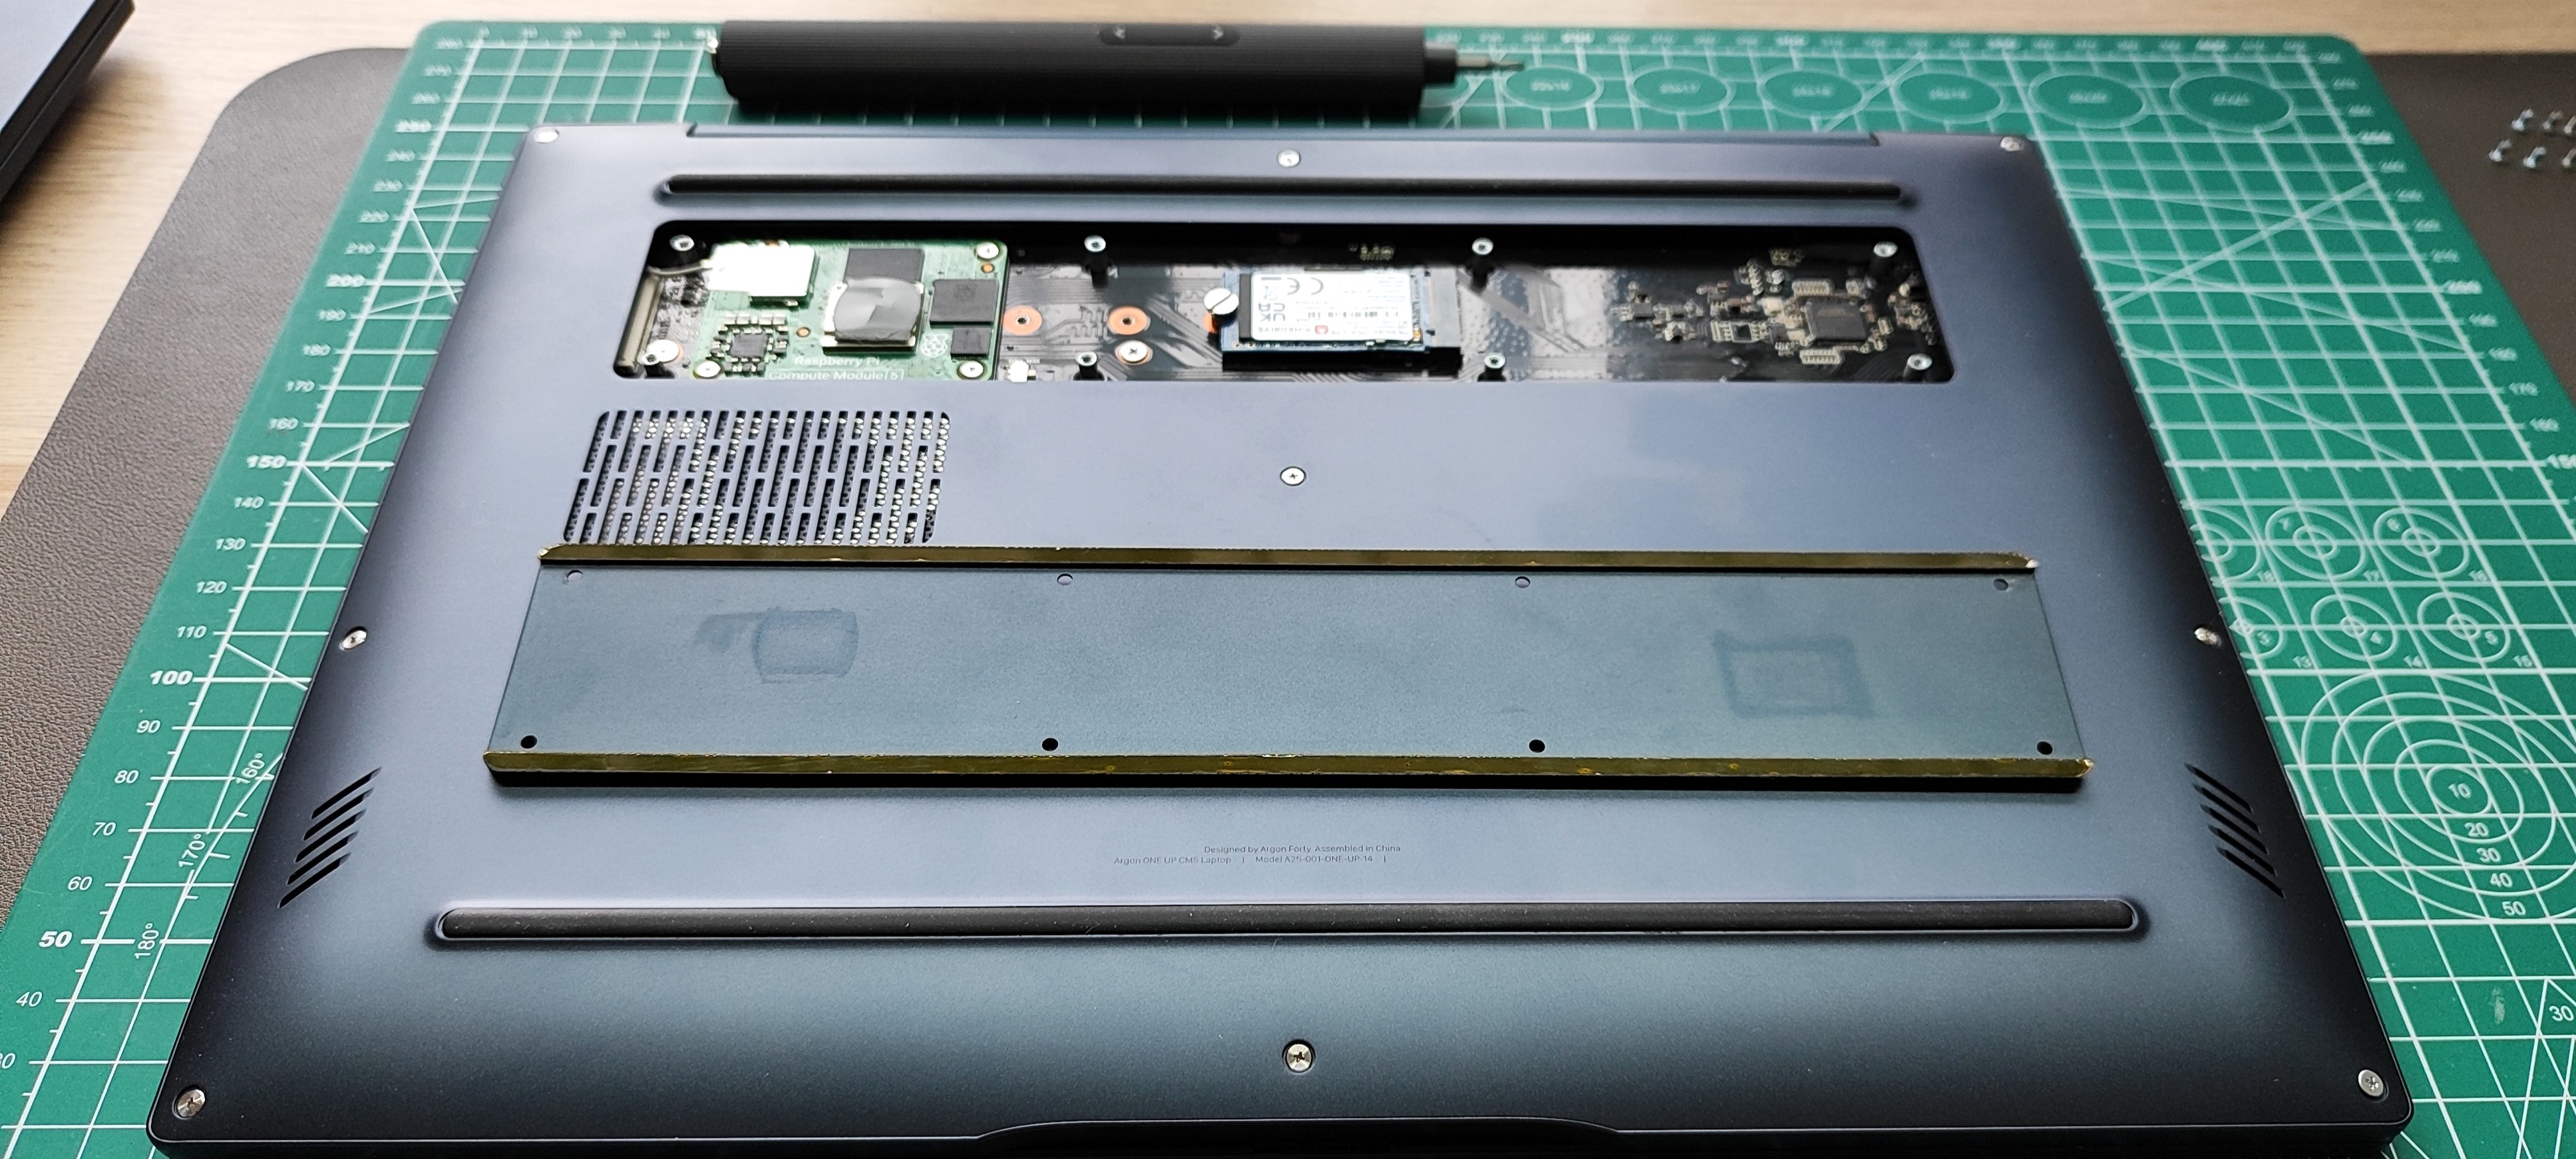
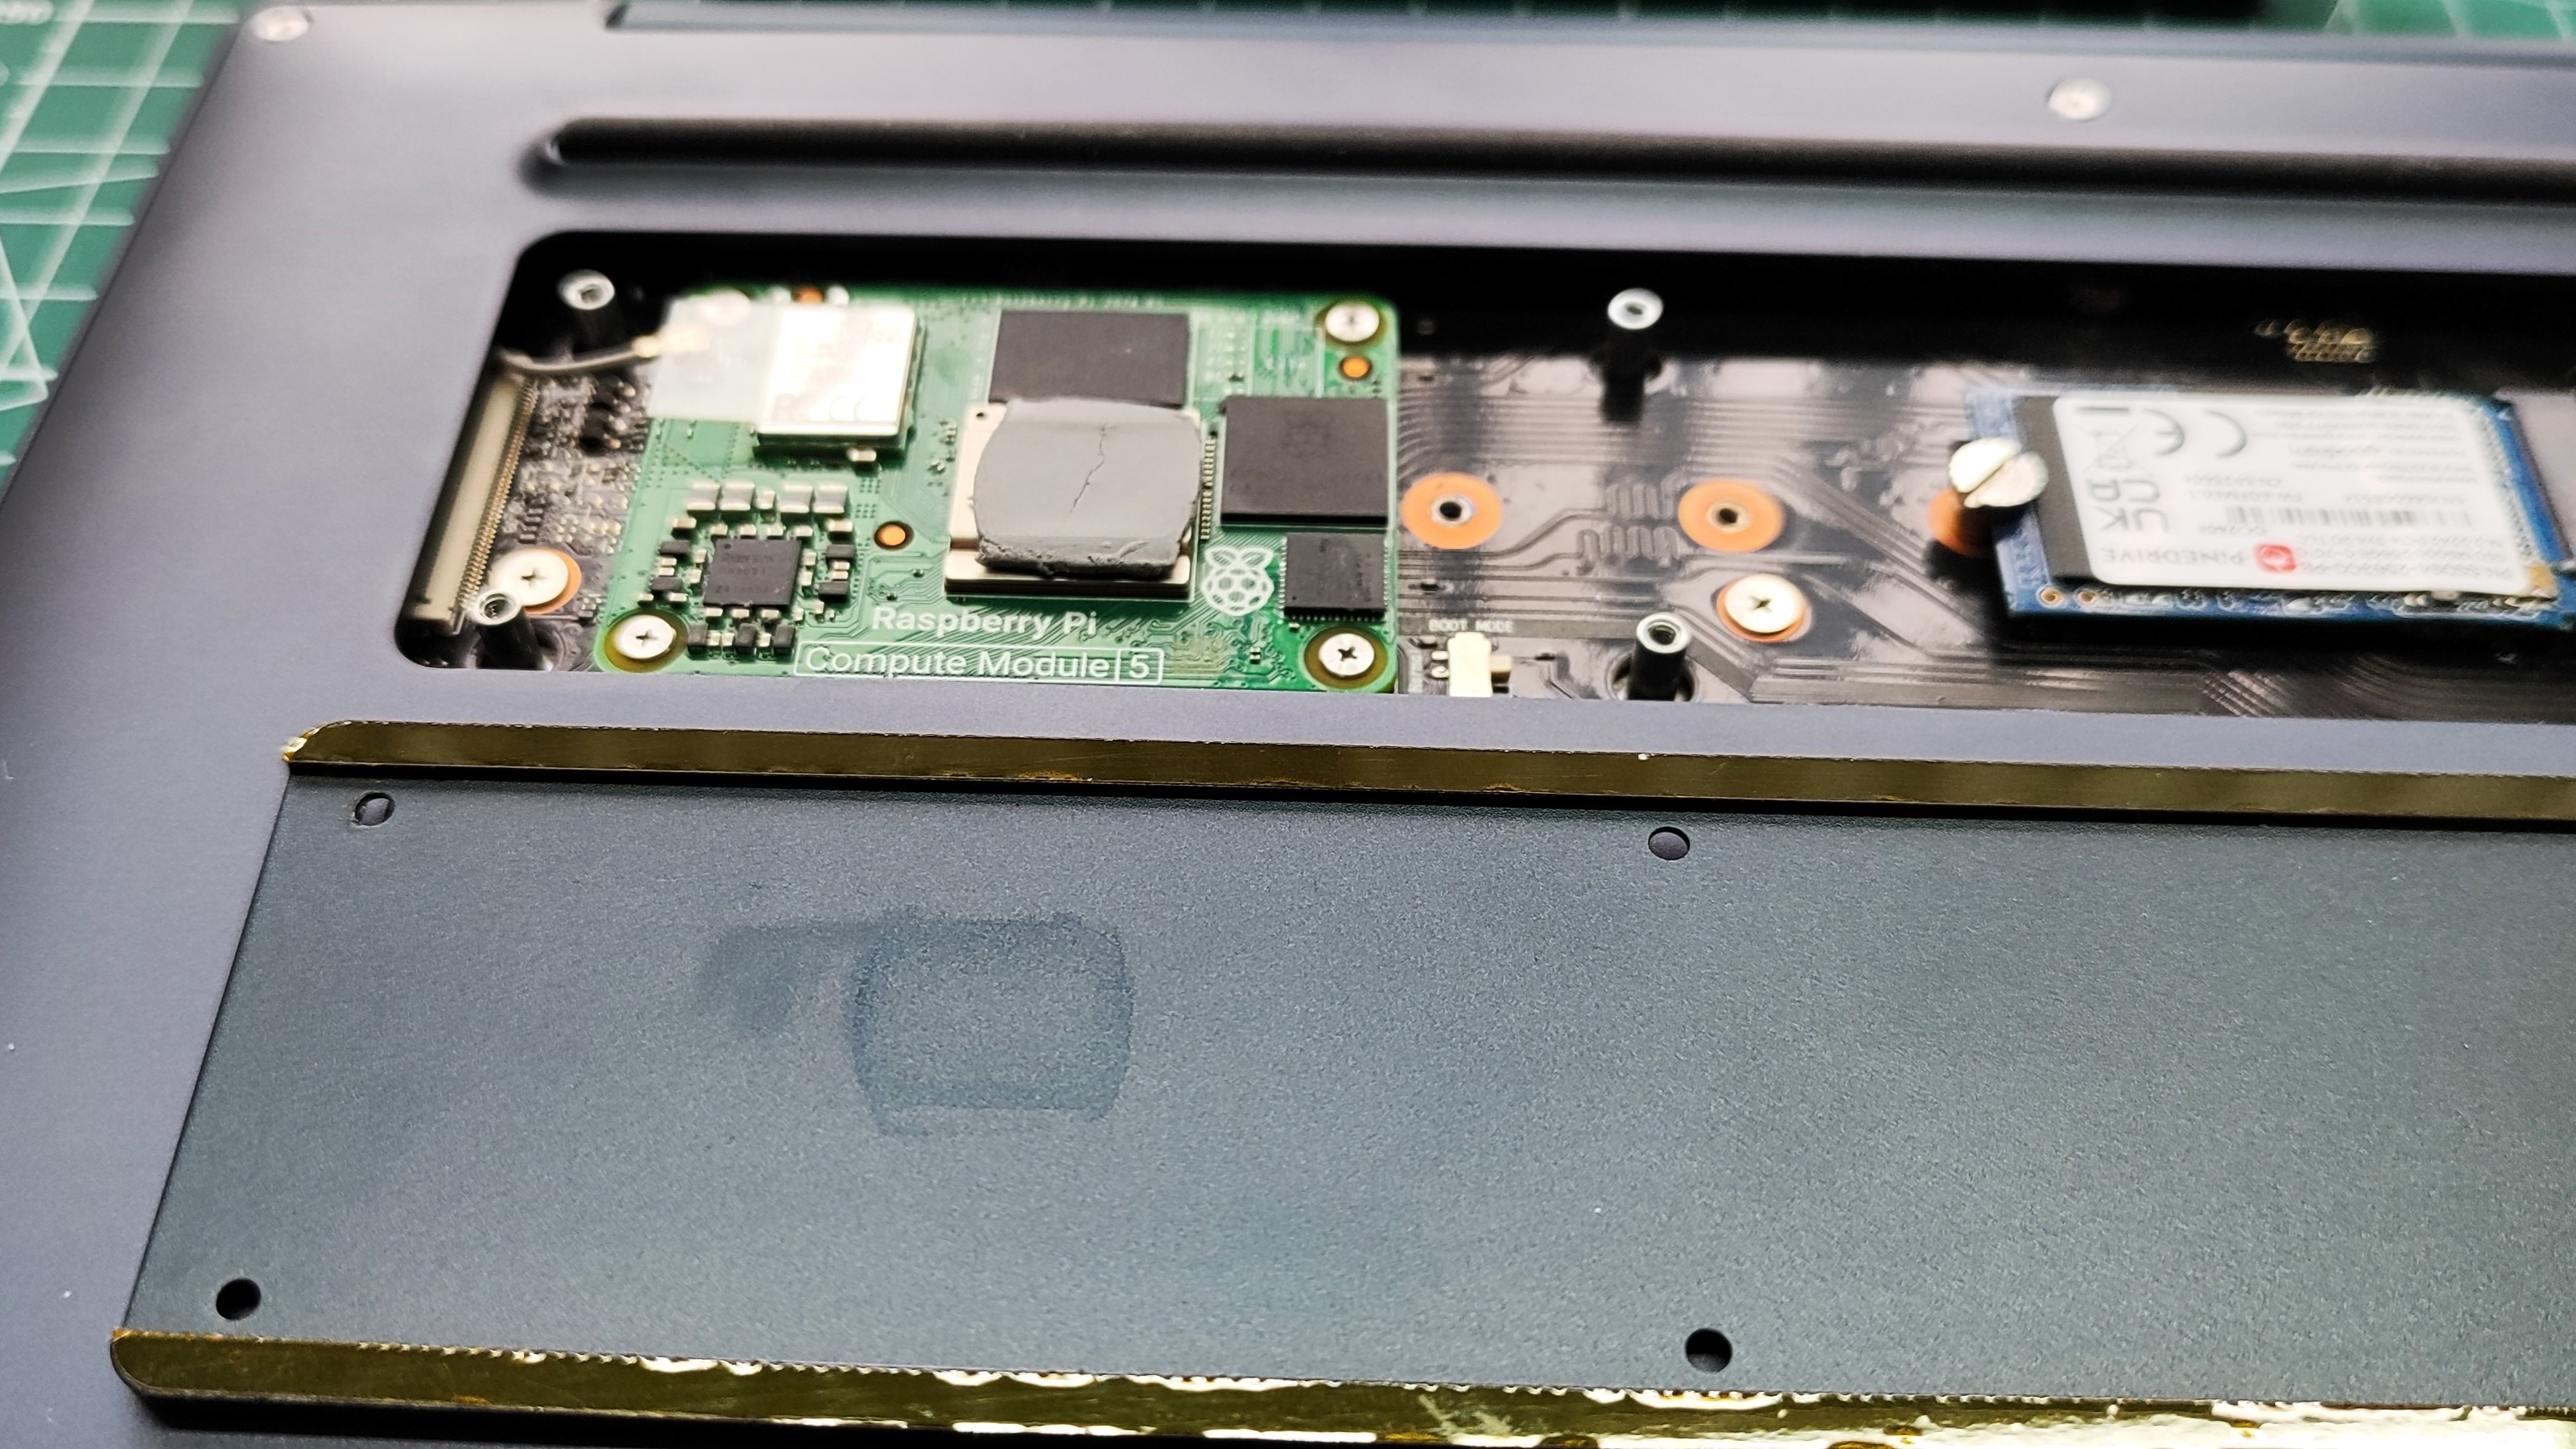
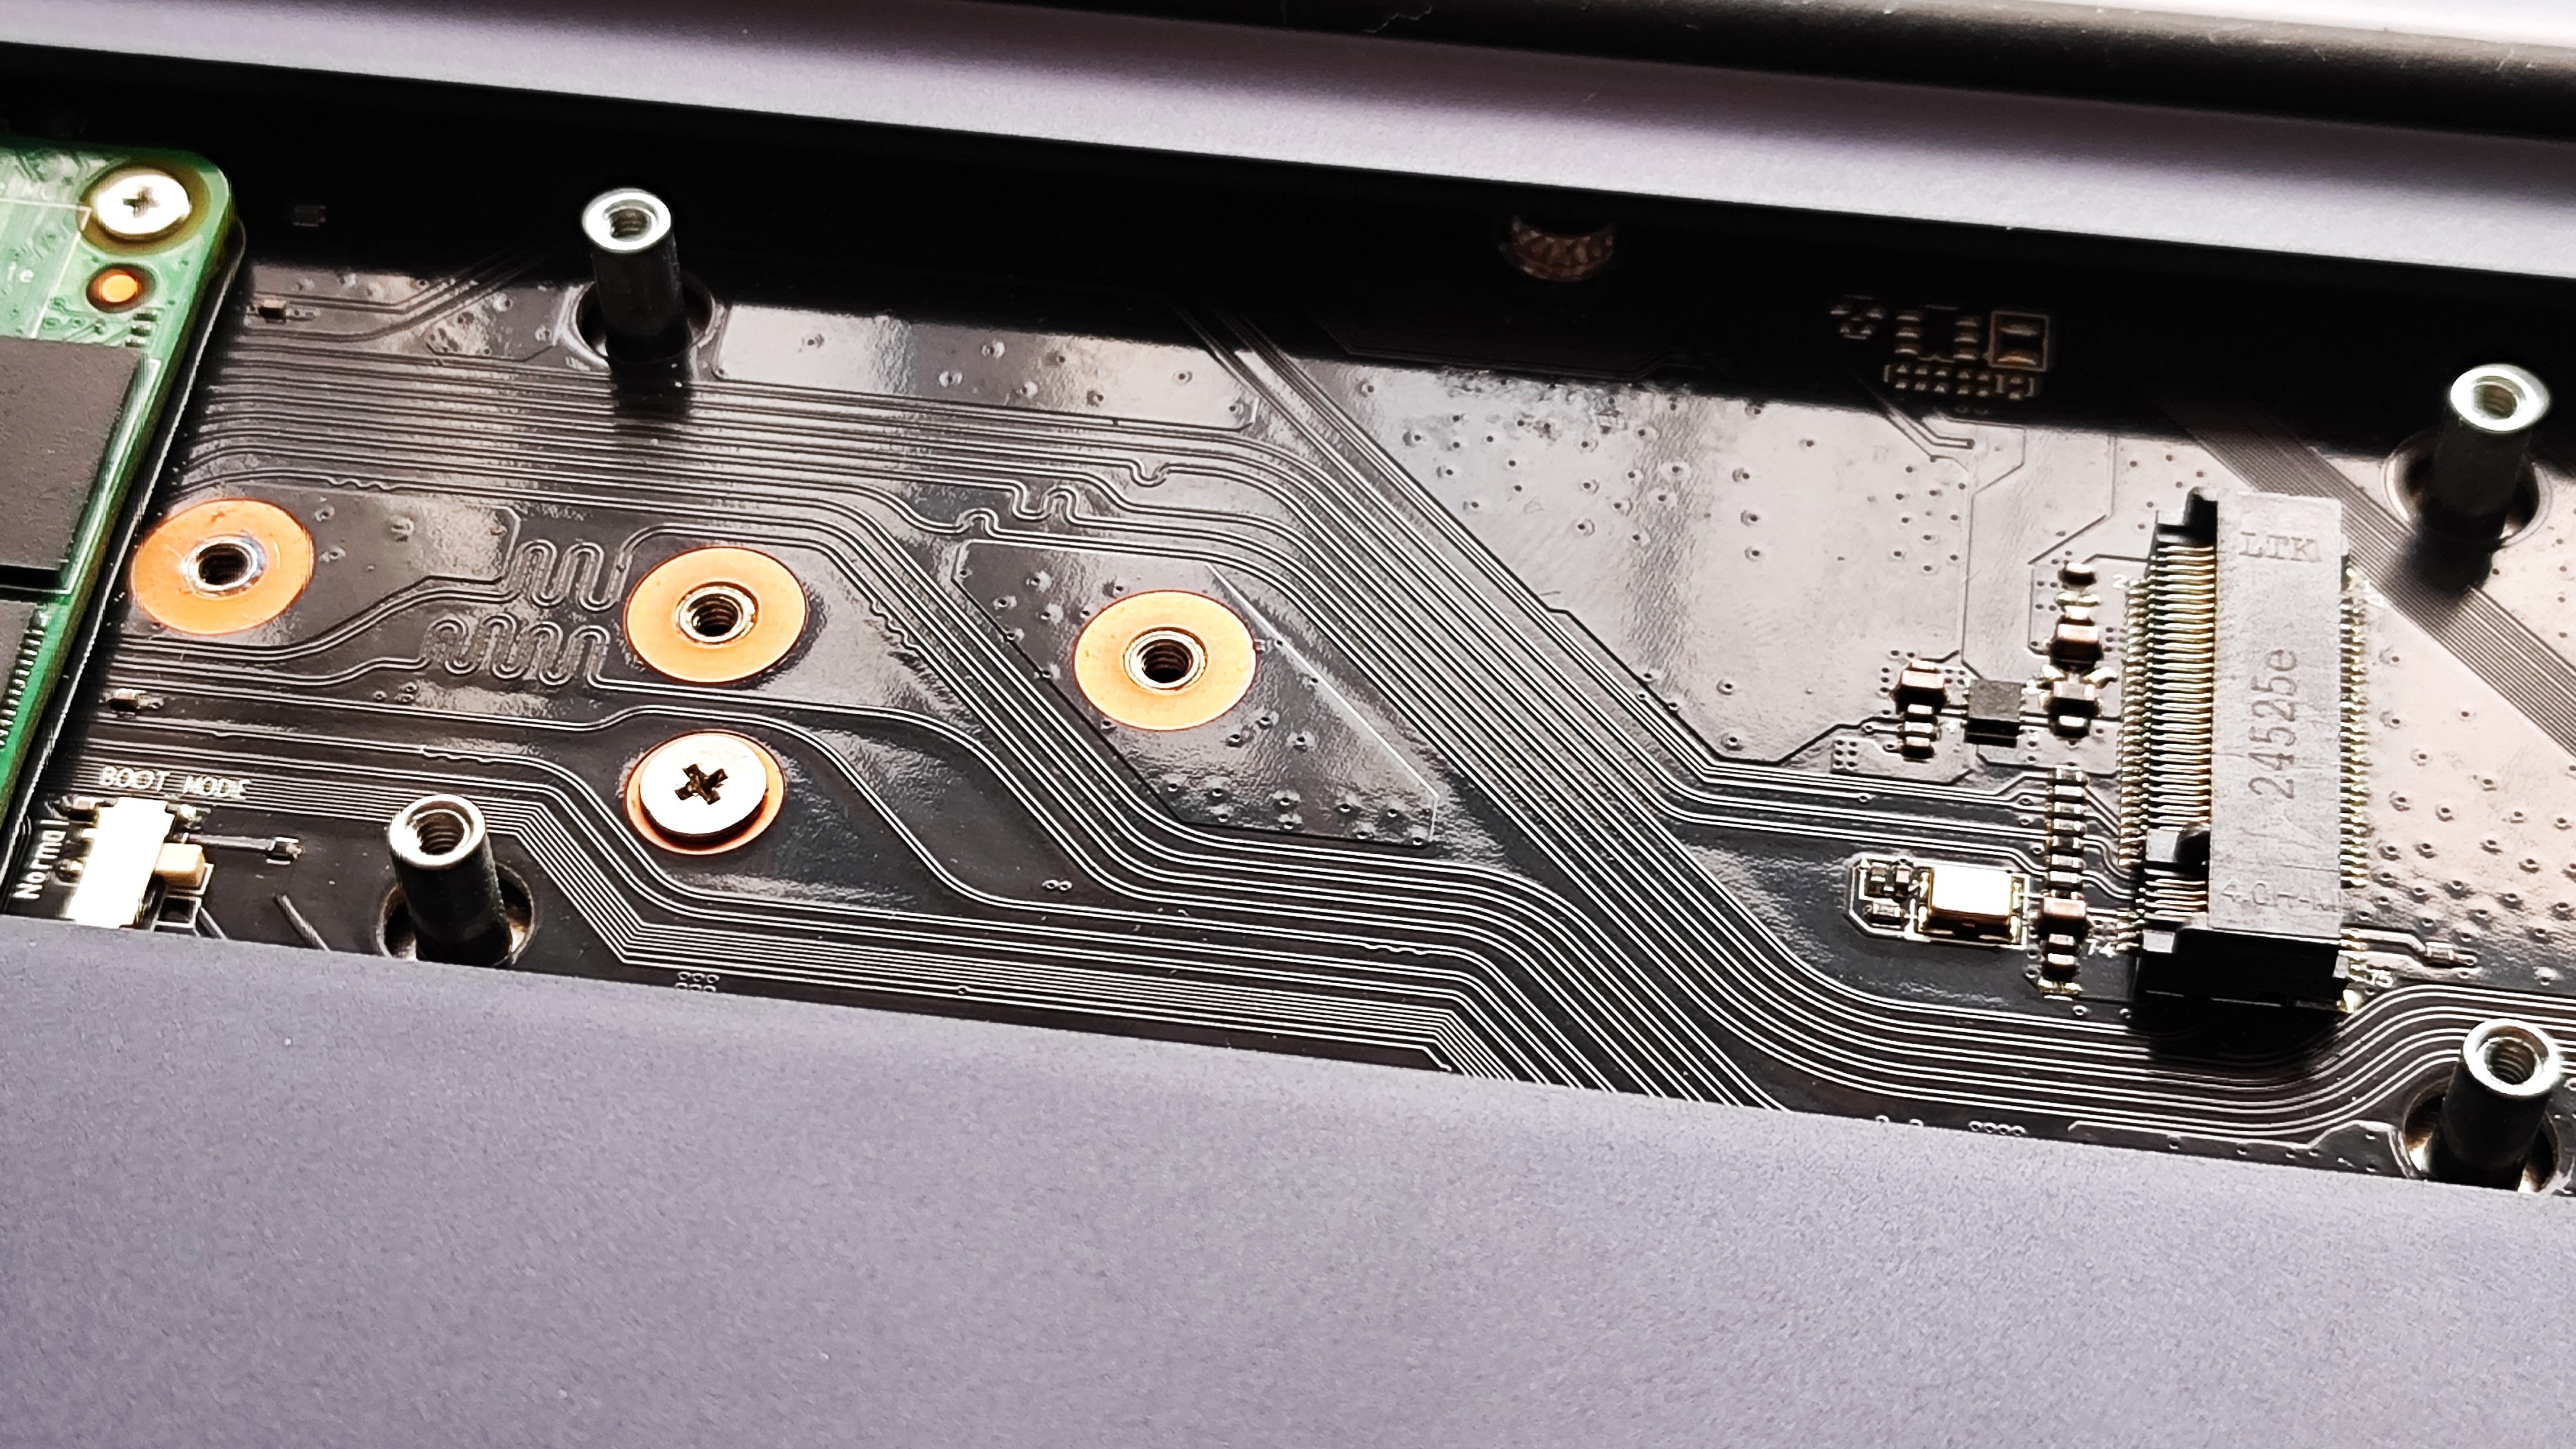
The Compute Module 5 touches a heatsink “hatch” that forms part of the underside of the ArgonOne Up’s lower chassis. I like this feature a lot, chiefly because we have direct access to the CM5 and NVMe which are upgradable parts. But also because the heatsink isn’t the entire underside of the case, which can prove difficult to remove when required. I do have one issue with the heatsink, and this may sound obvious. It gets hot. The CM5 causes a hotspot on the heatsink, and when running a multi-hour stress test, that spot hit 47.6C! The rest of the unit was 10C cooler. It was hot enough to make me go “oooh that’s a bit hot”, but prolonged contact caused discomfort rather than pain. The takeaway from this is if you are doing highly complex / stressful tasks, do them on a desk and not your lap.
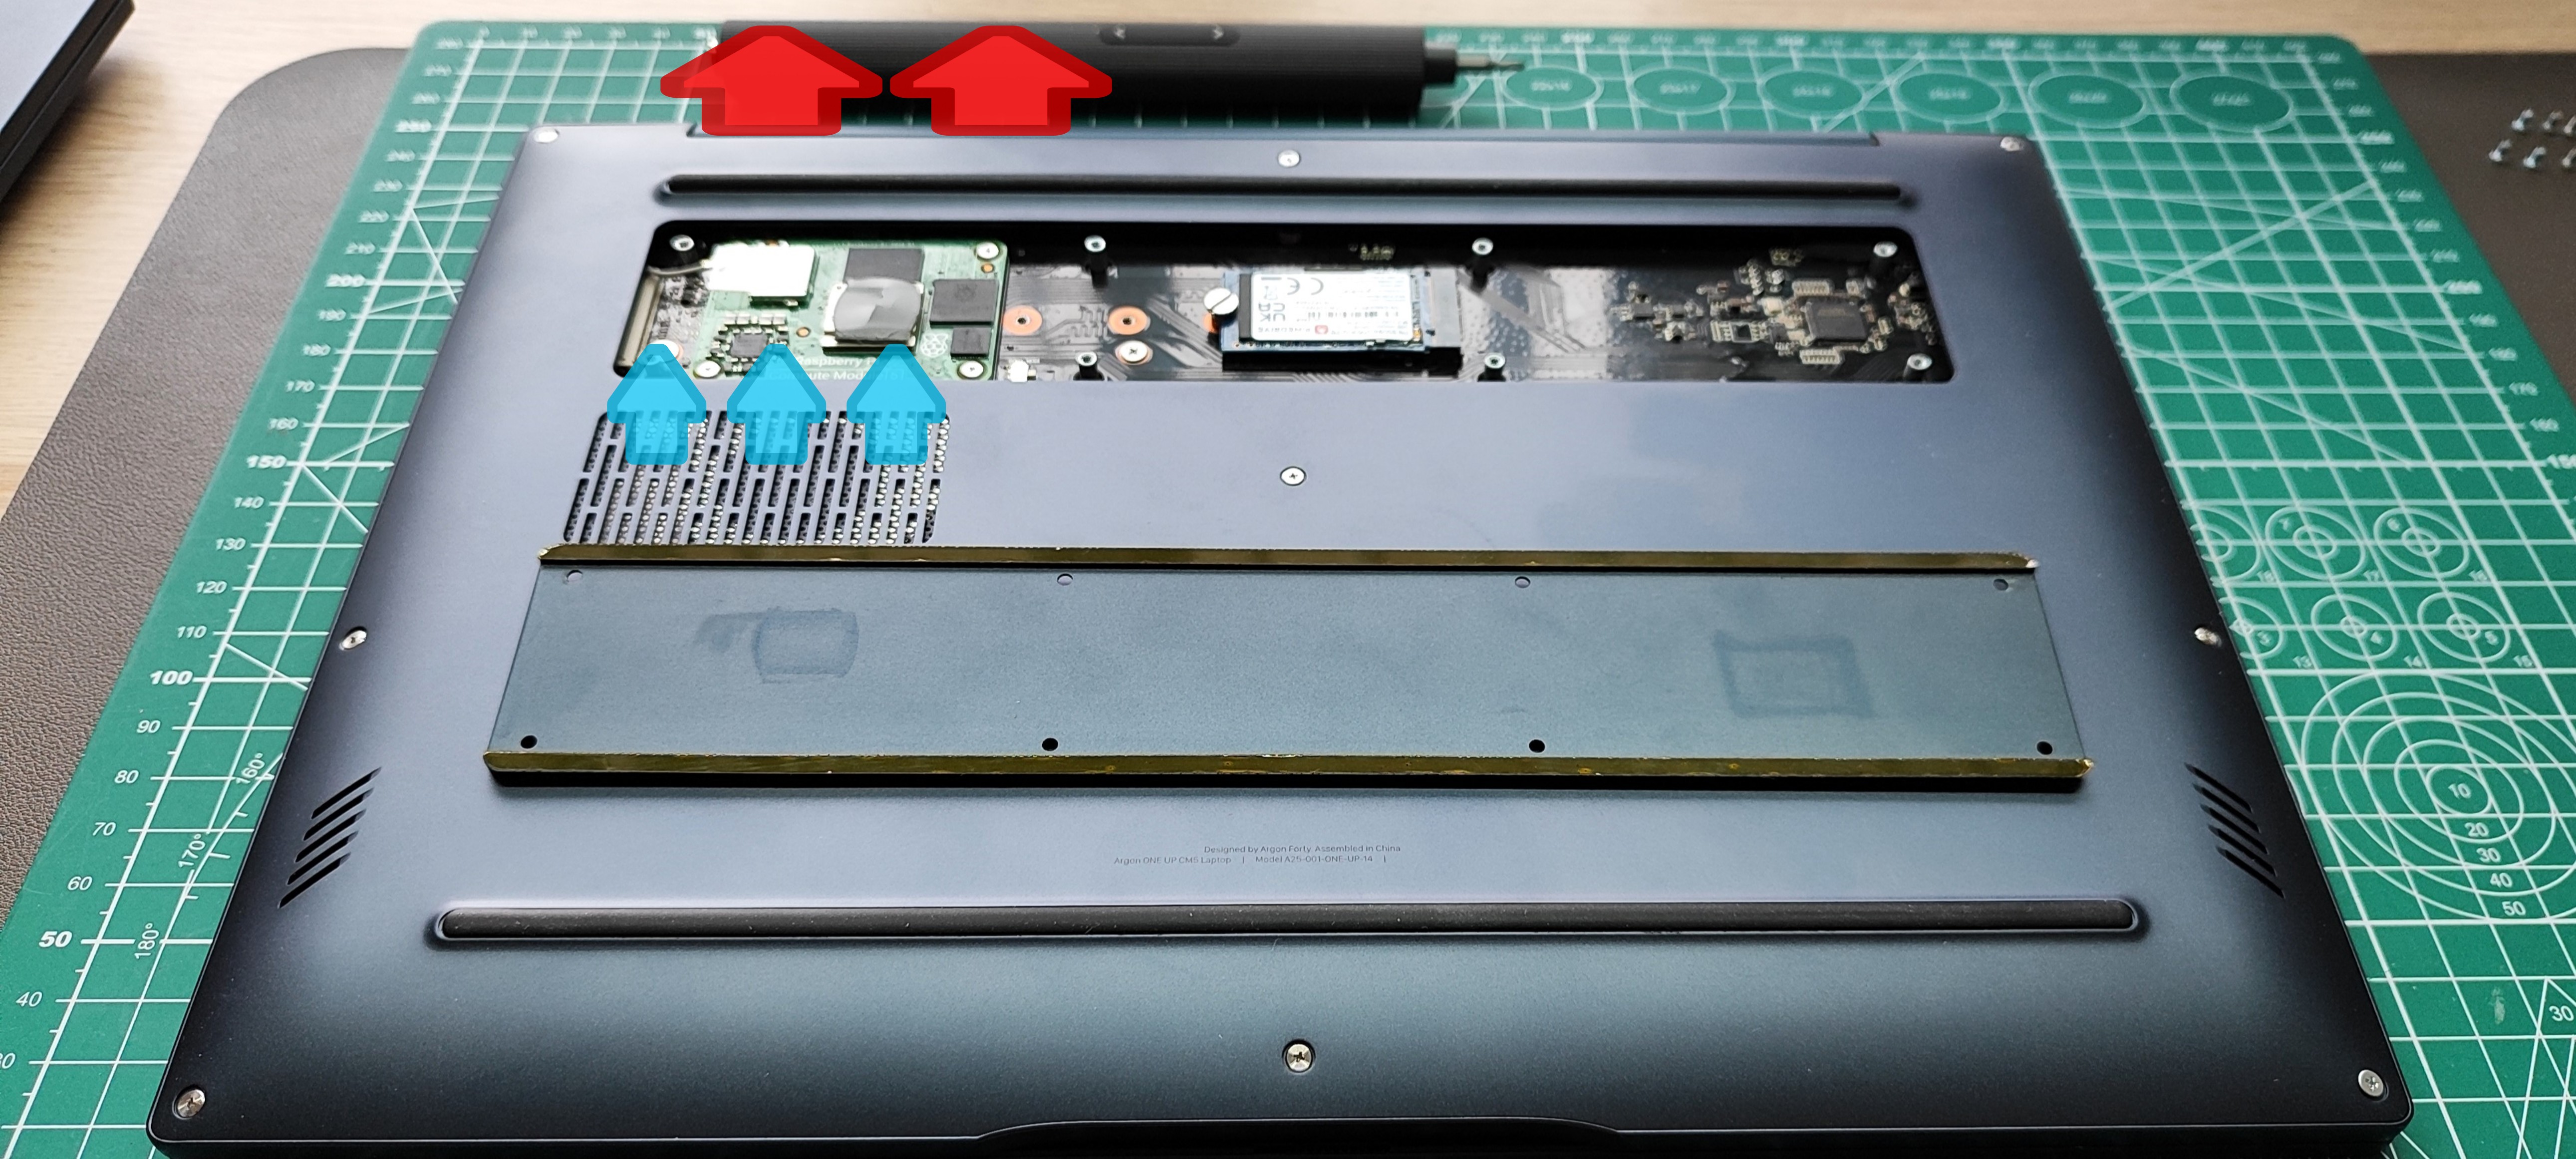
The ArgonOne Up has both passive (heatsink) and active (fan) cooling. On the underside of the unit I can see an air intake for a blower fan which blows cool air over the CM5 itself, which is also cooled by the heatsink. Where the warm air exhausts to is not immediately obvious. The exhaust vents are located on the back edge, just under the screen. You’ve got to really look for them, but they are there.
So how well does the ArgonOne Up cool our CM5? It turns out, it does a great job! Let’s dig into the raw data.
Swipe to scroll horizontally
Status | Temperature (C) | Row 0 - Cell 2 |
Stock Idle | 38.9 | Row 1 - Cell 2 |
Stock Stress | 56.5 | Row 2 - Cell 2 |
Overclock Idle | 36.2 | Row 3 - Cell 2 |
Overclock Stress | 58.7 | Row 4 - Cell 2 |
At stock speed (2.4GHz) the CPU runs at 38.9C. Putting the unit under stress, all CPU cores running at 100%, the CPU hit a high of 56.5C. Way under the 85C trigger point where thermal throttling occurs.
This got me thinking about overclocking the CM5 to see how the ArgonOne Up would handle the extra heat. Initially I went to 3GHz, but the silicon gods were not with me and so I had to reduce the overclock to 2.8GHz which is still 400MHz more than stock. The idle temperature when overclocked was 36.2C, lower than idle. Odd but not unheard of. Soldiering on, I tested the temperature under stress, and it hit a high of 58.7C, just a bit higher than stock, and still way under the thermal throttle point. It is fair to say that the ArgonOne Up can stand up to the heat!
Raspberry Pi OS is not made for laptops
Raspberry Pi OS, formerly Raspbian, is targeted at all models of Raspberry Pi and aims to be a general purpose operating system. It doesn’t claim to be the best for building servers, desktop PCs, nor laptops. Argon40 has mitigated this by including ArgonOne Up, a Python / Bash based script that monitors the system and provides basic battery, temperature and performance stats. It is a useful addition but it falls short of a seamless experience. I’d love to see better laptop integration in Raspberry Pi OS, but if Raspberry Pi LTD isn't making its own laptop, why would it put the work in? Argon40’s scripts are useful and do the job, perhaps we will see better integration once production units make it out into the wild.
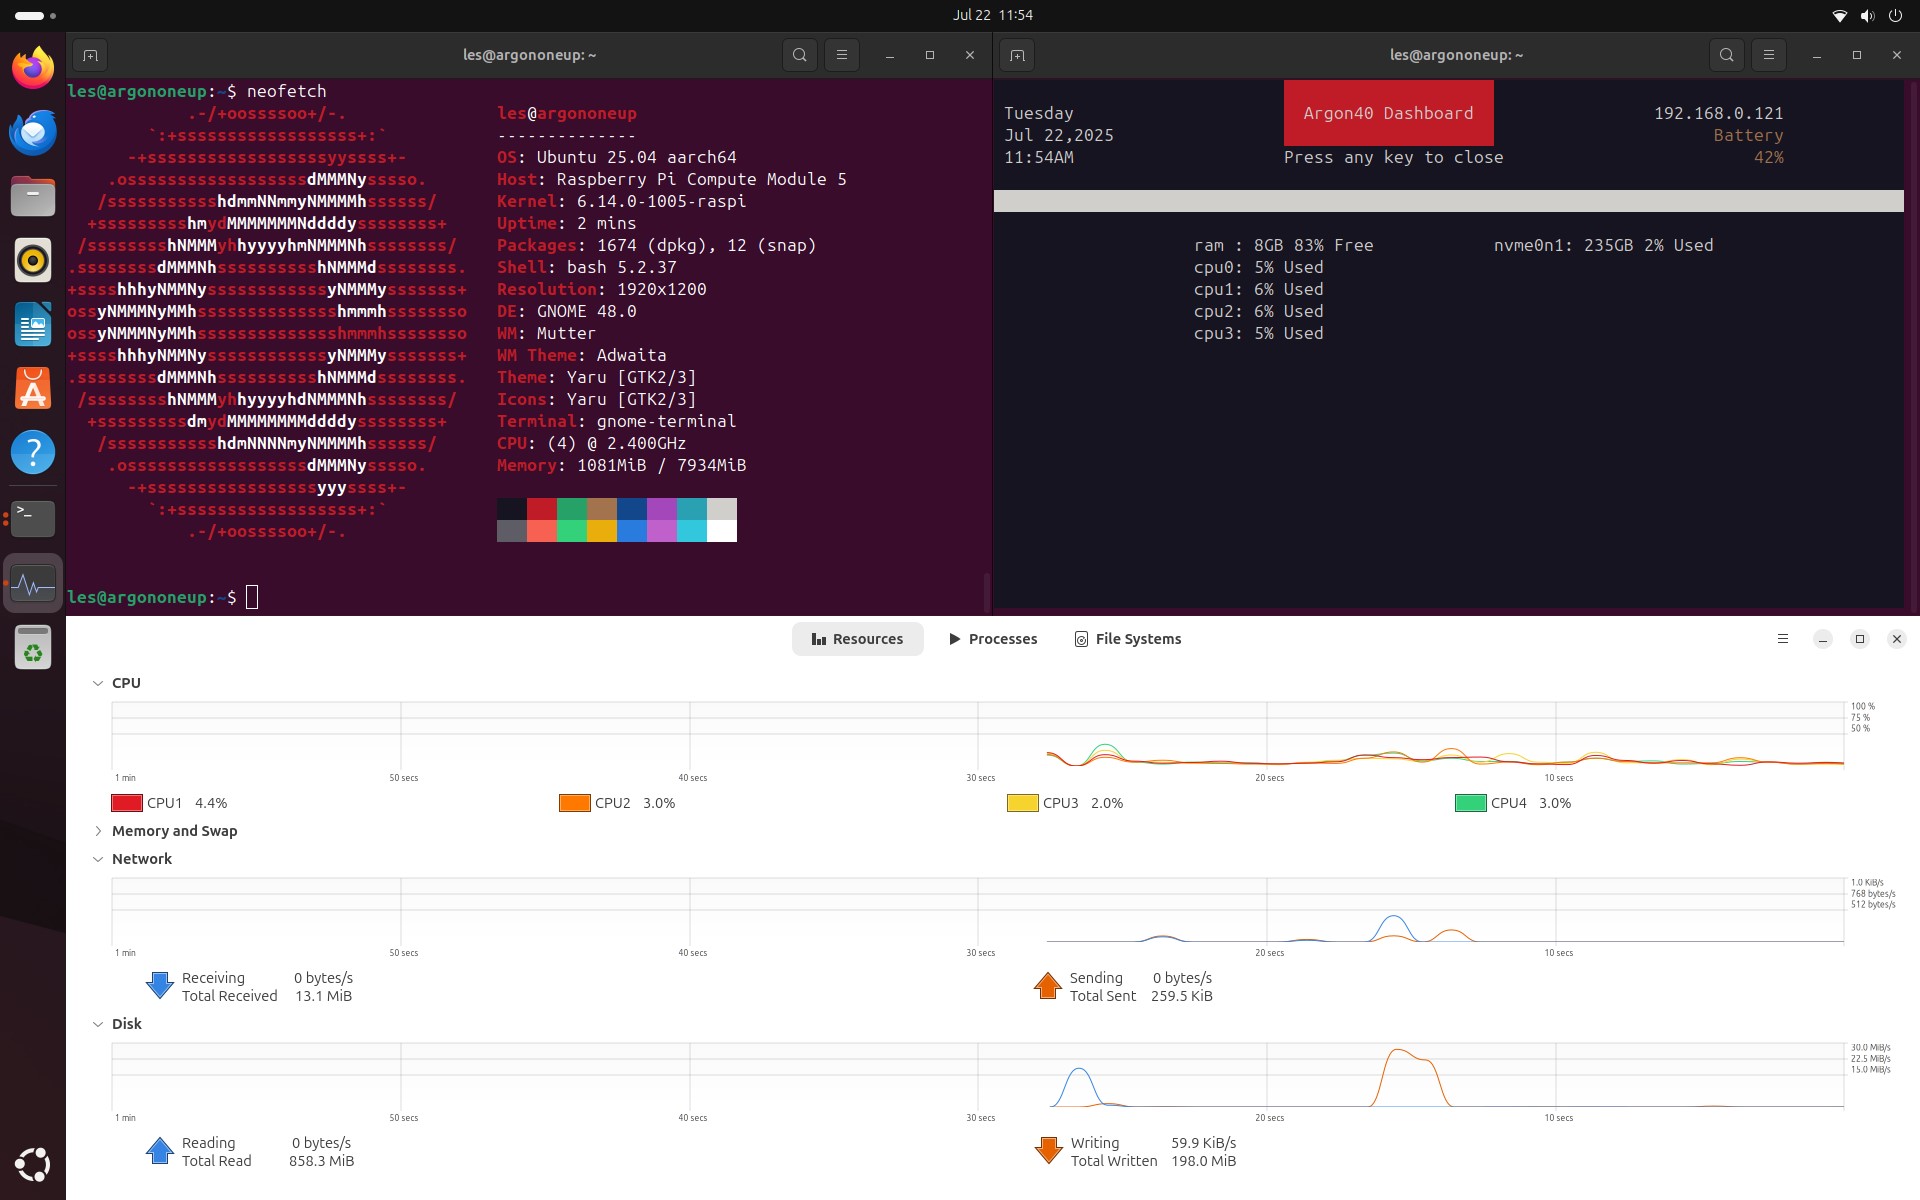
I also tried Ubuntu 25.04 on the ArgonOne Up and found it to be a rather pleasant experience. It runs well on the hardware and everything felt great, but there was a problem. No battery stats. Argon40 supplied an install script, and it worked with no errors. A quick reboot and I was left looking for the battery indicator. Nothing. I can open a terminal and get the battery stats via argon-config, but that is not the best experience. I hope that this feedback will help Argon40 ensure the software side of things is ready for retail.
The short history of Raspberry Pi laptops
This isn’t the first Raspberry Pi laptop. That honor goes to Pi-Top which ran a crowdfunding campaign over a decade ago, generating £142,901 ($192,046) for the original model Raspberry Pi B+. This laptop chassis was big and voluminous inside, you dropped a full-size Pi inside, connecting it to a power board, a custom GPIO breakout and a Li-Ion battery. The keys were mushy, the trackpad annoying and the screen was meh at best. Pi-Top had another go at Pi laptops, with a sleeker revision that was aimed at the Raspberry Pi 3. Sadly it came out >just< before the Raspberry Pi 4 was announced, and the port revisions (port placements and swapping micro USB for USB C) meant that Pi-Top’s new revision was “old hat” as users moved over to the new Pi.
There is a key difference between the Pi-Top and Argon40 laptops, the use of a Compute Module. For the uninitiated, the Compute Module (abbreviated to CM) is the same as the Raspberry Pi model that it is based on, but shrunk down so that it can be designed and integrated into your own custom PCBs. That is what Argon40 has done, designing a custom PCB that sits inside the laptop, along with an M.2 PCIe breakout for use with NVMe SSD, or even an AI accelerator card.
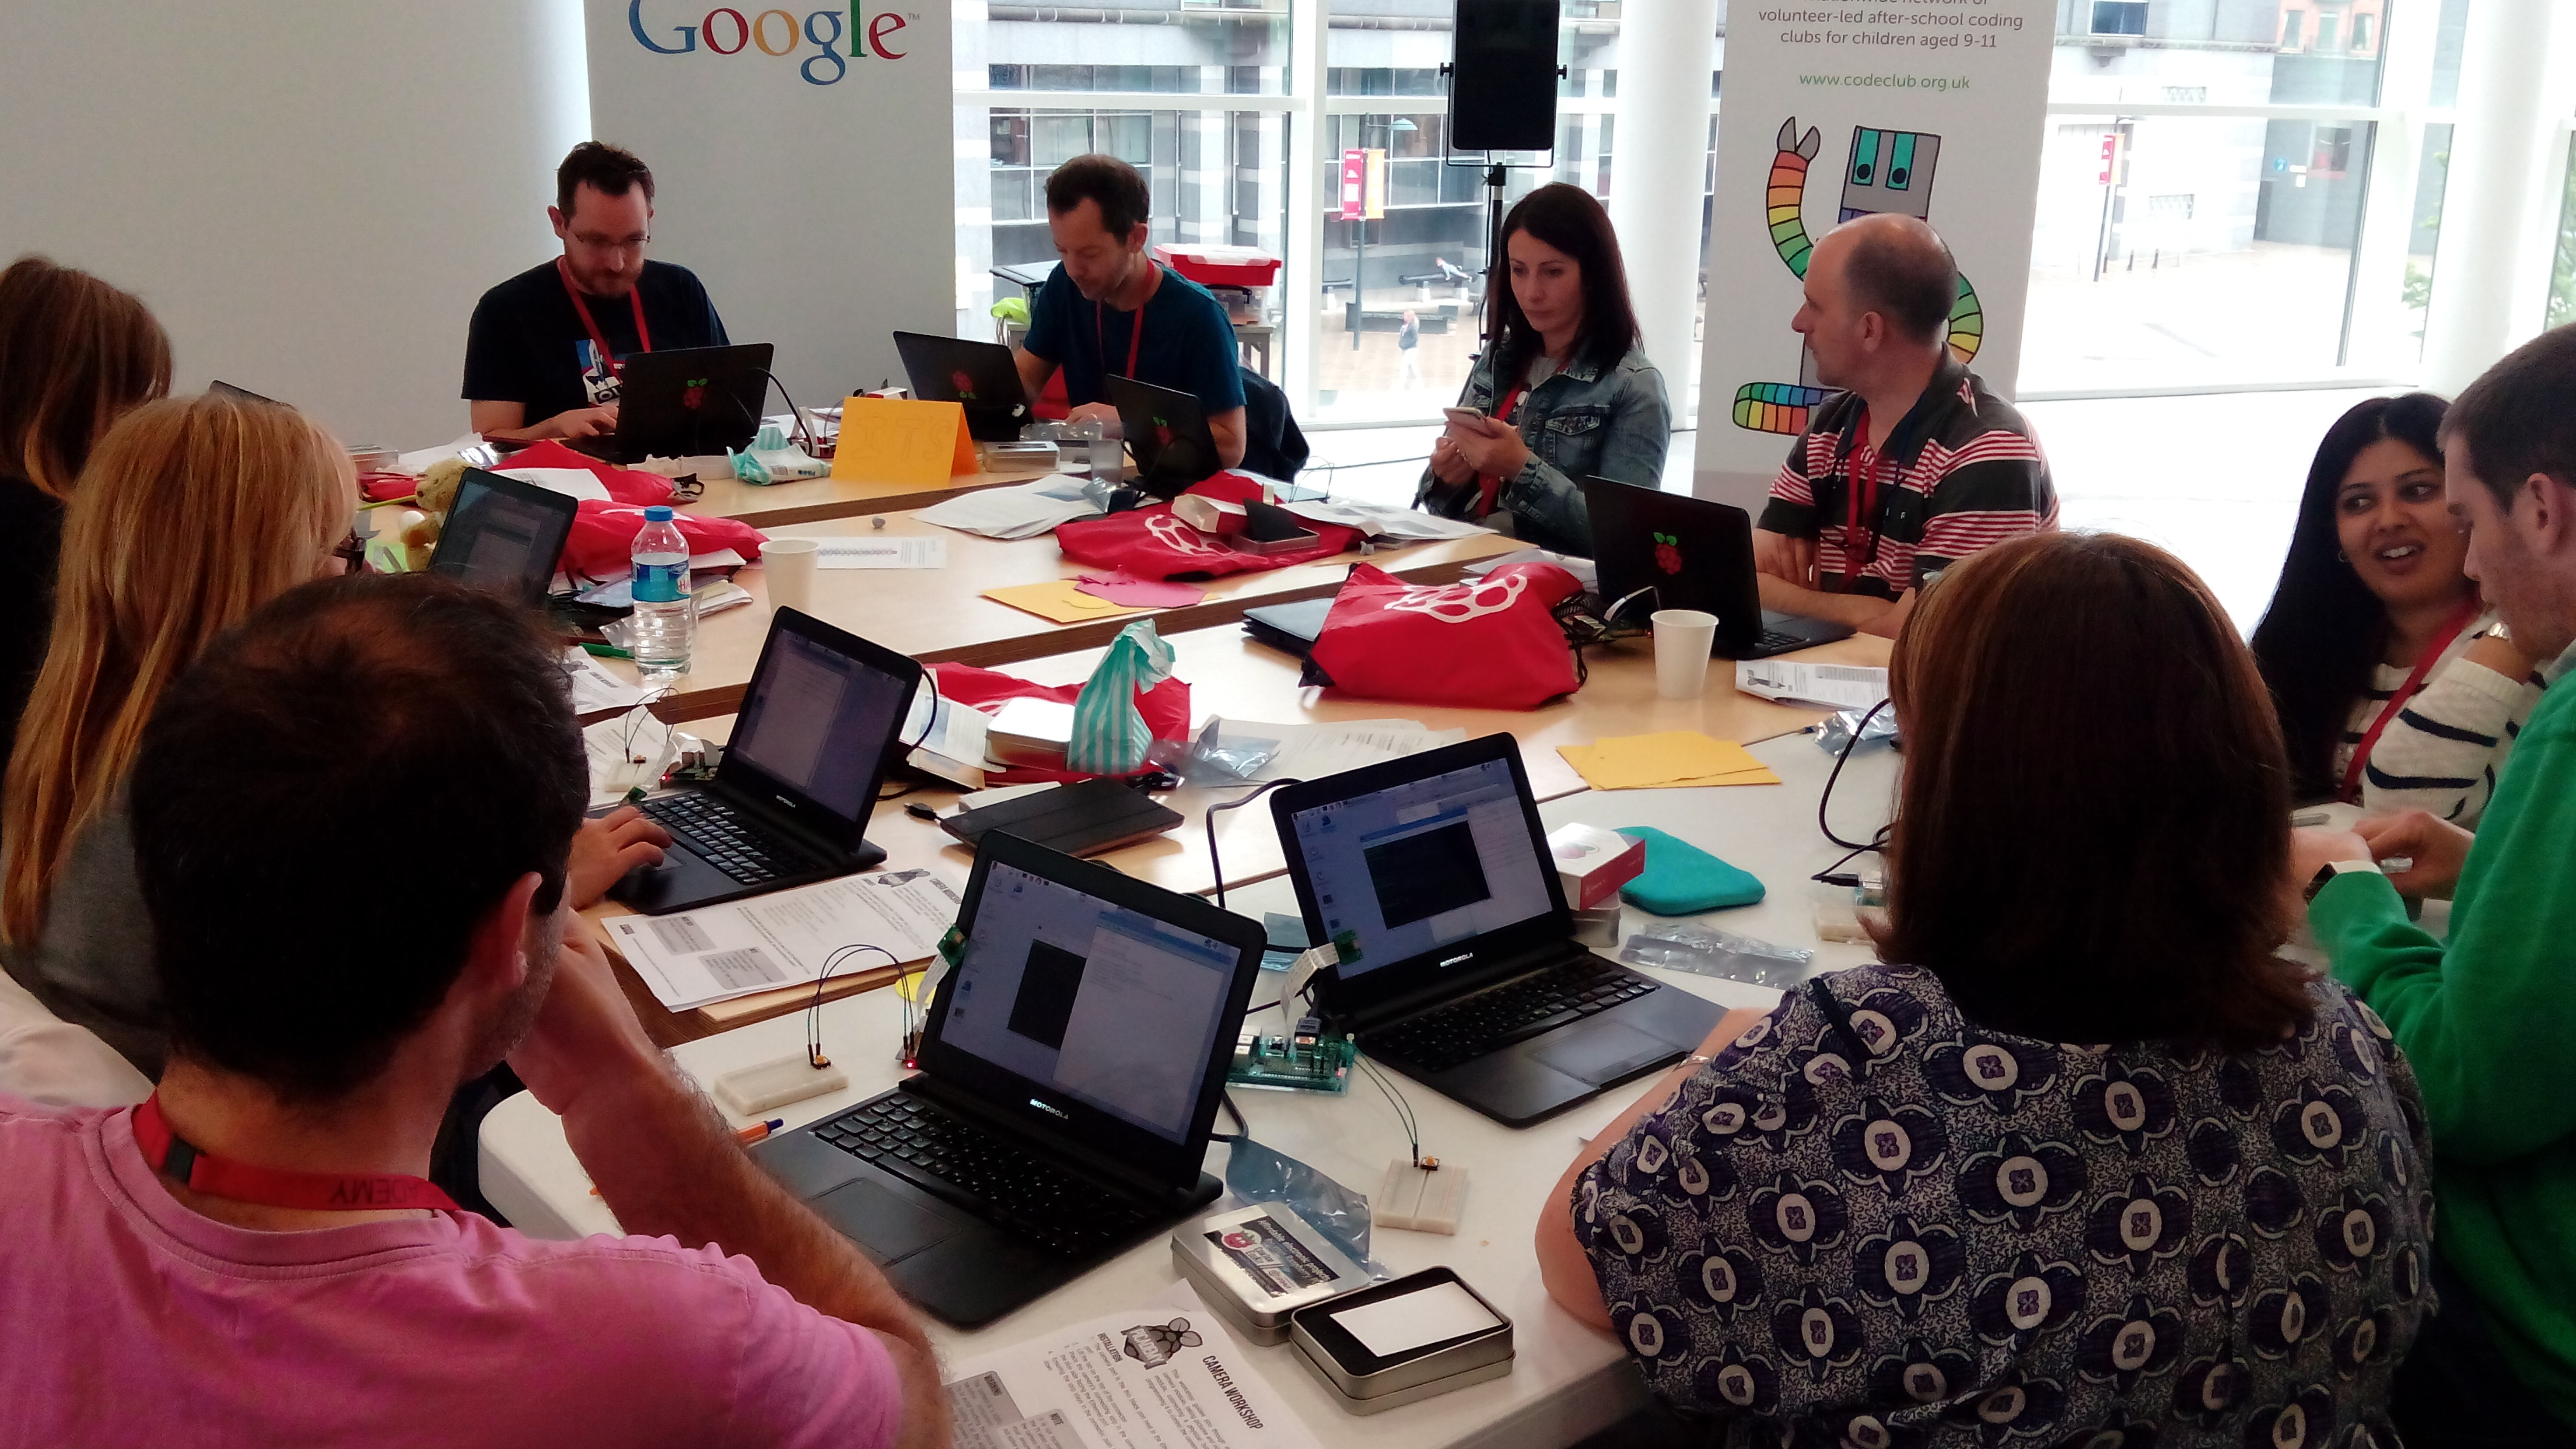
But, before Pi-Top there was another Raspberry Pi laptop. Some clever community members discovered that the Motorola Atrix Lapdock, a “laptop” that connected to a Motorola Atrix smartphone to create an Android laptop, could be hacked to work with the Raspberry Pi. Using a myriad of cables and adapters we made it work, and we truly had a portable Raspberry Pi. The idea was even adopted by Raspberry Pi for its teacher training course, Picademy. I can confidently say this because for three years I was one of the trainers and I remember the students creating excellent projects.
Alternatives?
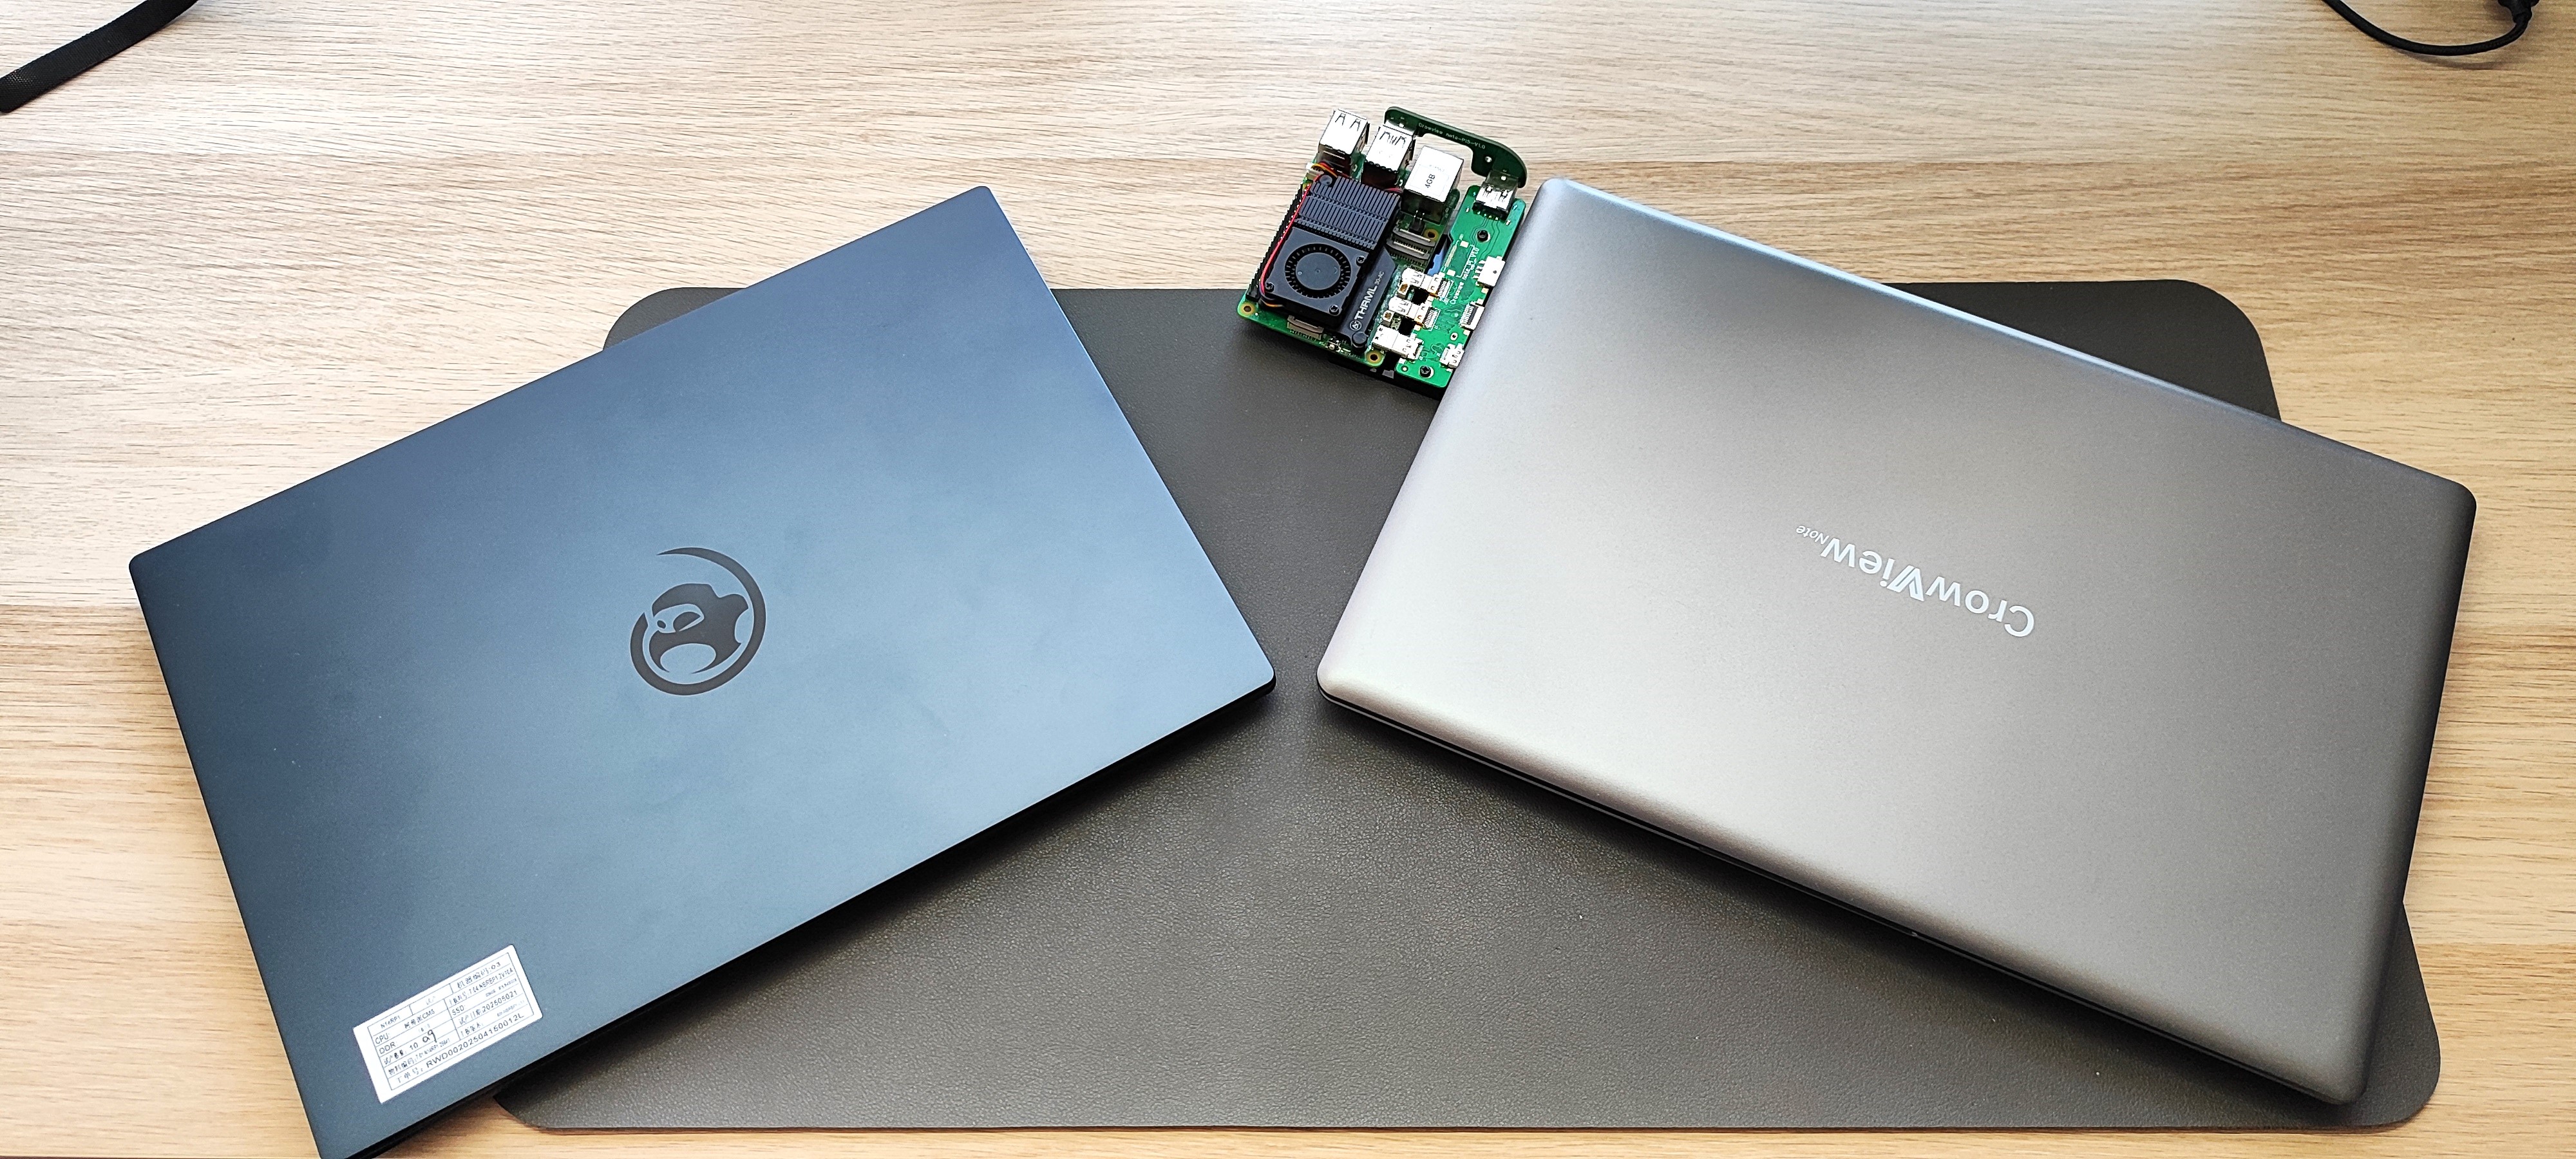
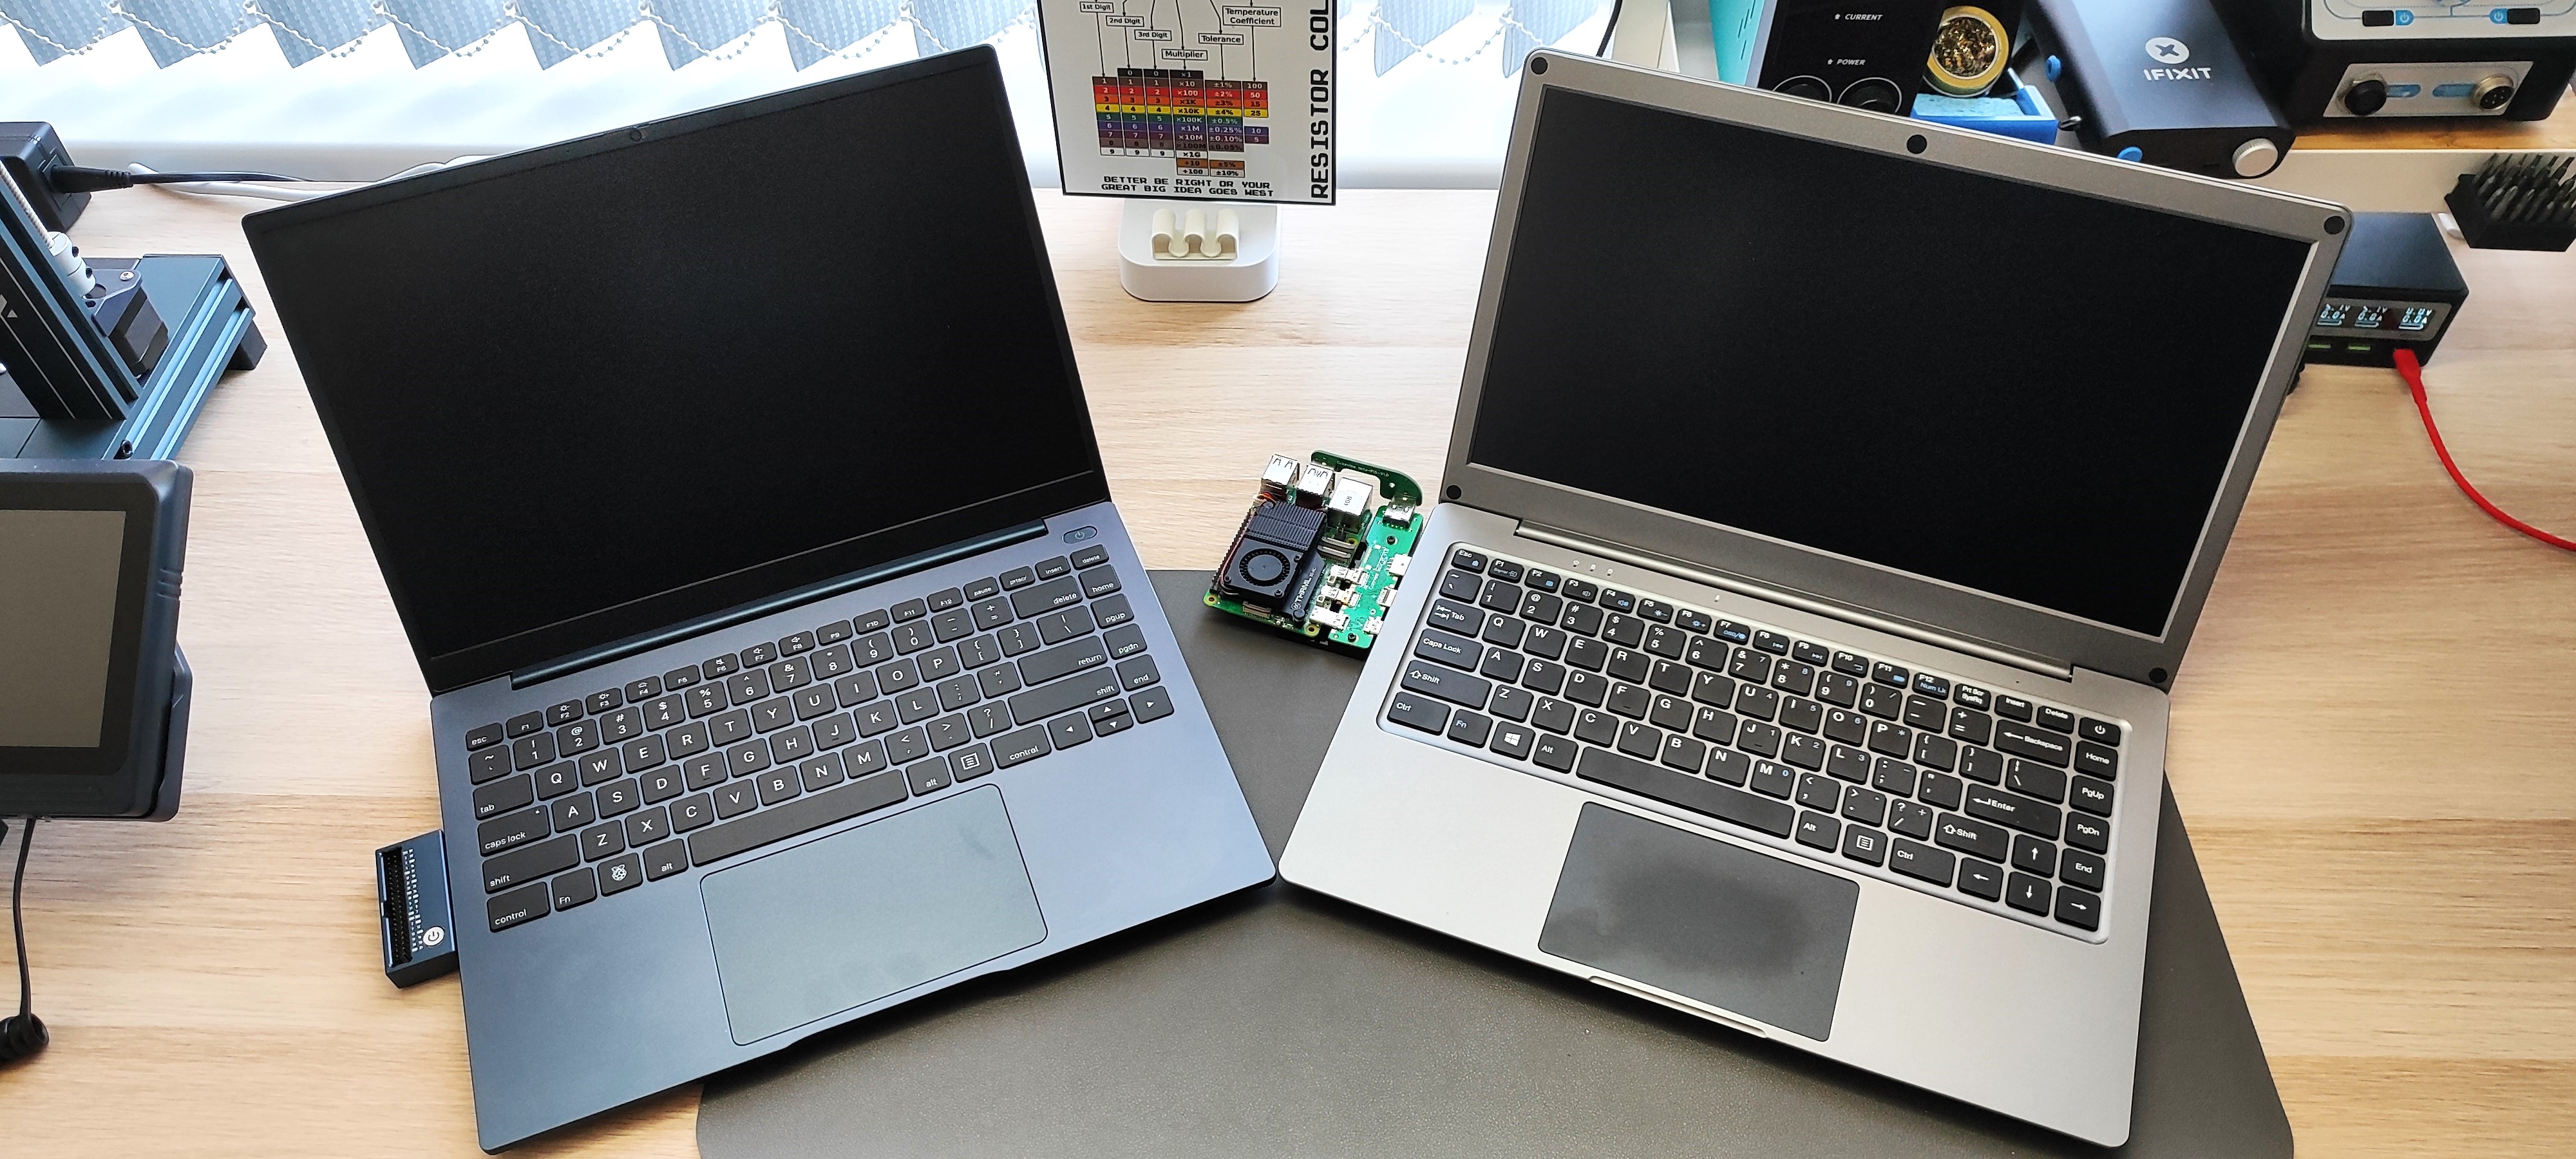
The Elecrow CrowView Note is a viable option, but it's not a self-contained package like the ArgonOne Up. your Raspberry Pi (or Nvidia Jetson) rides on a sidecar that breaks out the connections. It is a great idea, and it could be just the thing for those that want to use a Raspberry Pi on the go. but it isn’t a laptop, more of a convergence of functionality in a neat package. Battery, screen, keyboard and trackpad all in one package, with the Pi hanging off the side.
Bottom Line
The promise of a Raspberry Pi laptop has been fulfilled, and the ArgonOne Up is exactly what I have been looking for ever since I hacked together my own Pi laptop with a Motorola Atrix Lapdock back in 2014. The hardest pill to swallow is the $350 price tag. But the ArgonOne Up is a quality piece of kit, and you truly get what you pay for. Because the Argon One Up uses the Compute Module, it means that we can upgrade this laptop as our needs change. I’m fairly certain that Raspberry Pi LTD will use the same interface for the CM6.
The GPIO interface is cleverly done and most welcome. Using two USB Type C connections is completely left field. I expected a 40-pin GPIO breakout on the side of the chassis, not a standalone unit. I like the USB Type C approach, and I can see myself doing more GPIO work using this novel interface.
So the bottom line? If you’ve dreamt of a Raspberry Pi, now is the time to wake up and open your wallet.


 English (US) ·