Noctua is legendary in the PC cooling industry, often considered the “gold standard,” even if its color of choice is traditionally brown. The company’s products are known for their high-quality designs, with attention to detail. For this reason, the product we’re looking at today – Noctua’s NH-D15 G2 – was delayed many times as Noctua worked on perfecting the new fans included with this cooler. Noctua is also known for its best-in-class customer support – something I can personally attest to, having utilized its warranty service in the past, long before I ever published my first review.
The NH-D15 raised the bar for air coolers when it was originally released. Can its successor do the same, and make our list of best air coolers? The benchmarks will tell, but first, we’ll look at the unit's specifications and features.
Cooler specifications
Swipe to scroll horizontally
| Cooler | Noctua NH-D15 G2 |
| MSRP | $149.95 USD |
| Heatsink Material | Aluminum |
| Rated Lifespan | >150,000 for the included fans |
| Socket Compatibility | Intel Socket LGA 1851/1700/1200/115x AMD AM5 / AM4 |
| Base | Copper |
| Average Maximum TDP (Our Testing) | ~240W with Intel’s i7-14700K |
| Installed Size (with fans) | 168mm (H) x 150 mm (W) x 152mm (D) |
| Weight | 1525g (with fans) |
| Warranty | 6 years |
Packing and included contents
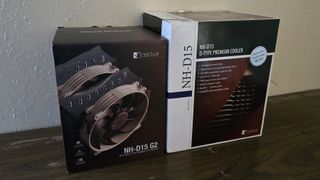
The NH-D15 G2’s packaging has improved compared to the original NH-D15, featuring a more compact box.
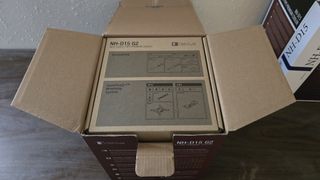
Opening the main box first reveals the accessories box included inside.
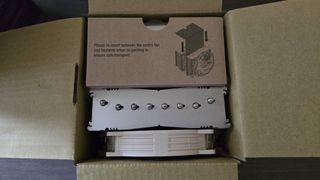
The cooler and fans are located directly below.
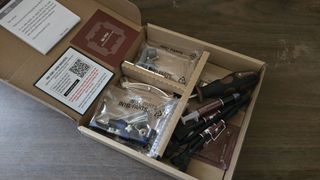
Included with the cooler are the following:
- Two NF-A14x25r G2 PWM 140mm fans
- Low-noise adapter
- NT-H2 Thermal Paste
- Cleaning wipes
- Thermal paste guard for AM5 systems
- Shim washers for LGA 1700 systems
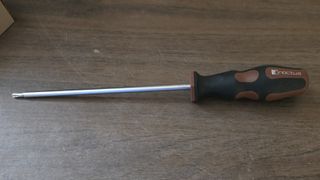
- Torx T20 screwdriver
- Noctua metal case-badge
- Dual-tower heatsink
Differences between the NH-D15 and NH-D15 G2
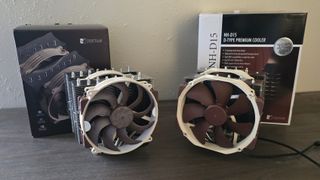
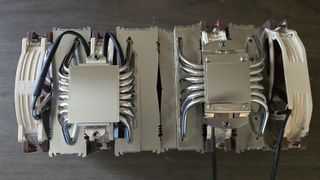
▶ More heatpipes, larger contact base
Noctua’s NH-D15 G2 has two additional copper heatpipes compared to the original NH-D15, going from six to eight, and it also features a larger CPU contact plate.
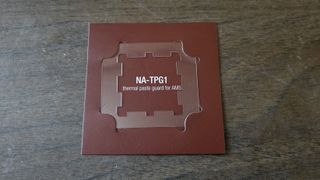
▶ Included thermal paste guard for AM5 systems
Noctua includes a thermal paste guard for AM5 systems, which can be useful if the sight of thermal paste on the side crevices of the CPU bothers you.
▶ Shim washers for LGA 1700 systems
Noctua also includes shim washers for LGA 1700 systems, which can be useful if you’re not already using an LGA 1700 contact frame.

▶ NT-H2 Thermal Paste and cleaning wipes
Also included with the cooler is a small tube of Noctua’s high-quality NT-H2 thermal paste and cleaning wipes to remove any existing thermal paste from the CPU.
▶ 3 versions of the NH-D15 G2 to best suite your needs
There are three variants of the Noctua NH-D15 G2 available for purchase. But the only difference between them is how the CPU contact plate is shaped. The standard version is designed for folks using washer shims or contact frames for Intel CPUs and on AMD CPUs if offset mounting is used.
The HBC (High Base Convexity) version of this cooler is designed for CPUs that have suffered warping from LGA 1700 socket bending. Finally, the LBC (Low Base Convexity) variant of this cooler is designed for relatively flat CPUS, such as AM4 or LGA2011.
What I don’t like about the Noctua’s NH-D15 G2
▶ Torx T20 screws and screwdriver
Noctua now uses Torx T20 screws instead of traditional Phillips screws. There are advantages to using a Torx screw, but I’m not convinced it is needed for a consumer CPU cooler.
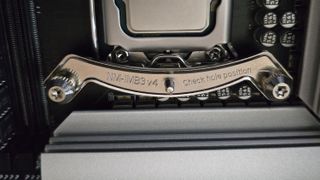
To the company’s credit, Noctua does include a Torx T20 screwdriver with the cooler. But make sure to store it in a place where you won’t lose it, otherwise you’ll have to purchase another if you ever need to remove the NH-D15 G2.
▶ Rattlegate - NF-A14x25r G2 fans
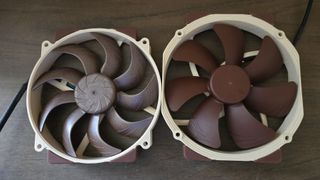
There’s more to a cooler than just the heatsink or radiator. The bundled fans have a significant impact on cooling and noise levels, as well as how the cooler looks in your case. The NH-D15 G2 was delayed many times as the company’s new fans, NF-A14x25r G2, were being developed. The new fans incorporate nine fan blades instead of seven, have stronger curves on the blades, and feature a frame made with the company’s Sterrox liquid-crystal polymer.
Unfortunately, some of the initial batch of these units suffered from production issues. This has resulted in what parts of internet have dubbed “Rattlegate”. In theory, the new fans of the G2 should operate at slightly lower noise levels than the previous generation. However, the unit I tested had noise levels slightly higher than the original NH-D15 G2. Another issue I observed is that noise levels were not fully consistent. When I recorded the maximum noise levels of the NH-D15 G2, the measurements would vary between 44.2 and 44.6 dBA.
With any other manufacturer, I would have sent the unit back to investigate for defects and request a replacement. However, I hold Noctua to a much higher standard of quality than I do other manufacturers – partly because this is the only air cooler in the world (to my knowledge) that costs a whopping $150 USD! For this reason, I’ve tested this unit with the included fans, though I suspect there is a defect in their quality.
Swipe to scroll horizontally
| Model | Noctua NF-A14x25r G2 |
| Dimensions | 140 x 140 x 25mm |
| Fan Speed | Up to 1500 RPM ± 10% |
| Air Flow | Up to 155.6 m3/h |
| Air Pressure | Up to 2.56 mmH2O |
| Bearing Type | SSO2 |
| Lighting | None |
▶ High Price
Noctua’s NH-D15 features a price higher than any other air cooler on the market – for its price of $150 USD, you could buy three or four similarly strong air coolers from Thermalright.
Testing Methodology, and how my testing differs from the competition
Since my review of Arctic’s Liquid Freezer III, I’ve been placing a stronger emphasis on testing methodology and what I feel are poor testing methods because I feel that the bar for cooler reviews on the market is rather low.
■ Poor Ambient Temperature Control
One of the biggest factors that can influence the results of a cooler is the ambient temperature. While most of the best cooling reviewers control this factor, I’ve seen some sites that list a variance in ambient temperature of up to 4C (7.2F). That results in a huge margin of error for test results, and it’s why I strictly regulate the ambient temperature while testing to 23 degrees Celsius.
■ Open Bench Testing
Some reviewers test CPU Coolers on an open test bench, the idea being to remove any variables other than the cooler. The problem with this type of testing is that it doesn’t actually represent the sort of performance you’ll see in traditional use cases.
Due to the enclosed nature of a case, the ambient temperature within will be higher than that outside – increasing the difficulty of cooling a CPU. By testing outside of a case, you’re making it a lot easier for the cooler to do its job – making weak coolers look better than they really are.
■ Thermal Plate Testing
Some test CPU coolers using a thermal plate, instead of using a CPU. This suffers from all the drawbacks of open bench testing, but also doesn’t effectively emulate the heat from a CPU. A thermal plate generally evenly distributes heat, with a low overall thermal density.
CPUs, on the other hand, have most of their heat generated in concentrated hotspots. This is much more difficult to cool. The best way to explain the difference is this: A thermal plate is like a cigarette lighter. You can take that flame and put it against your hand for a quick moment and while uncomfortable – you won’t be hurt seriously. But a CPU is like a concentrated butane torch lighter that produces a blue flame – if that touches your skin at all, you’re in for a painful time.
■ Using old CPUs to test coolers
Using an older generation CPU is certainly better than using a thermal plate, but it might not accurately represent the performance of a cooler on a more modern platform. The reason is the same: thermal density. Due to a combination of lower clock speeds and larger manufacturing processes, older CPUs aren’t quite as difficult to cool as modern Intel “Raptor Lake” and AMD Ryzen 7000 and 9000 series CPUs.
■ CPU-only testing
Testing with CPU-only loads provides good and useful information, but it doesn’t paint a complete picture of how a cooler will perform. Many workloads, and especially gaming, will stress both the CPU and GPU. To test how well a CPU’s cooler will perform in these situations, I’ve added two tests – one with a light CPU and one with a moderate CPU load, both while running a full load on the GPU.
Testing configuration – Intel LGA1700 platform
Swipe to scroll horizontally
| CPU | Intel Core i7-14700K |
| Motherboard | MSI Z790 Project Zero |
| Case | MSI Pano 100L PZ Black |
| System Fans | Iceberg Thermal IceGale Silent |
| PSU | Silverstone HELA 1300 |
There are many factors other than the CPU cooler that can influence your cooling performance, including the case you use and the fans installed in it. A system's motherboard can also influence this, especially if it suffers from bending, which results in poor cooler contact with the CPU.
In order to prevent bending from impacting our cooling results, we’ve installed Thermalright’s LGA 1700 contact frame into our testing rig. If your motherboard is affected by bending, your thermal results will be worse than those shown below. Not all motherboards are affected equally by this issue. I tested Raptor Lake CPUs in two motherboards. And while one of them showed significant thermal improvements after installing Thermalright’s LGA1700 contact frame, the other motherboard showed no difference in temperatures whatsoever! Check out our review of the contact frame for more information.
LGA 1700 Installation
The installation of the cooler is largely unchanged from previous Noctua products, the main difference being the use of Torx screws instead of traditional Phillips screws.
1. Place the CPU bracket against the rear of the motherboard. Place the blue standoffs on the front side of the motherboard.
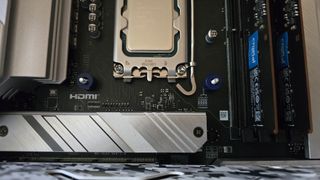
2. The next step is to place the mounting bars on top of the blue standoffs and secure them with the included screws.

3. Next, apply the included thermal paste to the top of your CPU. If you’re not sure how to do this, we have a guide you can read for more details.
4. Press the dual tower heatsink against the mounting bars, and secure it using the included screwdriver.
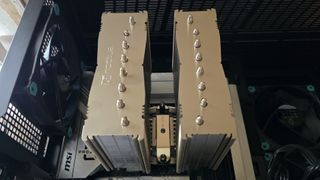
5. Attach the fans using the included fan clips.
6. Finally, connect the fans to the included PWM splitter cable and connect the splitter to your motherboard.

 1 month ago
35


:quality(85):upscale()/2024/10/17/848/n/1922729/9dece426671163b35dcb11.60305022_.jpg)


 English (US) ·