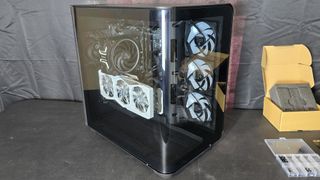
The latest PC case on our test bench is the MSI’s MEG Maestro 700L PZ, a premium chassis intended for high-end builds where price is not a concern. It features a fishbowl-style design that uses a single wrap-around piece of tempered glass for the front and includes everything needed for a vertical GPU setup – in fact, that’s the default configuration!
Will the Maestro 700L make our list of best PC cases? Let’s take a look at the specifications of the PC case from MSI, then we’ll go over the features and wrap up our review with thermal and acoustic benchmarks.
Product Specifications
Swipe to scroll horizontally
| Motherboard Support | E-ATX (up to 305 x 280 mm), ATX, Micro ATX, Mini-ITX |
| Color | Black |
| Type | Mid-tower |
| Case Dimensions | 470mm (D) x 474mm (H) x 300mm (W) (18.5 x 18.66 x 11.81 inches) |
| Drive Support | Up to two drives of either 2.5” or 3.5” size |
| PCI-E Expansion Slots | 7 |
| Fan Support | Up to 10 fans |
| Pre-Installed fans | None |
| CPU Cooler Clearance | 170mm (6.69 inches) |
| GPU Clearance | 430mm (16.93 inches) |
| PSU Length | 230mm (9.06 inches) ATX |
| Radiator Support | Up to three 360mm radiators |
| MSRP | $399.99 USD |
Features of MSI’s Maestro 700L PZ Computer Case
▶️ Build Quality
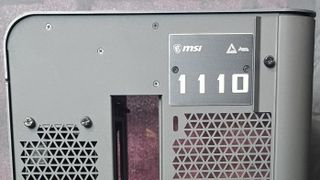
The overall build quality is extremely sturdy and solid, as should be expected for a case with a $399.99 price tag. The outsides of the unit are etched steel, which really gives a “premium” feel to the unit. Each unit has a backplate identifying the number of the unit; our sample was production unit 1110.
▶️ Side view and customization options
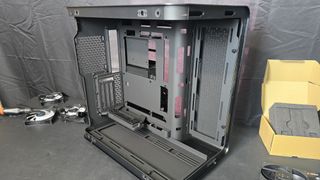
Looking at the side of the unit, a few features stand out. This case supports both traditional and back-connector motherboards like MSI’s Project Zero, which place most connections on the back side of the motherboard to reduce cable clutter.
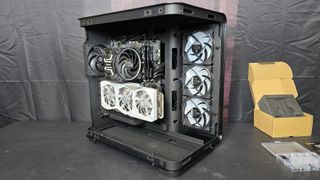
The next thing that’s interesting is that the case arrives configured for and with all components necessary for vertical GPU installation – including a PCIe 4.0 riser cable.
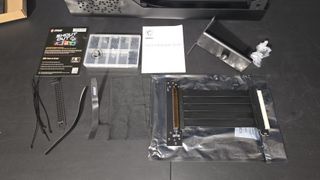
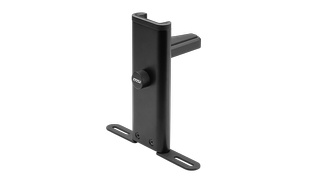
Now if for some reason y’all don’t want to utilize a vertical GPU setup – perhaps you need to install another PCI-e device – MSI also includes an anti-sag bracket to use with the GPU. The picture above of the accessories doesn’t show that part very well, so here’s a closer look.
▶️ Radiator and fan support
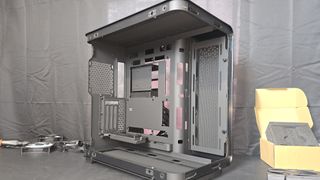
As this is a “fishbowl” style case, you can install fans on the side, top, bottom, and rear of the unit. The top, side, and bottom all support up to 360mm radiators or three fans. Each of the brackets for the radiators has a mesh filter built in it, but you’ll have to remove the entire bracket to clean it.
▶️ IO Panel
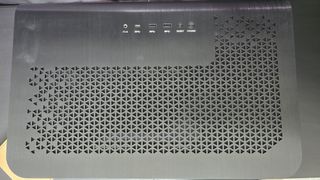
The IO Panel is located on the top of the case. It features your standard power and reset buttons, a combined audio and mic jack, 2x USB-A ports, and 1x USB-C port.
▶️ Rear side view and cable management features
The back of the Maestro is a little bit different than most cases on the market, featuring a small side panel to access the rear of the unit.
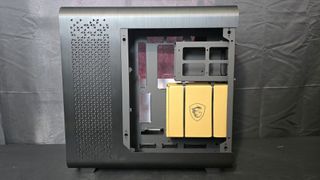
The power supply is installed where the accessories box is shown above, and MSI includes basic storage support with a drive bay that can accommodate two drives of either 2.5- or 3.5-inch sizes.
Some of you might look at the picture above and wonder about cable management features. Well, that’s the genius of this design – you don’t see them!
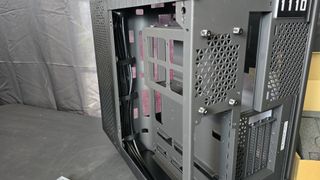
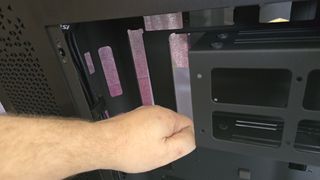
The case does feature cabling paths and includes pre-attached (and extra) Velcro straps for the job, but they are cleverly hidden. There is a ton of room for cable management (or lack thereof) in the back – literally a fistful of depth, as shown in the picture below.
▶️ Storage support
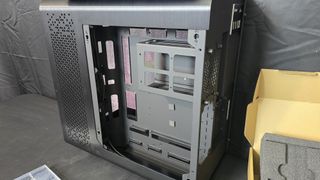
On the other hand, storage support on MSI’s Maestro 700L is lacking for its size. It only supports up to two traditional SATA drives in total. Some will consider this to be a con, but most folks looking at this case are probably gamers looking for a flashy build, who won’t have the need for multiple SATA drives and will likely be using m.2 NVMe SSDs instead.
▶️ Front view

The front of the unit is a single wraparound piece of glass, giving a full view of your build’s internal components. However, just like a glossy display, it’s prone to reflections.
▶️ Rear view
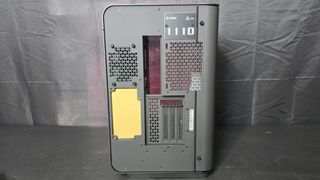
The photo above shows the back of the unit. Notice the previously mentioned backplate highlighting the unit’s production number, and that the case’s expansion slots arrive in vertical configuration. If you need room for more PCI-e devices, MSI’s case supports up to 7 expansion slots in a horizontal orientation.
▶️ Bottom
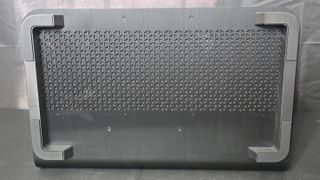
At the bottom of the case, there are openings for airflow and rubber-bottomed wraparound feet to support the case.
Swipe to scroll horizontally

These thermal tests are presented to give you more information about the product’s performance, but aren’t intended as the sole judgment of the chassis. The style, price, and features of a case should also be considered.
And we all have different preferences. What I might like in a case, you might not - and vice versa. Some of y’all want a flashy case to show off your builds. Others might just want a simple case with the best thermal performance. That’s OK. My goal with these reviews is to give everyone, no matter their preferences, enough information to decide whether or not a product is right for them.
With my previous case reviews, I’ve tested units that arrived with fans pre-installed – and as such evaluated the default configuration of those cases. The case we’re looking at today, however, does not ship with fans. So to keep things fair, I’ll be using the same fans on all computer cases tested for this review.
The first of these will feature results from three premium fishbowl cases, but other than the fans,the parts I use to test the cases will be the same as other reviews I’ve published – including the use of a single-tower Akasa air cooler. That said, there are many ways to test a product like this and I am considering whether or not these should also be tested with AIOs for future reviews.
To test the thermal efficiency of cases, I’ve run the following tests:
- CPU-only thermal tests running Cinebench R23, with no power limits enforced. We’ll look at CPU power consumption and VRM temperatures for this first test.
- Testing the case with a 150W load on Intel’s i9-14900K and running a full load on the GPU, to emulate the thermals of the most intense games. We’ll evaluate CPU & GPU temperatures in this scenario.
- Testing the case with the CPU running Cinebench R23 with no power limits enforced, while also running a full load on the GPU. This is a “worst case” scenario, where we’ll look at the CPU’s power consumption and the GPU’s temperature to evaluate thermal efficiency.
MORE: Best PC Cases
MORE: Best Mini-ITX Cases

 1 week ago
3




 English (US) ·