
 5 days ago
9
5 days ago
9
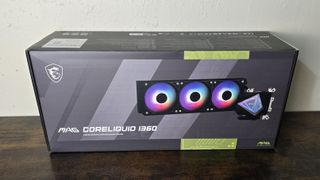
Micro-Star International, more commonly known as MSI, is one of the most well-known and diverse companies in the PC realm. The Taiwanese company makes and sells almost everything we cover, from laptops to SSDs, motherboards to monitors and, of course, CPU coolers.Many of MSI’s previous AIOs have been aimed at the premium section of the market, featuring fancy LCD screens and high price tags. But the CoreLiquid I240 and I360 we’re testing today are typically priced at a more mainstream $109.99 and $139.99 USD.
Do MSI’s I360 and I240 AIOs have what it takes to make our list of Best CPU coolers? Let’s take a quick look at the unit’s specifications, then we’ll dive into its features and our testing.
Cooler specifications
Swipe to scroll horizontally
| Cooler | MSI CoreLiquid I360 | MSI CoreLiquid I240 |
| MSRP | $139.99 USD | $109.99 USD |
| Radiator Material | Aluminum | Aluminum |
| Lighting | ARGB | ARGB |
| Warranty | 3 Years | 3 Years |
| Socket Compatibility | Intel Socket LGA 1851/1700/1200/115x AMD AM5 / AM4 | Intel Socket LGA 1851/1700/1200/115x AMD AM5 / AM4 |
| Pump Speed | 0-3400 RPM ±10% | 0-3400 RPM ±10% |
| Base | Copper | Copper |
| Average Maximum TDP (Our Testing) | ~259W with Intel’s i7-14700K | ~256W with Intel’s i7-14700K |
Packing and included contents
The contents of the cooler box are protected with the typical molded cardboard, plastic linings, and a foam covering.
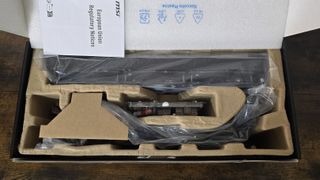
Included with the box are the following:
- 120mm fans, preinstalled
- 240mm or 360mm radiator
- Thermal Paste
- Mounting for modern AMD and Intel platforms
- Cable management bar
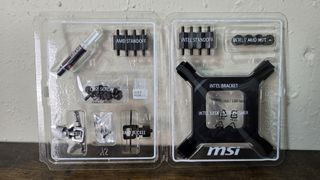
The installation accessories are packed in a plastic container that has a resealable cover. I appreciate this, as it makes it easy to keep track of parts without losing them.
Features of MSI’s CoreLiquid I360 and I240 AIO coolers
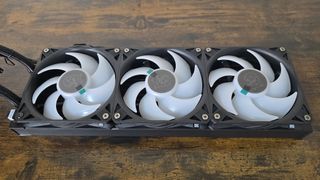
*️⃣ 120mm fans with seven fan blades
There’s more to a cooler than just the heatsink or radiator. The bundled fans significantly impact cooling and noise levels, as well as how the cooler looks in your case. MSI’s included fans support zero RPM operation – so if you don’t mind manually adjusting a fan curve, the AIO can operate in virtual silence.
These fans are preinstalled to the radiator and utilize a quick-connect system to simplify cable management. Additionally, MSI includes a covering bar to hide any cables that might be exposed, depending on how the cooler is installed.
Swipe to scroll horizontally
| Dimensions | 120 x 120 x 25mm |
| Fan Speed | Up to 2300 RPM ±10% with 0-RPM operation supported |
| Air Flow | Up to 70.7 CFM |
| Air Pressure | Up to 3.61 mmH2O |
| Bearing Type | Loop Dynamic Bearing |
| Lighting | ARGB |
*️⃣ UNI bracket
Most CPU coolers on the market have one top bracket for Intel-based systems and another for AMD systems. MSI took the time to create a bracket that’s compatible with both AMD and Intel systems, and pre-installed it – saving a few moments during installation.
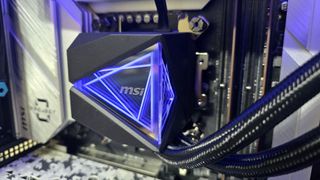
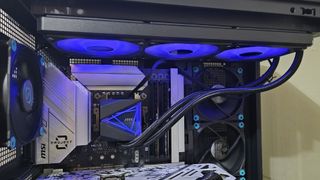
*️⃣ Infinity mirror ARGB illumination
The CPU block showcases MSI’s logo with an ARGB-illuminated infinity-mirror aesthetic.
*️⃣ Full RAM Compatibility
As with most other AIO coolers, the MSI’s I240 and I360 AIOs do not interfere with or overhang RAM DIMMs – so all sizes of DIMMs, no matter how tall, can be used without compatibility concerns due to the height of your RAM sticks.
*️⃣ Does not require the use of additional software
Some of MSI’s AIOs are fully controlled by the MSI Center software via USB. Others have both PWM and USB control options. While there are advantages to MSI’s software, I don’t like being required to use it to control fan speeds because I’ve encountered issues with the software respecting my preferences for maximum fan speeds - it ignores user preferences if the CPU reaches its peak temperature.
While users who prefer maximum performance might not mind this behavior, I find it annoying because I prefer my computers to run quietly in all circumstances. As a reviewer, this is problematic for me because it prevents proper noise-normalized testing for comparison purposes.
Fortunately, MSI’s new I240 and I360 are simpler units that are fully PWM-controlled. No additional software is required to operate these units – the RPM speed of the unit can be controlled normally via the fan control section of your motherboard’s BIOS.
*️⃣ Standard price
The 240mm version of this AIO is available for $109.99 USD, and the 360mm variant has a price tag of $139.99 USD. While there are cheaper competitors on the market, these prices are fairly typical of 240mm and 360mm AIOs.
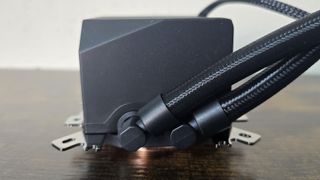
*️⃣ Rotatable braided tubing
The ports connecting to the liquid pump can be fully rotated to either side.
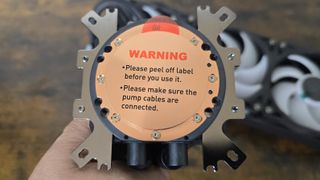
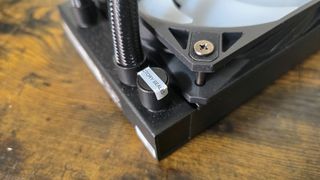
*️⃣ Accessible refill port without “Warranty void if removed” scare tactics
In the past, I’ve criticized MSI because, while they included an accessible refill port, they covered it with a “warranty void when removed” sticker. According to the U.S. Federal Trade Commission (FTC), these policies violate the Magnuson-Moss Warranty Act, which prohibits companies from putting conditions on their warranties based on the use of a product or service, such as a repair service. The FTC has recently cracked down on these sorts of violations warning Gigabyte, ASRock, and Zotac that they are in violation of US law.
In response, some manufacturers have opted to stop including refill ports, which I feel is an extremely consumer-unfriendly move. MSI, on the other hand, has stopped using “warranty void when removed” stickers and continues to include accessible refill ports. You shouldn’t ever need to refill the unit while it is under warranty, but it is nice to know that a user can easily service their device should the need arise after the warranty period has expired – and we should recognize companies that make pro-consumer choices.
*️⃣ Standard price
The 240mm version of this AIO is available for $109.99 USD, and the 360mm variant has a price tag of $139.99 USD. While there are cheaper competitors on the market, these prices are fairly typical of 240mm and 360mm AIOs.
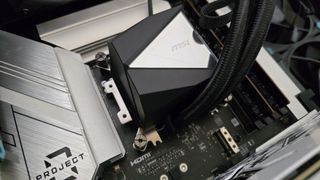
*️⃣ Cabling cover
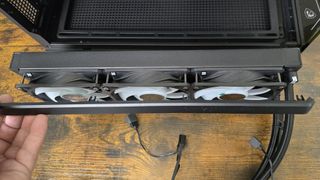
The I240 and I360 AIOs include a cable cover that connects to the screws which secure the fans to the radiator. Using this cover results in a clean look, especially if you choose to install the radiator opposite of what is shown below, where the cabling would be evident otherwise.
*️⃣ No cable management clips
Many AIOs now include management clips to help keep the tubing of the AIO tidy. MSI’s CoreLiquid I240 and I360 do not. This isn’t a big deal to me, but it might be important to some builders.
Testing Methodology, and how my testing differs vs the competition
I do a few things to ensure my results are useful to people who buy and use these coolers in typical setups. To begin, I very strictly regulate the ambient temperature to 23 degrees C during testing. I do not accept results at 22 or 24C as valid, even though in theory there shouldn’t be much of a difference.
I also do my best to emulate the conditions a user would encounter using the cooler, with thermal loads similar to real-life workloads, and tested in a real case – not on an open bench, which can decrease the difficulty of cooling.
Many other reviewers test coolers with just a load running on the CPU – I’ve also done this in many of my old reviews. While this does provide good and useful information, it doesn’t paint a complete picture of how a cooler will perform. Many workloads, especially gaming, will stress both the CPU and GPU. As such, to test how well a CPU’s cooler will perform in these situations I’ve added two tests – one with a light CPU and one with a moderate CPU load, both while running a full load on with AMD’s Radeon RX 7900GRE.
Testing configuration – Intel LGA1700 platform
Swipe to scroll horizontally
| CPU | Intel Core i7-14700K |
| Motherboard | MSI Z790 Project Zero |
| Case | MSI Pano 100L PZ Black |
| System Fans | Iceberg Thermal IceGale Silent |
| PSU | Silverstone HELA 1300 |
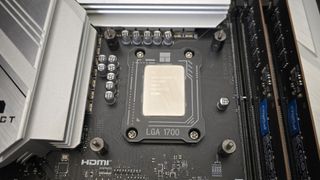
Many factors other than the CPU cooler can influence your cooling performance, including the case you use and the fans installed in it. A system's motherboard can also influence cooling, especially if its socket suffers from bending, resulting in poor cooler contact with the CPU.
In order to prevent bending from impacting our cooling results, we’ve installed Thermalright’s LGA 1700 contact frame into our testing rig. If your motherboard is affected by bending, your thermal results will be worse than those shown below. Not all motherboards are affected equally by this issue. I tested Raptor Lake CPUs in two motherboards. And while one of them showed significant thermal improvements after installing Thermalright’s LGA1700 contact frame, the other motherboard showed no difference in temperatures whatsoever! Check out our review of the contact frame for more information.
LGA 1700 Installation
- I would start by securing the radiator to your computer case, but this step can be done at the end if you prefer.
- Place the CPU bracket against the rear of the motherboard and secure it using the included standoffs.
- Apply the included thermal paste to your CPU. If you have any questions on how to do this properly, please refer to our handy guide on how to apply thermal paste.
- .Place the CPU block against the standoffs, and secure it with a screwdriver.
- Connect the PWM and ARGB cables to the corresponding headers on your motherboard, and installation is complete.


:quality(85):upscale()/2024/10/17/848/n/1922729/9dece426671163b35dcb11.60305022_.jpg)


 English (US) ·