Enabling XMP or Extreme Memory Profile is a simple yet powerful and effective way to maximize your RAM’s performance and ensure you’re getting the most out of your hardware. By default, motherboards run most RAM at lower speeds than what it’s rated for, which means you’re not tapping into its full potential.
Whether you’re a gamer looking to boost frame rates or a professional dealing with memory-intensive tasks, enabling XMP can help unlock faster speeds and improve system responsiveness. In this guide, we’ll walk you through how to enable XMP and unleash your RAM’s true capabilities with just a few tweaks in your BIOS.
What is XMP?
XMP is a technology developed by Intel that allows users to easily overclock their RAM by loading predefined memory profiles that a given RAM kit is rated for. These profiles contain optimized settings for your RAM's speed, timings, and voltage, which can be applied automatically without manually adjusting each parameter.
Modern RAM modules, particularly those aimed at gamers or enthusiasts, often come with XMP profiles that allow them to run at speeds higher than the default settings. By default, when you install RAM in your system, your motherboard runs the memory at standard speeds, depending on your motherboard and processor. Without enabling XMP, you won’t achieve the full performance that your RAM is capable of delivering.
While XMP was initially developed for Intel systems, many AMD motherboards also support XMP or the similar EXPO (Extended Profiles for Overclocking) or DOCP (Direct Overclock Profile) for newer AM5 CPUs. These effectively provide the same functionality for AMD systems, allowing them to take advantage of higher memory speeds with just a few clicks and tweaks.
Why should you enable XMP?
When you purchase performance-oriented RAM that’s rated for high speeds (e.g., 6000 MHz, 6400 MHz, or higher), the RAM doesn’t automatically run at those speeds when you install it. Enabling XMP allows you to get the full benefit of the high-speed RAM you’ve paid for without needing to manually adjust complex settings like frequency, voltage, or timings. Here are some of the benefits of enabling XMP:
- Improved performance: RAM with higher frequencies (or MT/s, short for megatransfers per second) allows faster data transfer, reducing bottlenecks and improving overall system responsiveness, particularly in tasks like gaming, video editing, and 3D rendering.
- Automatic configuration: XMP simplifies the overclocking process by offering pre-configured profiles, making it easier for less technical users (or technical users who just want to save time) to boost memory performance.
- Optimized system stability: Since XMP profiles are designed and tested by the manufacturer, they are generally more stable and reliable than manually adjusting memory settings, which could lead to crashes or instability.
Without XMP, you're essentially leaving performance on the table. While the difference in speed might not always be dramatic in every task, certain applications like gaming, video editing, and multitasking can benefit significantly from the increased memory bandwidth.
Some XMP kits push the bleeding edge of performance, so they won't be stable with all processors — you'll need good luck in the silicon lottery to attain those higher speeds. Do your research to determine if the XMP profile falls into the 'safe' range that almost every processor can support. These bleeding-edge kits often come with eyewatering price tags.
A step-by-step guide to enable XMP
1. Enter BIOS/UEFI
To enable XMP, you’ll need to access your system’s BIOS (Basic Input/Output System) or UEFI (Unified Extensible Firmware Interface). This is the system-level software that controls your hardware settings. Restart your PC and immediately start pressing the BIOS key, which varies depending on your motherboard manufacturer but is often Delete, F2, F10, or Esc. If you can't figure it out, see our feature on how to enter the BIOS on any PC.
You can also find the correct key by consulting your motherboard manual or by paying attention to the on-screen prompt during startup, which usually says something like "Press [Key] to enter setup." If you miss the timing, restart your PC and try again.
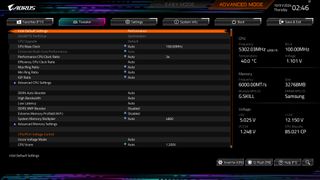
Once you’re in the BIOS interface, you’ll see a menu with options for controlling various hardware components. Modern UEFI systems often have a user-friendly graphical interface, while older BIOS versions might look more basic with a text-based interface.
2. Navigate to the Overclocking or Memory Settings
After entering the BIOS, you’ll need to locate the section where memory or overclocking settings are managed. The exact name and location of these settings will depend on your motherboard’s manufacturer, but some common terms that you should be looking for include: Overclocking, AI Tweaker, Extreme Tweaker, Advanced Memory Settings, DRAM Configuration, etc.
In some UEFI interfaces, there may be a Search function that can help you locate these settings more easily. Once you’ve found the appropriate section, you should see options for your RAM’s speed, timings, and voltage.
3. Enable XMP profile
You’ll find an option to enable XMP in the memory or overclocking settings. The setting may be listed under XMP, Extreme Memory Profile, or, in the case of AMD motherboards, DOCP (Direct Overclock Profile) or EXPO (Extended Profiles for Overclocking).
Next, select Profile 1, which is usually the most stable and common XMP profile. This profile typically matches your RAM's advertised speed, voltage, and timings. For example, if you bought 6000MHz RAM, Profile 1 will likely configure the memory to run at 6000MHz.
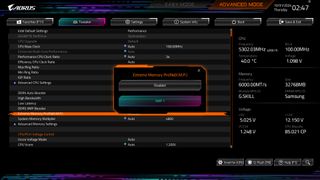
Some systems might offer a Profile 2, which could provide an even more aggressive overclock but might not always be as stable as Profile 1. This is optional and should only be used if you’re confident in your system’s ability to handle more advanced overclocking. Once selected and saved, your system will automatically adjust the memory settings to the optimized values stored in the XMP profile.
4. Save and exit BIOS
After you’ve selected the desired XMP profile, you’ll need to save the changes and exit the BIOS. Navigate to the Save & Exit menu, typically accessible by pressing the F10 key, or find it within the BIOS menu options. Confirm that you want to save the changes. Your system will restart with the new settings applied.
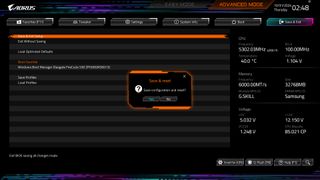
At this point, your RAM should be running at its optimized speed, voltage, and timings according to the XMP profile.
5. Verify XMP is enabled
To verify that XMP is enabled on your Windows system, you can use built-in tools and third-party software. Start by checking your RAM speed using Windows Task Manager. Although it won’t explicitly show whether XMP is enabled, it will display your memory’s current speed.
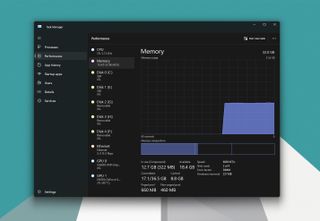
To do this, right-click on the Taskbar and select Task Manager. Once it opens, click on the Performance tab and select Memory from the left sidebar. In the Speed section, you will see the current speed of your RAM. If this speed matches the advertised speed of your RAM, it’s a good indication that XMP is enabled.
Another way to verify XMP is through CPU-Z, a free software that provides detailed information about your system’s hardware components. Start by downloading and installing the program if you haven't already. Once installed, launch CPU-Z and navigate to the "Memory" tab at the top of the window. This section provides detailed information about your system's memory, including the active XMP profile. Look for the "XMP" label in the memory timings to confirm the profile is enabled. You can also compare the current memory speed, listed under "DRAM Frequency," with the rated XMP speed from your memory's specifications to ensure the profile is applied correctly.
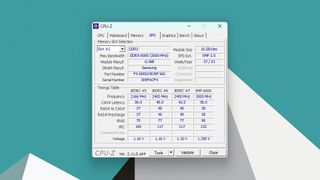
If you’re still unsure, you can always check directly in your system’s BIOS. Restart your PC and access the BIOS menu, then navigate to the memory or overclocking section to confirm that XMP is enabled and the profile is active.
Troubleshooting tips
You might encounter system instability after enabling XMP, such as crashes or random reboots. If this happens, the first step is to switch from Profile 2 to Profile 1, as Profile 2 often pushes RAM to higher frequencies that may not be as stable. If the issue persists, another approach is to manually increase the RAM voltage in the BIOS by a small margin. Increasing the voltage can sometimes stabilize memory performance, but it’s important to be cautious. Over-volting can damage components, so proceed only if you're familiar with BIOS settings and understand the risks involved.
Another potential fix involves updating your motherboard’s BIOS. Often, XMP-related issues stem from an outdated BIOS that doesn't fully support the specific RAM kit you’re using. Manufacturers regularly release updates to improve compatibility, so visit your motherboard's website, check for the latest BIOS version, and follow their instructions for updating. A BIOS update can often resolve compatibility problems and allow XMP to run without further issues.
If you don’t see the option for XMP in your BIOS, the problem could be that your motherboard or RAM is not XMP-compatible. In this case, you can manually configure memory settings like timings, speed, and voltage in the BIOS. This manual method requires more technical knowledge, as it involves tweaking settings typically handled by the XMP profile. It’s also less likely to deliver the same stability as an official XMP profile, so this option is best suited for advanced users comfortable with BIOS-level adjustments. For more information, see our feature on how to overclock DDR5 RAM.

 1 week ago
6


 English (US) ·