
 2 months ago
45
2 months ago
45
Windows 10 is set to go end-of-life (EOL) on October 14, and while you can purchase an extended service license to keep your machine updated for a little longer, some will ultimately choose to upgrade to Windows 11. But what if your machine doesn’t meet Microsoft’s requirements? You can get around them quite easily with Rufus or the focus of this how-to, Flyoobe.
Originally known as Flyby11, Flyoobe touts itself as “A better way to set up Windows,” and it has an expansive set of features that should make Windows 11 a much better experience on more modest hardware.
- Upgrade a Windows 10 machine to Windows 11
- Remove AI components
- Slim down Windows 11
- Enhance the Windows 11 experience
- Install commonly used applications
In this how-to, I’ll be updating a laptop that is over a decade old to run Windows 11. This process can be applied to any machine running Windows 10. For those already running Windows 11, skip the upgrade and go right to the tweaks.
No matter what, though, you will need to install Flyoobe.
Download and Install Flyoobe
1. Download the latest Flyoobe release from the official GitHub repository. At the time of writing this was 1.10.
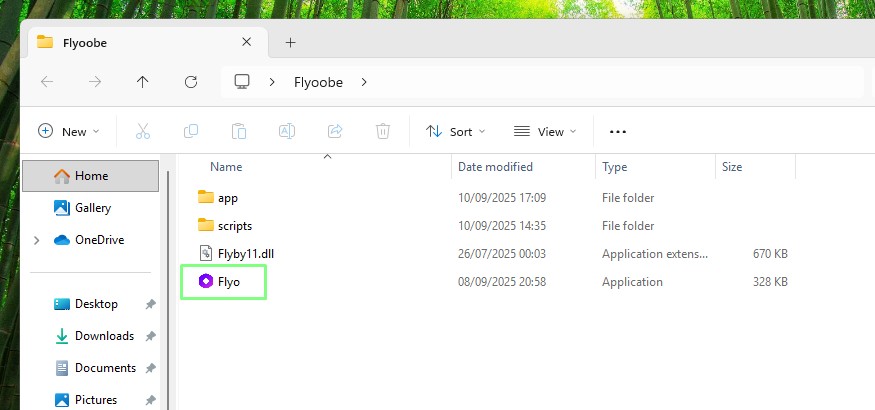
2. Extract the files to a folder on your desktop.
3. Double click on the Flyoobe application.
Upgrading from Windows 10 to Windows 11
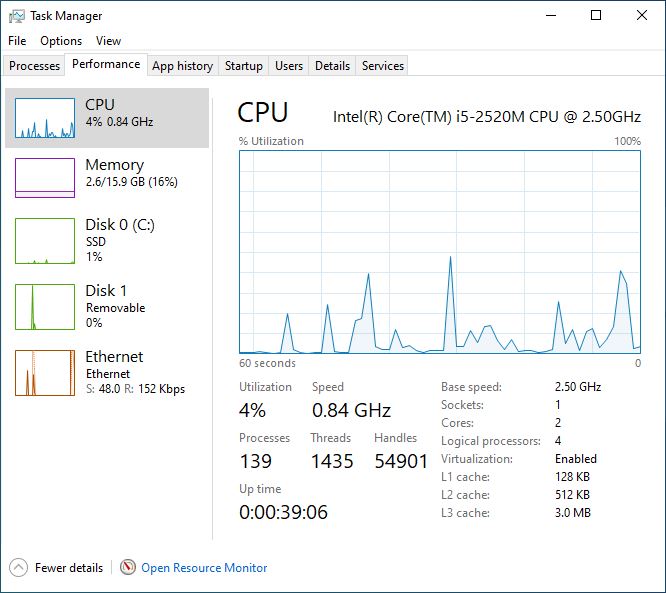
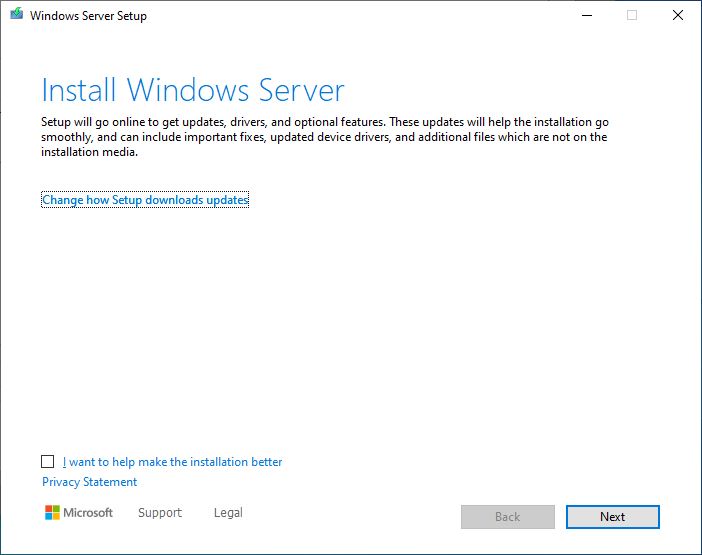
On my test machine, an ancient Lenovo X220 with a paltry 2nd-Gen Intel Core i5, I have Windows 10, freshly installed and ready for this how-to. But I want to install Windows 11. I could use Rufus to make an installation USB drive, but I wanted to use Flyoobe, which will download the latest Windows 11 ISO and install it using a Windows Server variant of the setup tools to skip hardware checks for TPM 2.0, Secure Boot, and, of course, the 2nd-Gen i5, which is most certainly not supported.
I’ll assume that you have an older machine running Windows 10, a machine that does not meet Microsoft’s Windows 11 requirements.
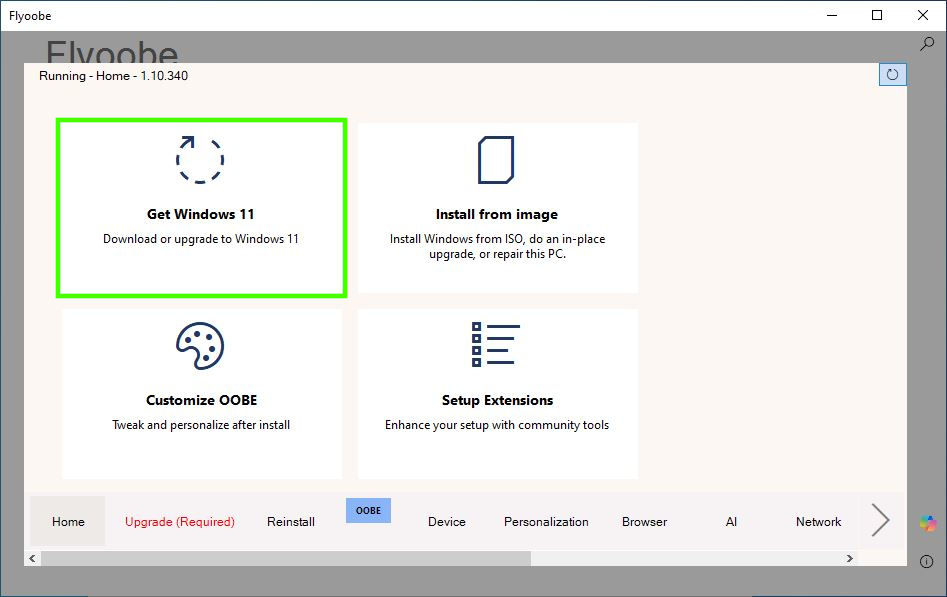
1. Open Flyoobe.
2. Click on Get Windows 11.
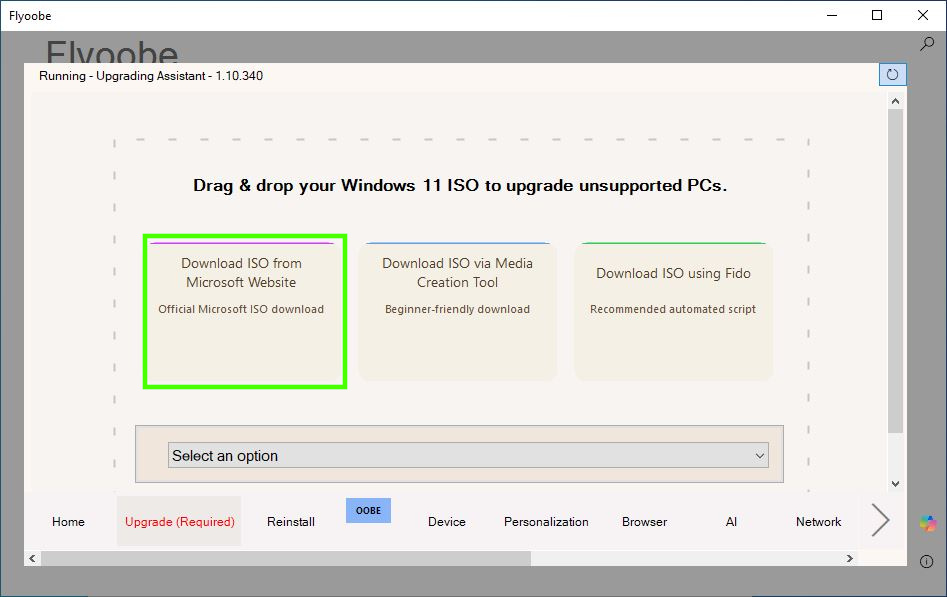
3. Click on Download ISO from Microsoft website, this will trigger a browser to open.
4. Download the Windows 11 multi-edition ISO and set your preferred language. Click Confirm to move on.
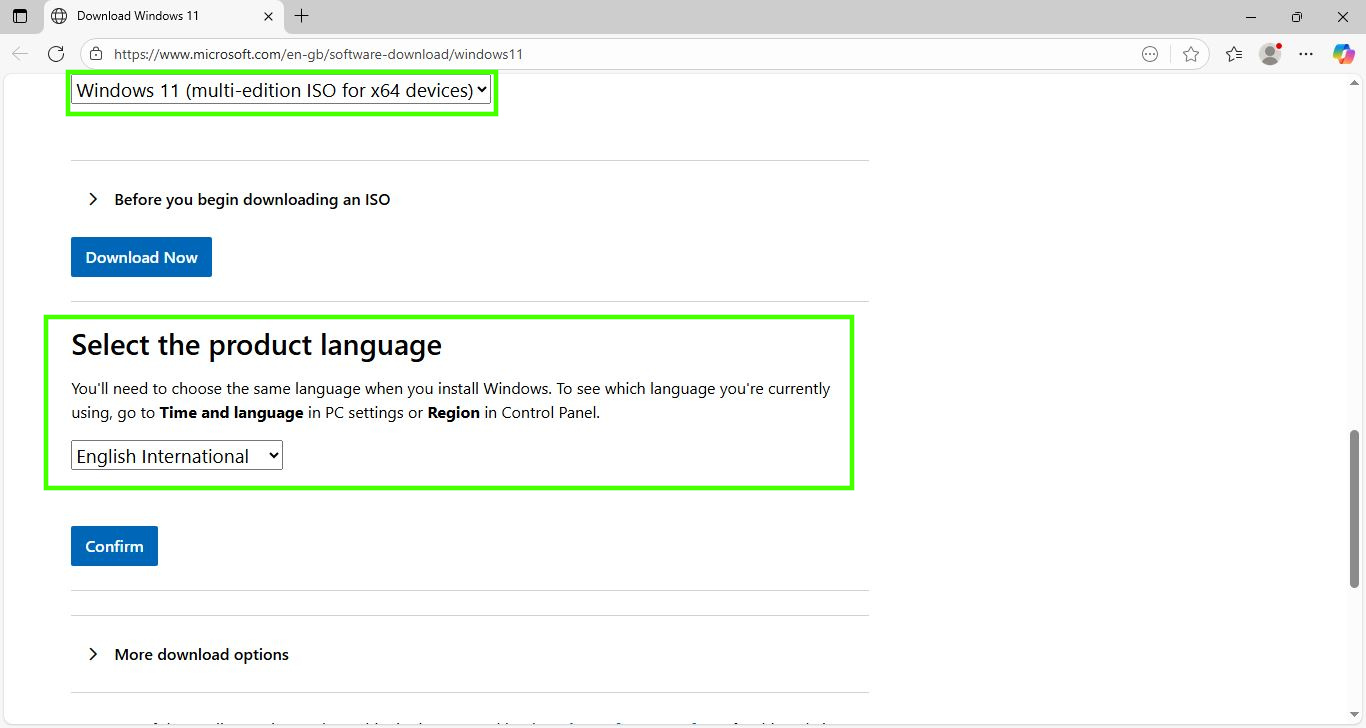
5. Click on the generated link to download the Windows 11 ISO.
6. Drag the downloaded ISO from the file manager into Flyoobe, this will trigger the installer to start.
7. Follow the instructions to run the install. When prompted to keep files, settings, apps or just personal files, make the choice most relevant to your requirements.
8. When ready, click on Install to install Windows 11 over the Windows 10 installation. The installer will reboot automatically and run the Windows 11 post installation setup script.
Tweaking Windows 11 with Flyoobe
We’ve got Windows 11 on an unsupported machine, so now lets spend a little time tweaking it for better performance. The first task is to remove the AI features. I don’t need them, nor do I want them. So let's use Flyoobe to remove them all.
1. In the Flyoobe app, select the AI tab.
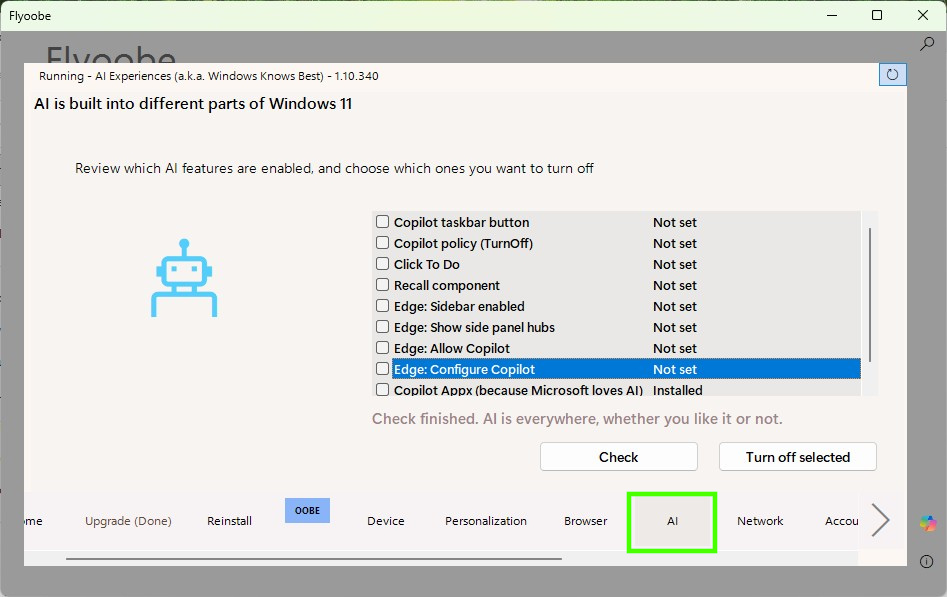
2. Click on Check to search for all of the possible AI components.
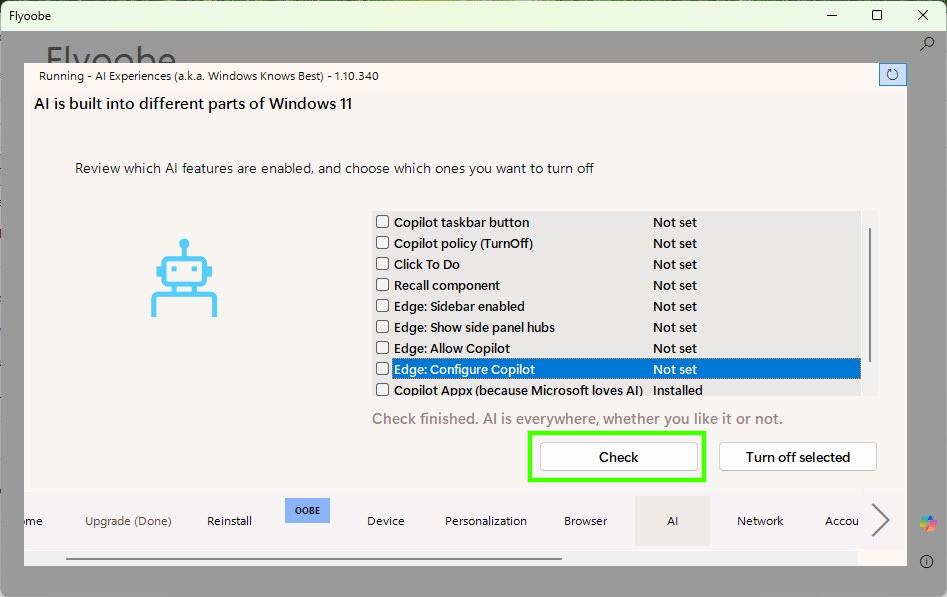
3. Select all of the components that you wish to turn off.

4. Click on “Turn off selected”. This will trigger Windows Powershell to run a script to deactivate the AI elements.
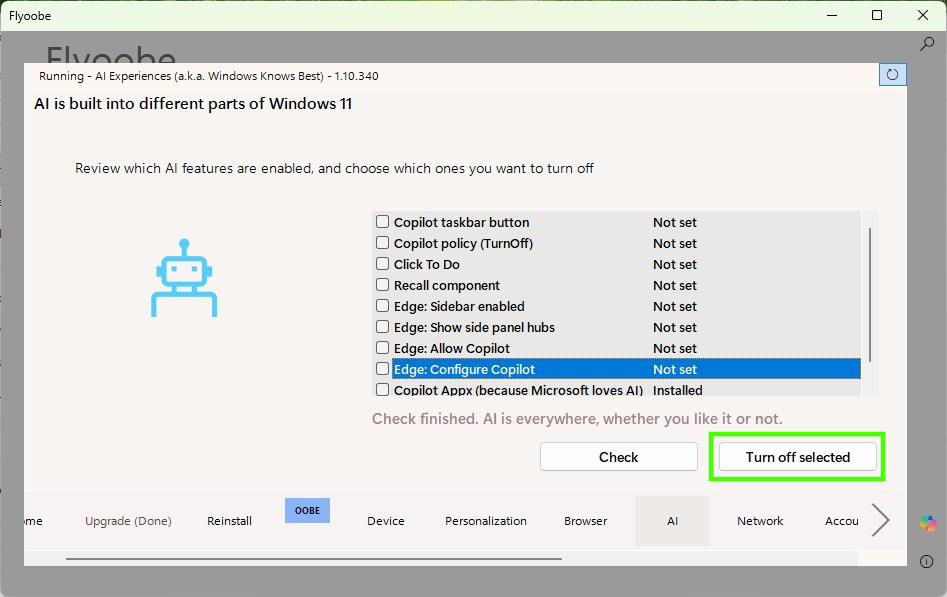
5. Reboot for the changes to take effect.
Install Updates and Driver with Flyoobe
My old Lenovo X220 worked out of the box with Windows 11, but the trackpad scroll button did not work and I love scrolling with that! So I needed to install the correct drivers and updates.
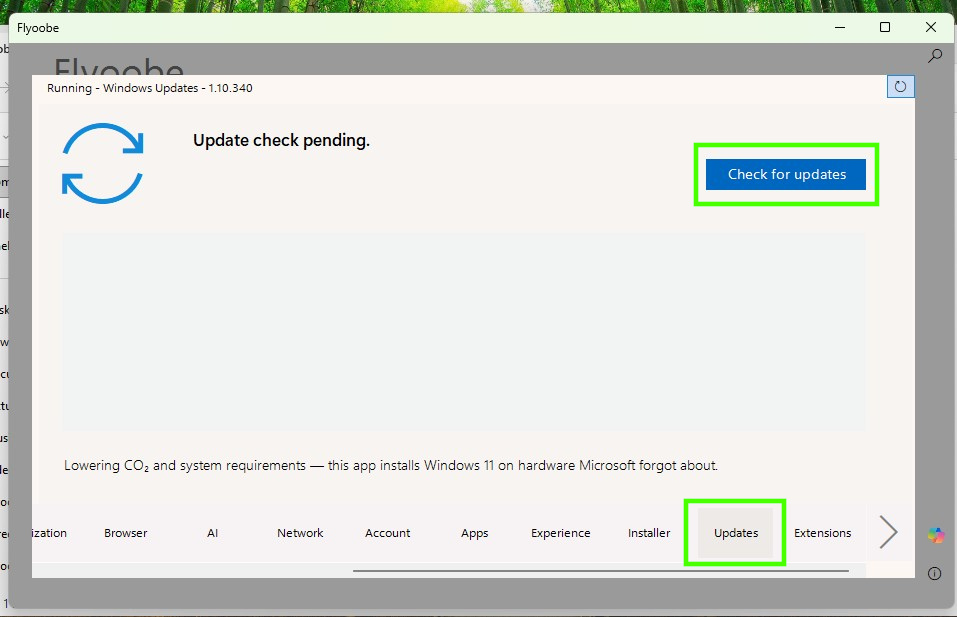
1. Right click on the Flyoobe app and select Run as Administrator. We need to do this so that we can install the drivers / updates. I tried without, and the process just hung.
2. Select the Updates tab and click on “Check for Updates”.
3. Select all of the relevant updates and click on “Install Updates”.
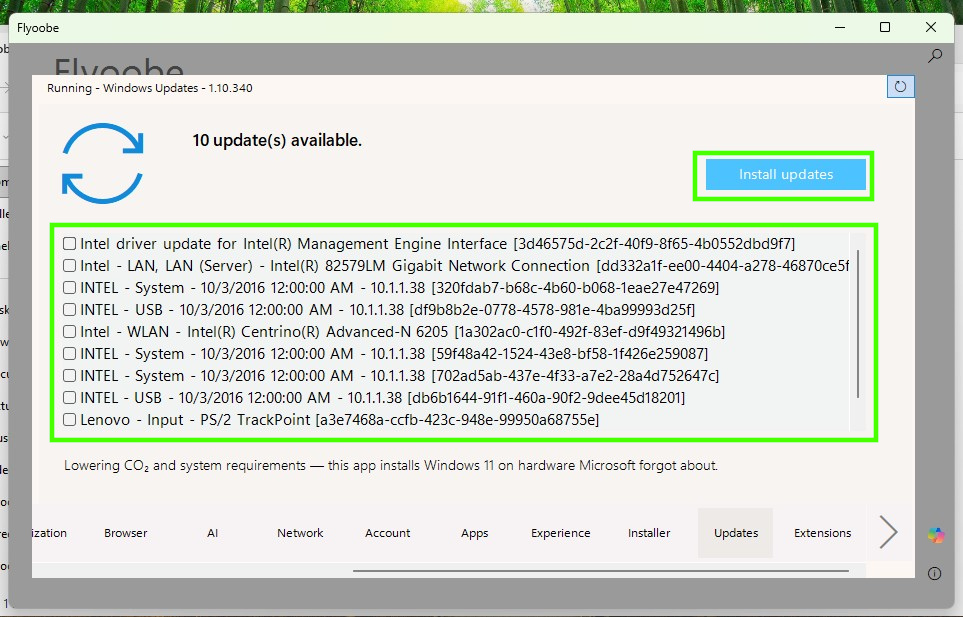
4. Wait for the process to finish. You may see some errors, these can be ignored.
5. Reboot for the changes to take effect.
Improve the Windows 11 Experience with Flyoobe
Windows 11 is a different experience from Windows 10. For one thing, the Start menu is now in the center, and my muscle memory reminds me of this every time I use it. I wanted to improve my Windows 11 experience, and so I turned to Flyoobe, which has a quick list of changes that I can make to speed up and improve the overall features of Windows 11.
1. Open Flyoobe and go to the Experience tab.
2. Using the dropdown menu, select “Use quick settings”
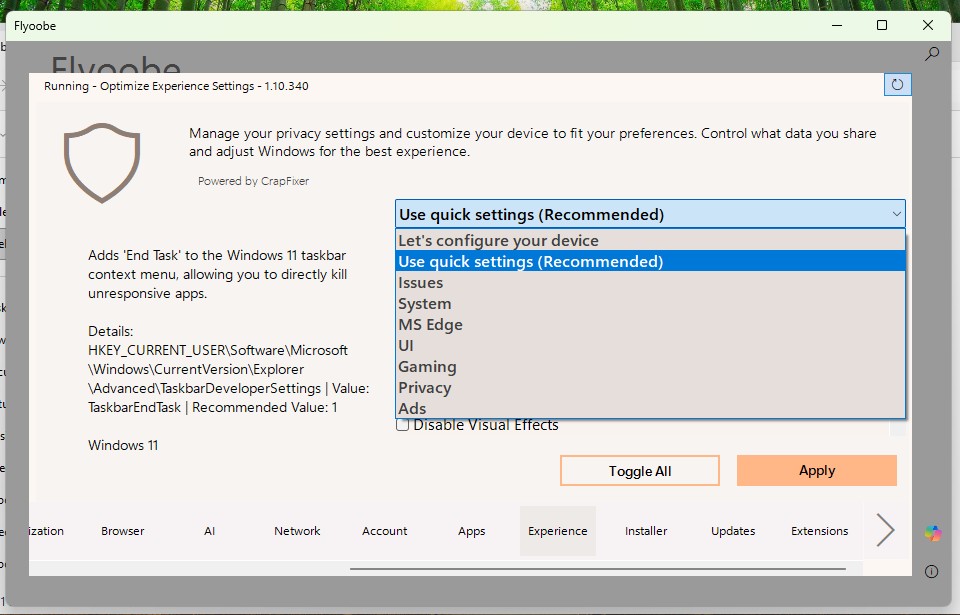
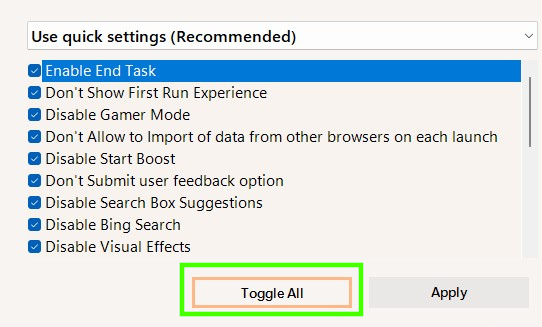
3. Click on “Toggle All” and click Apply to action.
4. Wait for the process to finish. You may see some errors, these can be ignored.
5. Reboot for the changes to take effect.
Remove Unwanted Apps with Flyoobe
Windows 11, like other Windows before it, comes with a plethora of applications. Some useful, some not so. I wanted a clean start and for that I turned to Flyoobe to remove all of the unwanted applications.
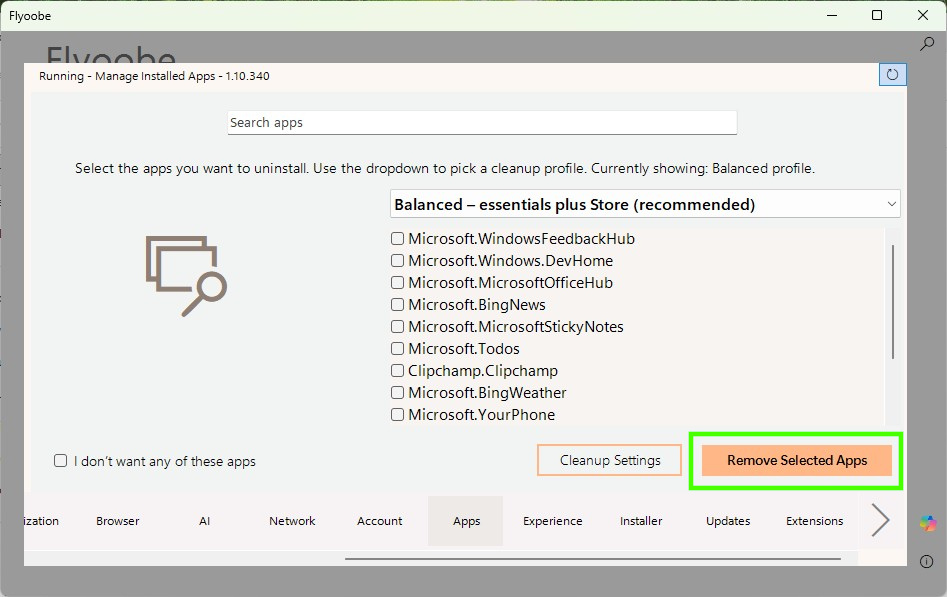
1. Open Flyoobe and go to the Apps tab.

2. Using the dropdown menu, select “Minimal Windows” Of course you can change this to meet your needs. The “Balanced” option provides all of the essential apps and that is why it is recommended.

3. Click on “Remove Selected Apps” to start the uninstall process.
4. Wait for the process to finish. You may see some errors, these can be ignored.
5. Reboot for the changes to take effect.
Install Apps with Flyoobe
The complete opposite now! Whenever I install any OS, there are always a number of applications that I want / need to install. Flyoobe has an Installer tab that I can use to install a few of these, making it a little easier to get started.
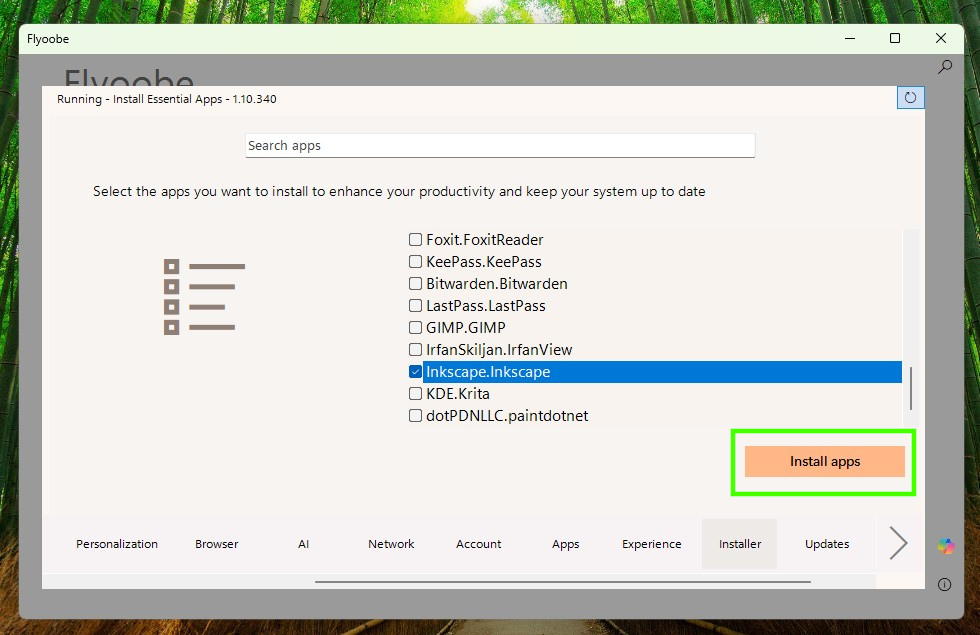
1. Open Flyoobe and go to the Installer tab.
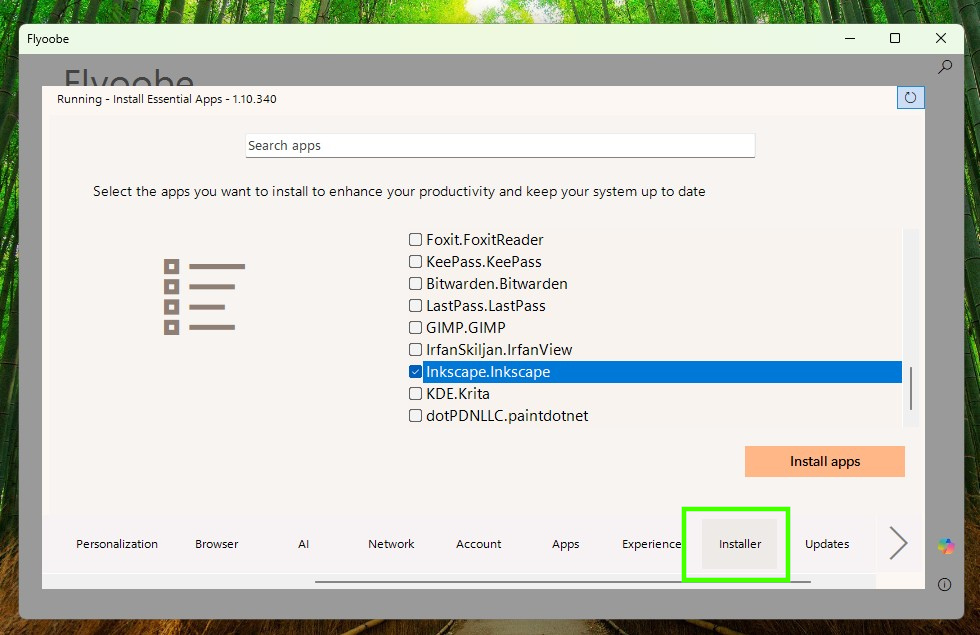
2. Scroll down the list and select the apps that you want to install.
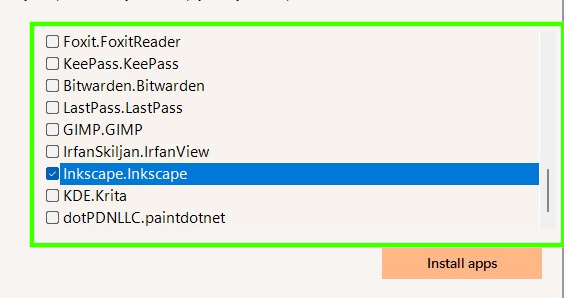
3. Click on “Install Apps” to start the install process.
4. Wait for the process to finish. You may see some errors, these can be ignored.
5. Go to the start menu and your new apps are ready to use.
Flyoobe Extensions
This section covers extensions, written for Flyoobe, and designed to further improve your experience. There are extensions for
- Post-setup cleanup
- Restoring deleted apps
- View telemetry settings
- Tweak the File Explorer
and many more.
I’m going to show you how to run Disk Cleanup via Flyoobe, but the process is the same for the other extensions.
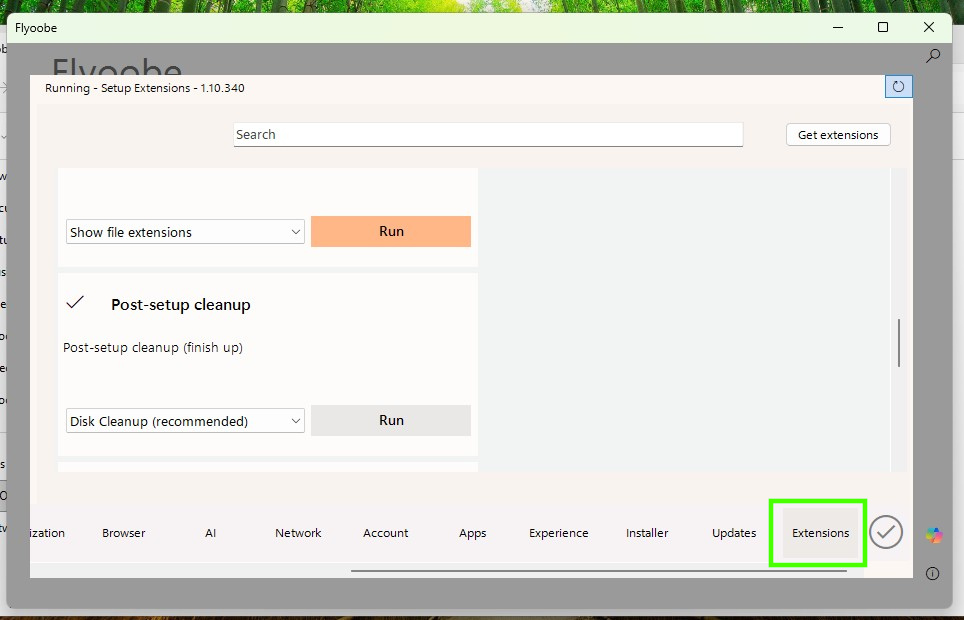
1. Open Flyoobe and go to the Extensions tab.
2. Scroll down the list and select the Post-setup cleanup option.
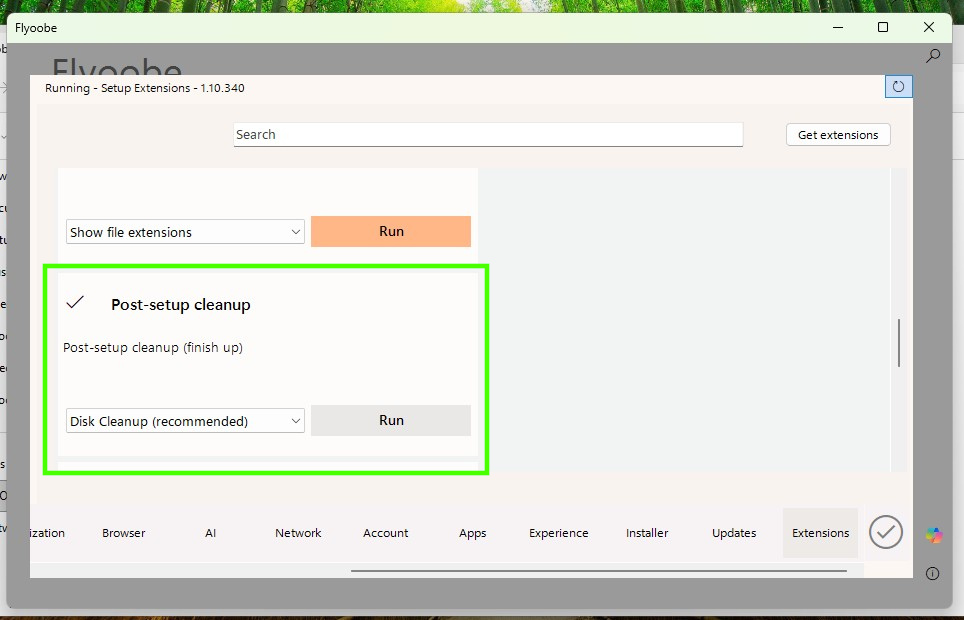
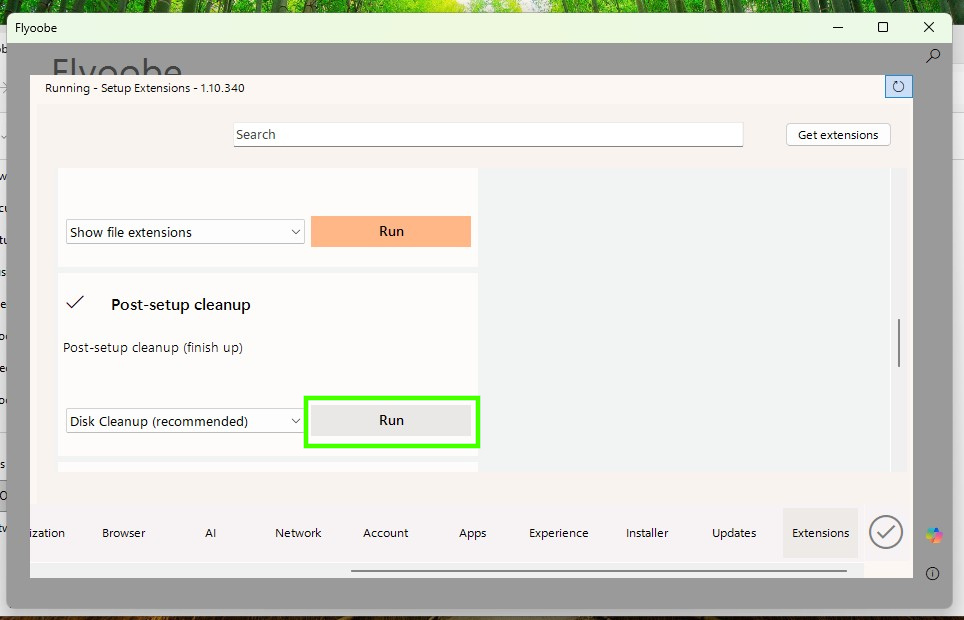
3. Click on “Run” to start the cleanup process.
4.Wait for the process to finish. You may see some errors, these can be ignored.
5. The disk cleanup dropdown has other options for cleaning up the system. Choose any that are relevant to your needs and setup. Just remember to take backups before clicking the button.


 English (US) ·