
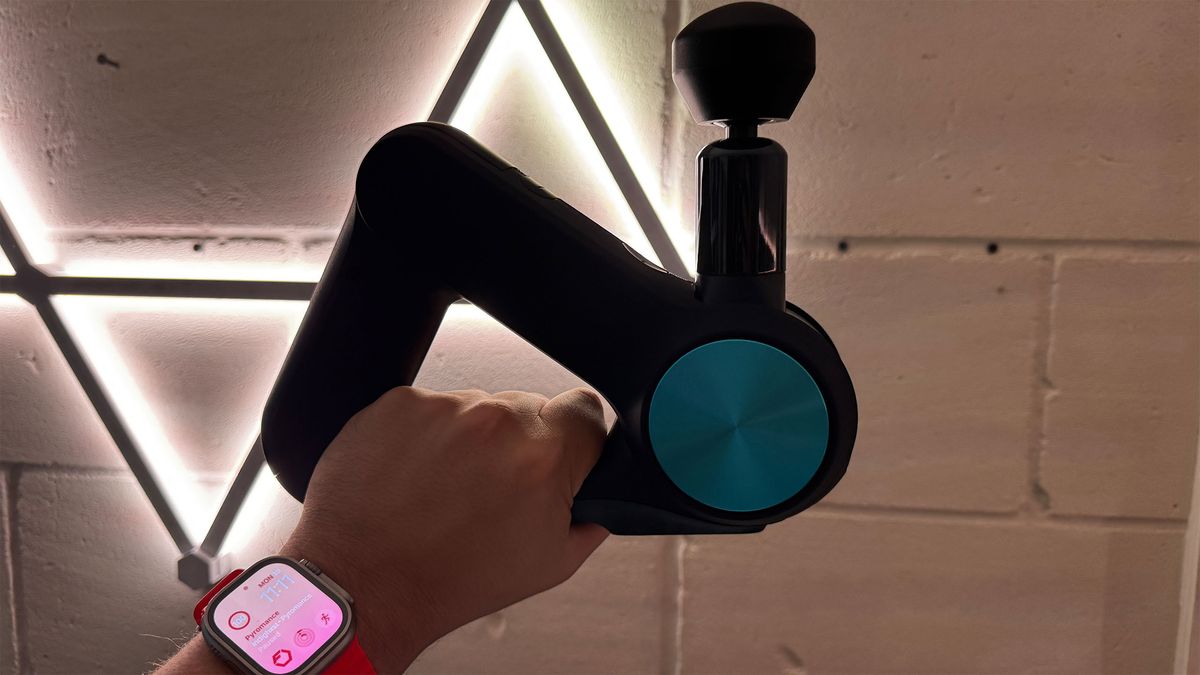
 1 month ago
16
1 month ago
16
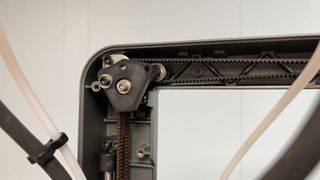
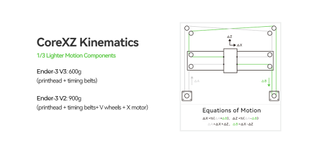
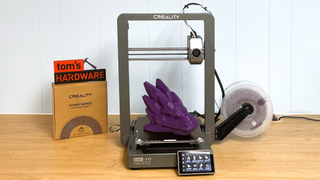
Creality’s Ender 3 V3 is a well-built, speedy bed slinger with a secret: it’s a Core XZ. No, that’s not a typo. Turn the printer around, and you’ll find belts and pulleys along the gantry driving both the up and down Z axis as well as the side-to-side X axis. Think of it as the more familiar Core XY motion system tipped up on its side.
Core XZ is a bit of a novelty — I’ve only seen it previously on a Voron Switchwire. But the design has its advantages. All the stepper motors can be attached to the base, eliminating weight on the X axis, which lightens the load the machine has to push around. Creality also put the spool holder on the side and made the frame out of sturdy metal so there are fewer vibrations for input shaping to counteract. All this adds up to smoother layer lines and higher quality prints.
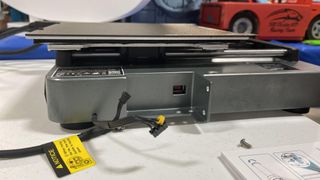
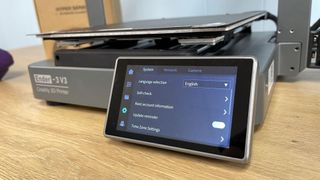
The machine has a premium feel and an affordable price. It has a 300° C high flow hotend with Creality’s new tri-metal “unicorn” nozzle and the same touch screen as the more expensive K1 printer line. It’s running Creality’s fork of Klipper for precision at speed, and it has root access if you want to switch to a custom version of Klipper for more control.
The V3 boasts a top speed of 600mm/s and an acceleration speed of 20,000mm/s², but only pulls those numbers out for speed tests. The slicer defaults limit its speed to a more reasonable 200-300 mm/s which still makes it our fastest bed slinger, with a speed boat test of 14 minutes and 54 seconds.
Retailing at $389 and on sale for $299 (as of this writing), the Ender 3 V3 is a feature-rich speedster that can take on the competition at an affordable price, making it our pick as one of the best 3D printers on the market today.
Specifications: Ender 3 V3
Swipe to scroll horizontally
| Build Volume | 220 x 220 x 250 mm (8.6 x 8.6 x 9.8 inches) |
| Material | PLA/PETG/TPU (up to 300 degrees) |
| Extruder Type | Direct Drive |
| Nozzle | .4 high flow hardened steel “unicorn” |
| Build Platform | PEI coated spring steel sheet, heated |
| Bed Leveling | Automatic + Z |
| Filament Runout Sensor | Yes |
| Connectivity | USB, Wi-Fi |
| Interface | 4.3-inch Touch Screen |
| Machine Footprint | 358 x 374 x 498 mm (14 x 14.7 x 19.6in) |
| Machine Weight | 7.8 KG (17.2 lbs) |
Creality Ender 3 V3 : Included in the Box
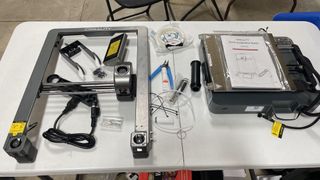
The Ender 3 V3 comes with everything you need to get your printer set up. You get tools to build and maintain the printer, side cutters, a nozzle cleaner, and a USB thumb drive. You also get a small sample of white PLA to print your first model.
The USB thumb drive includes a short video on assembling the printer, a PDF copy of the manual, and a material settings guide. It also has a copy of the custom slicer, Creality Print, and several test models.
Design of the Creality Ender 3 V3
From the front, the Ender 3 V3 looks similar to other recently released Ender 3 machines. You have to spin it around and look at the back to see the difference.
It has Core XZ kinematics, which means the X and Z axes share a belt and two motors. Think of it like a Core XY printer turned up on its side. The system does have a few benefits over a traditional bed slinger — without a heavy stepper motor for the X axis on the gantry and no Z rods, you’ll get smoother layers, and a bit more vertical speed.
This is a fast Ender with smooth linear rods for the X axis, a high flow hotend with a “unicorn” nozzle that can hit 300 degrees, and a powerful parts cooling fan. The build quality is a step up from the Ender 3 V3 KE, with a sturdy metal frame with enough weight to counter vibrations for better accuracy. Bed leveling is automatic, and the nozzle can be set to its own Z height — these features are a huge help, especially for beginners. It also has a built-in G-sensor for performing input shaping, which the KE lacked.
The touchscreen is borrowed from the K1 machine — another improvement to the Ender line that makes the machine feel more premium. Wi-Fi is easy to connect when using Creality’s slicer program. You can print through the cloud (and benefit from Creality’s app) or simply send files over your local network.
The machine comes 90% assembled, so popping it out of the box is a breeze. My only complaint is the contorted filament path, which puts the run out sensor on the back of the gantry. Filament has to be run vertically up the gantry because the machine homes the Z axis at the top. The spool holder, however, has an optional guide that fits over the spool to avoid tangles.
It also comes with a steel PEI coated flex plate, and for some of our testing, I used a special 10th anniversary plate the Creality mailed separately. These steel plates are thankfully standard now and work wonders for both adhesion and easy removal when cool.
Assembling the Creality Ender 3 V3
The Creality Ender 3 V3 is mostly pre-assembled and comes together with a handful of neatly labeled bolts and screws. It’s so simple, I threw this printer in the car to assemble at a recent 3D printing festival.
You need to attach the gantry, snap on the screen and slide the spool holder into place. Wiring is very simple as everything is already attached to the frame and only needs to be plugged in.
The last step is to flip the power supply switch to match your main household electric (115V in the U.S.).
Leveling the Creality Ender 3 V3
The Ender 3 V3 completely levels and calibrates itself the first time you turn the machine on. It can also recheck the level before each print to ensure accuracy. Like other modern printers, the Ender 3 V3 has stopped using manual adjustment knobs. I didn’t have any issue with getting the Ender 3 V3 level, and the auto Z height feature worked very well.
Loading Filament on the Creality Ender 3 V3
To load filament, click the horizontal lines icon on the side of the main menu. Press Extrude/Retract on the top menu. Place the filament into the top of the extruder and it will handle the rest.
Preparing Files / Software for Creality Ender 3 V3
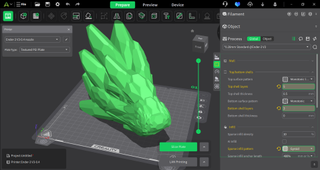
The Ender 3 V3 comes with a copy of Creality Print 5.1, a slicer built on the foundation of Orca Slicer and clearly ready for the coming K2 color printer. The machine has a profile on OrcaSlicer if you prefer to use it. It’s also compatible with Cura and PrusaSlicer, but you’ll need to build your own profile. You can base one off any Ender 3 (Cura is the most up-to-date with an Ender 3 V3 KE), though I would suggest downloading Creality’s slicer to copy the speed settings.
I did all of my test prints in Creality Print and continue to use it for any of the Creality machines in my workshop. It allows you to easily send files remotely using either Creality Cloud or your home network. If you don’t want to use the Cloud, you don’t have to, as files can be transferred via LAN or USB stick.
Printing on the Creality Ender 3 V3
The Creality Ender 3 V3 printed great right out of the box, but it only comes with a small sample coil of filament. Check out our list of the best filaments for 3D printing for more filament options and suggestions.
Because I set the printer up at a festival, I skipped the test prints and went right into printing dragons to show off. The Ender 3v3 did not disappoint.
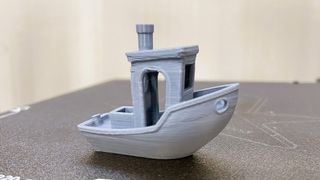
Once back home, I did a Benchy speed test, which printed out great results in 14 minutes and 54 seconds. I used Speed Boat Rules (2 walls, 3 top and bottom layers, 10% infill, a .25 layer height and .5 layer width). The layers are smooth along the hull, with just a tiny bit of slop in the cabin walls, but there are no ringing or layer shifts. This was printed in ordinary gray Inland PLA.
Admittedly, I’ve been on a bit of a dragon kick. But this Cinderwing dragon and egg is a good example of a clean print with excellent tolerances. These printed quickly, with clean details, no obvious layer lines, no wisps and nice loose joints. The egg screws together easily without binding. These printed together with a .2 layer height, using Bambu Lab Sparkle Gold PLA and default settings with average speeds of 200mm/s, only taking six hours and 39 minutes. For comparison, and older model Ender, like the Ender 3 S1, would take 13 hours and 56 minutes to print this same file.

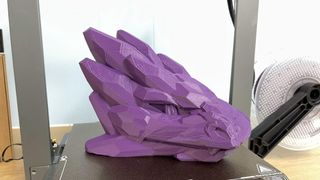
I needed a showpiece for another festival, so I let the Ender 3 v3 print an oversized dragon head. I split a Cinderwing dragon using the slicer’s “split to parts” function and loaded up a spool of Bambu Lab Carbon Fiber PETG. This printed in eight hours and 25 minutes, using a .28 layer line and standard print speeds averaging 200mm/s.
A pre-Klipper machine like the Ender 3 S1 would take just over 22 hours to print the same file. It did have an odd layer line where it possibly under extruded, which was annoying. Further tuning of the printer with this filament would eliminate this kind of flaw.
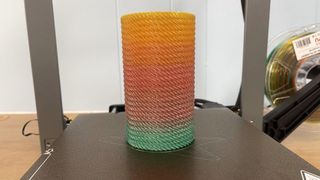
For TPU, I printed up a water bottle Koozie with Inland’s Rainbow TPU. I stretched the Z height on this model in the slicer to better cover the taller bottle, which didn’t spoil the rope effect at all. This printed remarkably well, though it was using a very sedate speed. It took 11 hours and 12 minutes using a .28 mm layer height. The speed settings were left at default, but the Volumetric Flow was ratcheted all the way down to 3.5mms³.
Bottom Line
Creality’s Ender 3 V3 shows that Creality has come a long way with its Ender line. No longer a cheap-looking science project to be hidden in the garage, the V3 has style, speed, and deluxe features. It’s Core XZ motion system may be a bit of a novelty, but it works fantastically.
Will this be the last Ender 3 we see from Creality now that they’re moving on to enclosed printers and four-color machines? Hopefully not, because there will always be a need for an affordable starting place for 3D printing. But, if this is the last Ender, it’s ending on a high note.
The Ender 3 V3 is currently the fastest 3D bed slinger in Creality’s line-up, and with a sale price of $299, it’s a very affordable alternative to more expensive Core XY machines. I highly recommend the Ender 3 v3 to users new to the hobby or those looking for an inexpensive second or third machine.
If you’re looking for a fast and affordable 3D printer that can also produce color prints, check out the Bambu Lab A1 Combo for $489. If you need a printer that can handle high temperature filaments like ASA and nylon, then the Creality K1C for $459 is a great alternative and just as fast.
MORE: Best 3D Printers
MORE: Best Budget 3D Printers
MORE: Best Resin 3D Printers


:quality(85):upscale()/2024/10/17/848/n/1922729/9dece426671163b35dcb11.60305022_.jpg)


 English (US) ·