
 9 months ago
171
9 months ago
171
Today we’re looking at Corsair’s latest AIO, the iCUE Link Titan 360 RX RGB. Most users interested in this AIO will be interested in it due to its compatibility with the iCUE ecosystem, which allows for a ton of customization options – including cooler upgrades like optional VRM fan modules or even adding a fancy LCD screen. In common scenarios, this cooler has some of the lowest noise levels I’ve seen thus far – but it isn’t without flaws, as I’ll detail below
Will this AIO make
our list of Best CPU Coolers? Let’s take a look at the specifications and features of the Titan RX RGB AIO, then we’ll go over thermal performance and noise levels.
Cooler specifications
Swipe to scroll horizontally
Cooler | Corsair iCUE Link Titan 360 RX RGB |
MSRP | $199 USD |
Radiator Material | Aluminum |
Pump Speed | Up to ~3000 RPM |
Lighting | iCUE Link for CPU Block and fans |
Warranty | 6 Years |
Socket Compatibility | Intel Socket LGA 1851/1700 AMD AM5 / AM4 |
Unit Dimensions (including fans) | 396 (L) x 120 (W) x 52mm (D) |
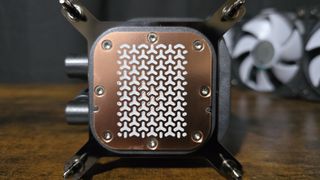
Base | Copper cold plate |
Maximum TDP (Our Testing) | >265W with Intel’s i7-14700K |
Packing and included contents
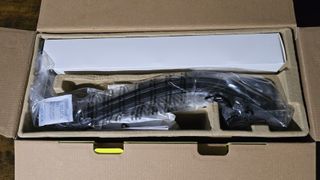
The packaging for Corsair’s AIO is relatively standard, not much different from the average AIO. The product is secured with plastic wrappings and molded cardboard, and the fans are preinstalled for user convenience.
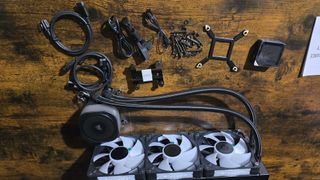
Included with the box are the following:
- Three pre-installed 120mm fans
- 360mm radiator and CPU block
- Pre-installed Thermal Paste
- iCUE Link Hub
- Mounting accessories for modern AMD & Intel platforms
Features of Corsair’s iCUE Link Titan 360 RX RGB
*️⃣Pre-installed Thermal Paste
Corsair only includes pre-installed thermal paste, sufficient for a single installation. This will be useful for most users, but the downside is that you’ll need to purchase additional thermal paste if you ever want to move the cooler to a new system or swap in a new CPU.
*️⃣27mm Radiator
The iCUE Link Titan 360 RX RGB includes a radiator 27mm in size, which is standard for most liquid coolers.
*️⃣Upgrade Options
One thing that sets the iCUE Link Titan 360 RX RGB apart is the ability to upgrade the AIO with different options that mount on top of the cold plate. These optional upgrades are cheapest if you purchase the AIO directly from Corsair and customize the features during the checkout process.
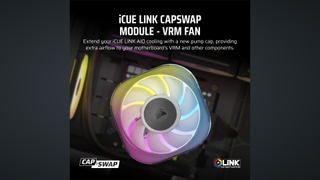
The module I find most interesting is the VRM fan upgrade, which costs an additional $30 if you purchase it after already owning the AIO – but only $15 if you purchase it with the AIO.
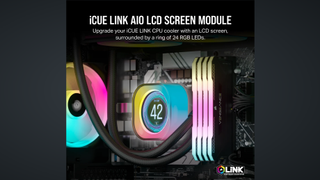
Another upgrade option is a 2.1-inch, 480x480 IPS display which allows you to view real-time CPU temperatures, animated GIFs, movie files, and more. However, I find it hard to recommend as an aftermarket purchase due to its high price of $100 USD.
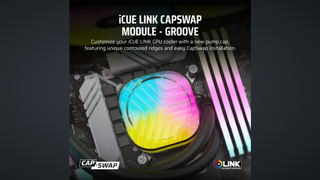
The last upgrade option available is a simpler “Groove” module, which changes the RGB aesthetic for only $15.
*️⃣iCUE Ecosystem
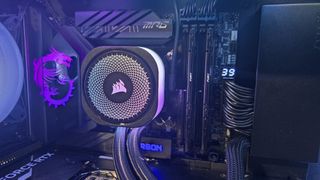
The Titan RX 360 RX RGB is controlled by an iCUE hub, pictured below. This allows you to take advantage of the iCUE ecosystem.

There’s a lot of options and customization available with Corsair’s iCUE Link system, which is designed to simplify PC building and cable routing, while adding some interesting lighting effects.
One disadvantage of the iCUE Link hub is that it has higher power requirements than a simple USB connection can provide – you’ll need an extra 6-pin PCI-e GPU power connection to power it on.
*️⃣Corsair RX Series 120mm fans
There’s more to a cooler than just the heatsink or radiator. The bundled fans have a significant impact on cooling and noise levels, as well as how the cooler looks in your case. The fans included here aren’t PWM and require using an iCUE Hub to control. However, as the benchmarks will show, they enable strong cooling performance, both at full speed and when restricted to low noise levels!
These fans are pre-installed and feature a quick-connect system, designed to save the user time and offer tidy cable management.
Swipe to scroll horizontally
Dimensions | 120 x 120 x 25mm |
Fan Speed | 300-2100 RPM |
Air Flow | Up to 73.5 CFM |
Air Pressure | Up to 4.33 mmH2O |
Bearing Type | Magnetic Dome |
Lighting | iCUE |
*️⃣Full RAM Compatibility
Like almost every other AIO on the market, Corsair’s AIO doesn’t interfere with or overhang RAM DIMMs in any manner, allowing for use of all sizes of RAM, no matter how tall.
*️⃣Six-year warranty
Most AIOs on the market have a limited warranty of only 1-3 years. Corsair goes the extra mile with a six-year warranty for the Titan 360 RX RGB. This generous warranty almost negates the high price of this AIO – almost.
Things I didn’t like about this AIO
There are two primary things I didn’t like about this AIO, and one minor complaint that is subjective.
❌ First, the iCUe software didn’t always save my custom cooling settings. On multiple occasions when I rebooted my computer, I’d have to manually configure them. Sometimes, my presets wouldn’t save at all. Enabling the “device memory mode” in the iCUE software prevents this problem from occurring entirely, but users shouldn’t have to take this extra step.
❌ The second thing I don’t like about this AIO is that it has higher power consumption compared to competitors. You need an extra 6-pin PCIe GPU power connection to power the hub and cooler. Even if you don’t care about some extra power consumption, this is inconvenient when modern GPUs often require whatever PCIe plugs your PSU has to offer.
❌ The last thing I don’t like about Corsair’s iCUE Link Titan 360 RX RGB is that by default, pump and fan speeds are tied to the temperature of the liquid coolant. But this is a personal preference, you might actually prefer this type of operation. This has the advantage of avoiding fan bursts and delivering lower maximum noise levels.
❌ The primary disadvantage is that this design allows the CPU to reach its peak temperature and throttle during intensive workloads. The other disadvantage is that fans will remain at higher noise levels even after a workload has ended – because it is harder / slower to cool the temperature of the liquid coolant down than it is to cool the temperature of the CPU down.
Testing configuration – Intel LGA1700 and LGA1851 platform
Swipe to scroll horizontally
CPU | Intel Core i7-14700K |
GPU | ASRock Steel Legend Radeon 7900 GRE |
Motherboard | MSI Z790 Project Zero |
Case | MSI Pano 100L PZ Black |
System Fans | Iceberg Thermal IceGale Silent |
There are many factors other than the CPU cooler that can influence your cooling performance, including the case you use and the fans installed in it. A system's motherboard can also influence this, especially if it suffers from bending, which results in poor cooler contact with the CPU.
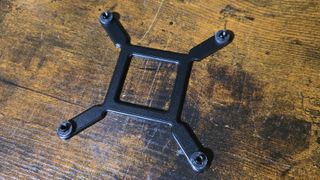
In order to prevent bending from impacting our cooling results, we’ve installed Thermalright’s LGA 1700 contact frame into our testing rig. If your motherboard is affected by bending, your thermal results will be worse than those shown below. Not all motherboards are affected equally by this issue. I tested Raptor Lake CPUs in two motherboards. And while one of them showed significant thermal improvements after installing Thermalright’s LGA1700 contact frame, the other motherboard showed no difference in temperatures whatsoever! Check out our review of the contact frame for more information.
I’ve also tested this cooler with Intel’s latest platform, Arrow Lake and LGA 1851.
Swipe to scroll horizontally
CPU | Intel Core Ultra 9 285K |
GPU | MSI Ventus 3X RTX 4070Ti Super |
Motherboard | MSI Z890 Carbon Wifi |
Case | |
System fans | Pre-installed case fans |
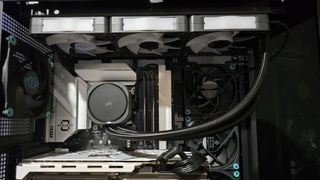
LGA 1700 and 1851 Installation
The installation of the AIO is simple. The following steps assume that you will mount the radiator to your case first, which is generally a good idea unless your case is very small.
1. You’ll first need to place the backplate against the rear of the motherboard. The backplate included is simple, and only really designed for a single installation. It uses adhesive strips around the rubber standoffs. This has the advantage of making the first installation easy, but it doesn’t adhere very well on additional installations – requiring that the user hold the backplate while attempting to complete the other installation steps.
2. Next, take the CPU block and place it on top of the CPU. Use the screws pre-attached to secure the CPU block.
3. The next step will be to install the iCUE hub, connect it to a 6-pin PCI-e power cable, and then connect cables from the hub to the CPU block and radiator.
4. Now you can power on your computer, as installation is complete.


 English (US) ·