
 1 month ago
243
1 month ago
243
Today we’re testing Cooler Master’s Hyper 212 3DHP. And yes, this feels like the 20th iteration of the company’s Hyper 212. The company has certainly rebranded the Hyper 212 numerous times, but this revision might be the most significant air cooler release in the past decade.
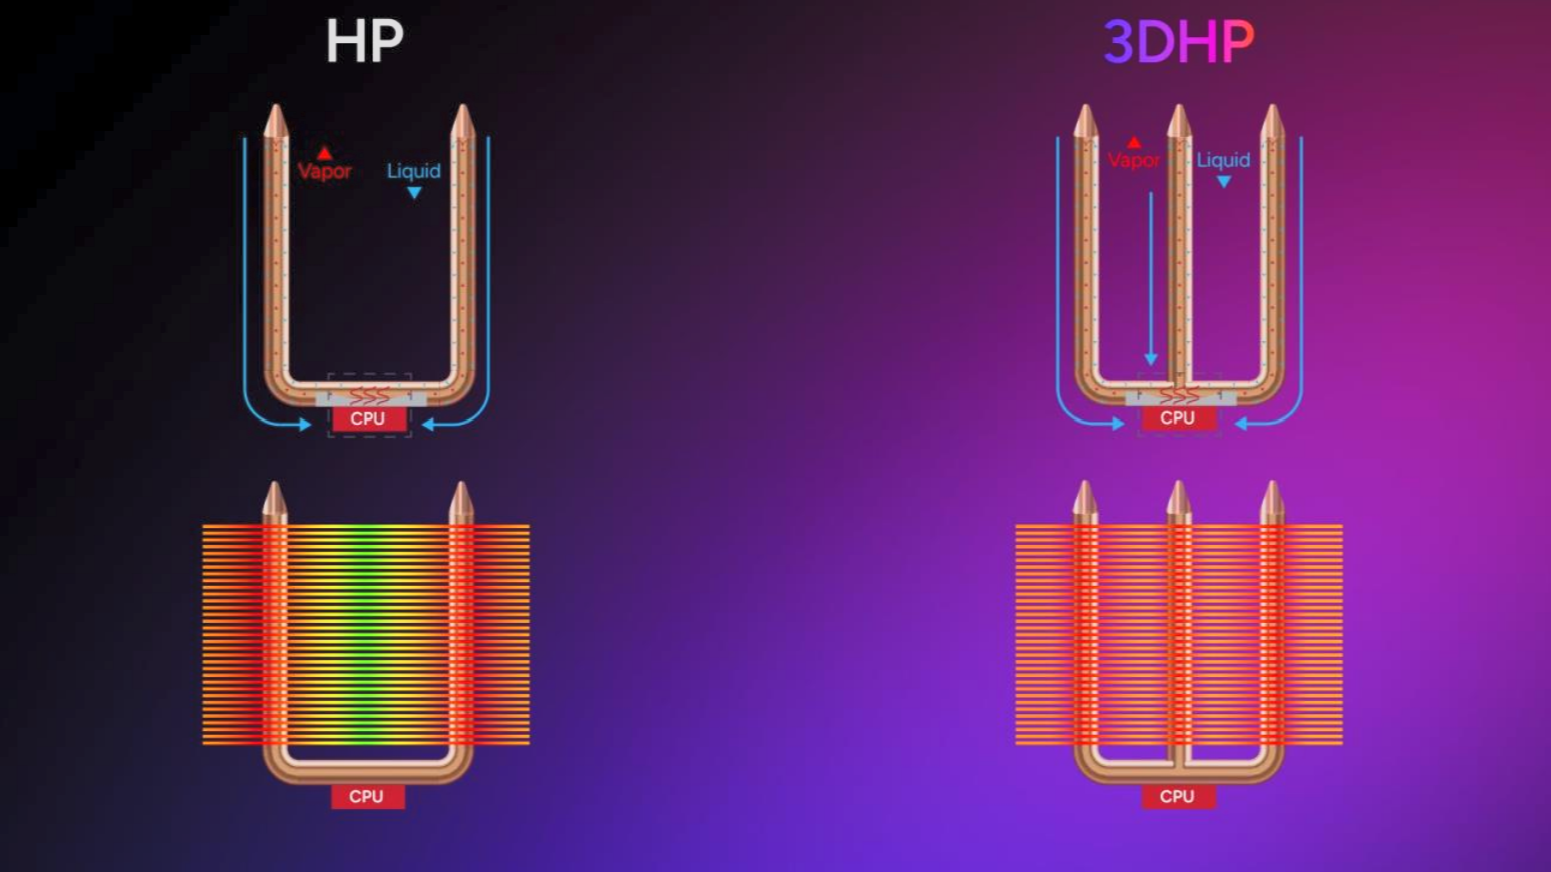
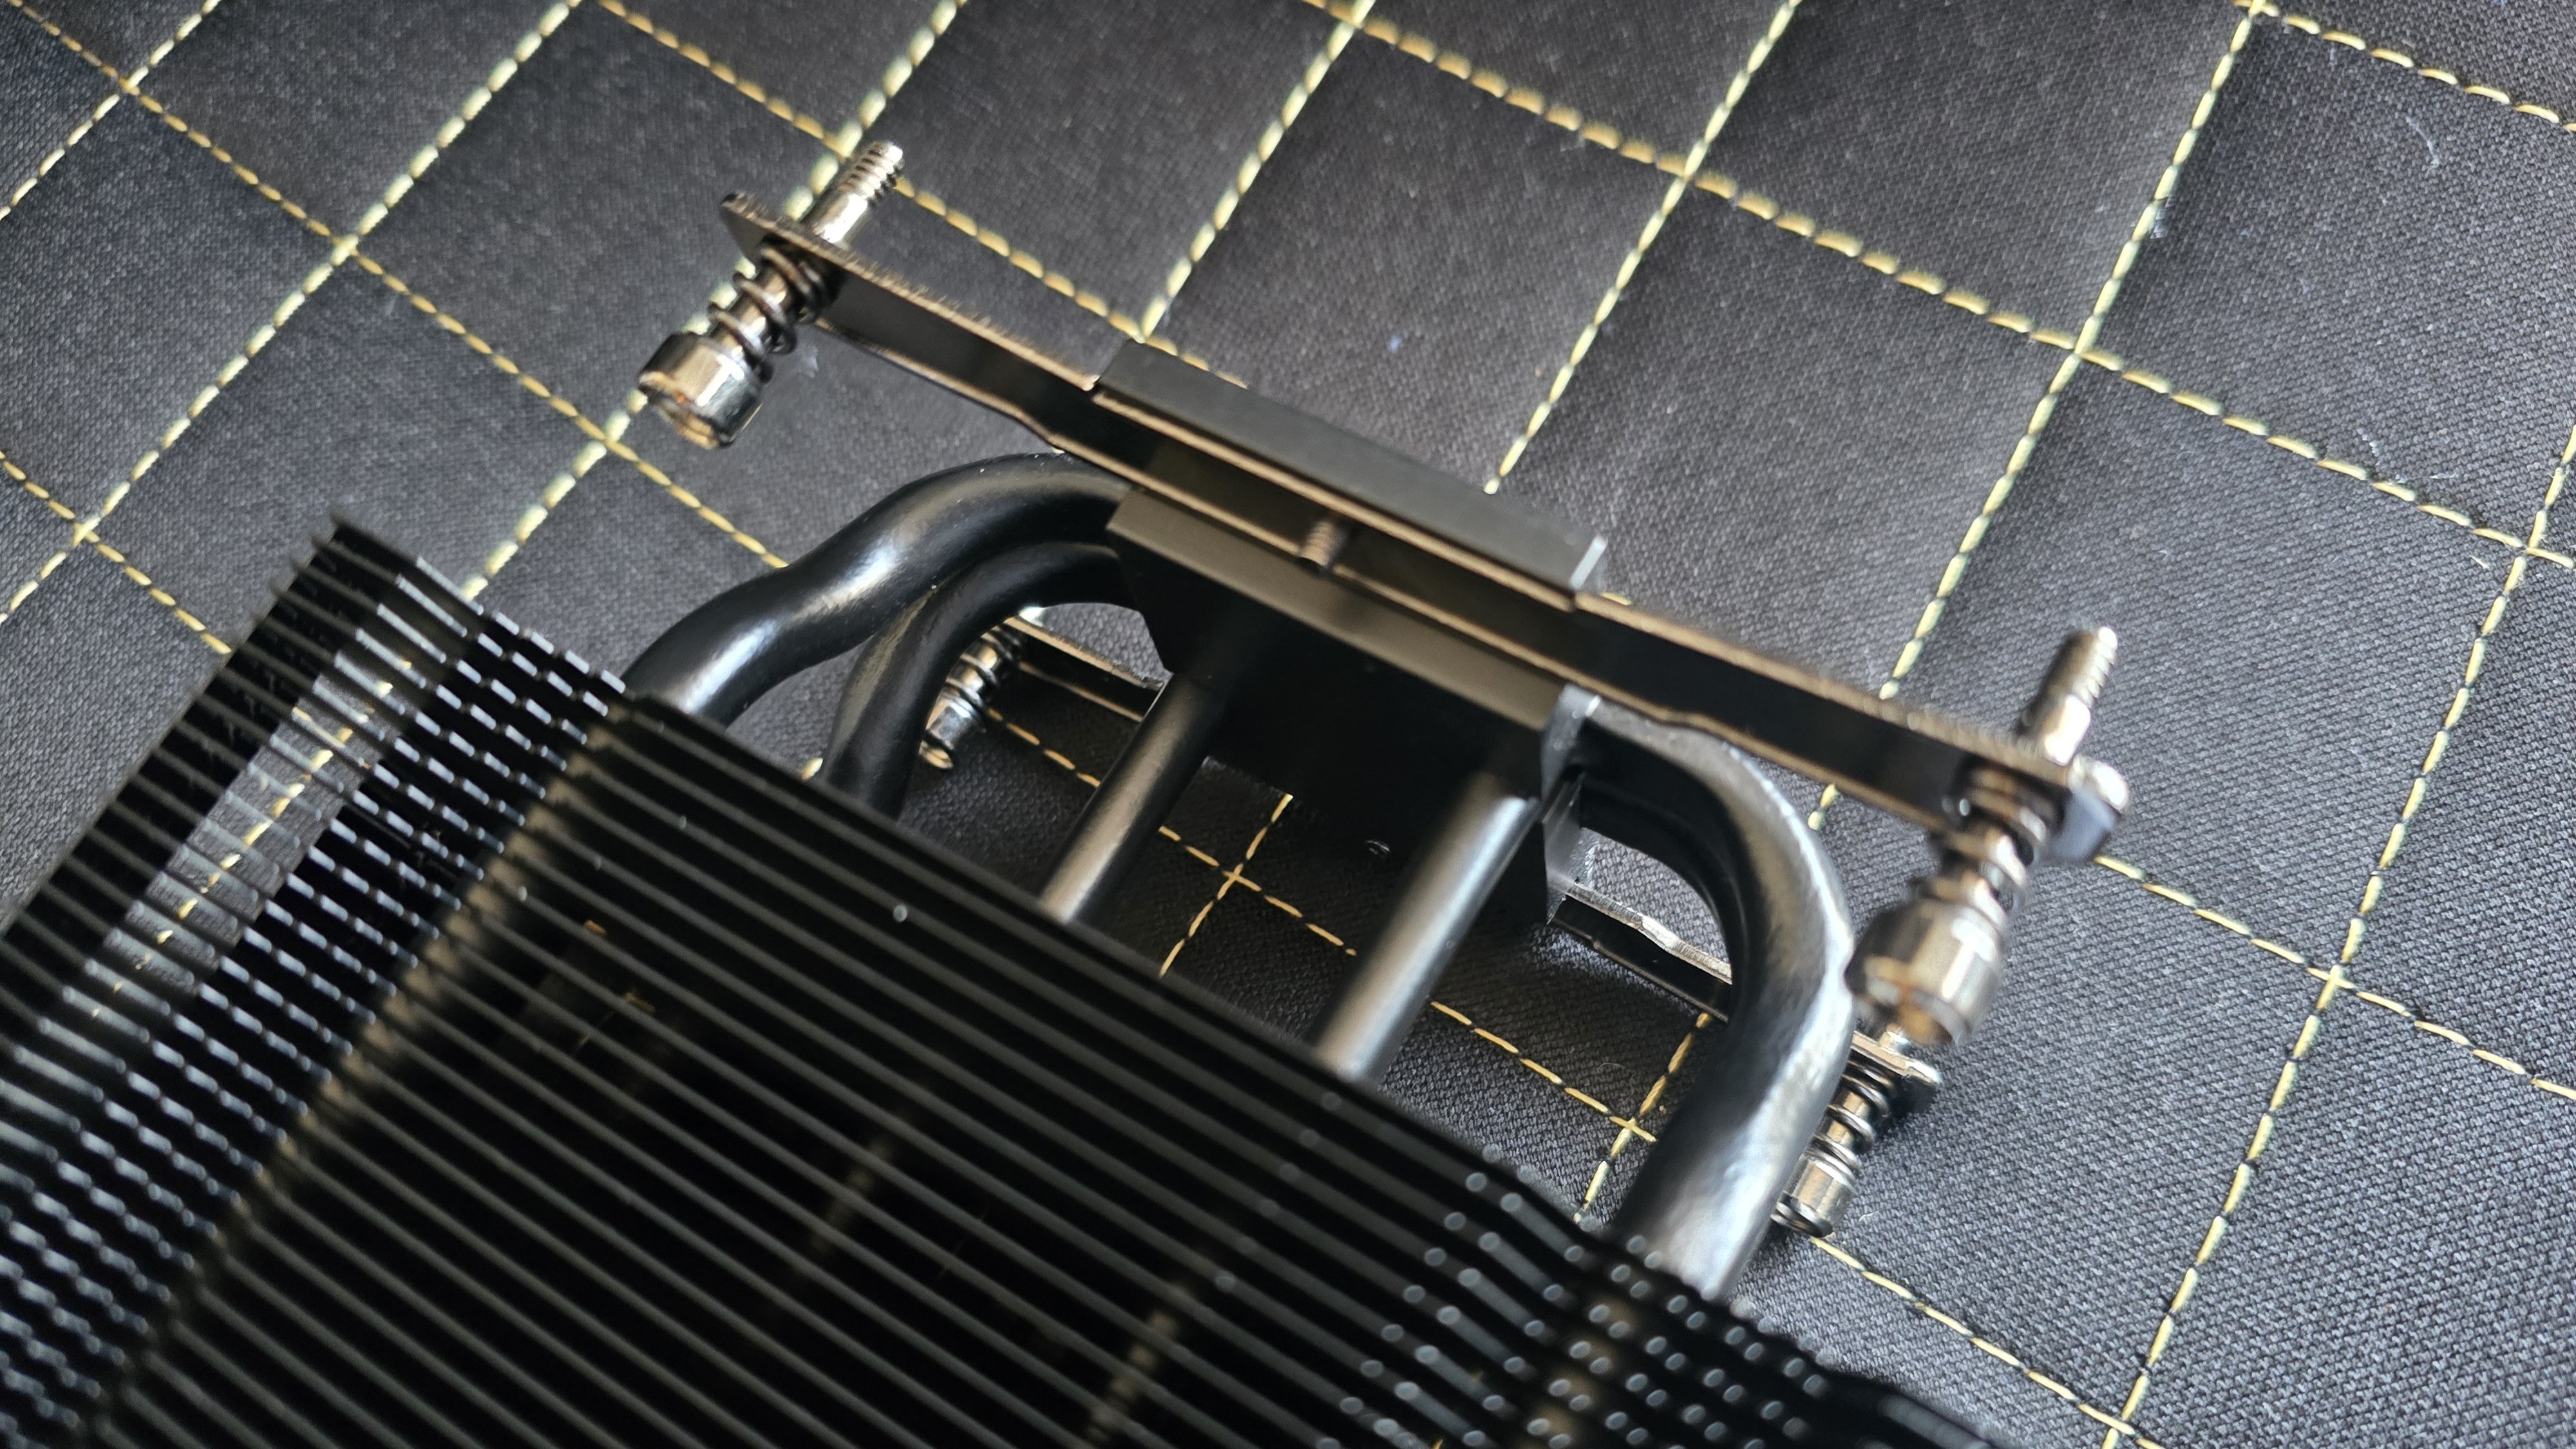
What makes the Hyper 212 3DHP so important? It's in the name of the cooler – the company’s new 3DHP heatpipe technology. Traditional copper heatpipes are typically formed in a “U” shape, and work well enough in most scenarios. But Cooler Master’s 3DHP heatpipes are formed in a trident-like shape, with three ends instead of two.
Will this new cooler make our list of best CPU coolers on the market? Well, let’s put it this way: It features genuine innovation – a rarity in the rather stale air cooling market, and features a nearly silent fan. Let’s go through the features and benchmarks of this cooler, and you can decide for yourself if it is worth sinking $29.99 of your cooling budget into.
Cooler specifications
Swipe to scroll horizontally
Cooler | Hyper 212 3DHP Black ARGB |
Heatpipes | Two 3DHP heatpipes |
Colors | Black |
MSRP | $29.99 |
Lighting | ARGB |
Warranty | 5 years |
Socket Compatibility | Intel Socket LGA 1851/1700/1200/115x AMD AM5 / AM4 |
Radiator Dimensions | 133 (L) x 86 (W) x 158mm (H) |
Maximum TDP (Our Testing) | >209W with AMD’s Ryzen 9 9950X |
Packing and included contents
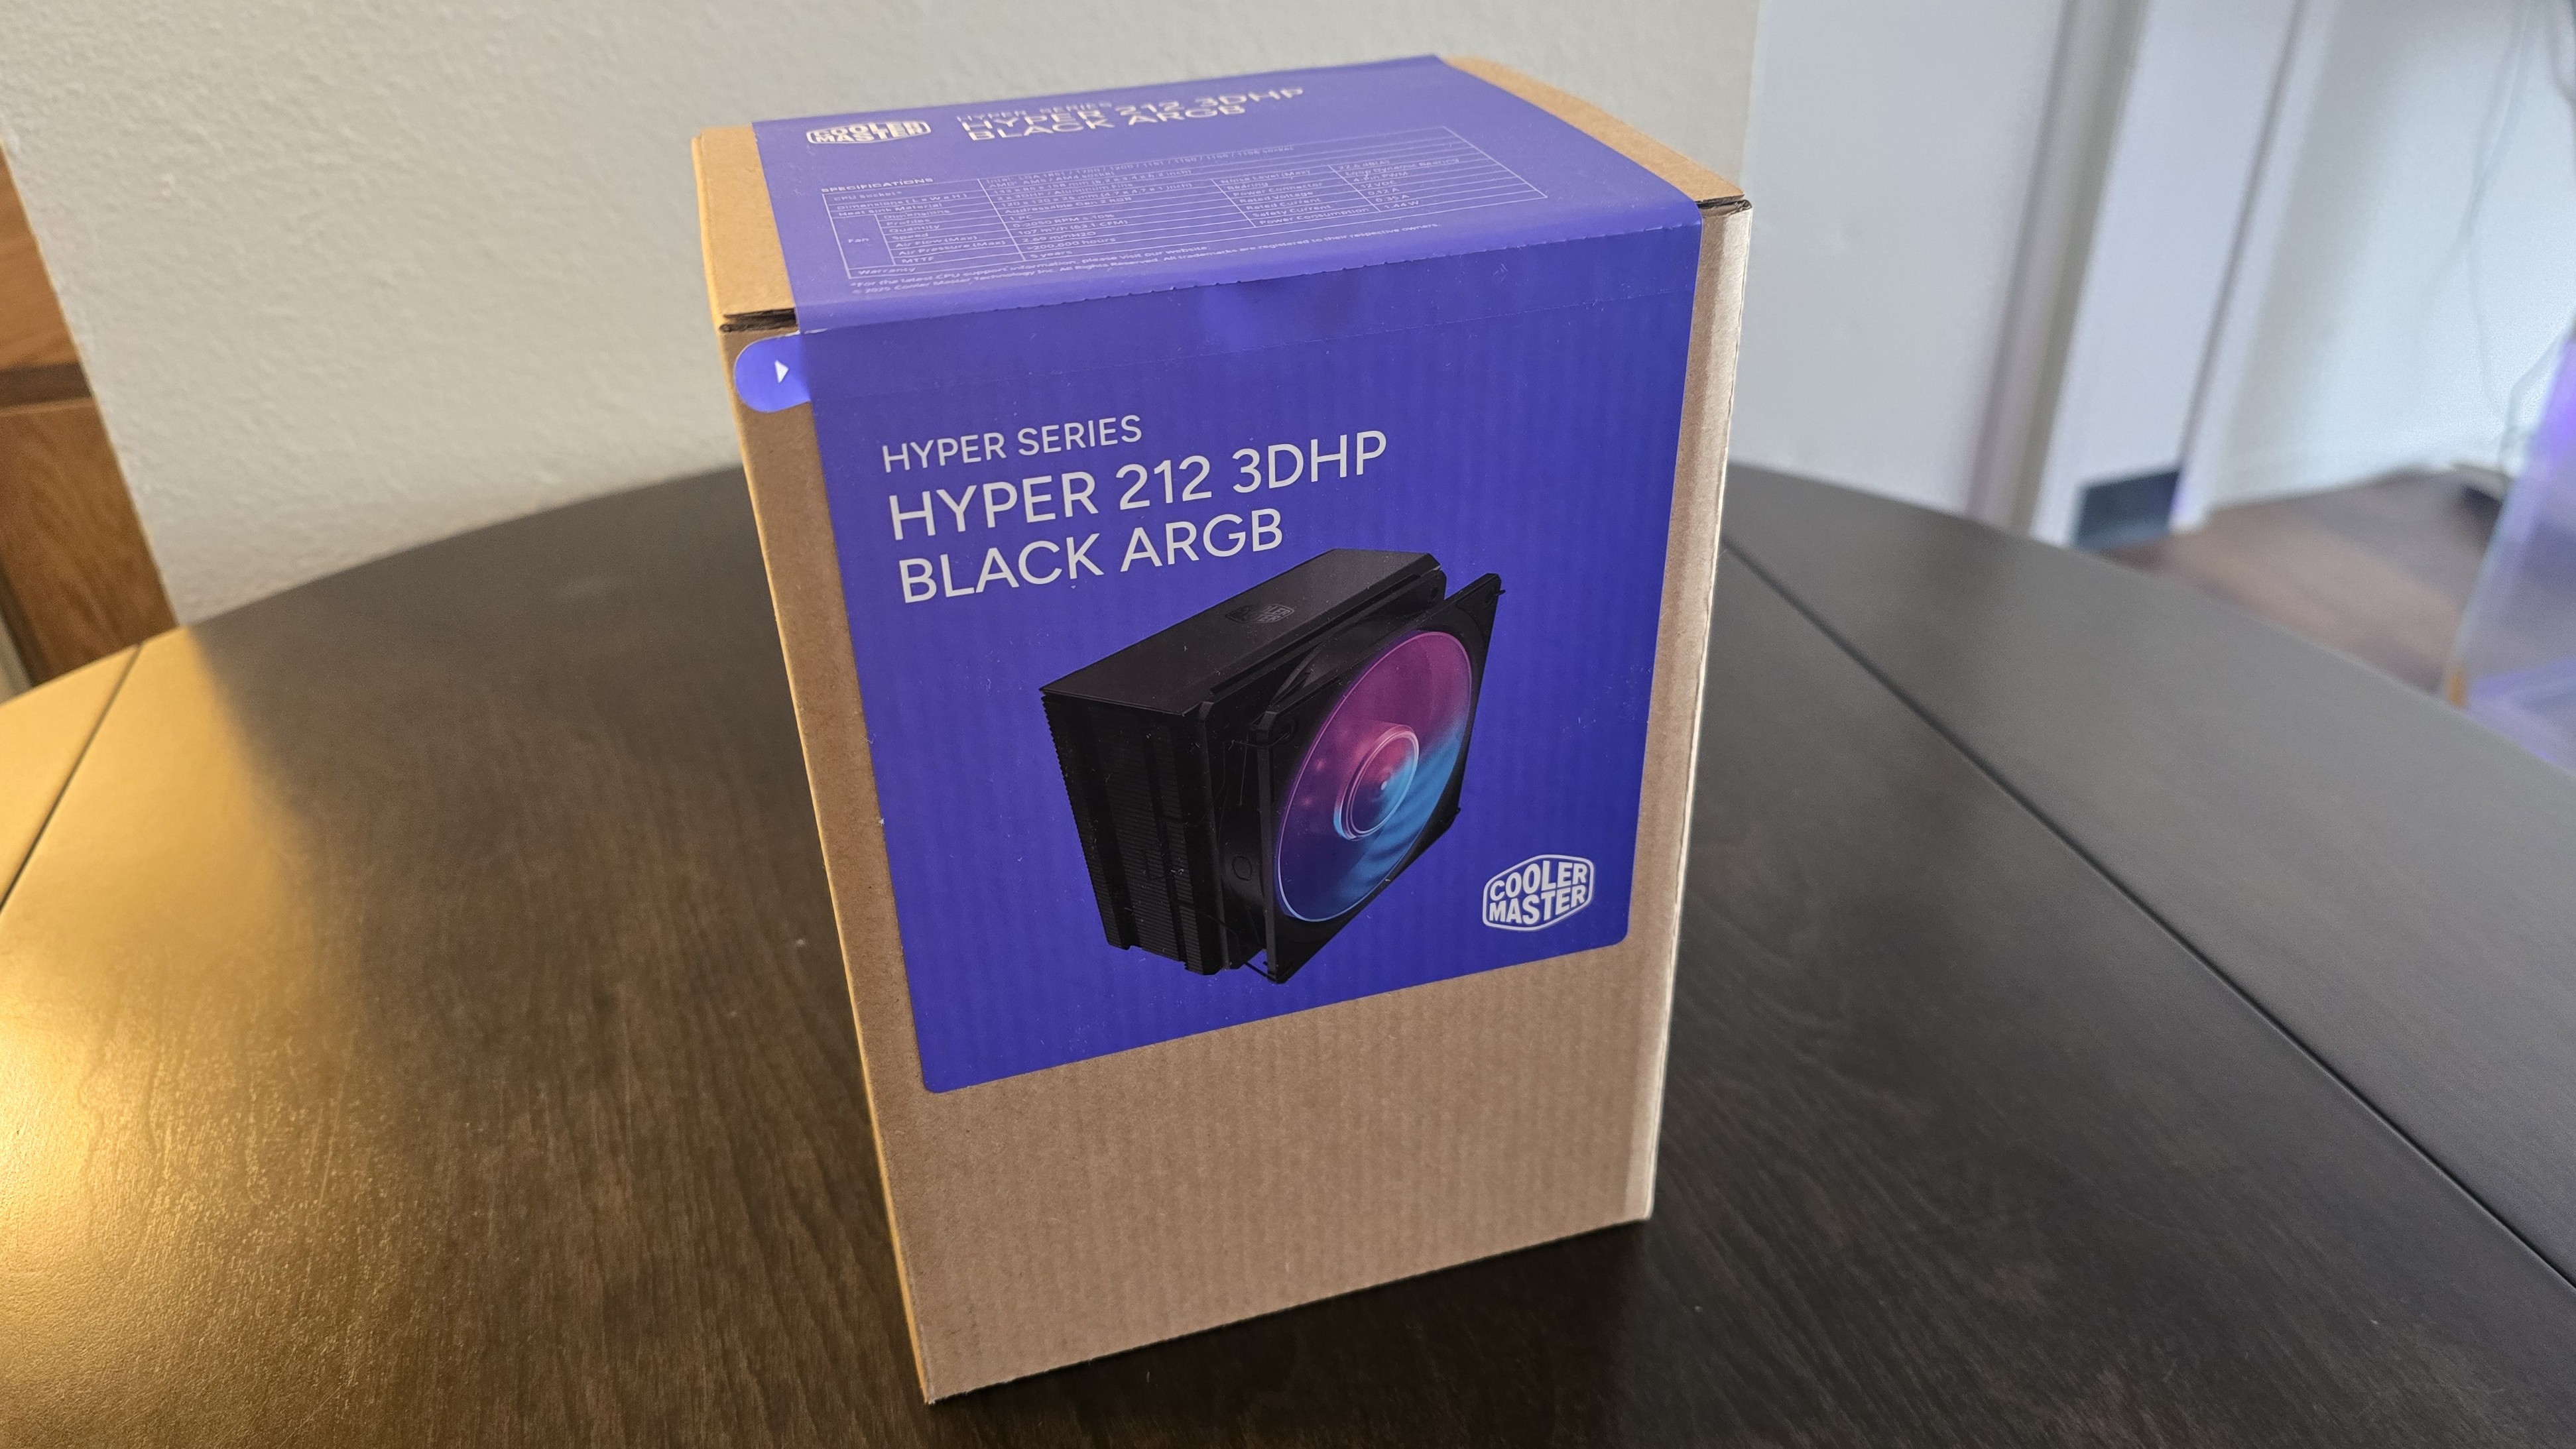
The cooler arrives in a simple brown box, with a purple label showing the design of the product and its specifications. Inside are two smaller boxes: One contains the heatsink and fan, while the other includes the mounting accessories.
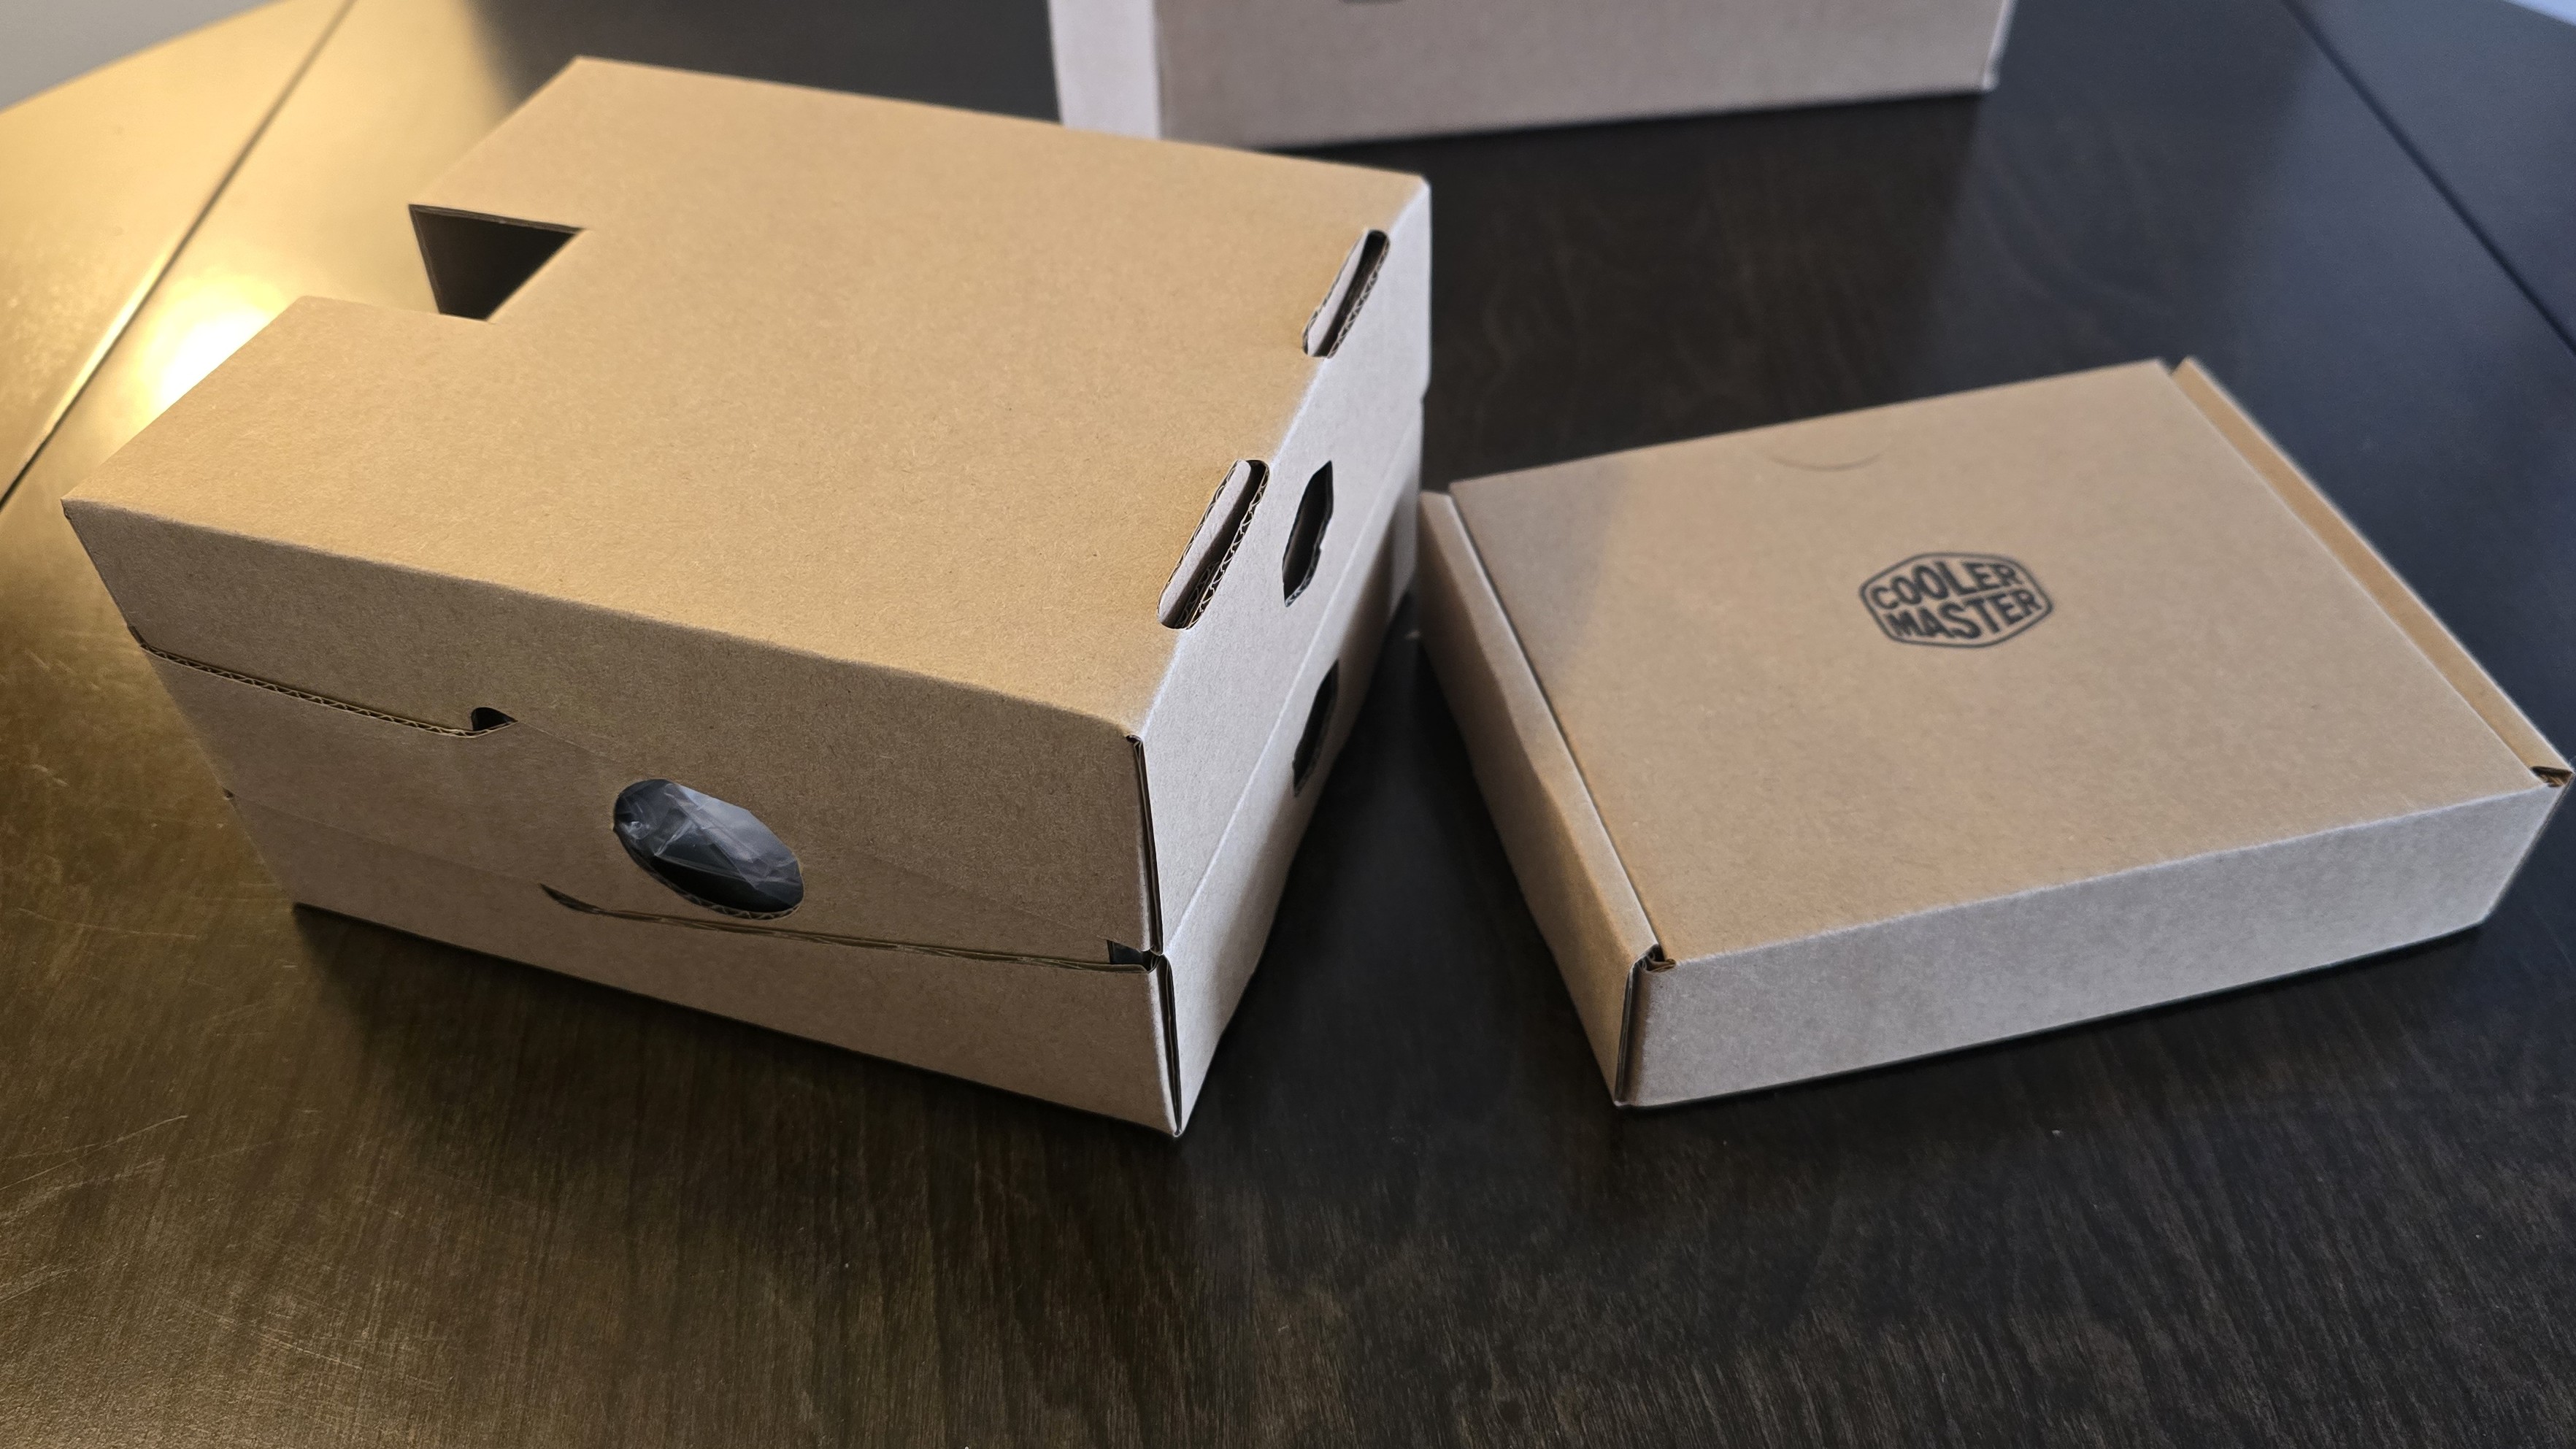
Included with the product are the following:
- 1x 120mm fan
- Single tower heatsink with two 3DHP copper heatpipes
- CryoFuze thermal paste
- Mounting for AMD and Intel platforms
- Installation manual
Features of Cooler Master’s Hyper 212 3DHP
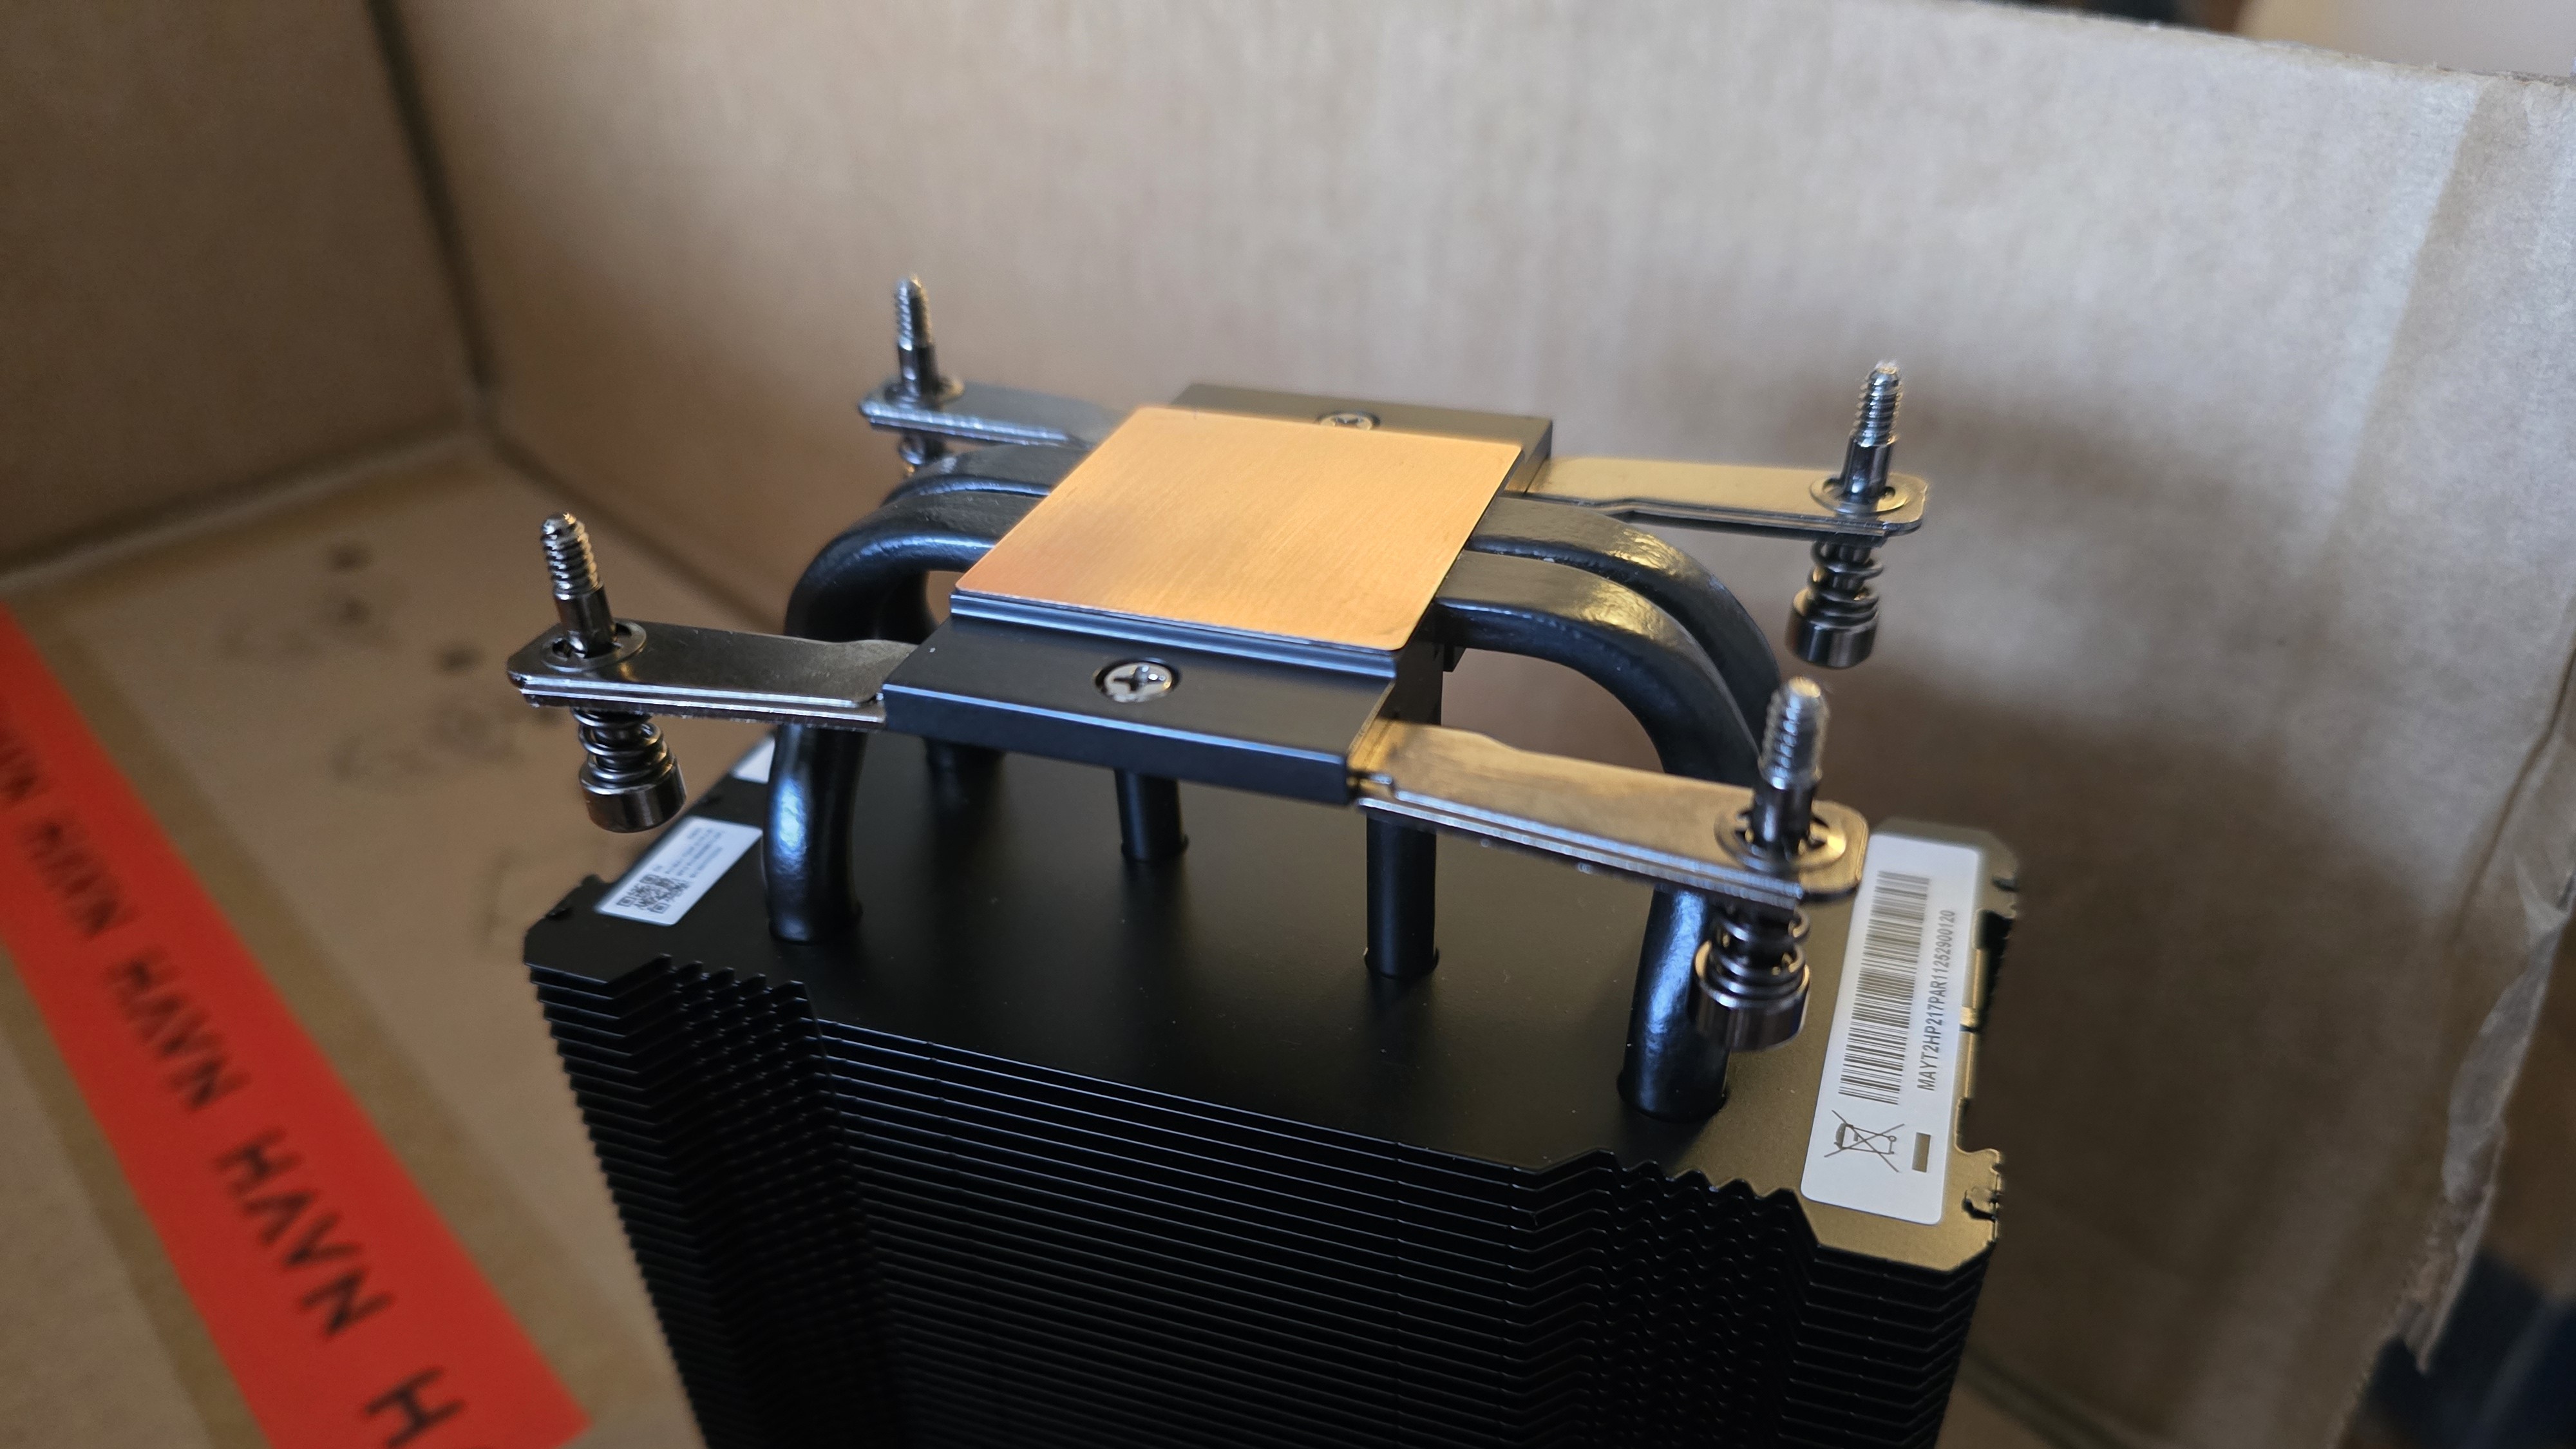
▶️ Innovative 3DHP copper heatpipes
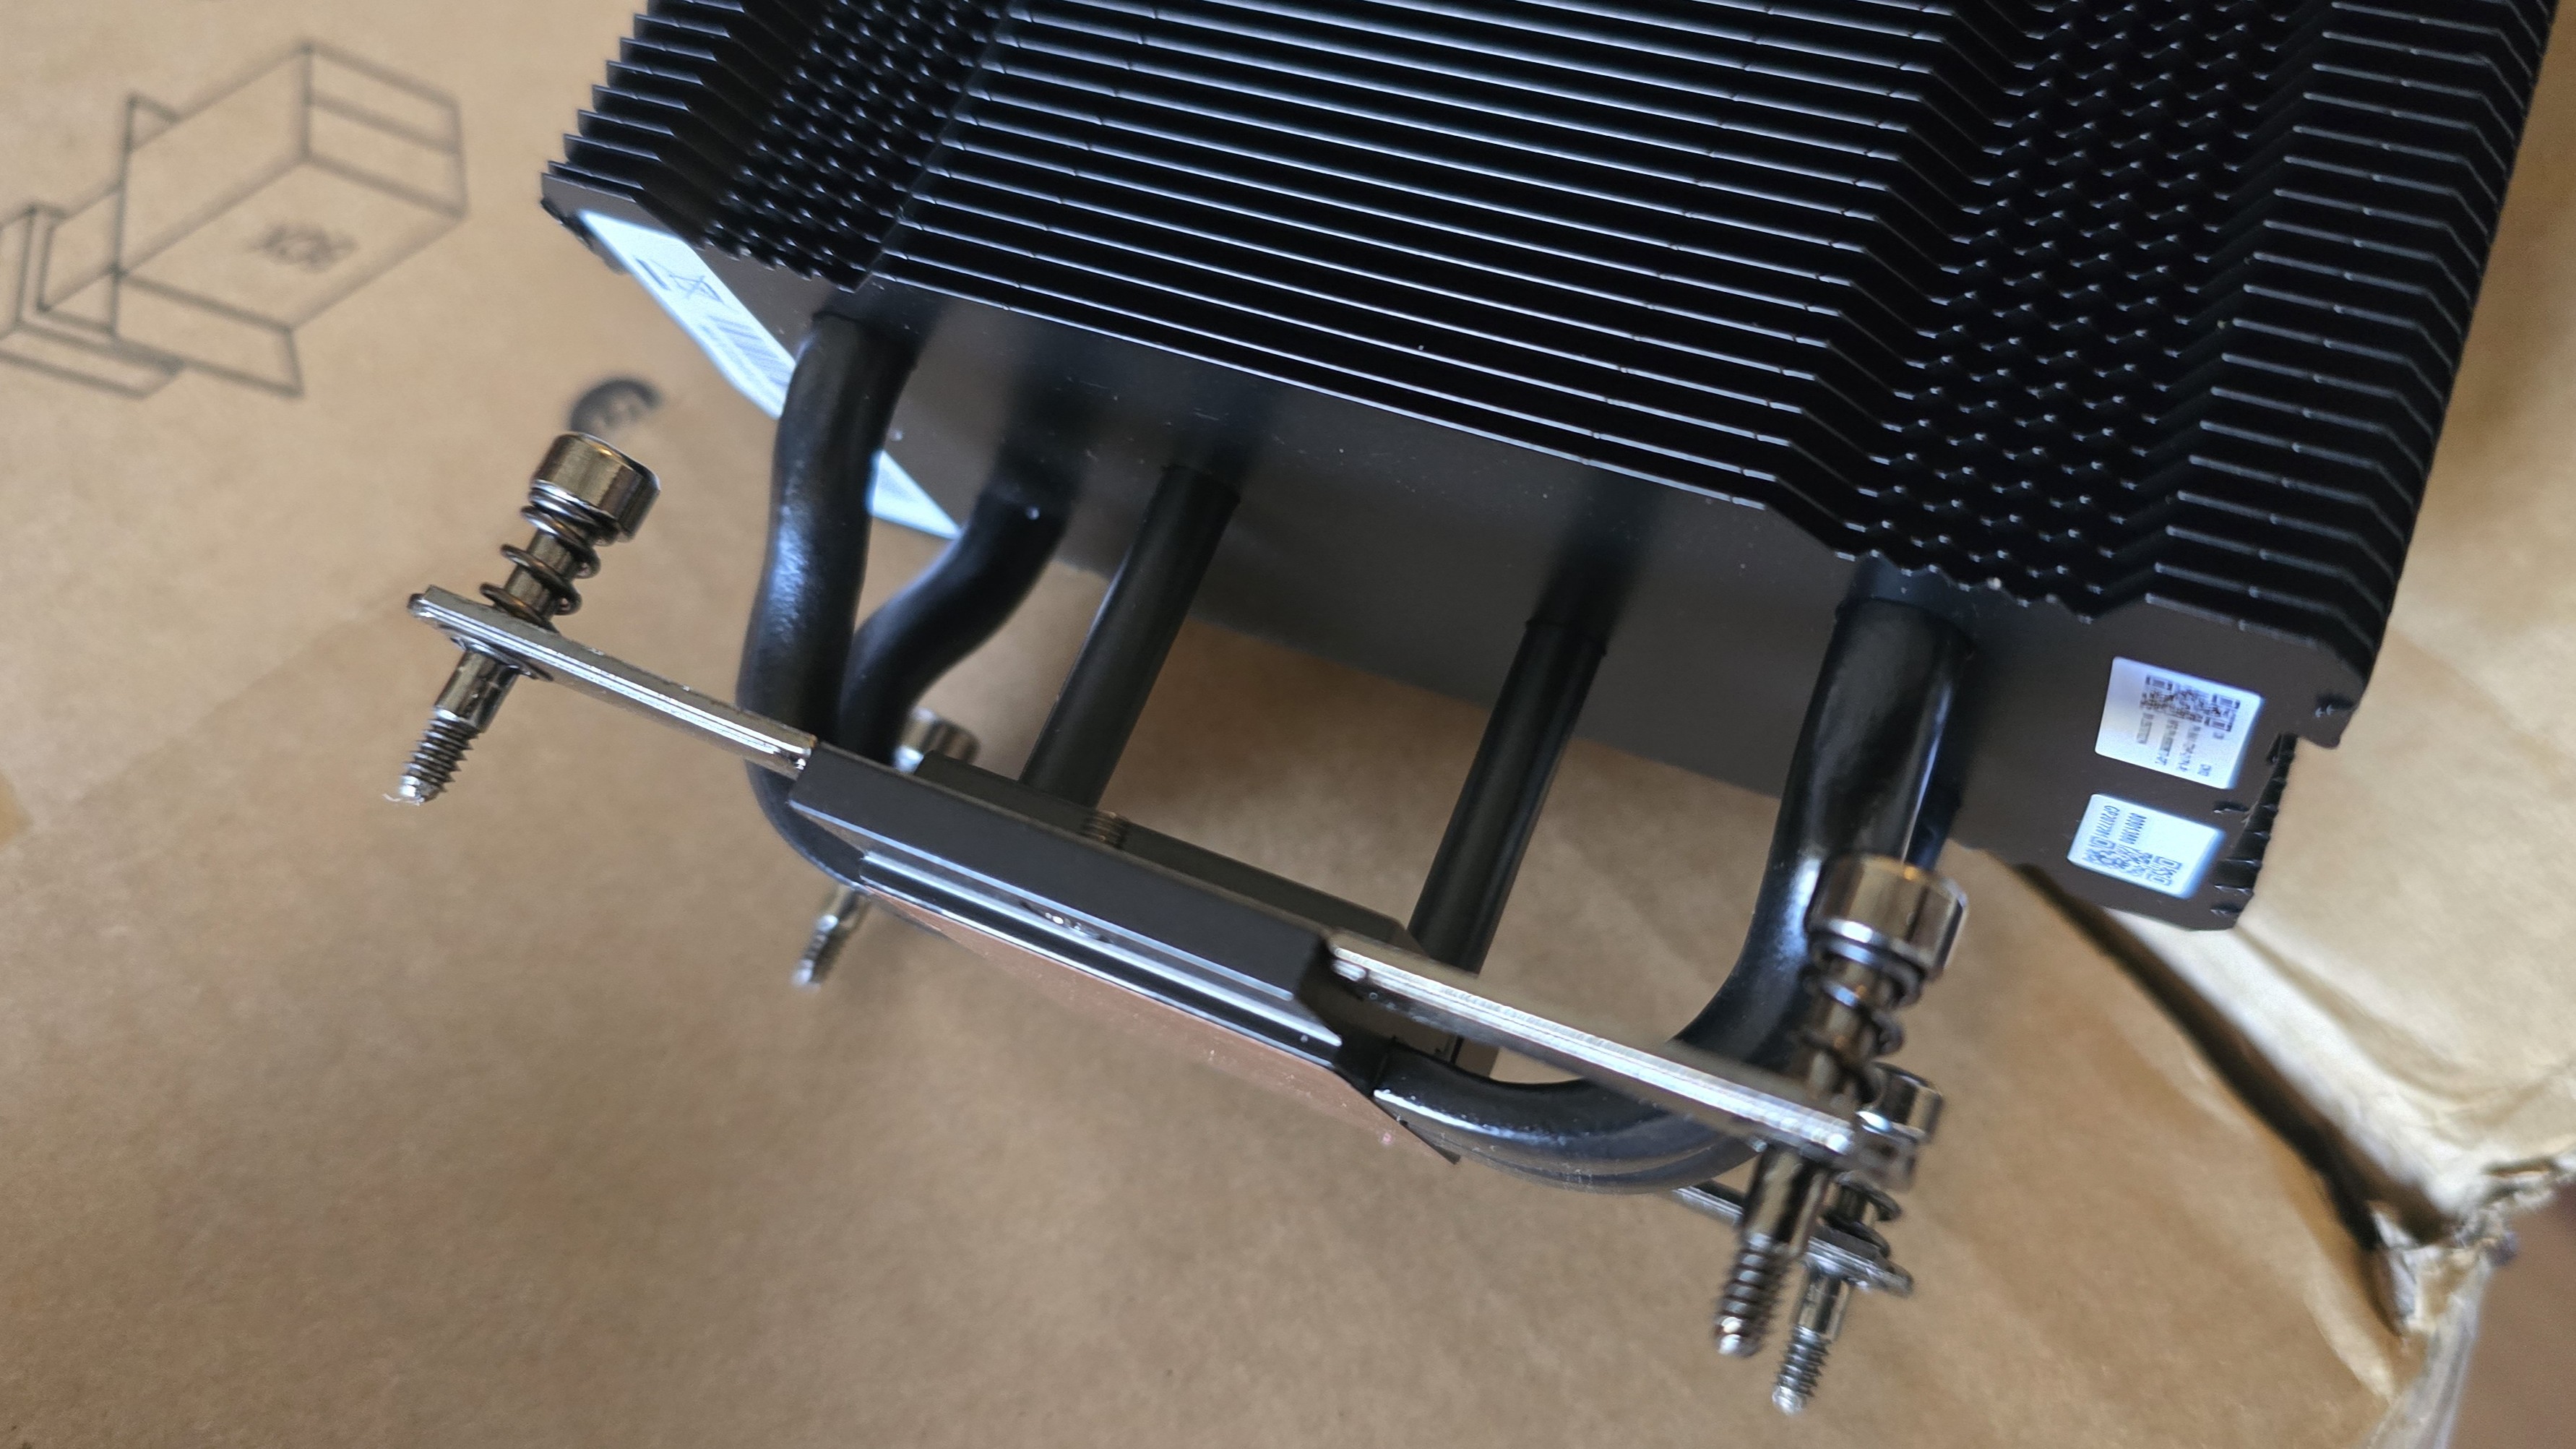
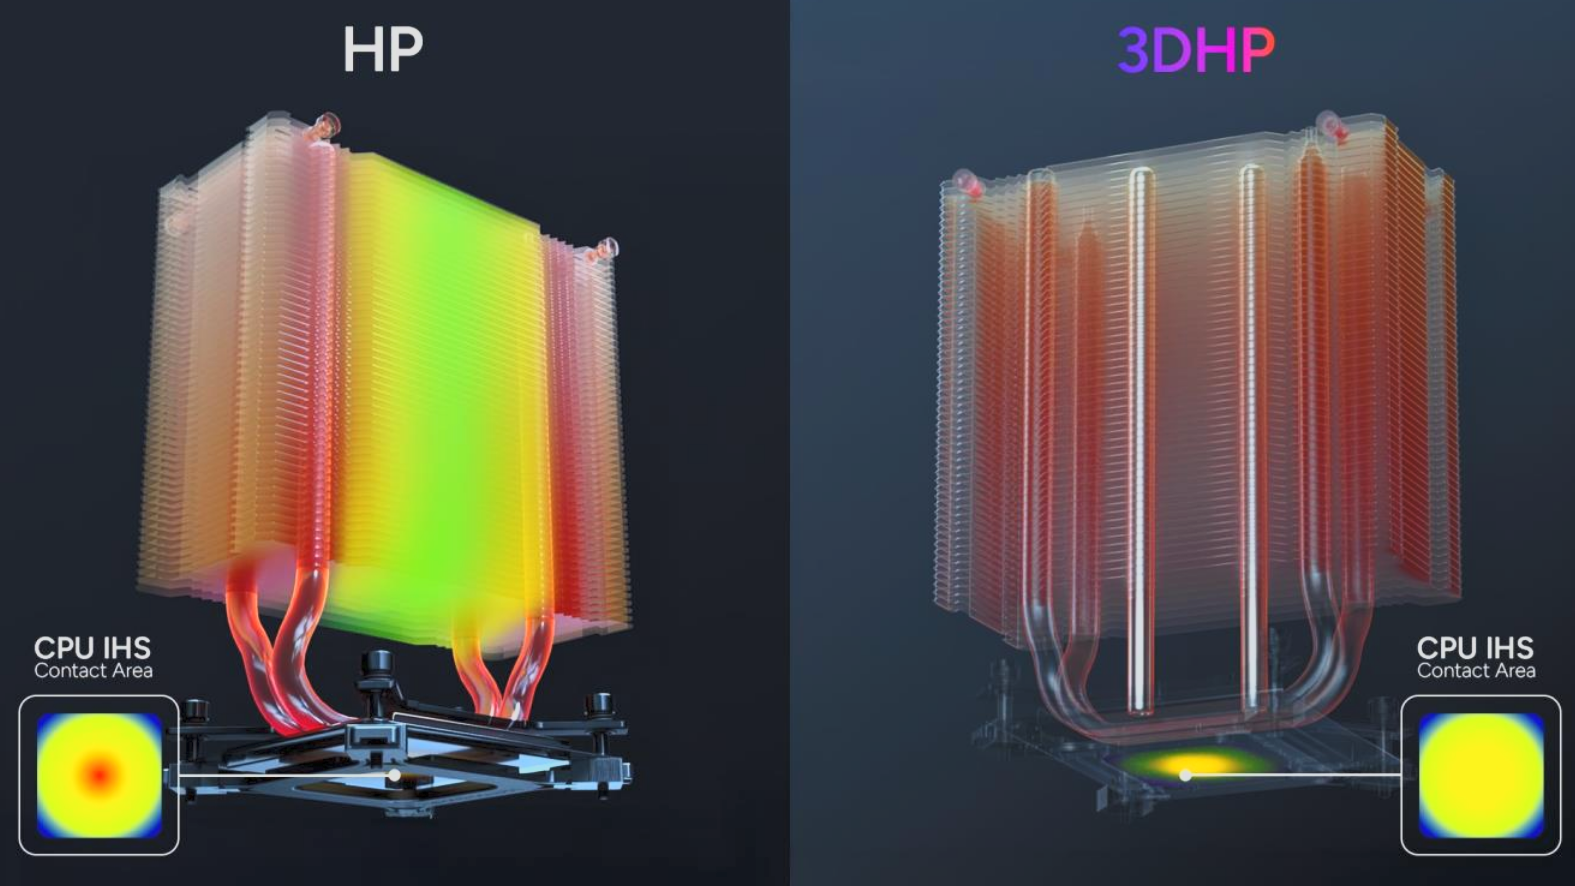
This isn’t just another Hyper 212 rebrand – the Hyper 212 3DHP is the first cooler on the market with Cooler Master’s new heatpipe technology. Most traditional heatpipes are formed in a “U” shape, but the 3DHP heatpipes are trident-shaped. As you’ll see in our benchmarks, this groundbreaking and effective design allows for just two of these new heatpipes to outperform four traditional direct-touch copper heatpipes!
Part of the reason these heatpipes perform better is that they more effectively remove heat from the center of the CPU. As an example, Cooler Master has kindly provided this thermal image showing how the hotspot of the CPU is reduced with this new heatpipe design.
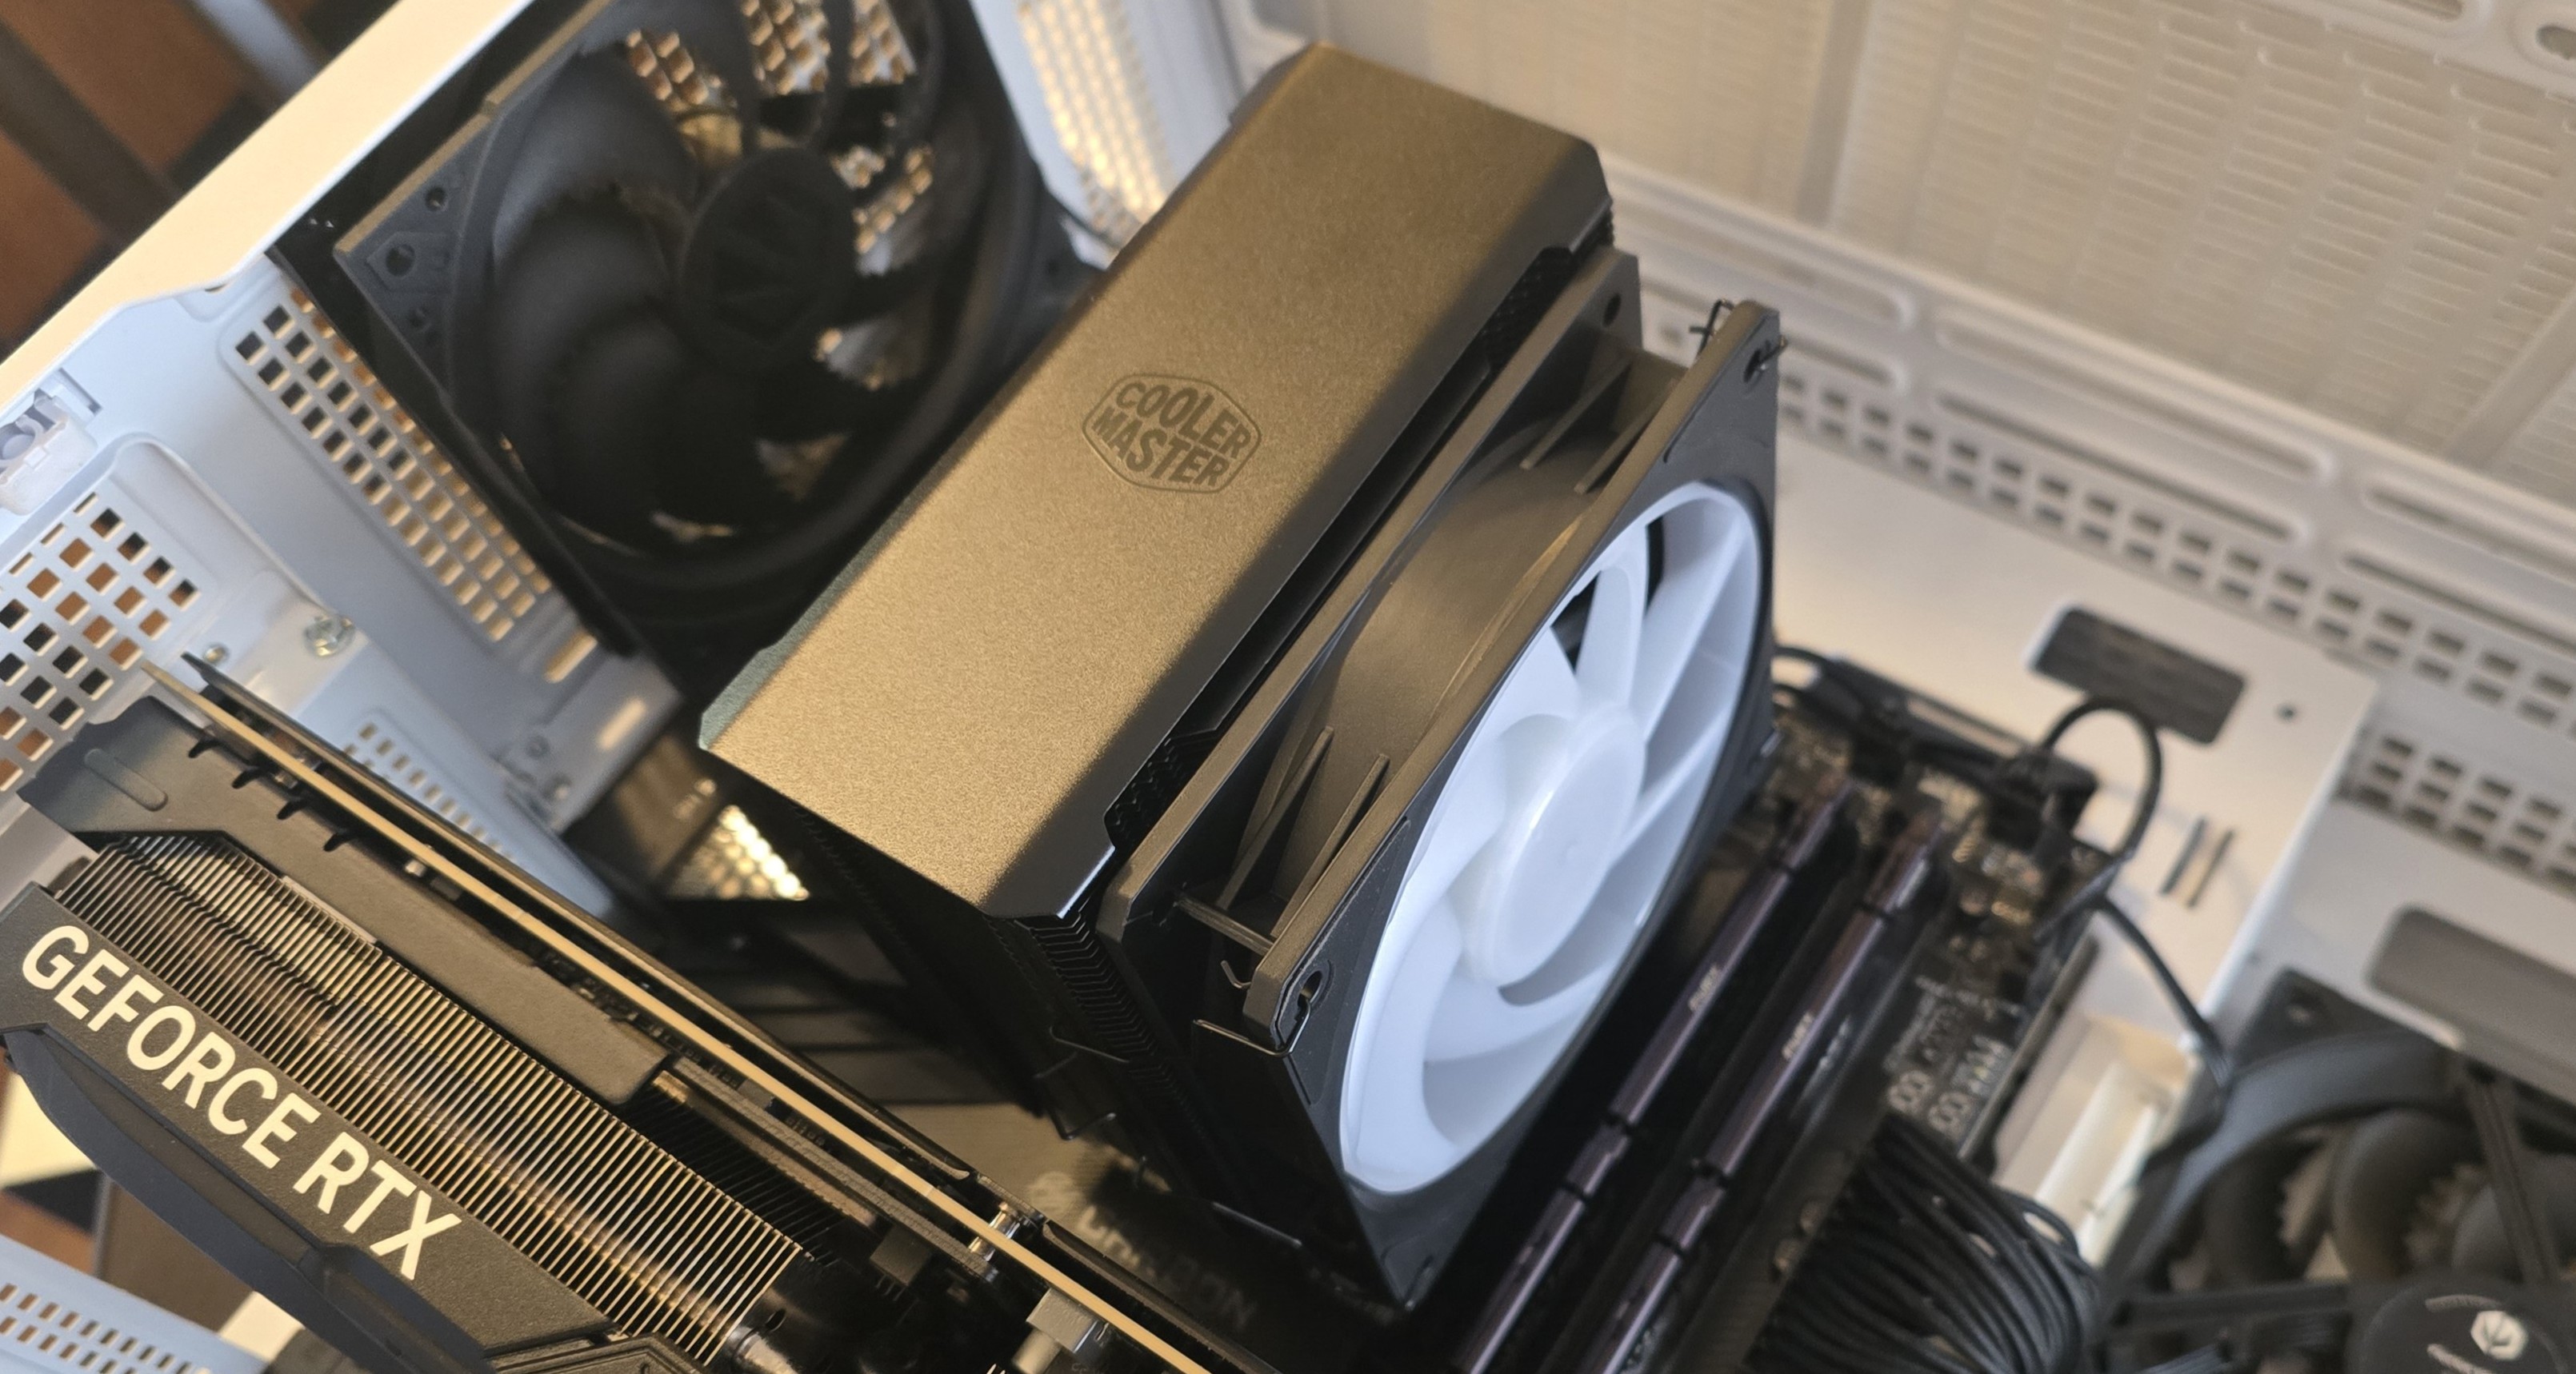
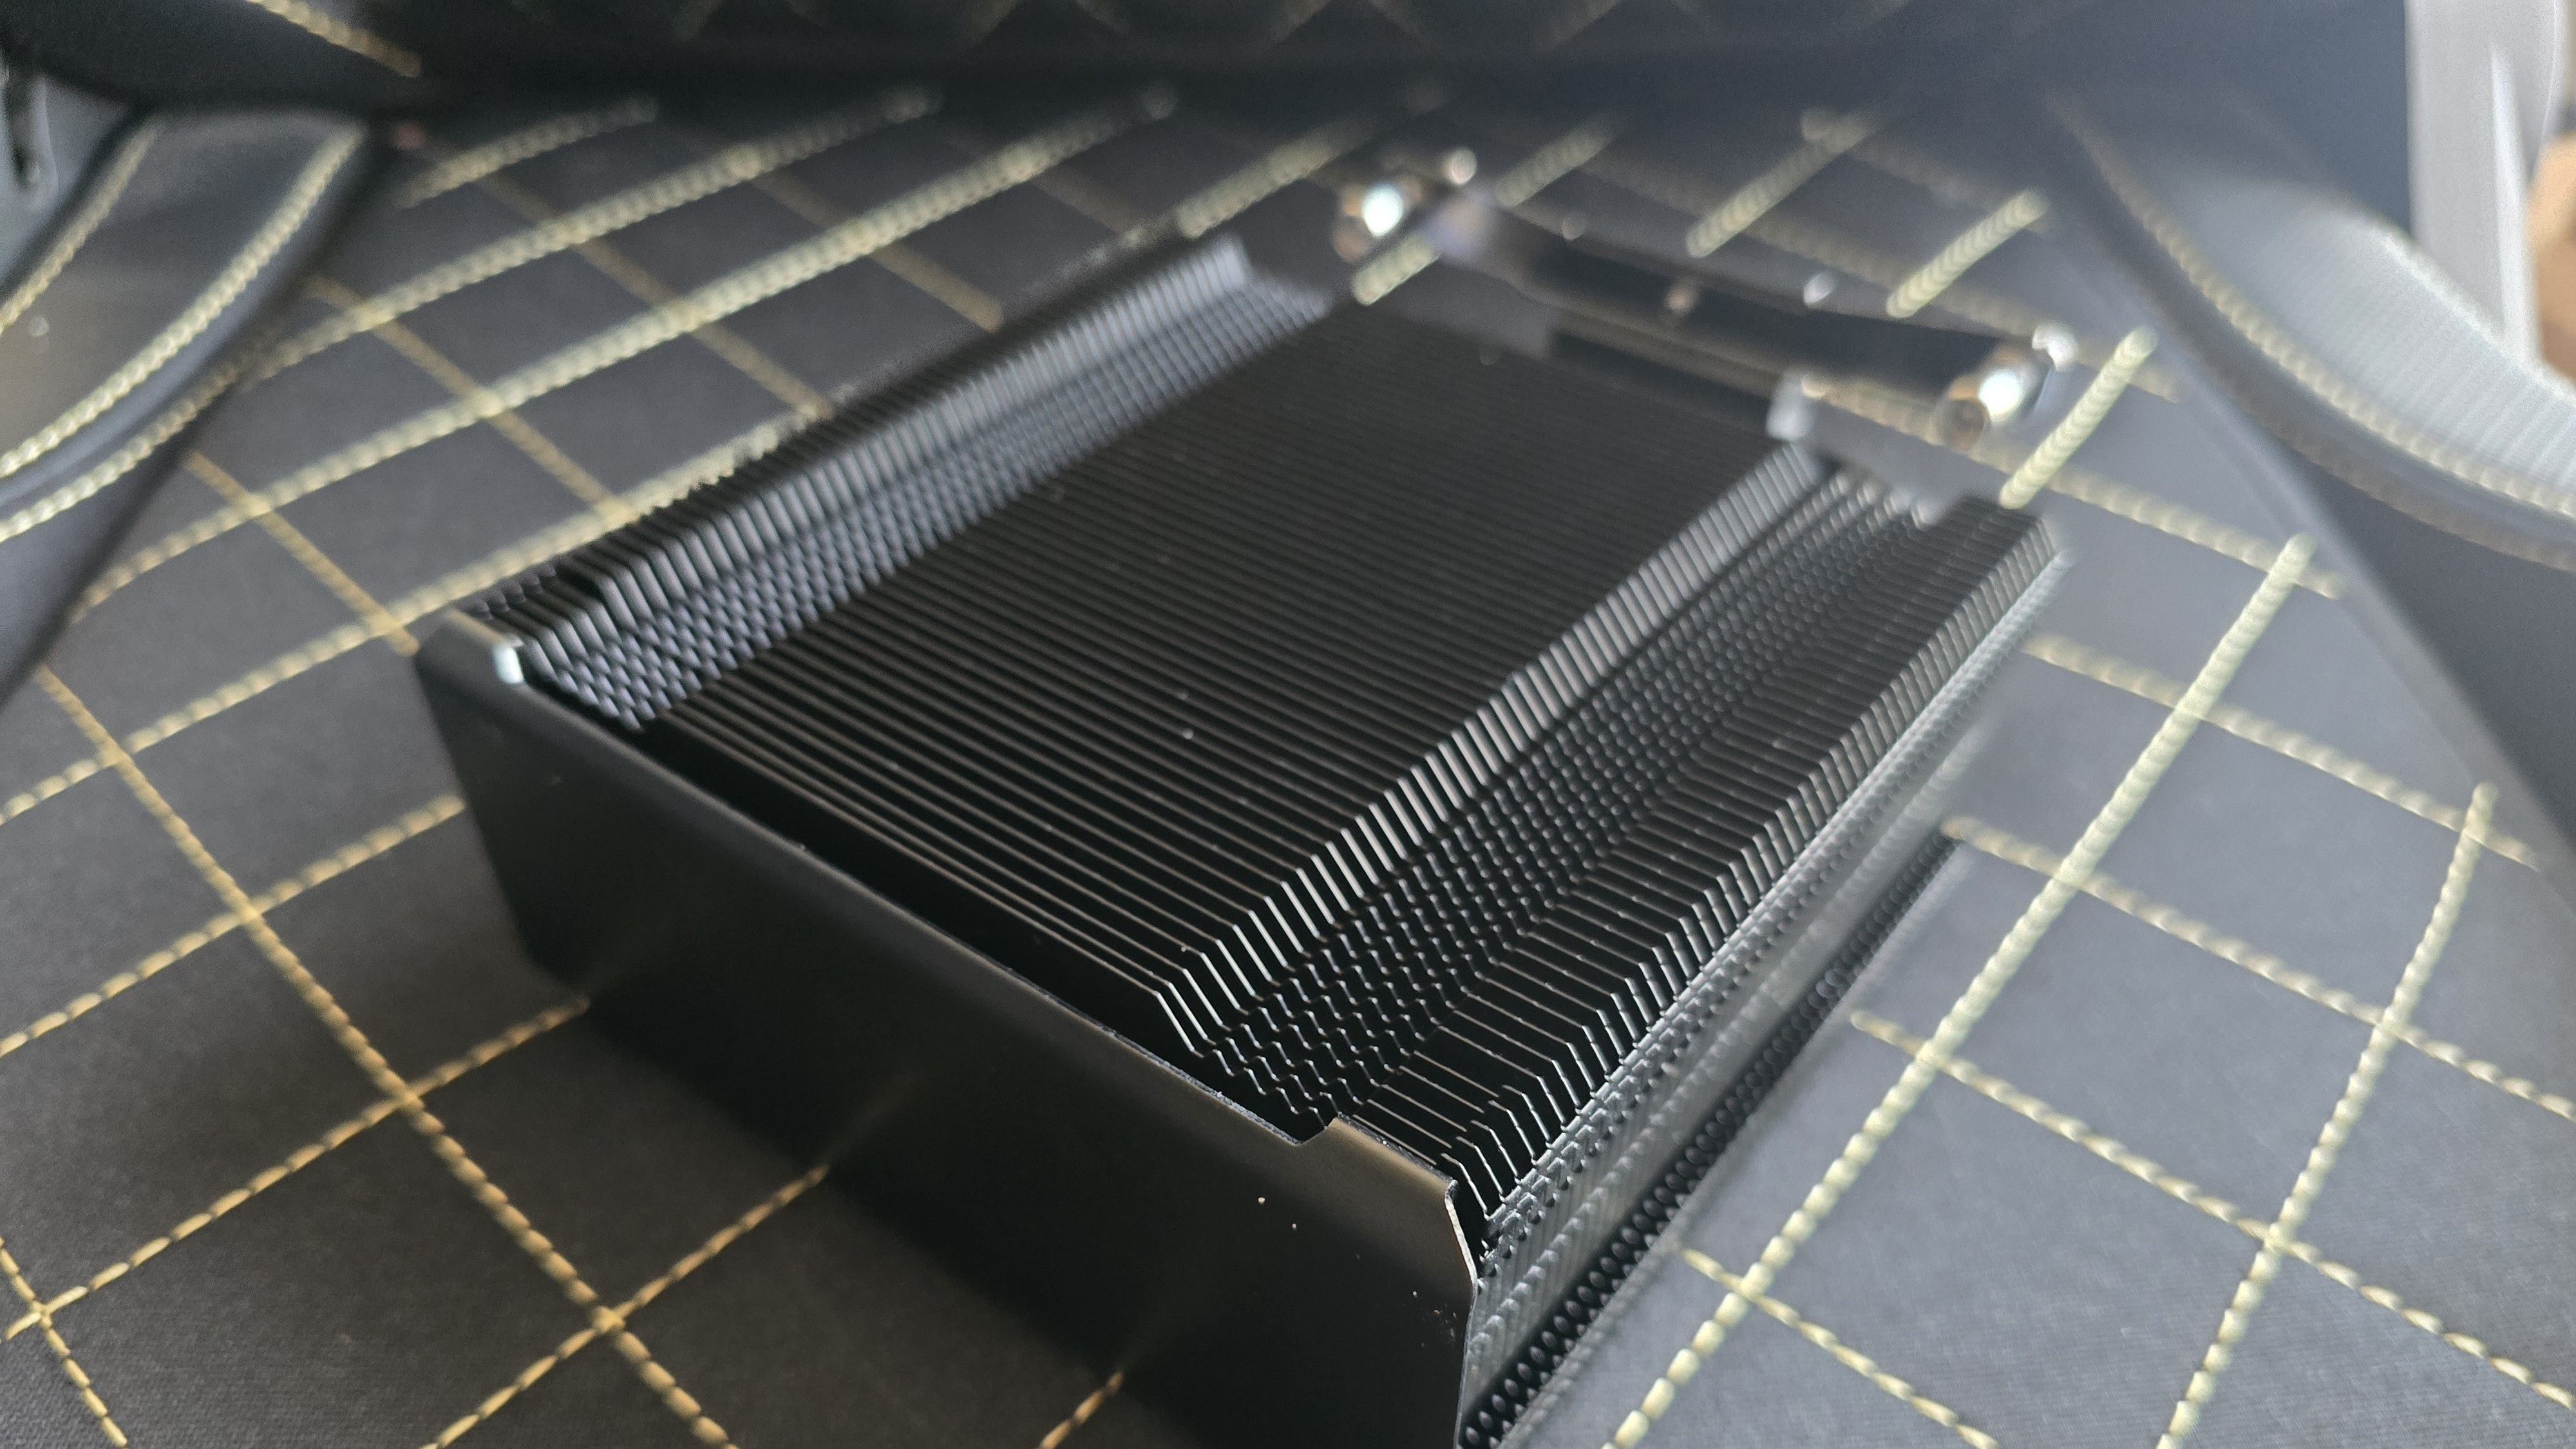
▶️ Single tower aluminum heatsink
The Hyper 212 is Cooler Master’s entry-level air-cooling line, and as such, it features a single-tower aluminum heatsink, shown in the photo above.
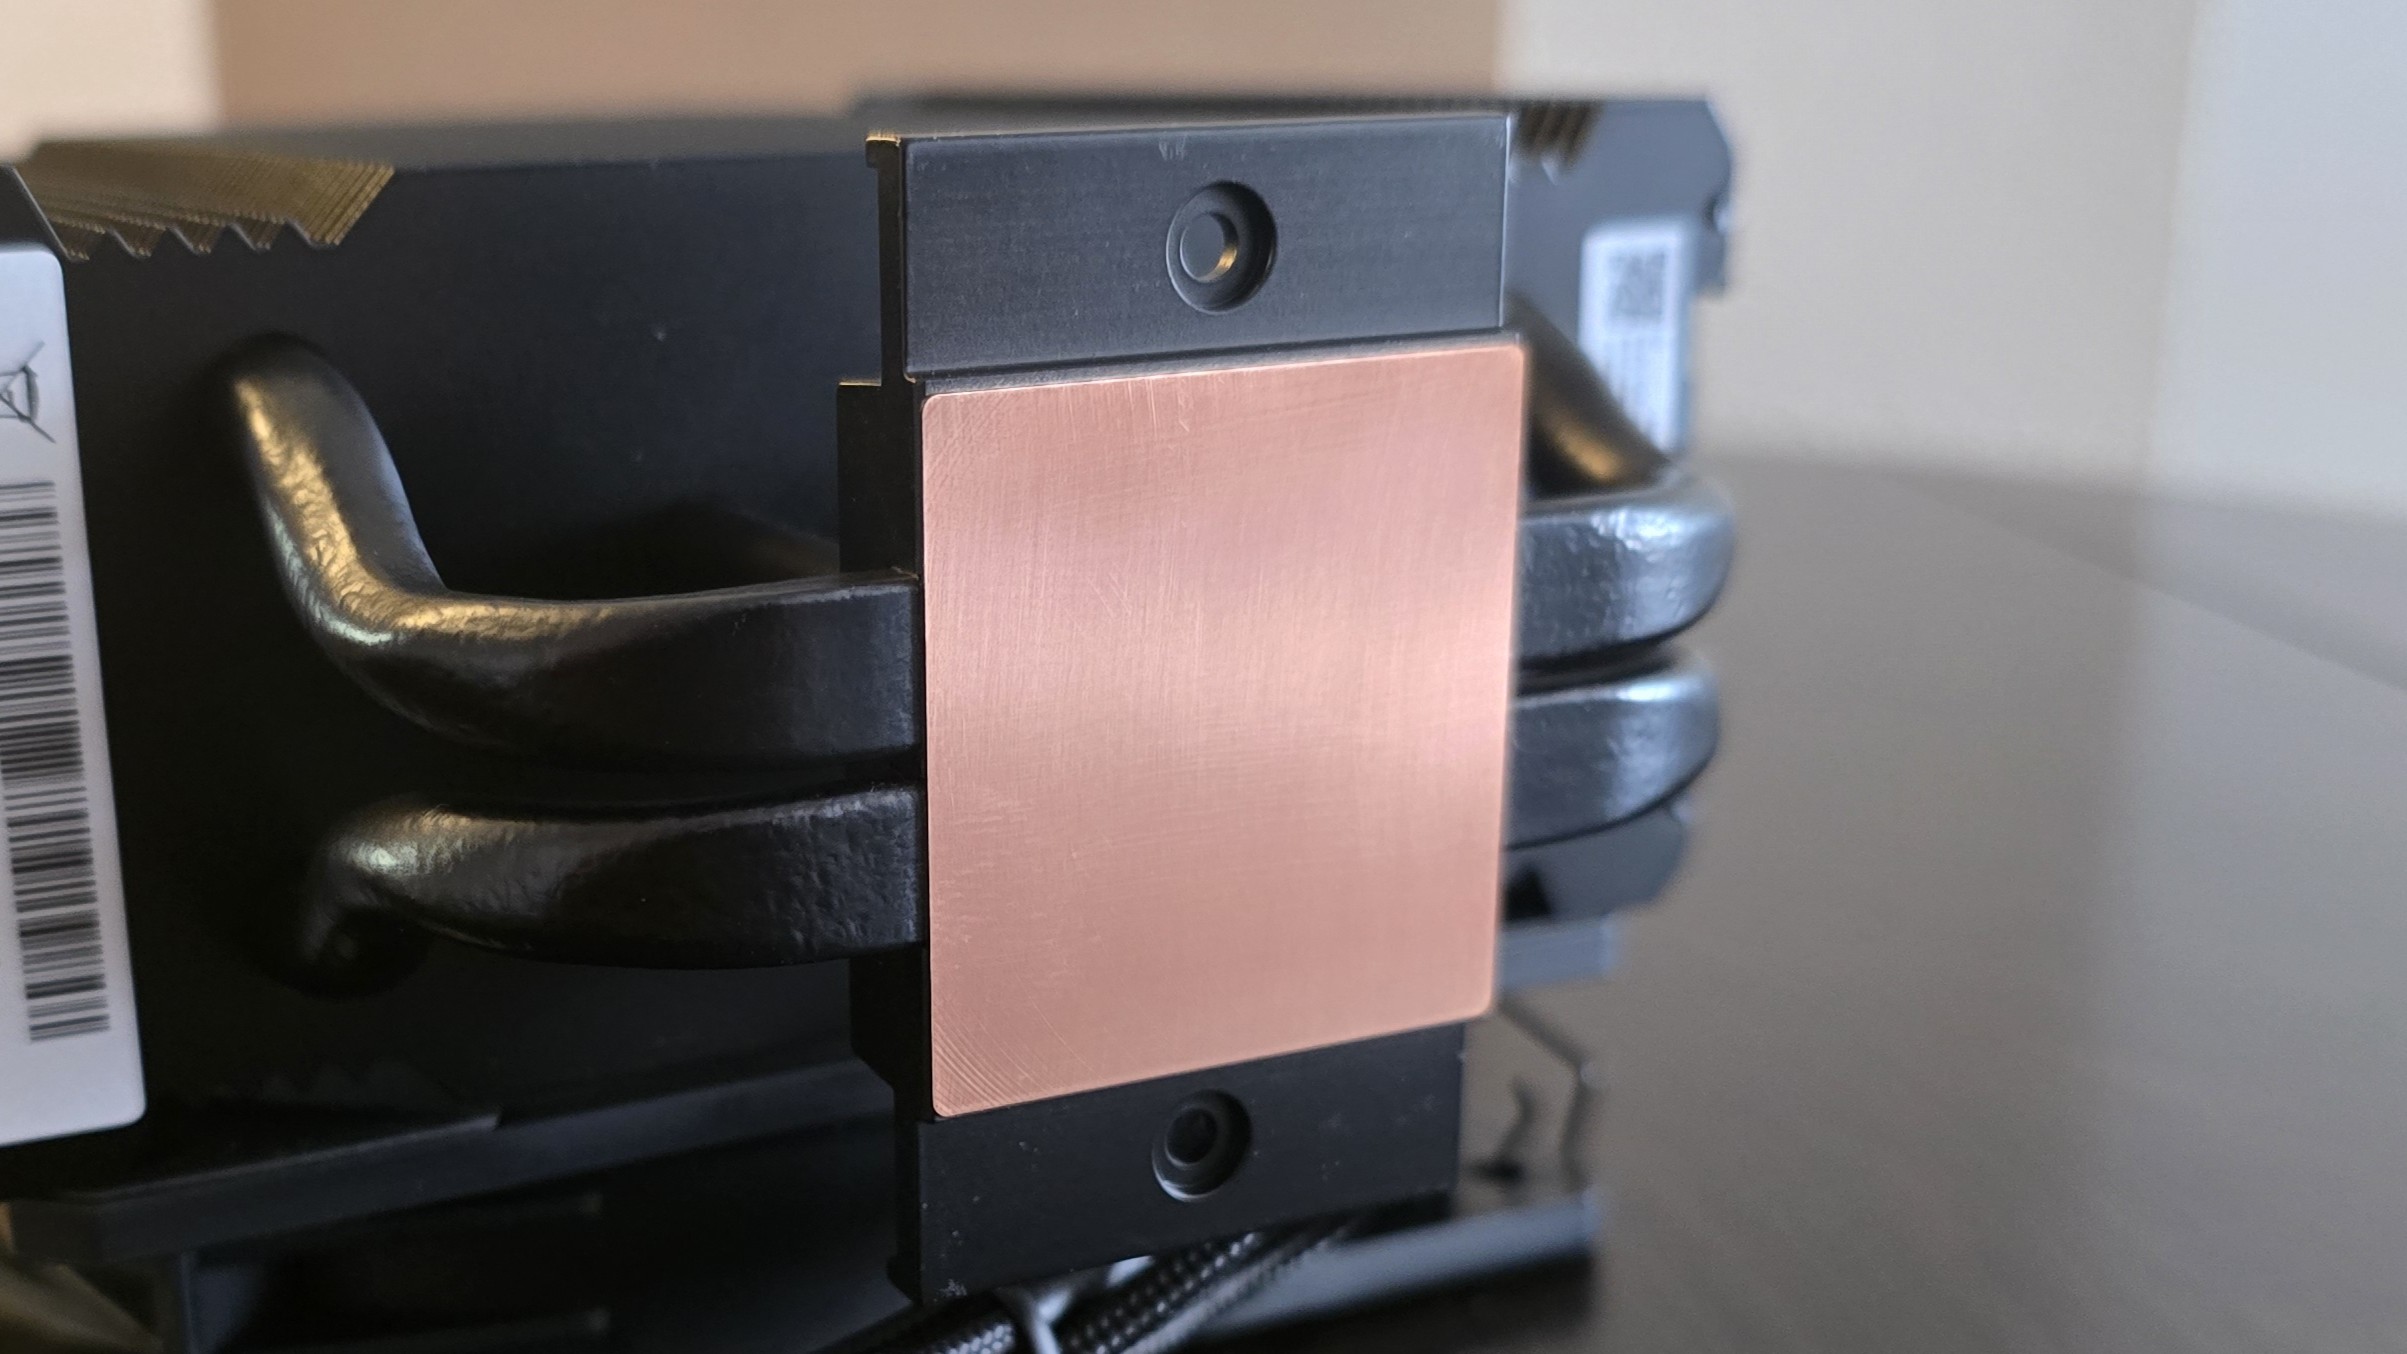
▶️ Copper CPU plate
The base of the CPU plate is pure copper.
▶️ Full RAM compatibility
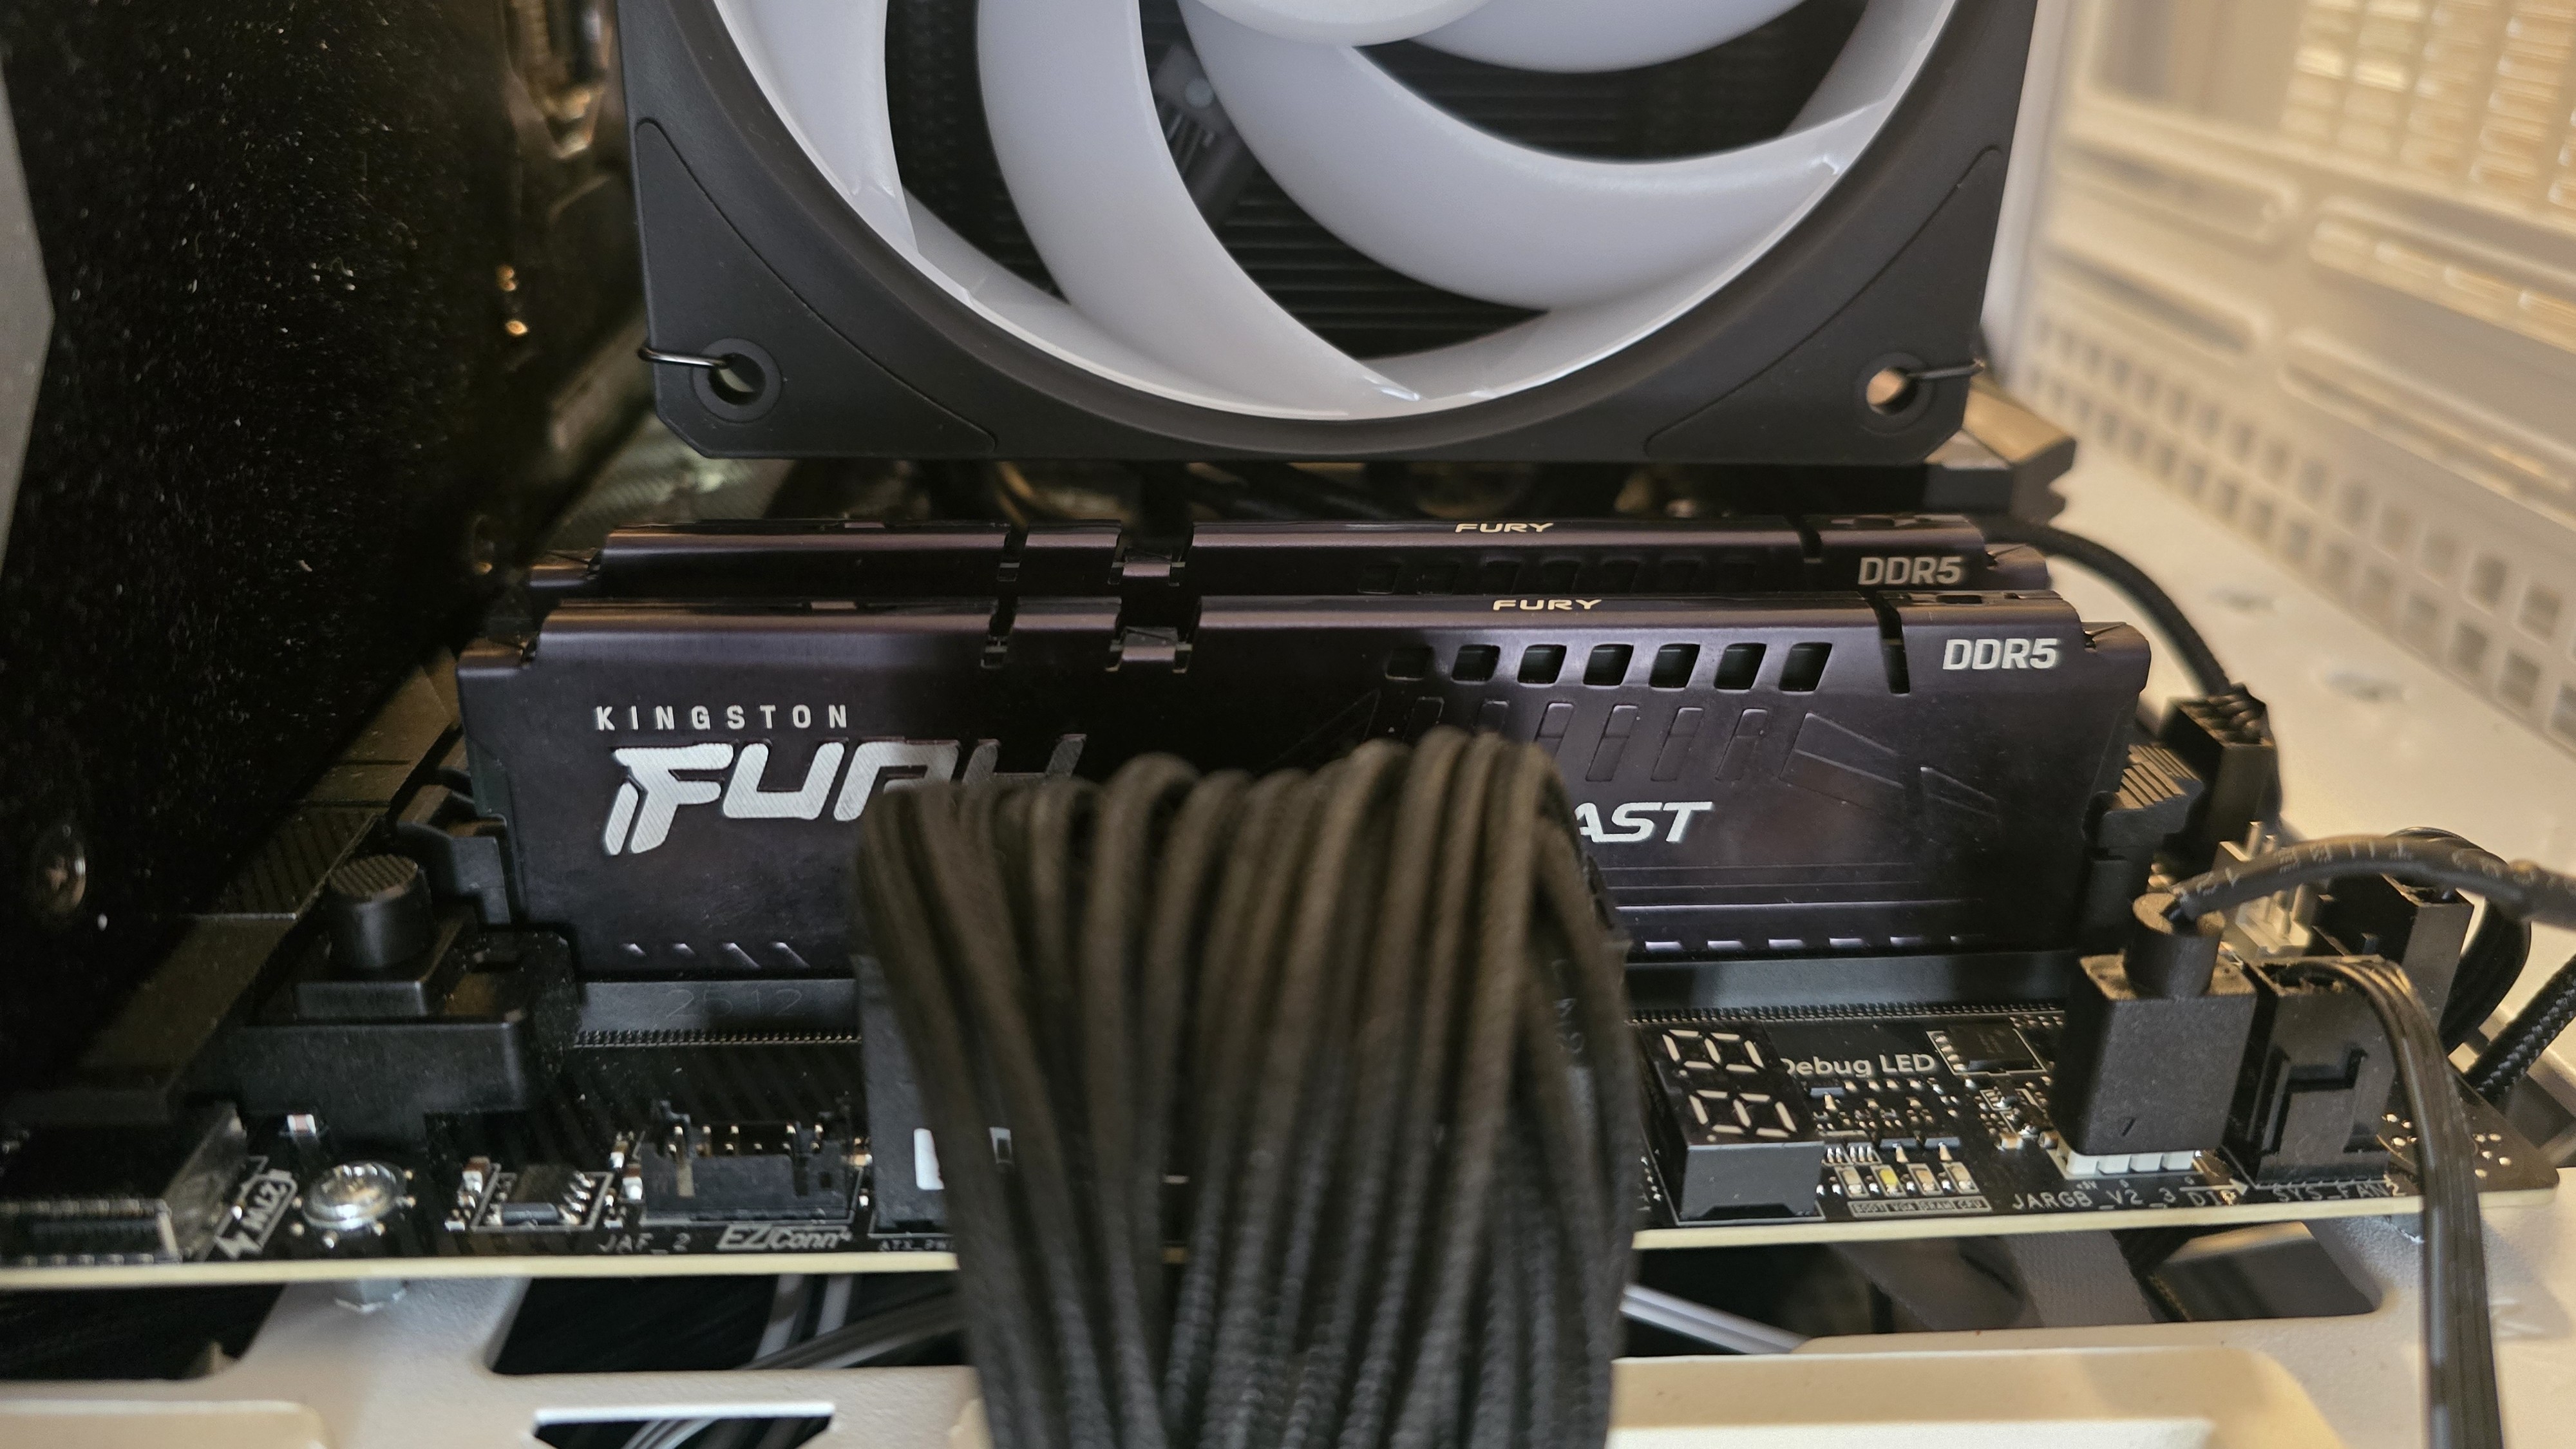
As the picture above demonstrates, the Hyper 212 3DHP does not interfere with or overhang DIMM slots in any manner, ensuring compatibility with all sizes of RAM, no matter how tall.
▶️ Low noise 120mm fan
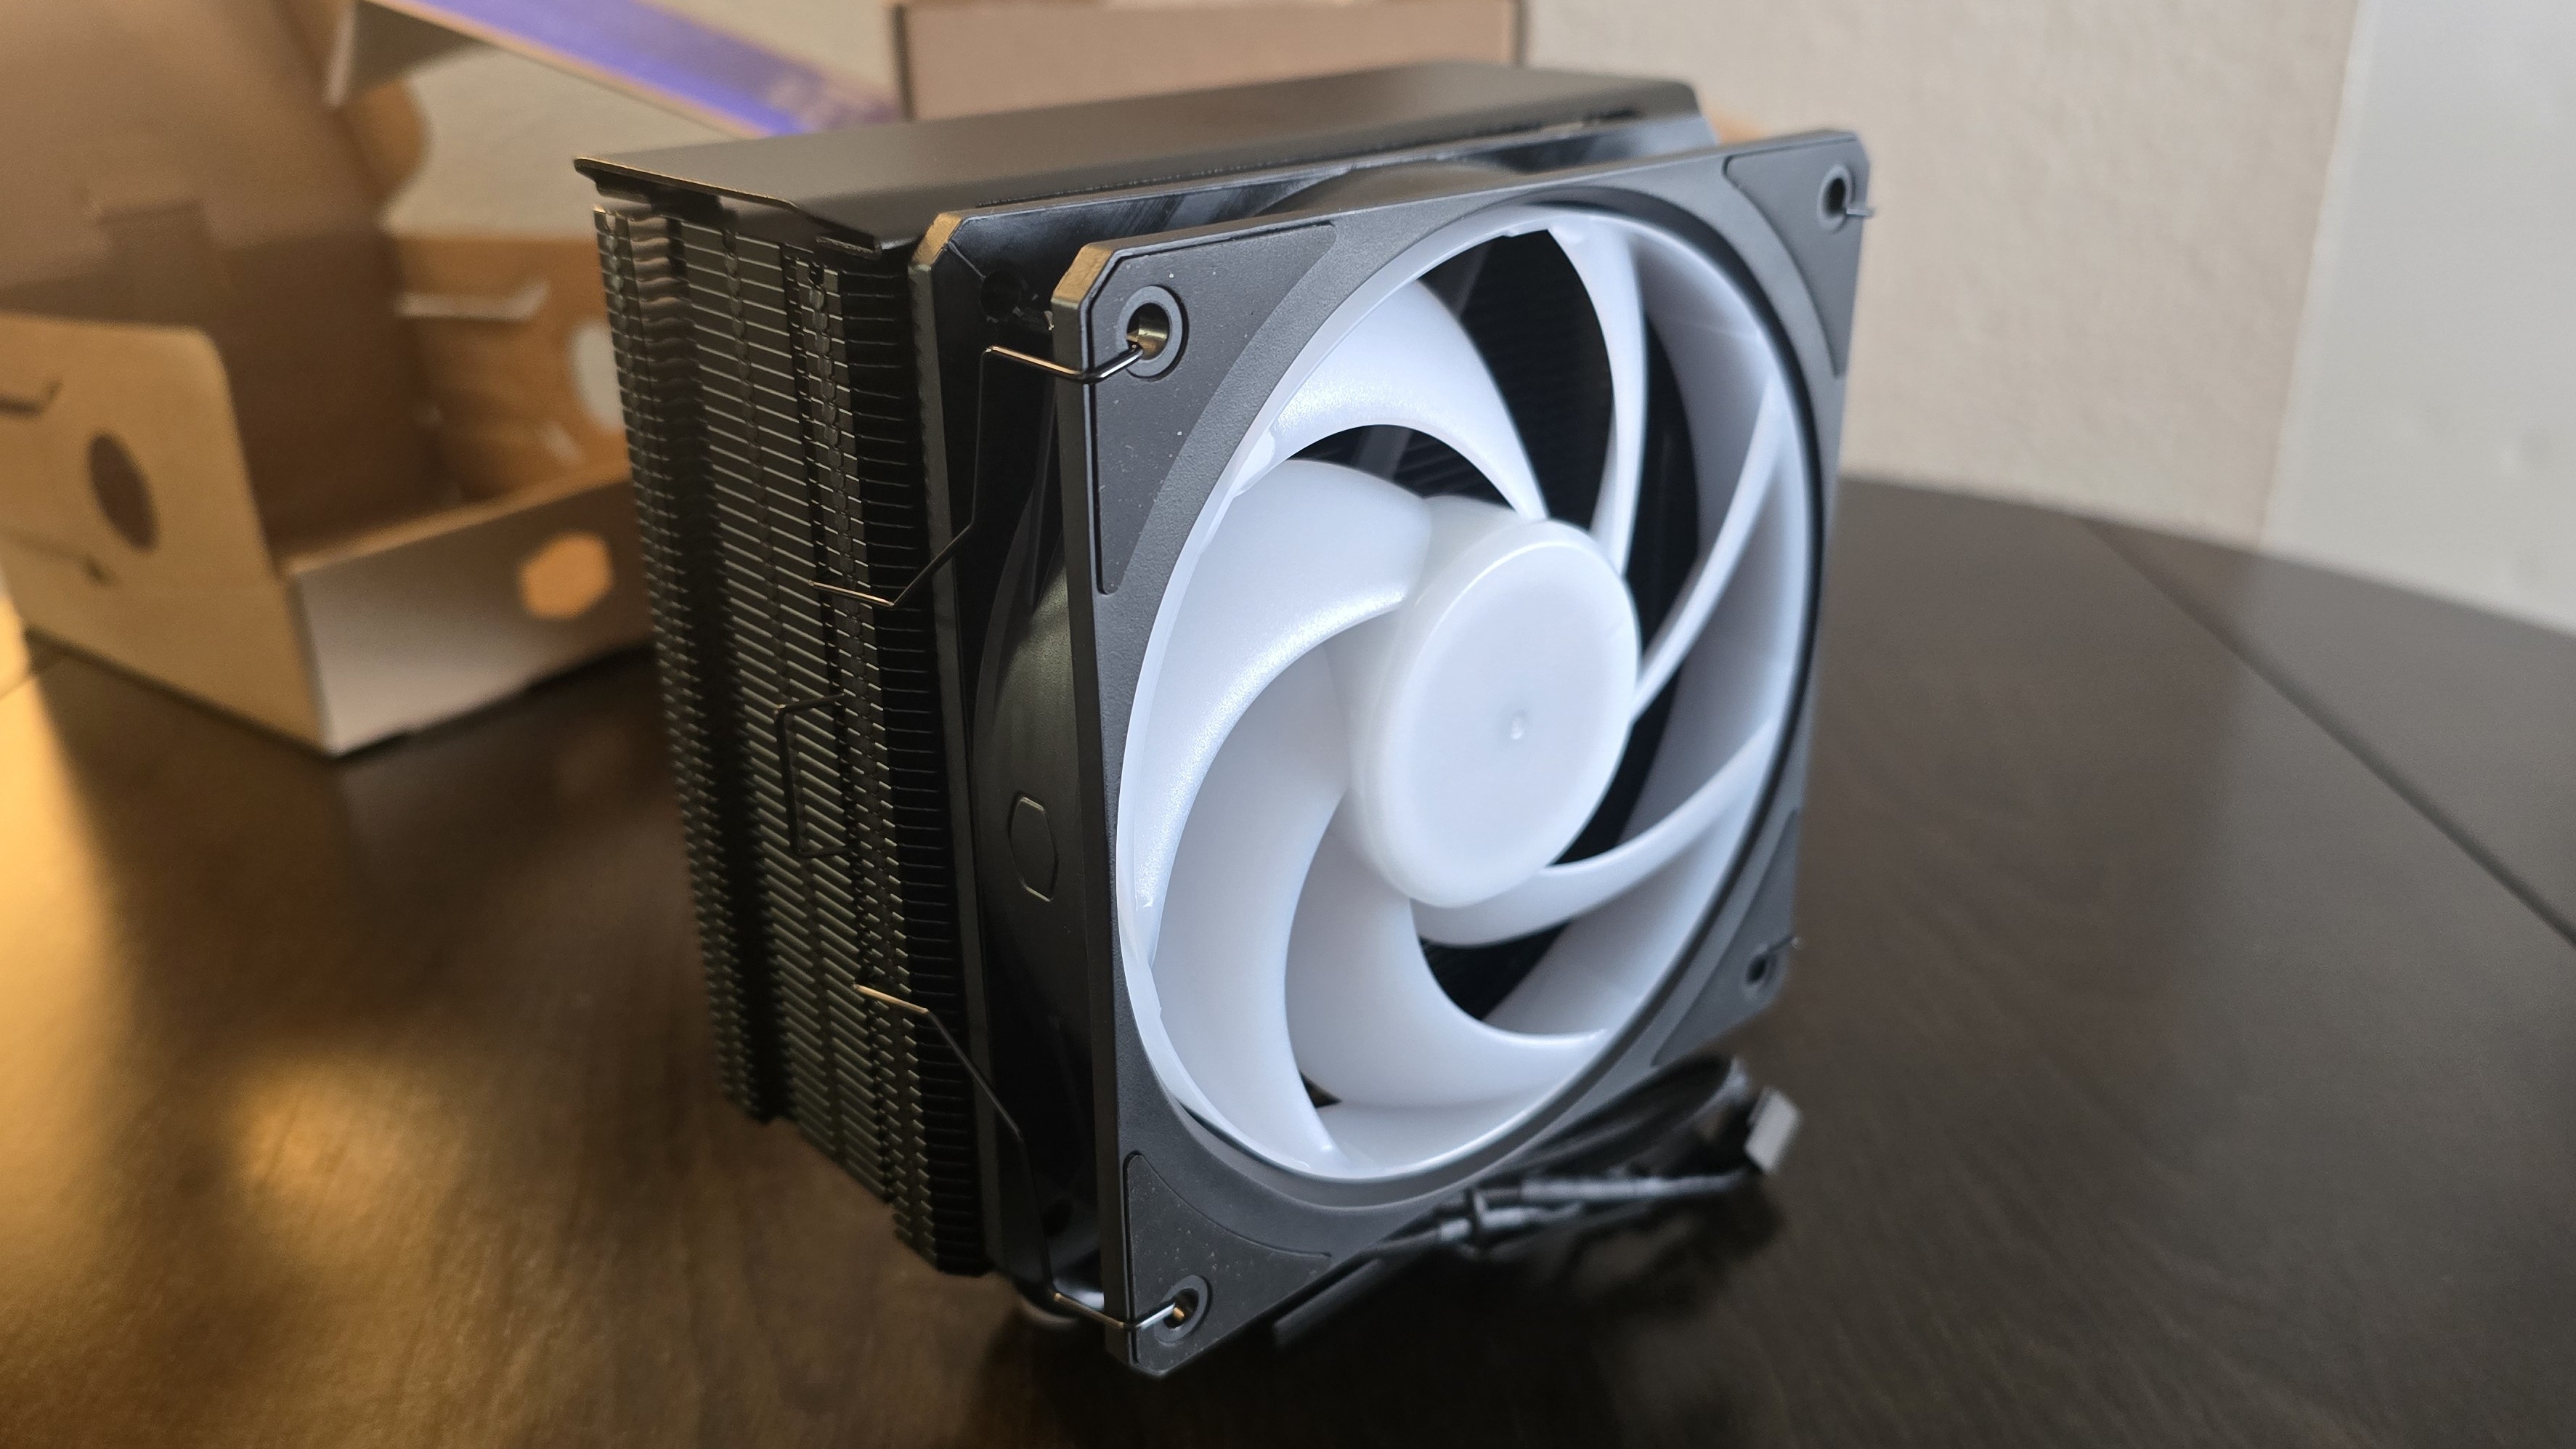
The fan included will appeal to enthusiasts who prefer a PC with the lowest volume levels possible, with our noise measurements reaching just 38.2 dBA. The version reviewed features ARGB support, but there is a solid black version of this cooler without ARGB, if you don’t want lights in your rig.
Swipe to scroll horizontally
Size (L x W x D) | 120mm x 120m x 25mm |
Bearing | Loop Dynamic Bearing |
Fan Speed | 0-2050 RPM ±10% |
Air Pressure | Up to 2.69 mmAq |
Airflow | Up to 63.1 CFM |
Life expectancy | >200,000 hours 5-year warranty |
AM5 and 1851 installation
The installation of the cooler is fairly simple for AMD systems – but it’s somewhat of a pain on Intel systems because the backplate of the cooler must be held in place during the install process.
- You’ll first need to apply the included backplate if you’re using an Intel CPU. AMD users will remove the default mounting mechanism.
- Next, you’ll need to install the mounting bars onto the cooler.
- Apply thermal paste to the CPU. If you’re unsure of the best way to do this, you can follow our thermal paste application guide.
- Place the heatsink on top of the CPU, and secure it with the included screws.
- Attach the fan with the included fan clips, and then connect the PWM/ARGB headers to your motherboard – installation is now complete!
Real-world testing configuration –AMD AM5 platform
My results may differ from others because I am looking for results that are comparable to real-world use. This means that I test CPU coolers inside a closed desktop case, which increases cooling difficulty compared to other testing methods.
Many will test CPU coolers outside of a case, on an open test bench. Open benches have lowered ambient temperatures, which in turn makes weak coolers appear stronger than they really are. Some publications have used generic thermal plates to test cooling solutions. I reject both of these methods because they don’t accurately reflect the real-world conditions where a CPU cooler is used.
Swipe to scroll horizontally
CPU | AMD Ryzen 9 9950X |
GPU | MSI Ventus 3X RTX 4070Ti Super |
Motherboard | MSI X870E Carbon Wifi |
Case | MSI MAG Pano 100R PZ |


 English (US) ·